简介
Proxmox virtualization environment,简称PVE,是一个开源免费的基于linux的企业级虚拟化方案

是一个基于Debian的linux系统,内置了一套虚拟机管理工具,并提供了web管理页面
安装
启动盘制作
工具下载: rufus
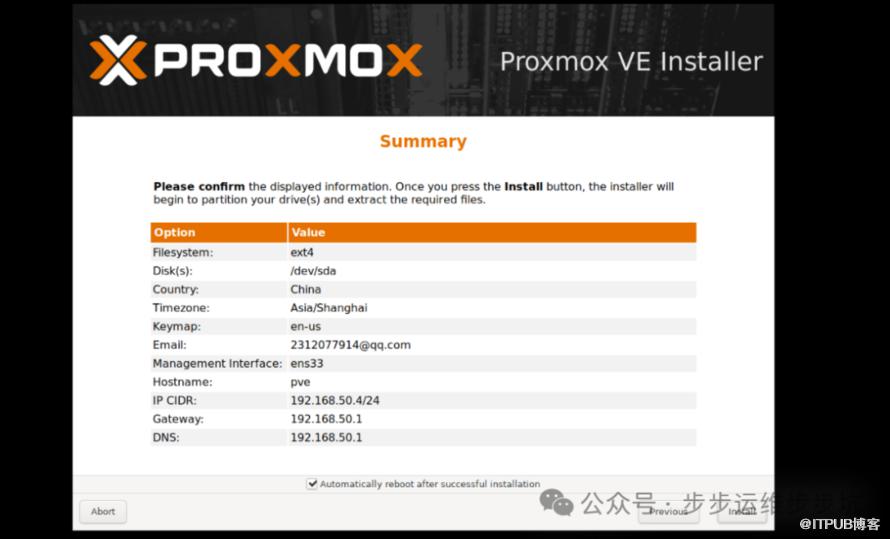
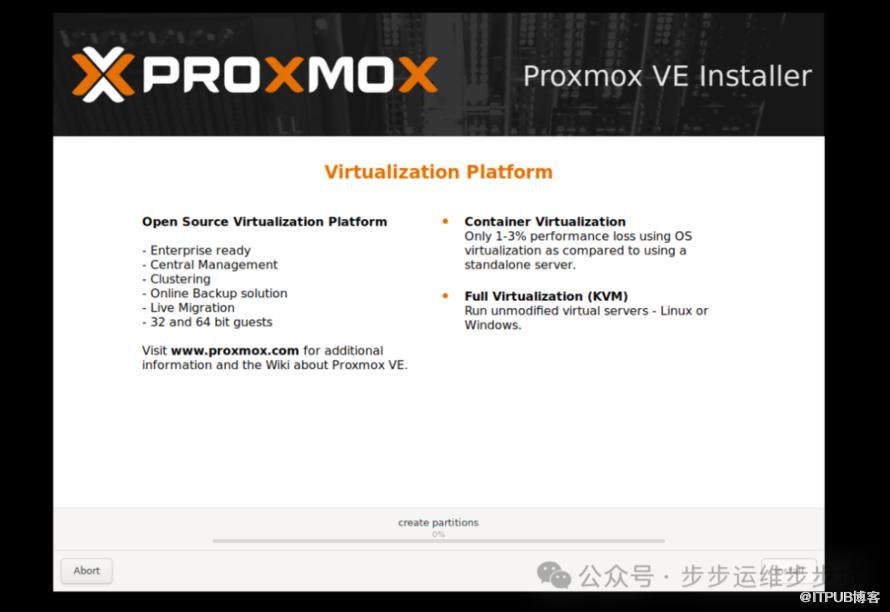
proxmox 安装步骤
官方文档地址
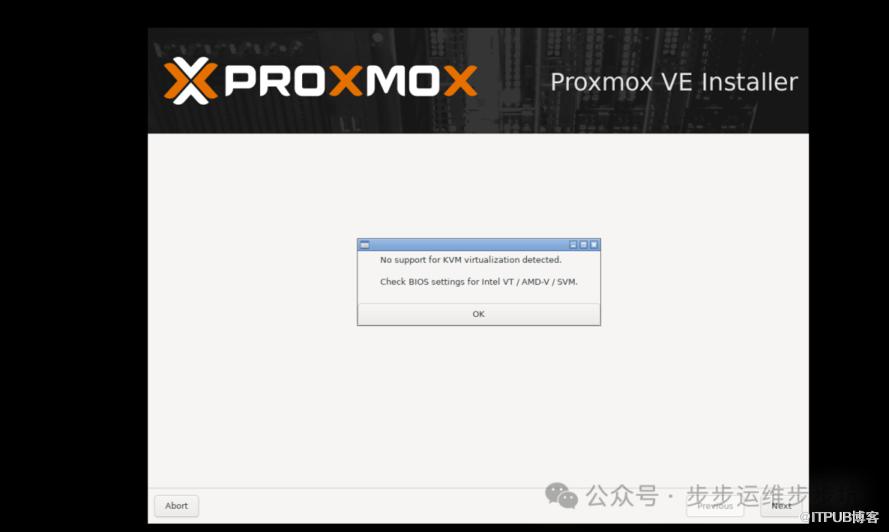
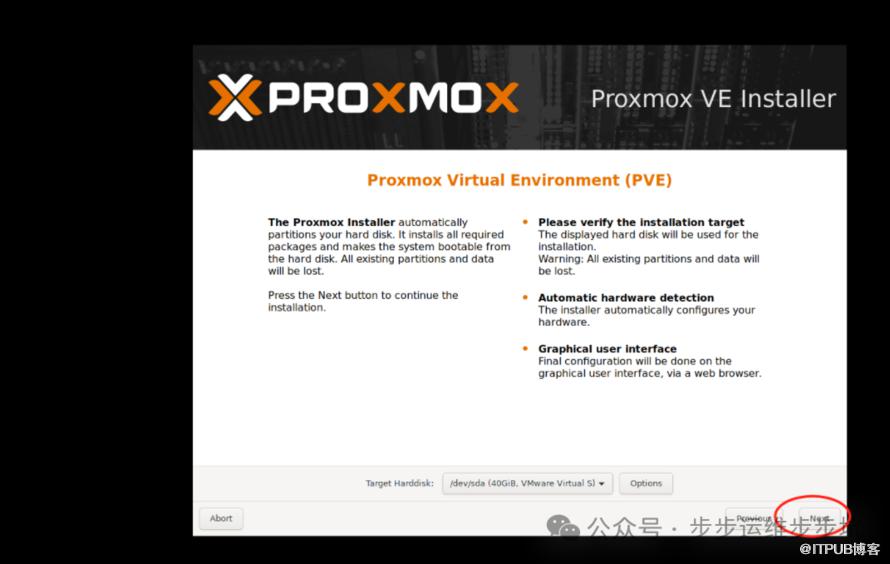
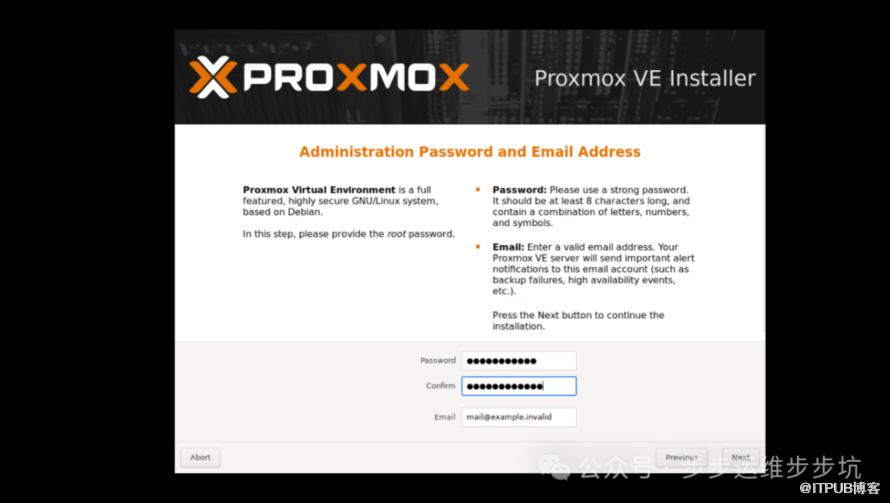
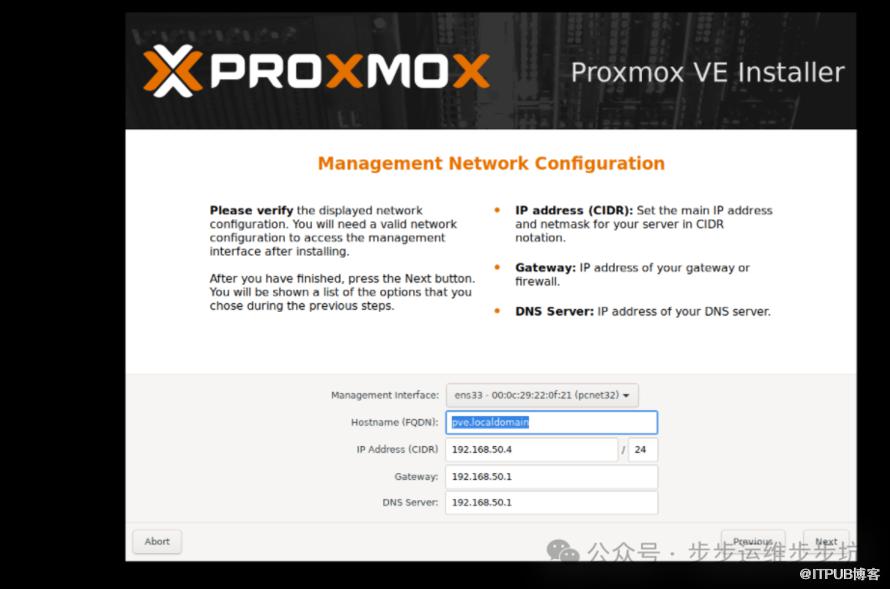
- 修改BIOS设为U盘启动,依据文档,安装等待完成即可
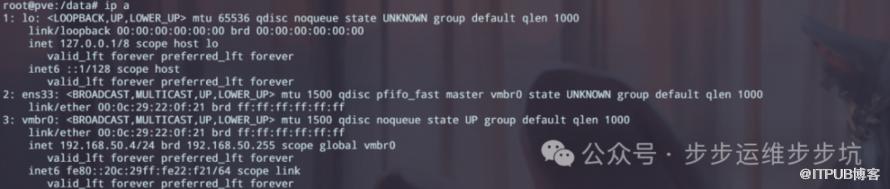
默认地址: https://127.0.0.1/8006
安装后续
源配置
官方文档




# cd /etc/apt/sources.list.d/

# mv pve-enterprise.list pve-enterprise.list.bak
vim /etc/apt/sources.list
deb http://ftp.debian.org/debian buster main contrib
deb http://ftp.debian.org/debian buster-updates main contrib
deb http://download.proxmox.com/debian/pve buster pve-no-subscription
deb http://security.debian.org/debian-security buster/updates main contrib
deb http://download.proxmox.com/debian/pve buster pvetest
此过程稍微有点久
# wget http://download.proxmox.com/debian/proxmox-ve-release-6.x.gpg -O /etc/apt/trusted.gpg.d/proxmox-ve-release-6.x.gpg
# apt-get update
# apt-get dist-upgrade
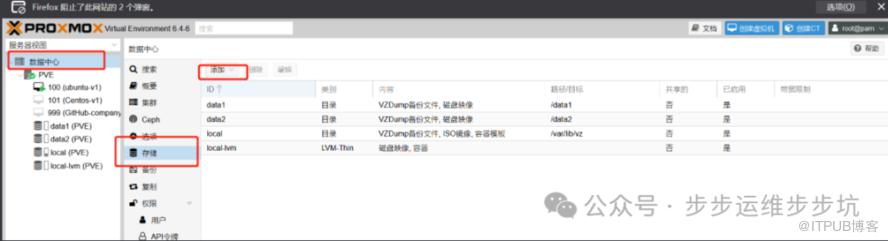
存储
1: 硬盘少于2T 使用fdisk 格式化分区,创建文件系统,硬盘空间大于2T 使用parted (需要安装 安装方式 apt install parted -y)
/var/lib/vz 为默认目录
Parted 使用
网络
网卡配置
此处选用nat 网络
NAT
网络架构
MS: 192.168.0.102
VM: 10.10.10.0
官方文档
vim /etc/network/interfaces
auto lo
iface lo inet loopback

auto eno1
iface eno1 inet static
address 192.168.0.102/24
gateway 192.168.0.1

iface eno1 inet static
address 192.168.0.102/24
gateway 192.168.0.1

iface eno2 inet manual
auto vmbr0

iface vmbr0 inet static
address 10.10.10.1/24

bridge-ports none
bridge-stp off
bridge-fd 0
bridge-vlan-aware yes
bridge-vids 2-4094

post-up   echo 1 > /proc/sys/net/ipv4/ip_forward
post-up   iptables -t nat -A POSTROUTING -s '10.10.10.0/24' -o eno1 -j MASQUERADE
post-down iptables -t nat -D POSTROUTING -s '10.10.10.0/24' -o eno1 -j MASQUERADE

post-up   iptables -t raw -I PREROUTING -i fwbr+ -j CT --zone 1
post-down iptables -t raw -D PREROUTING -i fwbr+ -j CT --zone 1
重启网卡
# /etc/init.d/networking restart
防火墙配置
proxmox 基于debain 系统, debain 系统默认iptables不是服务 需要手动处理一下
vim /etc/init.d/iptables
#!/bin/sh -e
PATH=”/usr/local/sbin:/usr/local/bin:/sbin:/bin:/usr/sbin:/usr/bin”
IPTABLES=/sbin/iptables
IPTABLES_SAVE=/sbin/iptables-save
IPTABLES_RESTORE=/sbin/iptables-restore
IPTABLES_CONFIG=/etc/iptables.conf
[ -x $IPTABLES ] || exit 0
. /lib/lsb/init-functions
case "$1" in
 start)
 log_action_begin_msg "Starting firewall"
type usplash_write >/dev/null 2>/dev/null && usplash_write "TIMEOUT 120" || true
if $IPTABLES_RESTORE < $IPTABLES_CONFIG ; then
log_action_end_msg $?
else
log_action_end_msg $?
fi
type usplash_write >/dev/null 2>/dev/null && usplash_write "TIMEOUT 15" || true
;;

 stop)
log_action_begin_msg "Saving current firewall configuration"
if $IPTABLES_SAVE > $IPTABLES_CONFIG ; then
 log_action_end_msg $?
 else
log_action_end_msg $?
 fi
log_action_begin_msg "Flushing ALL firewall rules from chains!"
if $IPTABLES -F ; then
log_action_end_msg $?
else
log_action_end_msg $?
fi
log_action_begin_msg "Deleting ALL firewall chains [Warning: ACCEPTING ALL PORT SERVICES!]"
if $IPTABLES -X ; then
$IPTABLES -P INPUT ACCEPT
$IPTABLES -P FORWARD ACCEPT
$IPTABLES -P OUTPUT ACCEPT
log_action_end_msg $?
else
log_action_end_msg $?
fi
;;
 save)
 log_action_begin_msg "Saving current firewall configuration"
if $IPTABLES_SAVE > $IPTABLES_CONFIG ; then
log_action_end_msg $?
    else
log_action_end_msg $?
fi
;;
force-reload|restart)
log_action_begin_msg "Reloading firewall configuration [Warning: POTENTIAL NETWORK INSECURITY DURING RELOAD]"
$IPTABLES -F
$IPTABLES -X
if $IPTABLES_RESTORE < $IPTABLES_CONFIG ; then
log_action_end_msg $?
else
log_action_end_msg $?
 fi
 ;;
 *)
echo "Usage: /etc/init.d/iptables {start|stop|save|restart|force-reload}"
 exit 1
;;
esac
exit 0
生成ipatables 配置文件
iptables-save > /etc/iptables.conf
启动和自启
service iptables start
路由设置
宿主机: pve 会自动生成

路由器(此处使用的是TP-LINK)
如果不设置会导致仅宿主机可远程虚拟机
为了使局域网内都可访问需在物理路由器上面设置静态路由
登陆管理员界面.设置静态路由

创建虚拟机
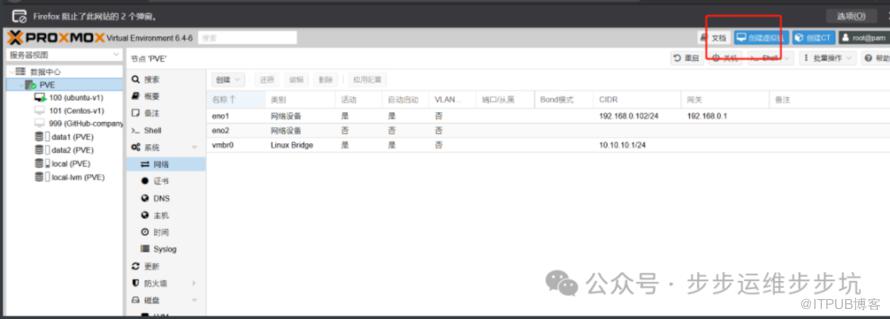
按照普通装机步骤实现装机
虚拟机后续操作
通过控制台登入虚拟机
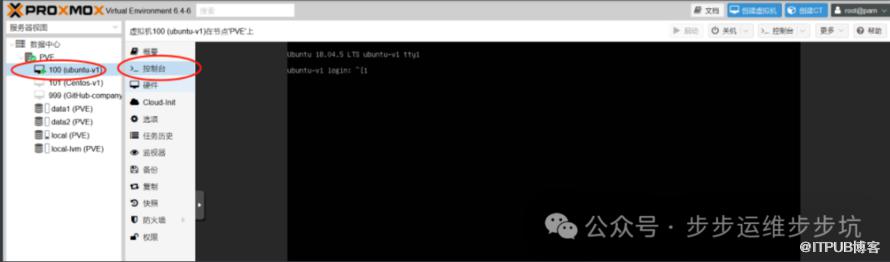
vim /etc/netplan/00-installer-config.yaml
# This is the network config written by 'subiquity'

network:
	ethernets:
		ens18:
			addresses:
			- 10.10.10.2/24
			gateway4: 10.10.10.1
			nameservers:
				addresses:
				- 10.10.10.1 #宿主机地址
				- 114.114.114.114  # 网络dns地址
 	version: 2
重启网卡
netplan apply
此时可以在局域网环境通过ssh 连接 虚拟机
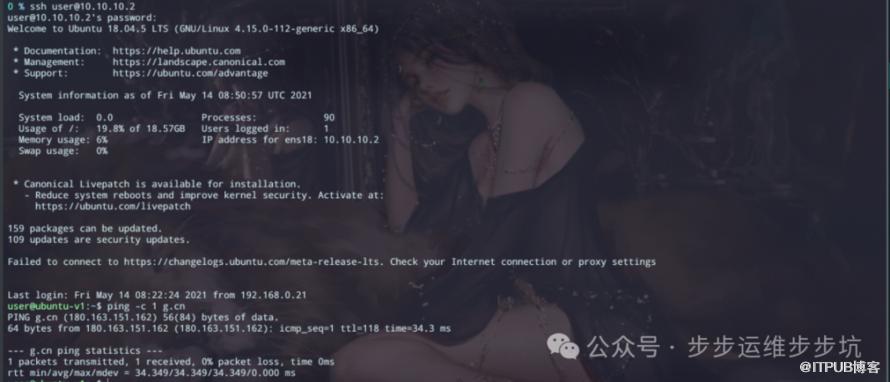
虚拟机管理
导入
官方文档
此处只做vmware 虚拟机导入
- 将vmware 虚拟机导出为OVF 格式
- 导入到proxmox 宿主机任意目录
这里以 GitHub-company-disk1.vmdk 为例
- 执行命令
将vmdk 转换为qcow2
# qemu-img convert -f vmdk -O qcow2 gitlab.vmdk gitlab.qcow2

# qm set  101 --scsi1 data1:101/gitlab.qcow2
磁盘扩容
首先在proxmox调整磁盘大小
parted /dev/sda

p

fix

解除waring
fdisk 创建分区
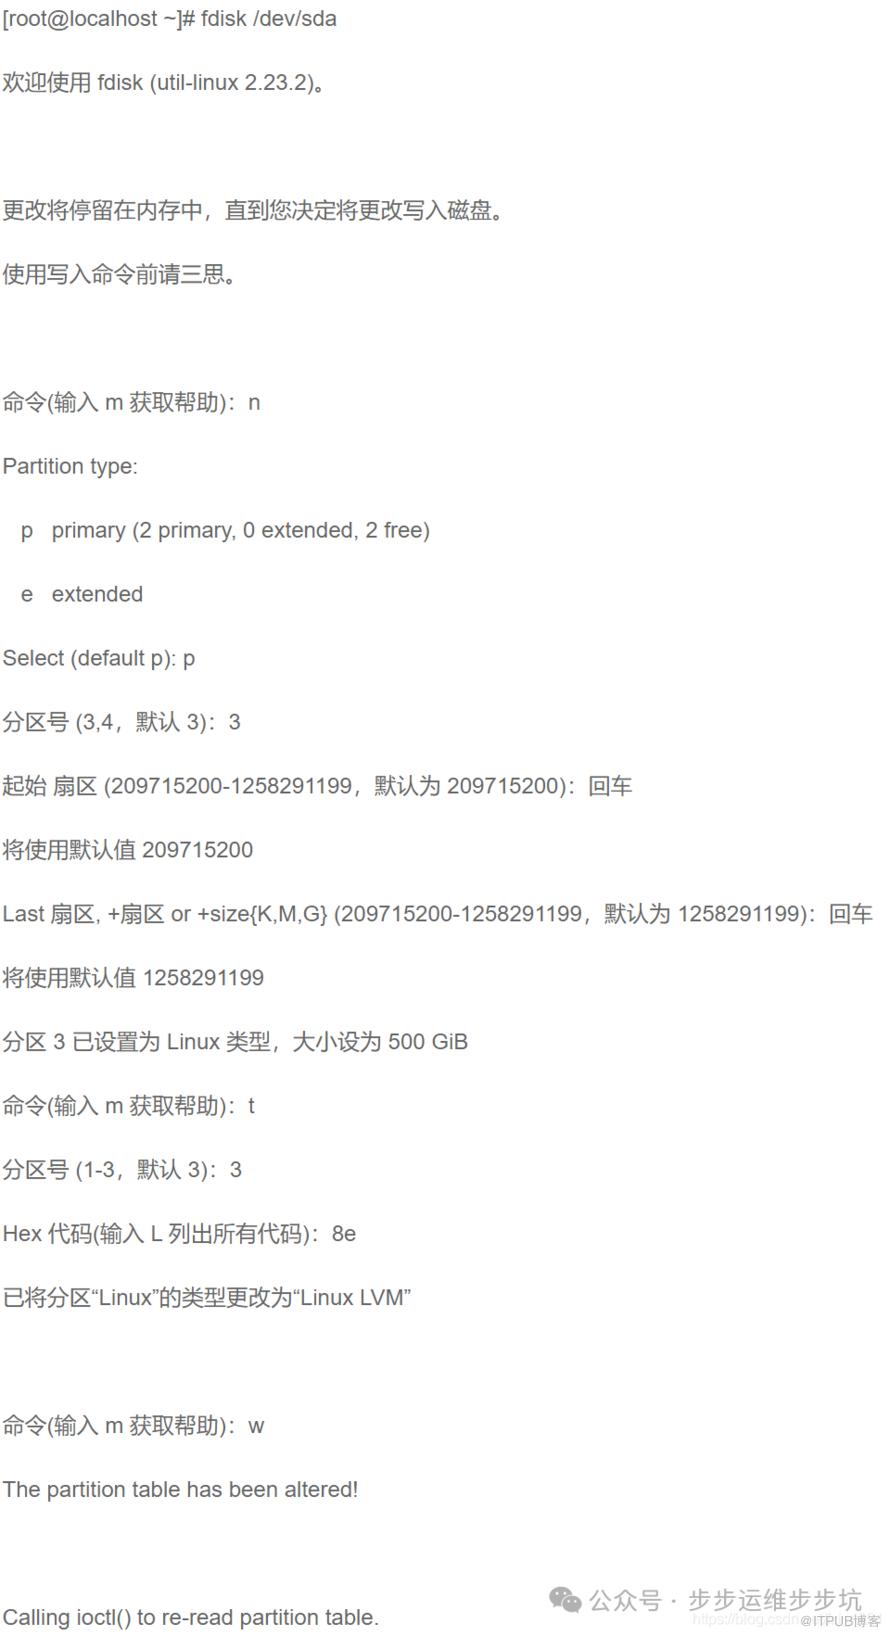
pvcreate /dev/sda3 创建物理卷
vgcreate amfslvm2 /dev/sda3 创建卷组
vgscan
vgmerge centos amfslvm2
df -Th
pvdisplay
lvresize -L +100G /dev/mapper/centos-root 给这个路径添加磁盘容量
如果resize2fs /dev/mapper/centos-root 没有执行成功
说明分区格式不是这个类型的
在执行:xfs_growfs /dev/mapper/centos-root 执行成功

添加博主
微信号|yfq940-
原文作者:步步运维步步坑;如有侵权,请联系管理员删除。

