3、Istio 快速入门
下面我们将 Istio 进行部署安装,来体验下它的魅力。

3.1、搭建 kubernetes 集群
Istio 运行在 kubernetes 平台是最佳的选择,所以我们先搭建 kubernetes 环境。
注意:初学者请参考课程资料提供的一键安装文档

3.1.1、环境准备
准备 2 台 Centos7 虚拟机:


3.1.2、前置工作
注意:both: 两台机器都需要操作
搭建 K8S 之前,需要一些前置的准备工作,否则不能完成集群的搭建。yum 如果不能用,则使用
yum -y install yum-utils或者
curl -o /etc/yum.repos.d/CentOS-Base.repo http://mirrors.aliyun.com/repo/Centos-7.repo然后再使用 yum。

内核升级(both)
[root@m1 data] # wget http://193.49.22.109/elrepo/kernel/el7/x86_64/RPMS/kernel-ml-4.19.12-1.el7.elrepo.x86_64.rpm[root@m1 data] # wget http://193.49.22.109/elrepo/kernel/el7/x86_64/RPMS/kernel-ml-devel-4.19.12-1.el7.elrepo.x86_64.rpm[root@m1 data] # yum localinstall -y kernel-ml*.rpm[root@n1 ~]# sudo awk -F\' '$1=="menuentry " {print i++ " : " $2}' /etc/grub2.cfg0 : CentOS Linux (4.19.12-1.el7.elrepo.x86_64) 7 (Core)1 : CentOS Linux (3.10.0-693.el7.x86_64) 7 (Core)2 : CentOS Linux (0-rescue-3f664c2d148147eba9f9c8f7906f08de) 7 (Core)[root@n1 ~]# grub2-set-default 0[root@n1 ~]# uname -r4.19.12-1.el7.elrepo.x86_64[root@n1 ~]#
要是wget地址丢失,可从网盘获取
链接: https://pan.baidu.com/s/1zYmOcZHGOARU7CqyOumuwA 提取码: 1111 --来自百度网盘超级会员v6的分享

修改主机名(both)
[root@n1 data] # hostnamectl set-hostname n1[root@m1 data] # hostnamectl set-hostname m1

更新yum源(both)
[root@m1 data] # mv /etc/yum.repos.d/CentOS-Base.repo /etc/yum.repos.d/CentOS-Base.repo.backup[root@m1 data] # wget -O /etc/yum.repos.d/CentOS-Base.repo https://mirrors.aliyun.com/repo/Centos-7.repo#如果wget无法使用直接输入 yum install wget安装即可[root@m1 data] # yum makecache[root@m1 data] # yum -y update[root@m1 data] # cat > /etc/yum.repos.d/kubernetes.repo <<EOF[kubernetes]name=Kubernetesbaseurl=https://mirrors.aliyun.com/kubernetes/yum/repos/kubernetes-el7-x86_64/enabled=1gpgcheck=0EOF[root@m1 data]# yum-config-manager --add-repo http://mirrors.aliyun.com/docker-ce/linux/centos/docker-ce.repo

docker /containerd安装(both)
本文使用的docker
[][][][][][][][]{"registry-mirrors": ["https://hc9oi3yo.mirror.aliyuncs.com"]}EOF[][][][][][]

containerd
[][][][]124 ShimCgroup = ""125 SystemdCgroup = true60 restrict_oom_score_adj = false61 sandbox_image = "sandbox_image=“registry.aliyuncs.com/google_containers/pause:3.7"[]Created symlink from /etc/systemd/system/multi-user.target.wants/containerd.service to /usr/lib/systemd/system/containerd.service.[]> runtime-endpoint: unix:///run/containerd/containerd.sock> image-endpoint: unix:///run/containerd/containerd.sock> timeout: 10> debug: false> EOF[][][][]capabilities = ["pull"]

主机映射(both)
[]172.16.20.121 m1172.16.20.122 n1[][]ssh-copy-id n1ssh n1

时间同步(both)
[][]ESC:3,6 s/^/server ntp1.aliyun.com iburstESCx![][]210 Number of sources = 4MS Name/IP address Stratum Poll Reach LastRx Last sample===============================================================================^+ time.neu.edu.cn 1 10 377 735 -1883us[+4213us] +/- 32ms^- ntp6.flashdance.cx 2 10 177 832 -8058us[-2237us] +/- 118ms^- ntp1.flashdance.cx 2 10 377 981 -10ms[-4829us] +/- 122ms^* 139.199.214.202 2 6 377 86 -188us[ -333us] +/- 48ms[]

ipvs安装(both)
[][]modprobe -- ip_vsmodprobe -- ip_vs_rrmodprobe -- ip_vs_wrrmodprobe -- ip_vs_shmodprobe -- nf_conntrackEOF[][][]ip_vs_sh 16384 0ip_vs_wrr 16384 0ip_vs_rr 16384 16ip_vs 151552 22 ip_vs_rr,ip_vs_sh,ip_vs_wrrnf_conntrack 143360 8 xt_conntrack,nf_nat,ip6t_MASQUERADE,nf_nat_ipv6,ipt_MASQUERADE,nf_nat_ipv4,nf_conntrack_netlink,ip_vslibcrc32c 16384 3 nf_conntrack,nf_nat,ip_vs[]

IPVS(IP Virtual Server)是 Linux 内核自带的一种负载均衡技术,它可以将请求分配到一组后端服务#器(也称为“真实服务器”),从而提高系统的性能和可靠性。
IPVS 采用网络地址转换(NAT)或直接路由模式来处理请求,
支持 LVS(Linux Virtual Server)协议、TCP、UDP 和 SCTP 等多种协议。
IPVS 能够自动检测后端服务器的状态,如果某个服务器出现故障,
IPVS 会自动将其从服务器池中删除,并将请求转发给其他健康的服务器。

3.1.3、搭建集群
系统参数修改(both)
将 SELinux 设置为 permissive 模式(相当于将其禁用)[root@m1 data] # setenforce 0[root@m1 data] # sed -i 's/^SELINUX=enforcing$/SELINUX=permissive/' /etc/selinux/config# 禁用swap文件,编辑/etc/fstab,注释掉引用 swap 的行[root@m1 data] # vim /etc/fstabswapoff -a# 设置网桥参数[root@m1 data]# cat <<EOF > /etc/sysctl.d/k8s.conf> net.ipv4.ip_forward = 1> net.bridge.bridge-nf-call-iptables = 1> fs.may_detach_mounts = 1> vm.overcommit_memory=1> vm.panic_on_oom=0> fs.inotify.max_user_watches=89100> fs.file-max=52706963> fs.nr_open=52706963> net.netfilter.nf_conntrack_max=2310720> net.ipv4.tcp_keepalive_time = 600> net.ipv4.tcp_keepalive_probes = 3> net.ipv4.tcp_keepalive_intvl =15> net.ipv4.tcp_max_tw_buckets = 36000> net.ipv4.tcp_tw_reuse = 1> net.ipv4.tcp_max_orphans = 327680> net.ipv4.tcp_orphan_retries = 3> net.ipv4.tcp_syncookies = 1> net.ipv4.tcp_max_syn_backlog = 16384> net.ipv4.ip_conntrack_max = 65536> net.ipv4.tcp_max_syn_backlog = 16384> net.ipv4.tcp_timestamps = 0> net.core.somaxconn = 16384> net.ipv6.conf.all.disable_ipv6 = 0> net.ipv6.conf.default.disable_ipv6 = 0> net.ipv6.conf.lo.disable_ipv6 = 0> net.ipv6.conf.all.forwarding = 1> EOF[root@m1 data]#[root@m1 data]# sysctl -p /etc/sysctl.d/k8s.confnet.ipv4.ip_forward = 1net.bridge.bridge-nf-call-iptables = 1sysctl: cannot stat /proc/sys/fs/may_detach_mounts: No such file or directoryvm.overcommit_memory = 1vm.panic_on_oom = 0fs.inotify.max_user_watches = 89100fs.file-max = 52706963fs.nr_open = 52706963net.netfilter.nf_conntrack_max = 2310720net.ipv4.tcp_keepalive_time = 600net.ipv4.tcp_keepalive_probes = 3net.ipv4.tcp_keepalive_intvl = 15net.ipv4.tcp_max_tw_buckets = 36000net.ipv4.tcp_tw_reuse = 1net.ipv4.tcp_max_orphans = 327680net.ipv4.tcp_orphan_retries = 3net.ipv4.tcp_syncookies = 1net.ipv4.tcp_max_syn_backlog = 16384sysctl: cannot stat /proc/sys/net/ipv4/ip_conntrack_max: No such file or directorynet.ipv4.tcp_max_syn_backlog = 16384net.ipv4.tcp_timestamps = 0net.core.somaxconn = 16384net.ipv6.conf.all.disable_ipv6 = 0net.ipv6.conf.default.disable_ipv6 = 0net.ipv6.conf.lo.disable_ipv6 = 0net.ipv6.conf.all.forwarding = 1[root@m1 data]# sysctl --system* Applying /usr/lib/sysctl.d/00-system.conf ...net.bridge.bridge-nf-call-ip6tables = 0net.bridge.bridge-nf-call-iptables = 0net.bridge.bridge-nf-call-arptables = 0* Applying /usr/lib/sysctl.d/10-default-yama-scope.conf ...* Applying /usr/lib/sysctl.d/50-default.conf ...kernel.sysrq = 16kernel.core_uses_pid = 1kernel.kptr_restrict = 1net.ipv4.conf.default.rp_filter = 1net.ipv4.conf.all.rp_filter = 1net.ipv4.conf.default.accept_source_route = 0net.ipv4.conf.all.accept_source_route = 0net.ipv4.conf.default.promote_secondaries = 1net.ipv4.conf.all.promote_secondaries = 1fs.protected_hardlinks = 1fs.protected_symlinks = 1* Applying /etc/sysctl.d/90-omnibus-gitlab-kernel.sem.conf ...kernel.sem = 250 32000 32 262* Applying /etc/sysctl.d/90-omnibus-gitlab-kernel.shmall.conf ...kernel.shmall = 4194304* Applying /etc/sysctl.d/90-omnibus-gitlab-kernel.shmmax.conf ...kernel.shmmax = 17179869184* Applying /etc/sysctl.d/90-omnibus-gitlab-net.core.somaxconn.conf ...net.core.somaxconn = 1024* Applying /etc/sysctl.d/99-sysctl.conf ...net.bridge.bridge-nf-call-ip6tables = 1net.bridge.bridge-nf-call-iptables = 1net.ipv4.ip_forward = 1* Applying /etc/sysctl.d/k8s.conf ...net.ipv4.ip_forward = 1net.bridge.bridge-nf-call-iptables = 1vm.overcommit_memory = 1vm.panic_on_oom = 0fs.inotify.max_user_watches = 89100fs.file-max = 52706963fs.nr_open = 52706963net.netfilter.nf_conntrack_max = 2310720net.ipv4.tcp_keepalive_time = 600net.ipv4.tcp_keepalive_probes = 3net.ipv4.tcp_keepalive_intvl = 15net.ipv4.tcp_max_tw_buckets = 36000net.ipv4.tcp_tw_reuse = 1net.ipv4.tcp_max_orphans = 327680net.ipv4.tcp_orphan_retries = 3net.ipv4.tcp_syncookies = 1net.ipv4.tcp_max_syn_backlog = 16384net.ipv4.tcp_max_syn_backlog = 16384net.ipv4.tcp_timestamps = 0net.core.somaxconn = 16384net.ipv6.conf.all.disable_ipv6 = 0net.ipv6.conf.default.disable_ipv6 = 0net.ipv6.conf.lo.disable_ipv6 = 0net.ipv6.conf.all.forwarding = 1* Applying /etc/sysctl.conf ...net.bridge.bridge-nf-call-ip6tables = 1net.bridge.bridge-nf-call-iptables = 1net.ipv4.ip_forward = 1[root@m1 data]#- 这个命令的作用是应用 k8s.conf 文件中的内核参数设置,并且开启网络桥接的防火墙功能。其中 k8s.conf 文件中的内容包括以下三个参数设置:- net.bridge.bridge-nf-call-iptables = 1 表示开启防火墙功能。- net.bridge.bridge-nf-call-ip6tables = 1 表示开启 IPV6 的防火墙功能。- net.ipv4.ip_forward = 1 表示开启 IP 转发功能。
CRI环境安装
### 1、cri-dockerd-0.3.4.amd64.tgz 下载[root@m1 data]# wget https://github.com/Mirantis/cri-dockerd/releases/download/v0.3.4/cri-dockerd-0.3.4.amd64.tgz[root@m1 data]# tar xf cri-dockerd-0.3.4.amd64.tgz -C /usr/local/bin[root@m1 data]# cri-dockerd --versioncri-dockerd 0.3.4 (e88b1605)[root@m1 data]#### 配置文件定制[root@n1 data]# cat /etc/systemd/system/cri-dockerd.service[Unit]Description=CRI Interface for Docker Application Container EngineDocumentation=https://docs.mirantis.comAfter=network-online.target firewalld.service docker.serviceWants=network-online.target[Service]Type=notifyExecStart=/usr/local/bin/cri-dockerd --pod-infra-container-image=registry.cn-hangzhou.aliyuncs.com/google_containers/pause:3.9 --network-plugin=cni --cni-conf-dir=/etc/cni/net.d --cni-bin-dir=/opt/cni/bin --container-runtime-endpoint=unix:///var/run/cri-dockerd.sock --cri-dockerd-root-directory=/var/lib/dockershim --docker-endpoint=unix:///var/run/docker.sock --cri-dockerd-root-directory=/var/lib/dockerExecReload=/bin/kill -s HUP $MAINPIDTimeoutSec=0RestartSec=2Restart=alwaysStartLimitBurst=3StartLimitInterval=60sLimitNOFILE=infinityLimitNPROC=infinityLimitCORE=infinityTasksMax=infinityDelegate=yesKillMode=process[Install]WantedBy=multi-user.target[root@n1 data]#[root@n1 data]# cat /etc/systemd/system/cri-dockerd.socket[Unit]Description=CRI Docker Socket for the APIPartOf=cri-docker.service[Socket]ListenStream=/var/run/cri-dockerd.sockSocketMode=0660SocketUser=rootSocketGroup=docker[Install]WantedBy=sockets.target[root@n1 data]#### 启动服务### 设置服务开机自启动[root@n1 data]# systemctl daemon-reload[root@n1 data]# systemctl enable --now cri-dockerd.service

kubernetes基础工具安装(both)
[][][]Loaded plugins: fastestmirrorLoading mirror speeds from cached hostfile* base: mirrors.aliyun.com* extras: mirrors.aliyun.com* updates: mirrors.aliyun.comkubernetes | 1.4 kB 00:00:00......Complete![][]Client Version: v1.28.2Kustomize Version: v5.0.4-0.20230601165947-6ce0bf390ce3The connection to the server 172.16.20.121:6443 was refused - did you specify the right host or port?[]kubeadm version: &version.Info{Major:"1", Minor:"28", GitVersion:"v1.28.2", GitCommit:"89a4ea3e1e4ddd7f7572286090359983e0387b2f", GitTreeState:"clean", BuildDate:"2023-09-13T09:34:32Z", GoVersion:"go1.20.8", Compiler:"gc", Platform:"linux/amd64"}[]Kubernetes v1.28.2[]

kubedm配置文件生成(m1)
data]# kubeadm config print init-defaults > kubeadm.confapiVersion: kubeadm.k8s.io/v1beta3 # 指定了配置文件的 API 版本。bootstrapTokens: # 定义了节点引导时使用的令牌,包括组、令牌值、TTL(有效期)和用途(签名和身份验证)groups:system:bootstrappers:kubeadm:default-node-tokentoken: abcdef.0123456789abcdefttl: 24h0m0susages:signingauthenticationkind: InitConfigurationlocalAPIEndpoint: # 指定本地 API 服务器的广告地址和绑定端口advertiseAddress: 172.16.20.122bindPort: 6443nodeRegistration: #定义节点注册时的配置,包括 CRI 套接字路径、镜像拉取策略、节点名称和污点配置criSocket: unix:///var/run/cri-dockerd.sockimagePullPolicy: IfNotPresentname: nodetaints: null---apiServer:timeoutForControlPlane: 4m0sapiVersion: kubeadm.k8s.io/v1beta3certificatesDir: /etc/kubernetes/pki # 证书存放目录clusterName: kubernetes #Kubernetes 集群的名称controllerManager: # 定义了控制管理器的配置extraArgs:# 额外参数: "true" # 启用节点 CIDR 分配: "10.244.0.0/16" # 定义了集群中所有 Pod 的 IP 地址范围。这通常与 podSubnet 相同dns: {} # 默认dnsetcd:local:dataDir: /data/etcd #数据目录imageRepository: registry.cn-hangzhou.aliyuncs.com/google_containers # 指定镜像仓库地址,用于拉取 Kubernetes 组件镜像kind: ClusterConfigurationkubernetesVersion: 1.28.2networking: # 定义网络配置,dnsDomain 设置为 cluster.local,serviceSubnet 为服务网段,dnsDomain: cluster.localserviceSubnet: 10.96.0.0/12 # Kubernetes 服务的虚拟 IP 地址范围。Kubernetes 服务的 ClusterIP 会从这个子网中分配podSubnet: 10.244.0.0/16 # Pod 网段,与 Flannel 配置相匹配scheduler: {}---apiVersion: kubeproxy.config.k8s.io/v1alpha1kind: KubeProxyConfigurationmode: ipvs # 指定 kube-proxy 的模式为 ipvs,这是一个高性能的负载均衡模式---apiVersion: kubelet.config.k8s.io/v1beta1kind: KubeletConfigurationcgroupDriver: systemd #指定 cgroup 驱动程序为 systemddata]#
如果使用containerd,需要制定runtime
[]
初始化master(m1)
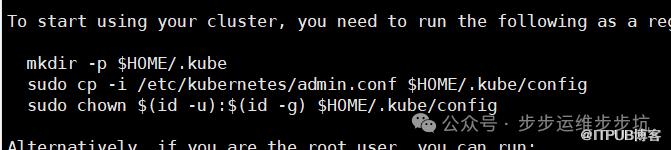
[root@m1 data]# kubeadm init --config ./kubeadm.conf...Your Kubernetes control-plane has initialized successfully!To start using your cluster, you need to run the following as a regular user:mkdir -p $HOME/.kubesudo cp -i /etc/kubernetes/admin.conf $HOME/.kube/configsudo chown $(id -u):$(id -g) $HOME/.kube/configAlternatively, if you are the root user, you can run:export KUBECONFIG=/etc/kubernetes/admin.confYou should now deploy a pod network to the cluster.Run "kubectl apply -f [podnetwork].yaml" with one of the options listed at:https://kubernetes.io/docs/concepts/cluster-administration/addons/Then you can join any number of worker nodes by running the following on each as root:kubeadm join 172.16.20.122:6443 --token abcdef.0123456789abcdef \--discovery-token-ca-cert-hash sha256:4a79d15308b5ce073762ed7d96e926d988c94a4f34caf997e4b63ccc0cbbd8ce[root@m1 k8s-1.25]#

node加入节点(n1)
[]> --discovery-token-ca-cert-hash sha256:4a79d15308b5ce073762ed7d96e926d988c94a4f34caf997e4b63ccc0cbbd8ce[] Running pre-flight checks[] Reading configuration from the cluster...[] FYI: You can look at this config file with 'kubectl -n kube-system get cm kubeadm-config -o yaml'W0712 15:49:51.677464 34999 kubelet.go:63] [kubelet-start] WARNING: unable to stop the kubelet service momentarily: [exit status 5][] Writing kubelet configuration to file "/var/lib/kubelet/config.yaml"[] Writing kubelet environment file with flags to file "/var/lib/kubelet/kubeadm-flags.env"[] Starting the kubelet[] Waiting for the kubelet to perform the TLS Bootstrap...This node has joined the cluster:* Certificate signing request was sent to apiserver and a response was received.* The Kubelet was informed of the new secure connection details.Run 'kubectl get nodes' on the control-plane to see this node join the cluster.
要是忘记了怎么加入 可以再master上执行
验证(m1)
[root@m1 data]# kubeadm token create --print-join-commandkubeadm join 172.16.20.121:6443 --token vuzmyr.17c13b0owaapi6aa --discovery-token-ca-cert-hash sha256:2ec7b702a01eaa880d0b02fc85926b6886c85d8f0422e00a95d42be89bd50cb0[root@m1 data]#
这里要注意先执行,不然会报错
[root@m1 data]# kubectl get po -ANAMESPACE NAME READY STATUS RESTARTS AGEkube-system coredns-6554b8b87f-mvw52 0/1 ContainerCreating 0 177mkube-system coredns-6554b8b87f-qnzbq 0/1 ContainerCreating 0 177mkube-system etcd-node 1/1 Running 0 177mkube-system kube-apiserver-node 1/1 Running 0 177mkube-system kube-controller-manager-node 1/1 Running 0 177mkube-system kube-proxy-kbmvz 1/1 Running 0 177mkube-system kube-proxy-vtr25 1/1 Running 0 108mkube-system kube-scheduler-node 1/1 Running 0 177m[root@m1 data]# kubectl get noNAME STATUS ROLES AGE VERSIONn1 Ready <none> 108m v1.28.2node Ready control-plane 177m v1.28.2[root@m1 data]#

命令补全
放到master主机的环境文件中echo "source <(kubectl completion bash)" >> ~/.bashrcecho "source <(kubeadm completion bash)" >> ~/.bashrcsource ~/.bashrc-bash: _get_comp_words_by_ref: command not found报错解决yum install bash-completion -ysource /usr/share/bash-completion/bash_completion重新执行上面的source

网络组件部署
二选一
flanneld
[]Unable to find image 'm.daocloud.io/docker.io/library/nginx:latest' locallylatest: Pulling from nginx...Digest: sha256:67682bda769fae1ccf5183192b8daf37b64cae99c6c3302650f6f8bf5f0f95dfStatus: Downloaded newer image for m.daocloud.io/docker.io/library/nginx:latest16ed938ee8dca08449c96354a5fca9bd466cc76cc4593afa8d65782344d2352d[]v1.5.1-flannel1: Pulling from flannel/flannel-cni-plugin....Status: Downloaded newer image for m.daocloud.io/docker.io/flannel/flannel-cni-plugin:v1.5.1-flannel1[]v0.25.4: Pulling from flannel/flannel...Status: Downloaded newer image for m.daocloud.io/docker.io/flannel/flannel:v0.25.4[]m.daocloud.io/docker.io/flannel/flannel-cni-plugin v1.5.1-flannel1 0b2af0d15971 2 weeks ago 10.4MBm.daocloud.io/docker.io/flannel/flannel v0.25.4 e6c43605b714 4 weeks ago 81MB[][][]flannel/flannel-cni-plugin v1.5.1-flannel1 0b2af0d15971 2 weeks ago 10.4MBm.daocloud.io/docker.io/flannel/flannel-cni-plugin v1.5.1-flannel1 0b2af0d15971 2 weeks ago 10.4MBflannel/flannel v0.25.4 e6c43605b714 4 weeks ago 81MBm.daocloud.io/docker.io/flannel/flannel v0.25.4 e6c43605b714 4 weeks ago 81MB[][][][]root@172.16.20.121's password:cni-flugin.tar 100% 10MB 150.2MB/s 00:00flanneld.tar 100% 78MB 161.6MB/s 00:00[][]ef7a14b43c43: Loading layer [==================================================>] 8.079MB/8.079MB21692b7dc30c: Loading layer [==================================================>] 2.634MB/2.634MBLoaded image: flannel/flannel-cni-plugin:v1.5.1-flannel1[]8980900bae6f: Loading layer [==================================================>] 8.027MB/8.027MB...Loaded image: flannel/flannel:v0.25.4[]
如果自定义了pod网段也就是adm文件中的cluster-cidr 和 podSubnet,那么flannel也需要对应变更不然会报错:
"Error registering network: failed to acquire lease: node “xxx” pod cidr not assigned"

calico
链接: https://pan.baidu.com/s/18SGmwpY2mPB3I3pmgHwQeA 提取码: 1111--来自百度网盘超级会员v6的分享[root@m1 k8s-1.25]# scp calico.tar.gz n1:/data/calico.tar.gz 100% 365MB 158.9MB/s 00:02[root@m1 k8s-1.25]#[root@m1 k8s-1.25]# ctr -n=k8s.io images import calico.tar.gzunpacking docker.io/calico/cni:v3.18.0 (sha256:3f4da42b983e5cdcd6ca8f5f18ab9228988908f0d0fc7b4ccdfdea133badac4b)...doneunpacking docker.io/calico/node:v3.18.0 (sha256:ea61434ae750a9bc6b7e998f6fc4d8eeab43f53ba2de89fc5bbf1459a7eee667)...doneunpacking docker.io/calico/pod2daemon-flexvol:v3.18.0 (sha256:d18a19134ccf88a2f97f220400953934655b5734eb846d3ac1a72e8e32f0df32)...doneunpacking docker.io/calico/kube-controllers:v3.18.0 (sha256:c9c9ea8416dc0d09c5df883a3a79bad028516beb5a04d380e2217f41e9aff1f0)...done[root@m1 k8s-1.25]#[root@n1 data]# ctr -n=k8s.io images import calico.tar.gzunpacking docker.io/calico/cni:v3.18.0...[root@n1 data]#[root@m1 k8s-1.25]# kubectl apply -f https://calico-v3-25.netlify.app/archive/v3.25/manifests/calico.yamlpoddisruptionbudget.policy/calico-kube-controllers created...deployment.apps/calico-kube-controllers created

查看正在执行的 pod,kubectl get pod --all-namespaces -o wide(下图是k9s的内容)

注意:如果机器重启导致 k8s 关闭,可以采用 systemctl status kubelet 查看状态,采用 systemctl start kubelet 启动 k8s,无论是主节点还是工作节点,都需要执行。


3.1.4 kuboard集群管理系统搭建
[root k8s-1.25]# kubectl apply -f https://addons.kuboard.cn/kuboard/kuboard-v3.yamlnamespace/kuboard createdconfigmap/kuboard-v3-config createdserviceaccount/kuboard-boostrap createdclusterrolebinding.rbac.authorization.k8s.io/kuboard-boostrap-crb createddaemonset.apps/kuboard-etcd createddeployment.apps/kuboard-v3 createdservice/kuboard-v3 created[root k8s-1.25]#
期待你的
分享
点赞
在看

添加博主
微信号|yfq940-
原文作者:步步运维步步坑;如有侵权,请联系管理员删除。

