本文主要是将RAC OUI安装做一个图形化细节记录
基础信息
硬件规划:
网卡至少两张 public / private
CD/DVD ####用于依赖安装
磁盘 : / 根盘
asm-ocr ##共享磁盘
asm-data ##共享磁盘
###物理机可不需要
/soft 50G使用时分配 用完可删除 ##共享 虚拟机上建议
/u01 60G使用时分配 ##虚拟机上建议
RAC信息规划:
主机名 racnode1 racnode2
IP地址
public: 192.168.11.156 192.168.11.157
private: 192.168.201.156 192.168.201.157
vip: 192.168.11.158 192.168.11.159
scan: 192.168.11.160
实例名:racdb1 racdb2
提前准备(略)
1、GI安装
su - grid
export CV_ASSUME_DISTID=RHEL7.6
export SSH_AUTH_SOCK=0
export
export DISPLAY=192.168.11.1:0.0
cd $ORACLE_HOME
./gridSetup.sh
step1: Specify the installation option
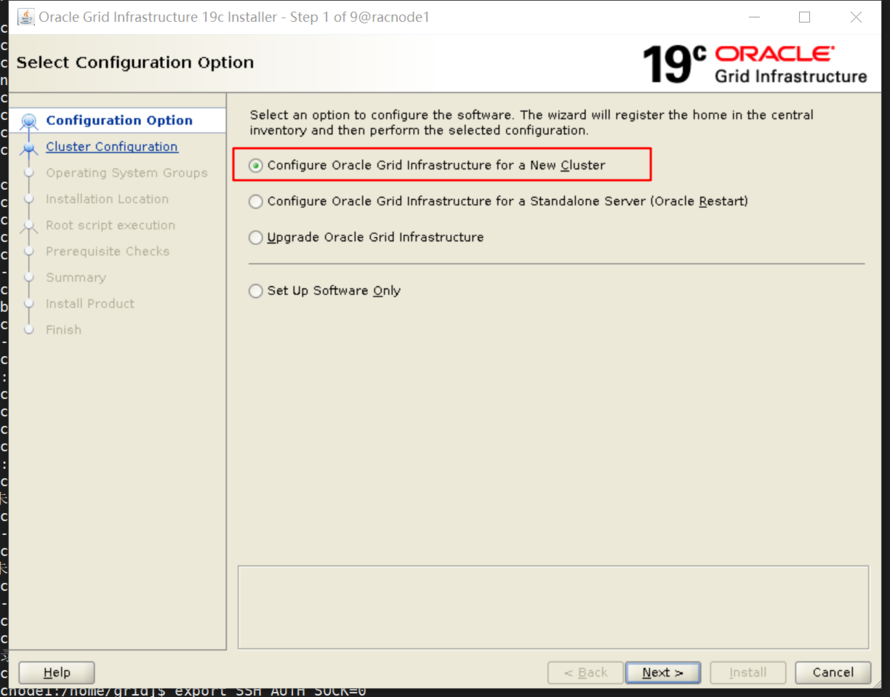
对应responsfile: oracle.install.option=CRS_CONFIG
step2:
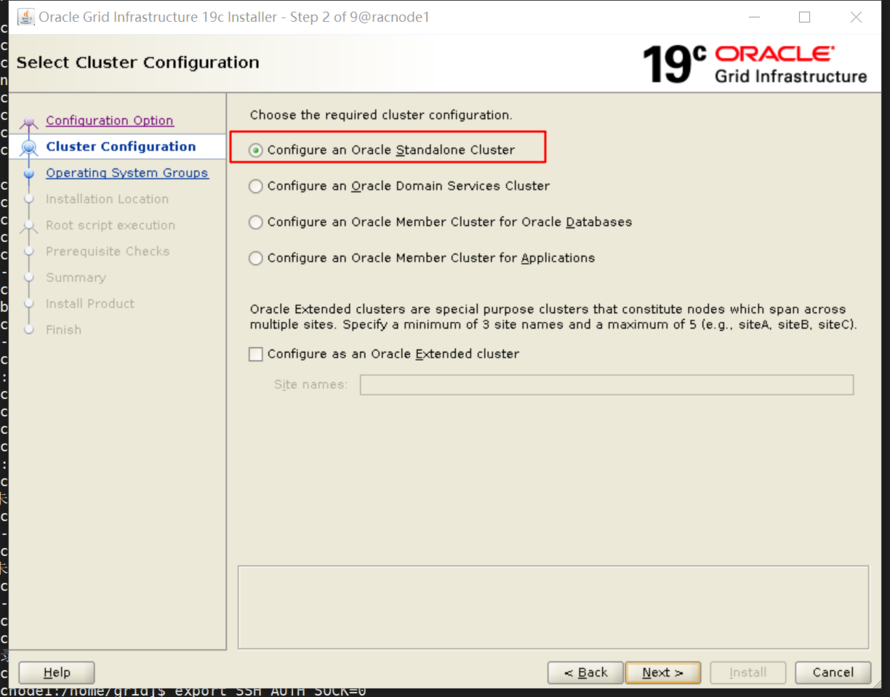
对应responsfile:
oracle.install.crs.config.ClusterConfiguration=STANDALONE
oracle.install.crs.config.configureAsExtendedCluster=false
step3:
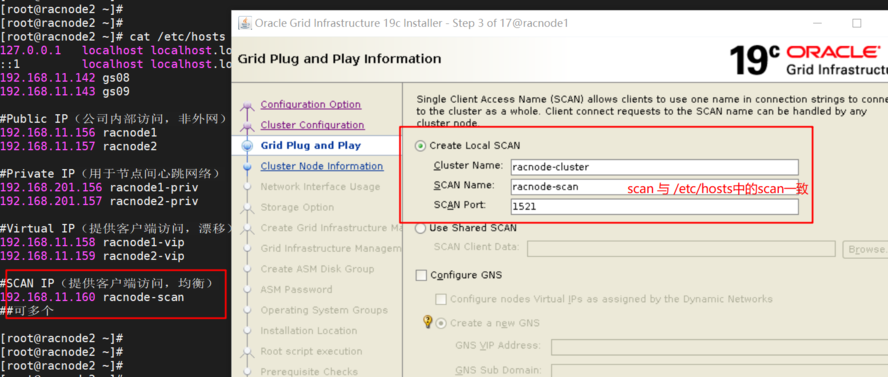
scan name与主机配置的一致,也可使用oui默认带出来的名称,一致即可。
对应responsfile:
oracle.install.crs.config.clusterName=racnode-cluster
oracle.install.crs.config.gpnp.scanName=racnode-scan
oracle.install.crs.config.gpnp.scanPort=1521
step4:
 如信任有问题可考虑如下信任创建和验证:
##删除已有的ssh配置
rm -f /home/grid/.ssh/*
rm -f /home/oracle/.ssh/*
##--手动互信
su - grid
cd $ORACLE_HOME
export SSH_AUTH_SOCK=0
./oui/prov/resources/scripts/sshUserSetup.sh -user grid -hosts "racnode1 racnode2" -advanced -confirm -noPromptPassphrase
./oui/prov/resources/scripts/sshUserSetup.sh -user oracle -hosts "racnode1 racnode2" -advanced -confirm -noPromptPassphrase
ssh racnode2 date
##对等验证
su - grid
$ORACLE_HOME/runcluvfy.sh comp admprv -n racnode1,racnode2 -o user_equiv -sshonly -verbose
##完毕,执行互相验证
su - oracle
date;ssh racnode1 date;ssh racnode1 date;ssh racnode2 date;ssh racnode2 date;ssh racnode1 date
su - grid
date;ssh racnode1 date;ssh racnode1 date;ssh racnode2 date;ssh racnode2 date;ssh racnode1 date
对应responsfile:
oracle.install.crs.config.clusterNodes=racnode1:racnode1-vip,racnode2:racnode2-vip
step5:

对应responsfile:
oracle.install.crs.config.networkInterfaceList=ens160:192.168.11.0:1,ens224:192.168.201.0:5,virbr0:192.168.122.0:3
step6:
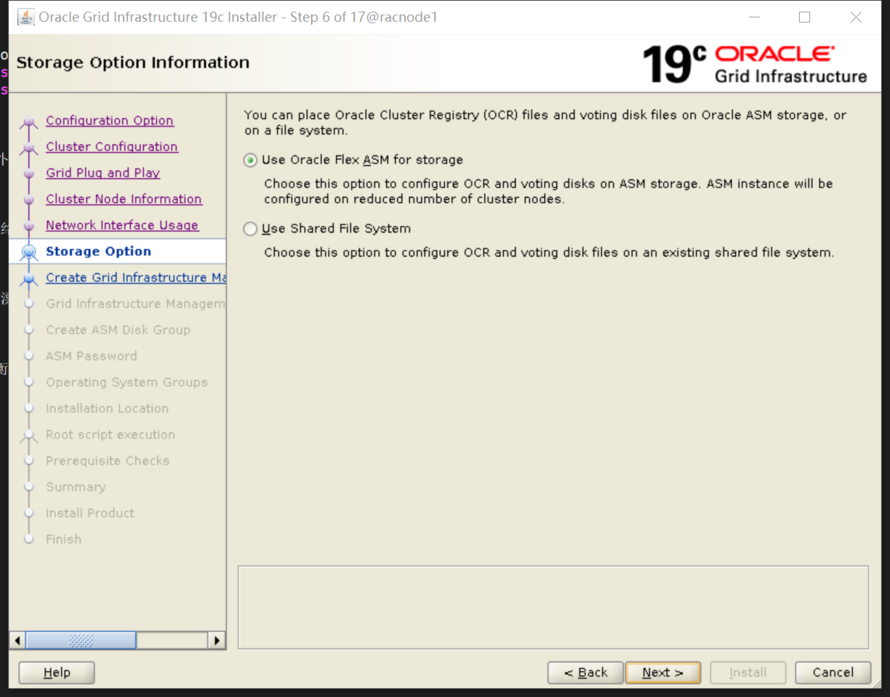
oracle.install.crs.config.storageOption=FLEX_ASM_STORAGE
step7:

oracle.install.crs.configureGIMR=false
step8:
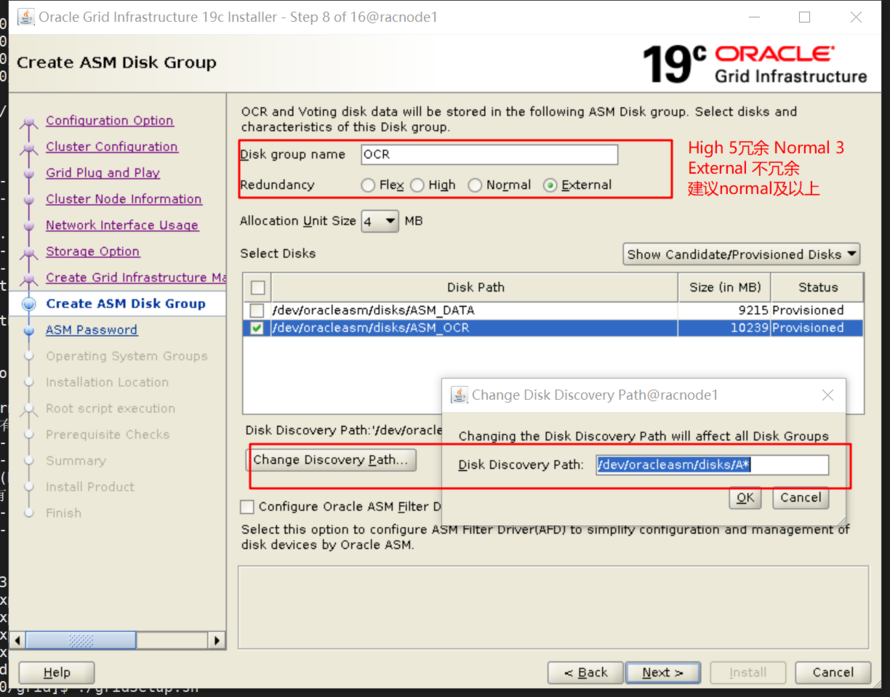
oracle.install.asm.diskGroup.name=OCR
oracle.install.asm.diskGroup.redundancy=EXTERNAL
oracle.install.asm.diskGroup.AUSize=4
oracle.install.asm.diskGroup.disks=/dev/asm_ocr
oracle.install.asm.diskGroup.disksWithFailureGroupNames=/dev/asm_ocr,
oracle.install.asm.diskGroup.diskDiscoveryString=/dev/as*
step9:
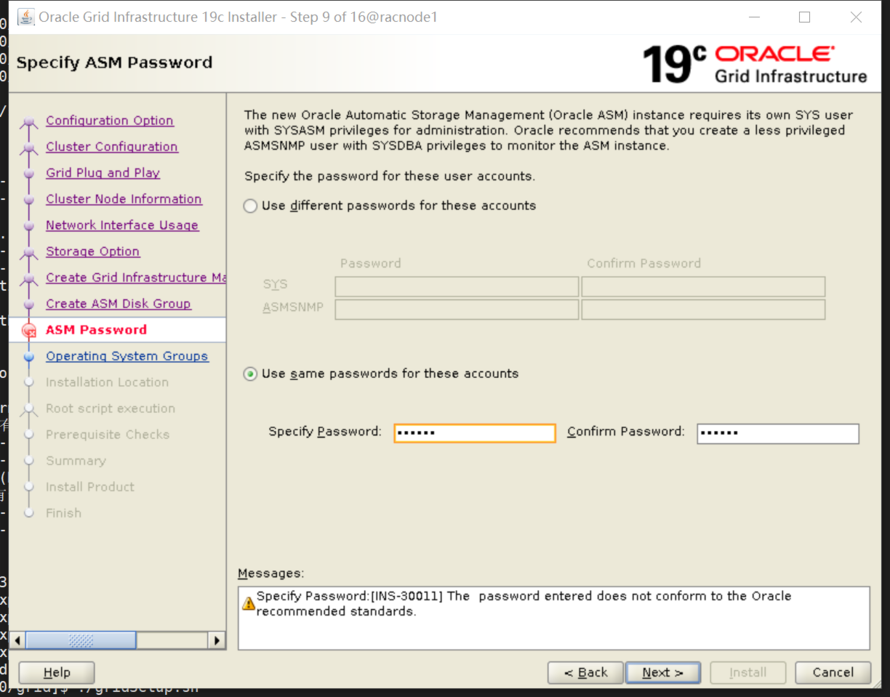
oracle.install.asm.SYSASMPassword=
oracle.install.asm.monitorPassword=

step10:
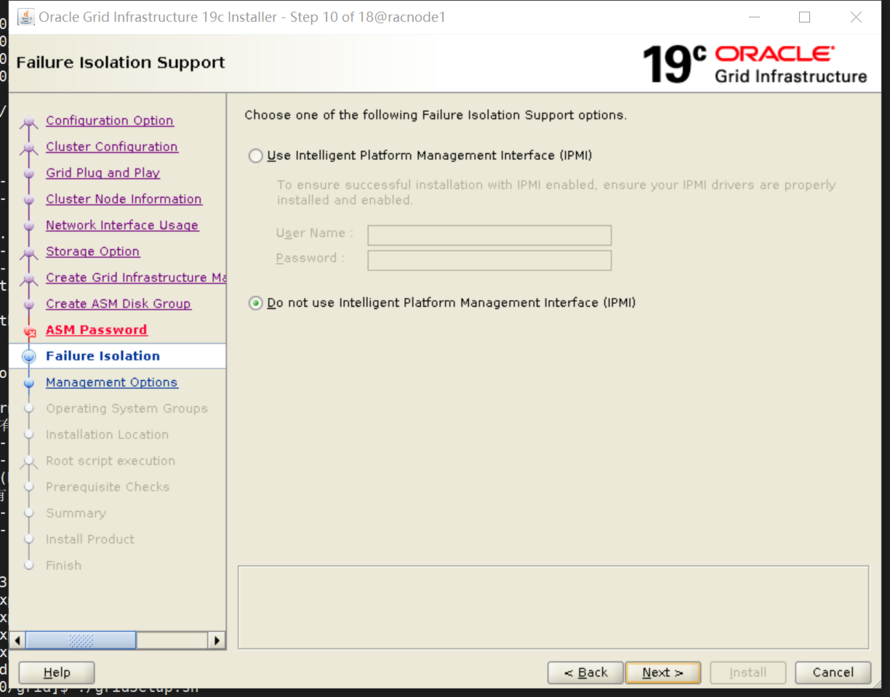
oracle.install.crs.config.useIPMI=false
oracle.install.crs.config.ipmi.bmcUsername=
oracle.install.crs.config.ipmi.bmcPassword=
step11:
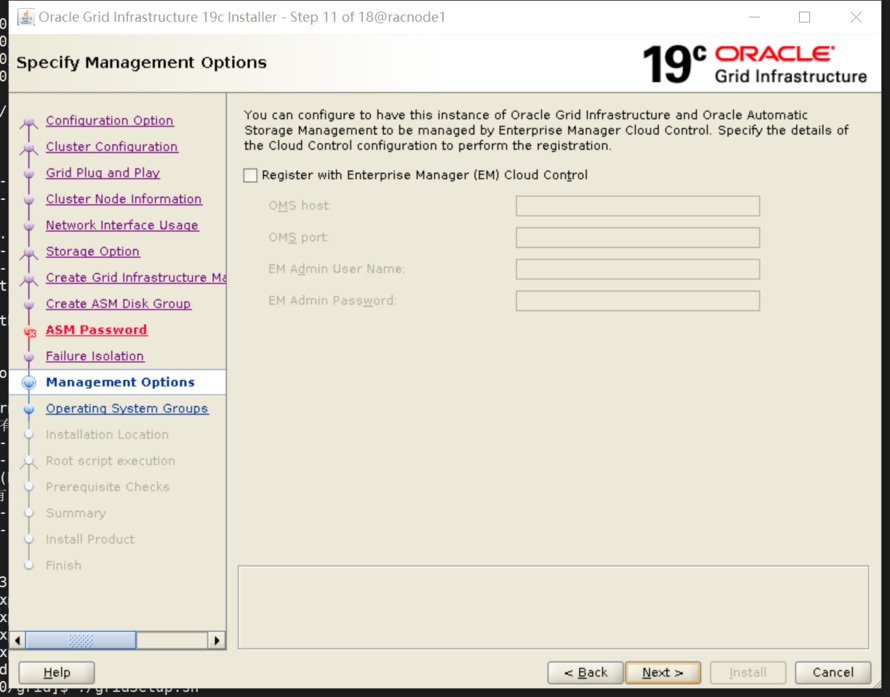
oracle.install.config.managementOption=NONE
oracle.install.config.omsHost=
oracle.install.config.omsPort=0
oracle.install.config.emAdminUser=
oracle.install.config.emAdminPassword=
step12:

oracle.install.asm.OSDBA=asmdba
oracle.install.asm.OSOPER=asmoper
oracle.install.asm.OSASM=asmadmin
step13:
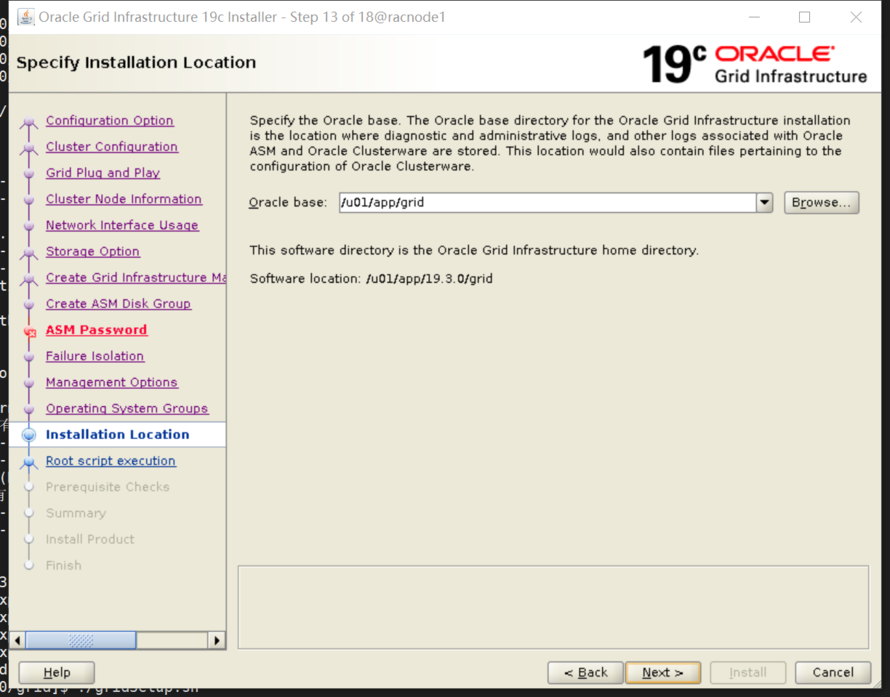
ORACLE_BASE=/u01/app/grid
step14:
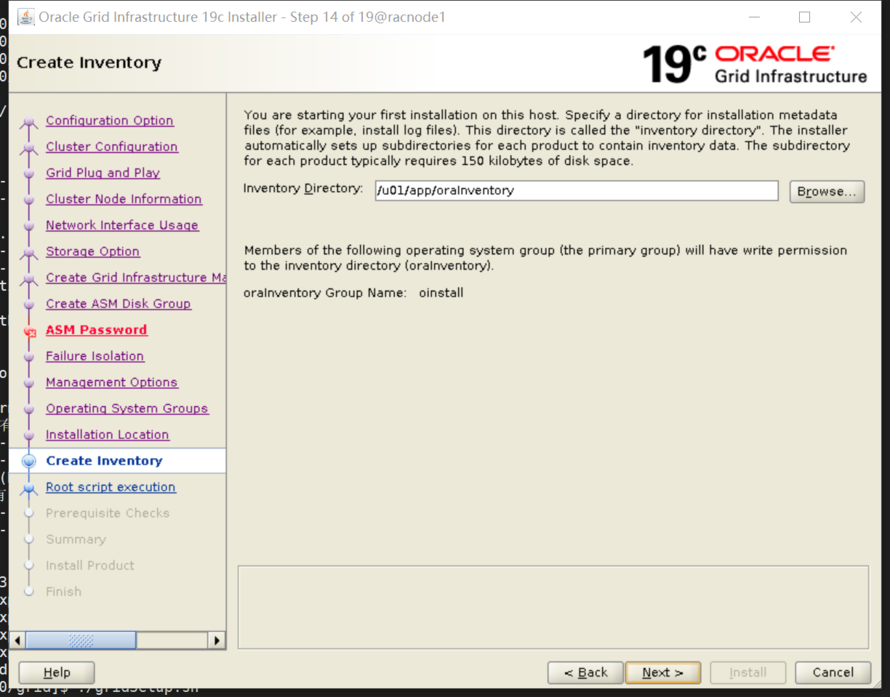
INVENTORY_LOCATION=/u01/app/oraInventory
step15:
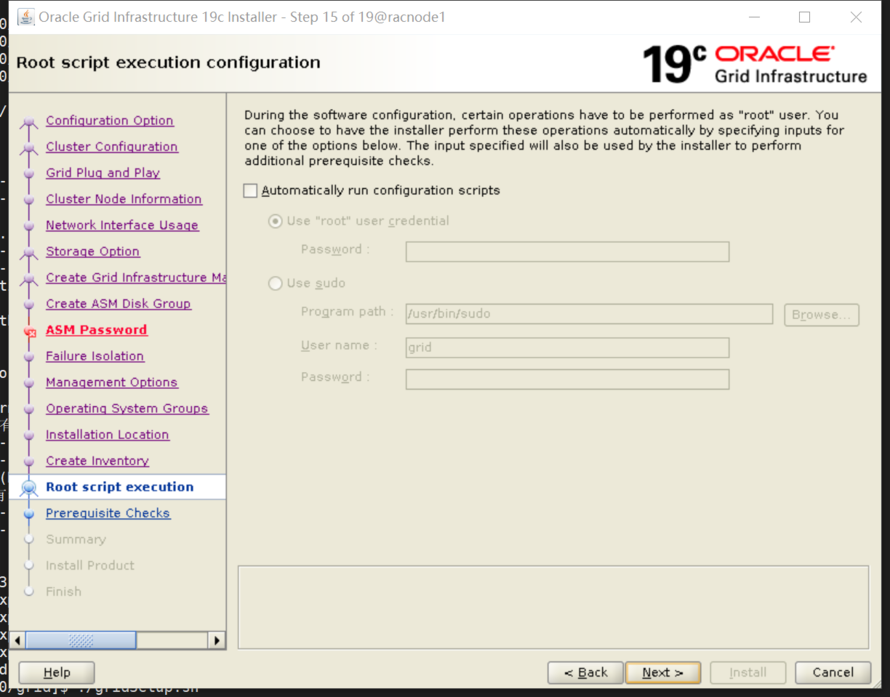
oracle.install.crs.rootconfig.executeRootScript=false
oracle.install.crs.rootconfig.configMethod=
oracle.install.crs.rootconfig.sudoPath=
oracle.install.crs.rootconfig.sudoUserName=
step16:
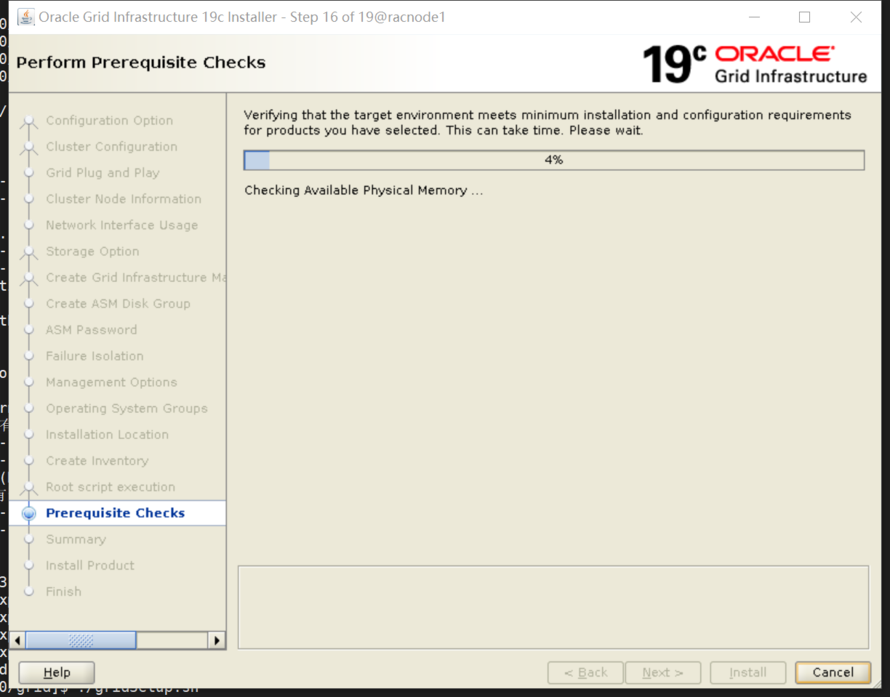
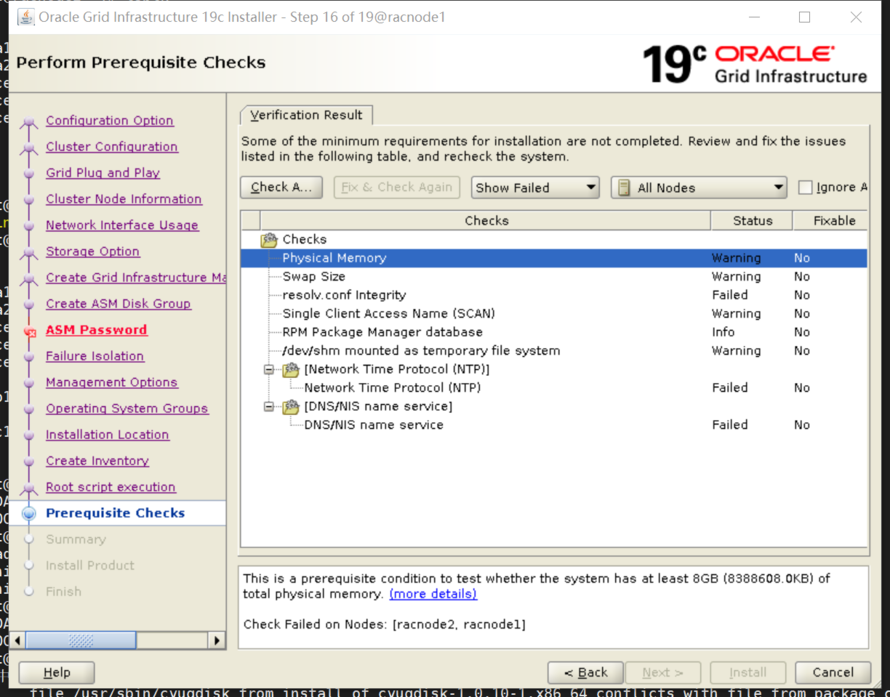
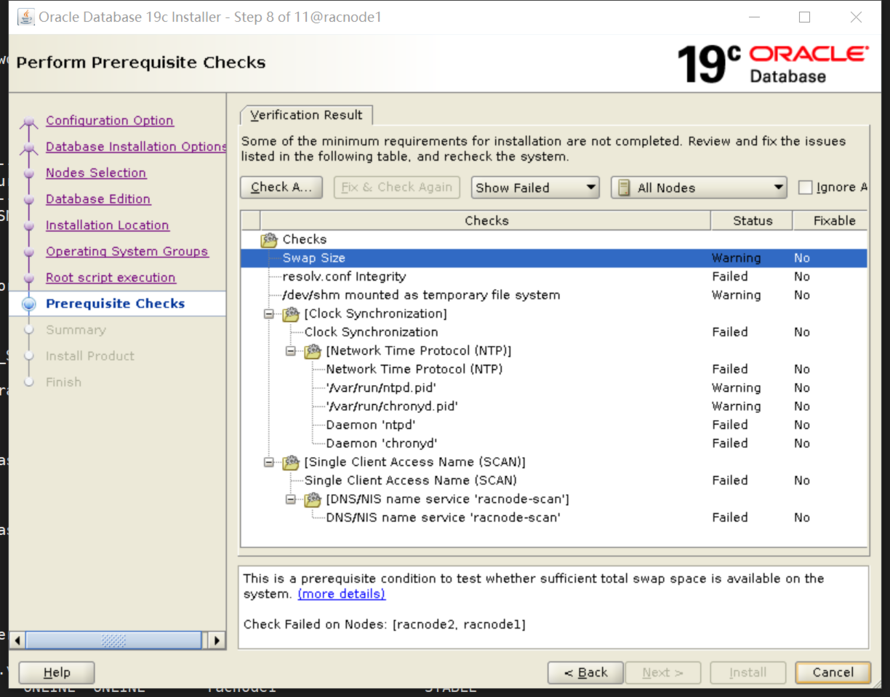
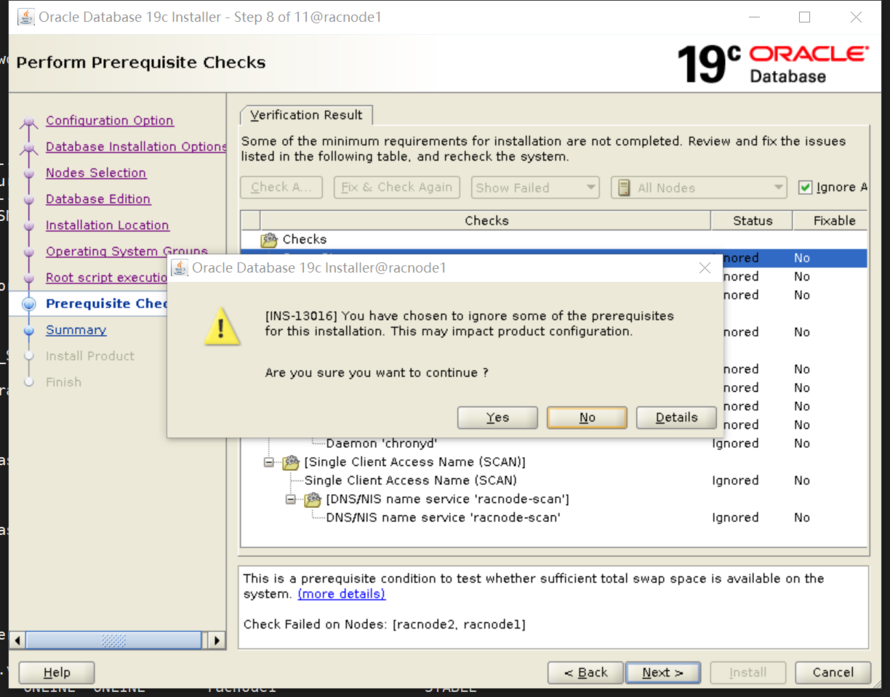
resolv.conf 、scan 、dns/nis 均与域名服务器有关, 使用本地域名 忽略
ntp未配置, 如解决此错误需配置时间服务器,这里已有公共时间同步服务器,ntpdate -u 同步即可,忽略
physical Memory /swap 这里是虚拟机资源有限忽略。物理机环境针对解决处理warning。

step17:
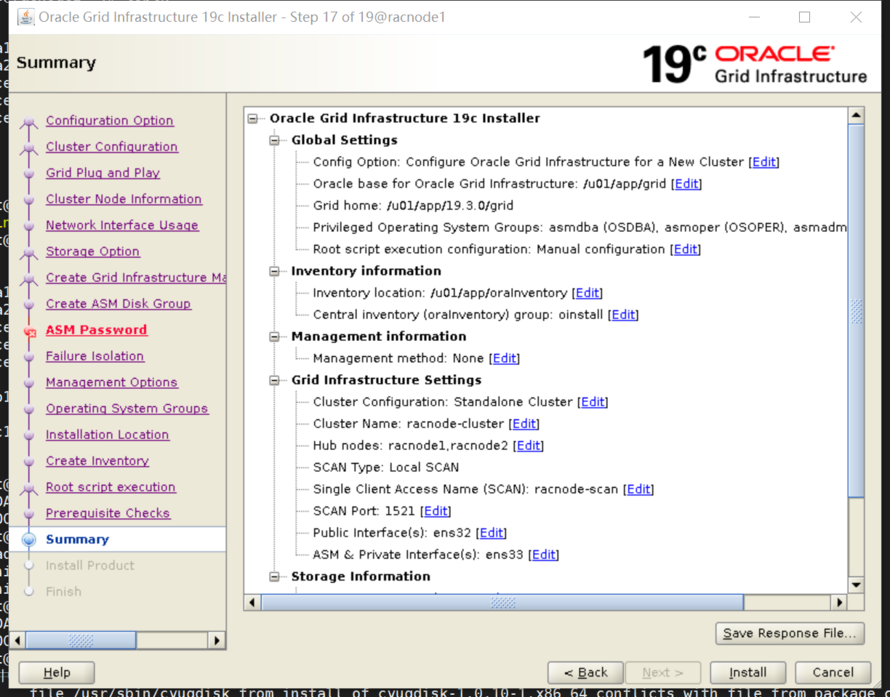
step18:

两个脚本在两个节点分别执行(主节点先执行完成 后续节点在依次执行),全部节点均执行完成后 OK继续
执行日志:
[root@racnode1:/root]$ /u01/app/oraInventory/orainstRoot.sh
Changing permissions of /u01/app/oraInventory.
Adding read,write permissions for group.
Removing read,write,execute permissions for world.
Changing groupname of /u01/app/oraInventory to oinstall.
The execution of the script is complete.
[root@racnode1:/root]$ /u01/app/19.3.0/grid/root.sh
Performing root user operation.
The following environment variables are set as:
ORACLE_OWNER= grid
ORACLE_HOME= /u01/app/19.3.0/grid
Enter the full pathname of the local bin directory: [/usr/local/bin]:
Copying dbhome to /usr/local/bin ...
Copying oraenv to /usr/local/bin ...
Copying coraenv to /usr/local/bin ...
Creating /etc/oratab file...
Entries will be added to the /etc/oratab file as needed by
Database Configuration Assistant when a database is created
Finished running generic part of root script.
Now product-specific root actions will be performed.
Relinking oracle with rac_on option
Using configuration parameter file: /u01/app/19.3.0/grid/crs/install/crsconfig_params
The log of current session can be found at:
/u01/app/grid/crsdata/racnode1/crsconfig/rootcrs_racnode1_2026-06-04_04-51-19PM.log
2026/06/04 16:51:26 CLSRSC-594: Executing installation step 1 of 19: 'SetupTFA'.
2026/06/04 16:51:26 CLSRSC-594: Executing installation step 2 of 19: 'ValidateEnv'.
2026/06/04 16:51:26 CLSRSC-363: User ignored prerequisites during installation
2026/06/04 16:51:26 CLSRSC-594: Executing installation step 3 of 19: 'CheckFirstNode'.
2026/06/04 16:51:28 CLSRSC-594: Executing installation step 4 of 19: 'GenSiteGUIDs'.
2026/06/04 16:51:29 CLSRSC-594: Executing installation step 5 of 19: 'SetupOSD'.
2026/06/04 16:51:29 CLSRSC-594: Executing installation step 6 of 19: 'CheckCRSConfig'.
2026/06/04 16:51:29 CLSRSC-594: Executing installation step 7 of 19: 'SetupLocalGPNP'.
2026/06/04 16:51:48 CLSRSC-594: Executing installation step 8 of 19: 'CreateRootCert'.
2026/06/04 16:51:52 CLSRSC-594: Executing installation step 9 of 19: 'ConfigOLR'.
2026/06/04 16:51:53 CLSRSC-4002: Successfully installed Oracle Trace File Analyzer (TFA) Collector.
2026/06/04 16:52:05 CLSRSC-594: Executing installation step 10 of 19: 'ConfigCHMOS'.
2026/06/04 16:52:05 CLSRSC-594: Executing installation step 11 of 19: 'CreateOHASD'.
2026/06/04 16:52:09 CLSRSC-594: Executing installation step 12 of 19: 'ConfigOHASD'.
2026/06/04 16:52:10 CLSRSC-330: Adding Clusterware entries to file 'oracle-ohasd.service'
2026/06/04 16:52:32 CLSRSC-594: Executing installation step 13 of 19: 'InstallAFD'.
2026/06/04 16:52:36 CLSRSC-594: Executing installation step 14 of 19: 'InstallACFS'.
2026/06/04 16:52:41 CLSRSC-594: Executing installation step 15 of 19: 'InstallKA'.
2026/06/04 16:52:45 CLSRSC-594: Executing installation step 16 of 19: 'InitConfig'.
已成功创建并启动 ASM。
[DBT-30001] 已成功创建磁盘组。有关详细信息, 请查看 /u01/app/grid/cfgtoollogs/asmca/asmca-260604下午045316.log。
2026/06/04 16:54:02 CLSRSC-482: Running command: '/u01/app/19.3.0/grid/bin/ocrconfig -upgrade grid oinstall'
CRS-4256: Updating the profile
Successful addition of voting disk 8d08833b490b4f83bfa54f4b61af024e.
Successfully replaced voting disk group with +OCR.
CRS-4256: Updating the profile
CRS-4266: Voting file(s) successfully replaced
## STATE File Universal Id File Name Disk group
-- ----- ----------------- --------- ---------
1. ONLINE 8d08833b490b4f83bfa54f4b61af024e (/dev/asm_ocr) [OCR]
Located 1 voting disk(s).
2026/06/04 16:55:21 CLSRSC-594: Executing installation step 17 of 19: 'StartCluster'.
2026/06/04 16:56:25 CLSRSC-343: Successfully started Oracle Clusterware stack
2026/06/04 16:56:25 CLSRSC-594: Executing installation step 18 of 19: 'ConfigNode'.
2026/06/04 16:57:39 CLSRSC-594: Executing installation step 19 of 19: 'PostConfig'.
2026/06/04 16:58:03 CLSRSC-325: Configure Oracle Grid Infrastructure for a Cluster ... succeeded

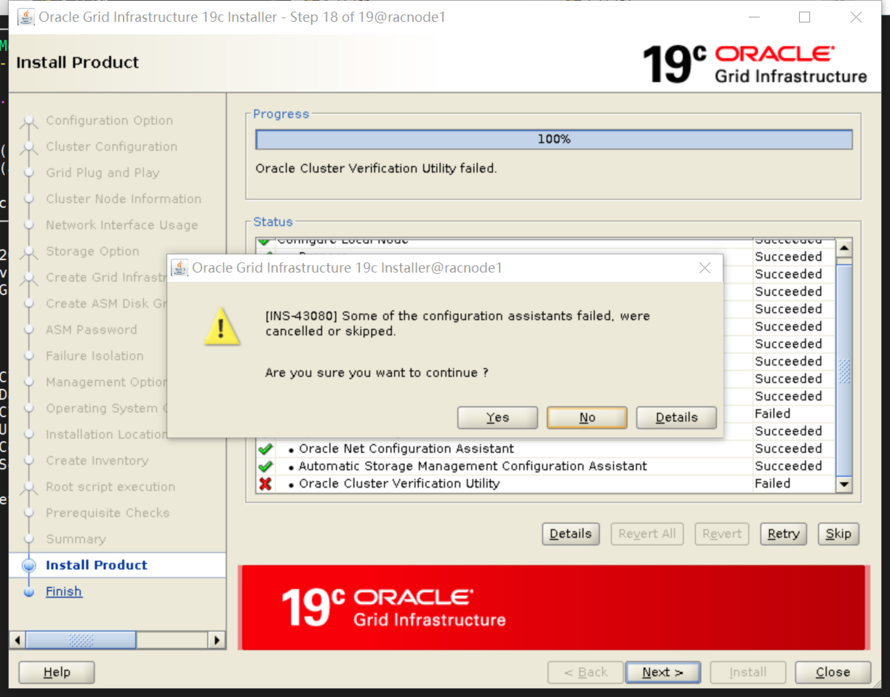
INS-20802错误 ,查看安装日志,verification 涉及local_scan的时候,出的异常,有域名服务器配置域名服务器,nslookup验证dns,如无域名服务器 直接忽略掉。(对外提供scan ip,不提供scan name即可)
step19:
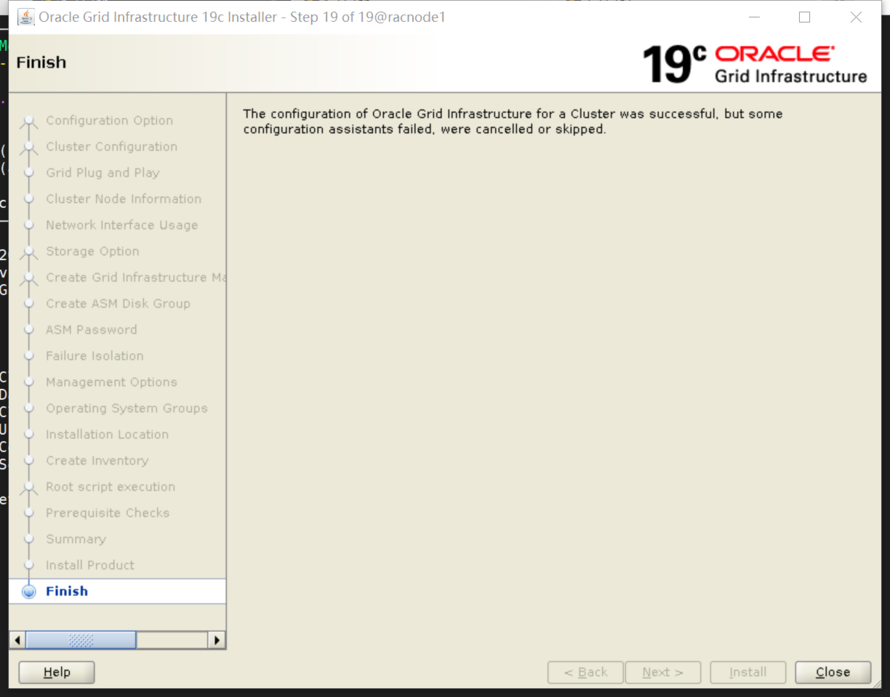
grid安装完毕
2、创建磁盘组
asmca

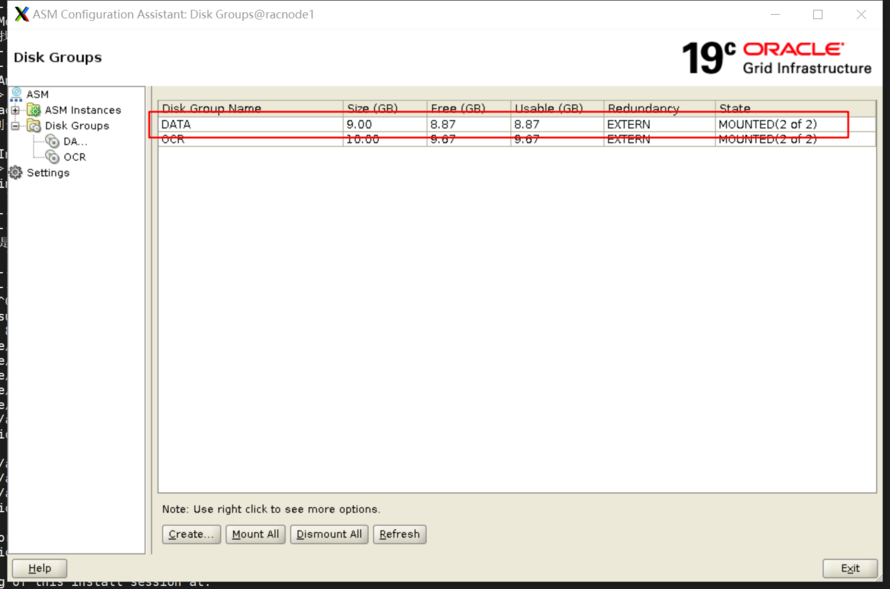

##检查 asm 磁盘:
asmcmd lsdg
然后检查集群状态:
crsctl stat res -t
3、数据库软件安装
su - oracle
##进入ORACLE_HOME目录
cd $ORACLE_HOME
##执行安装程序开始安装
export CV_ASSUME_DISTID=RHEL7.6
export SSH_AUTH_SOCK=0
export
export DISPLAY=192.168.11.1:0.0
./runInstaller
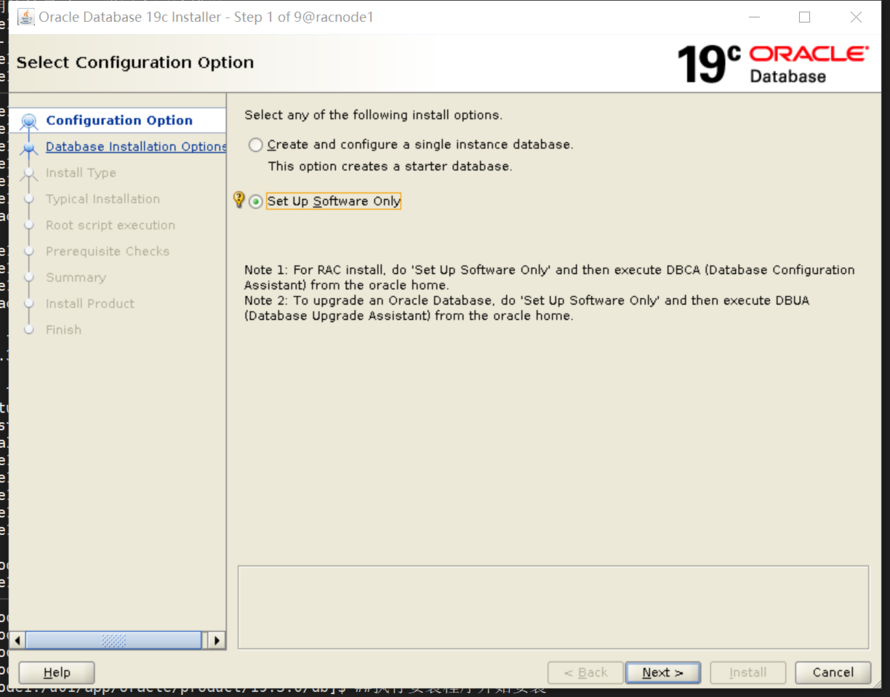
step1:
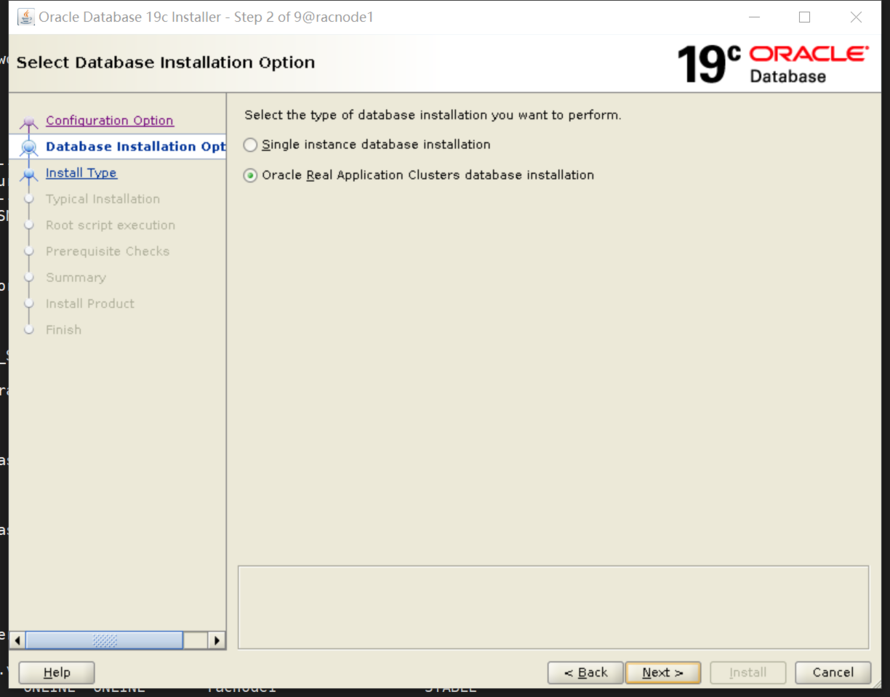
step2:
step3:
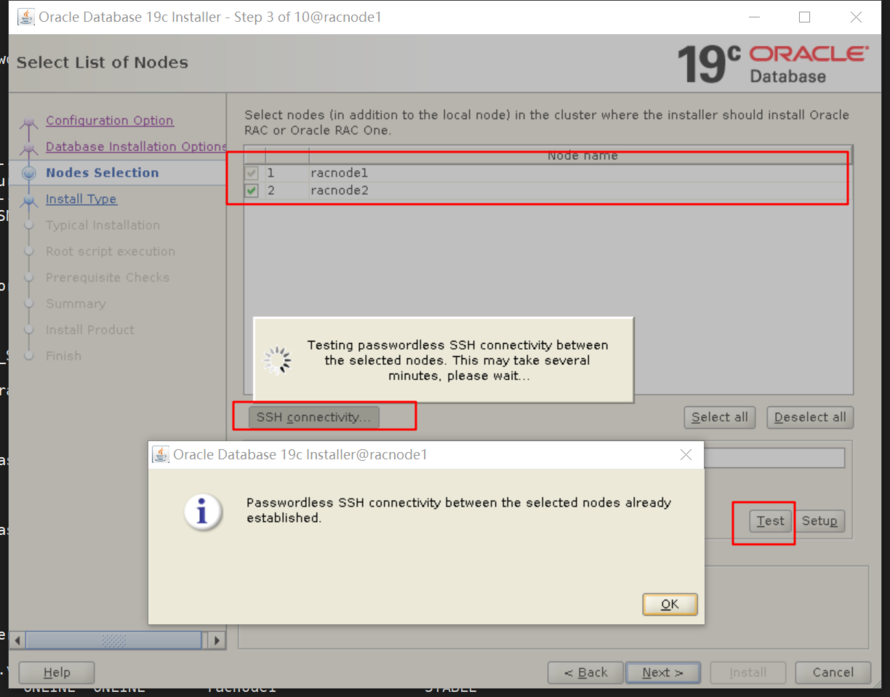
step4:
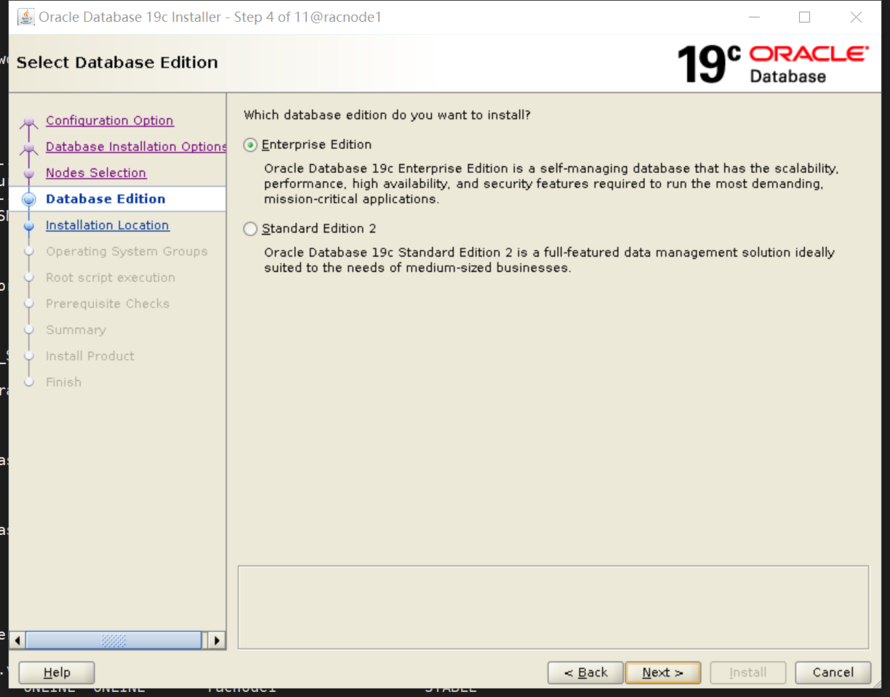
step5:
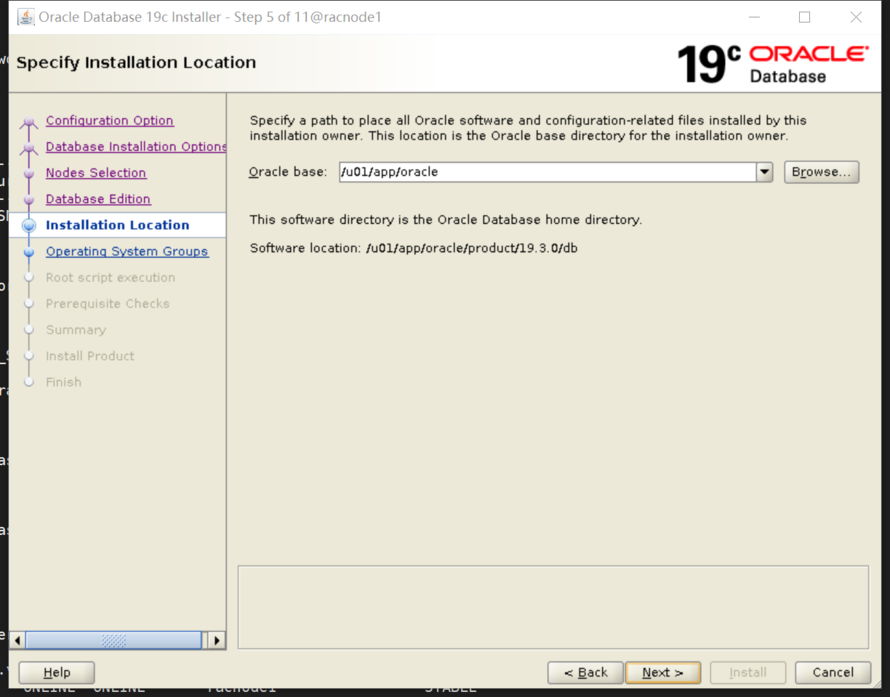
step6:
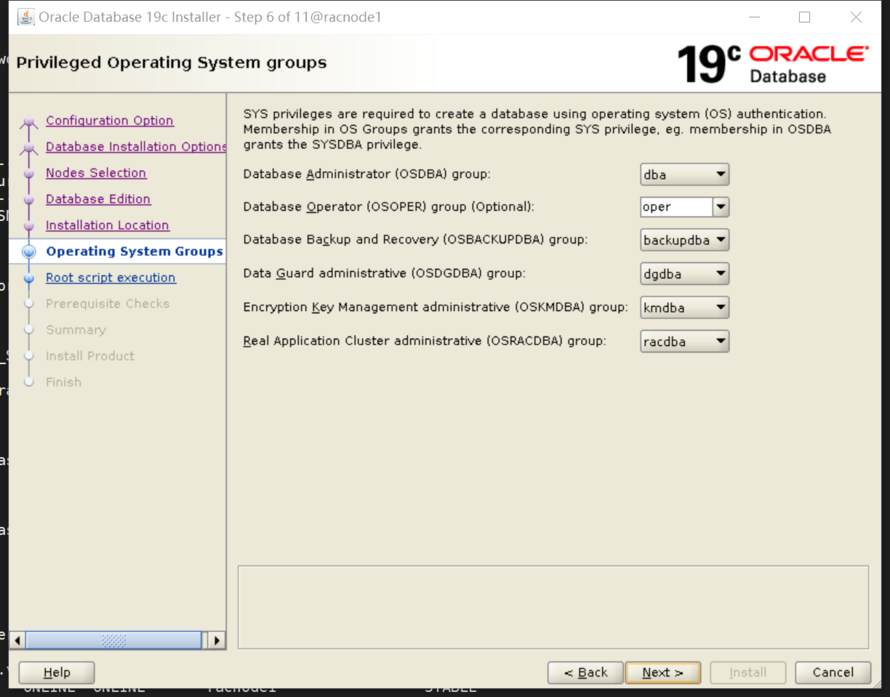
step7:
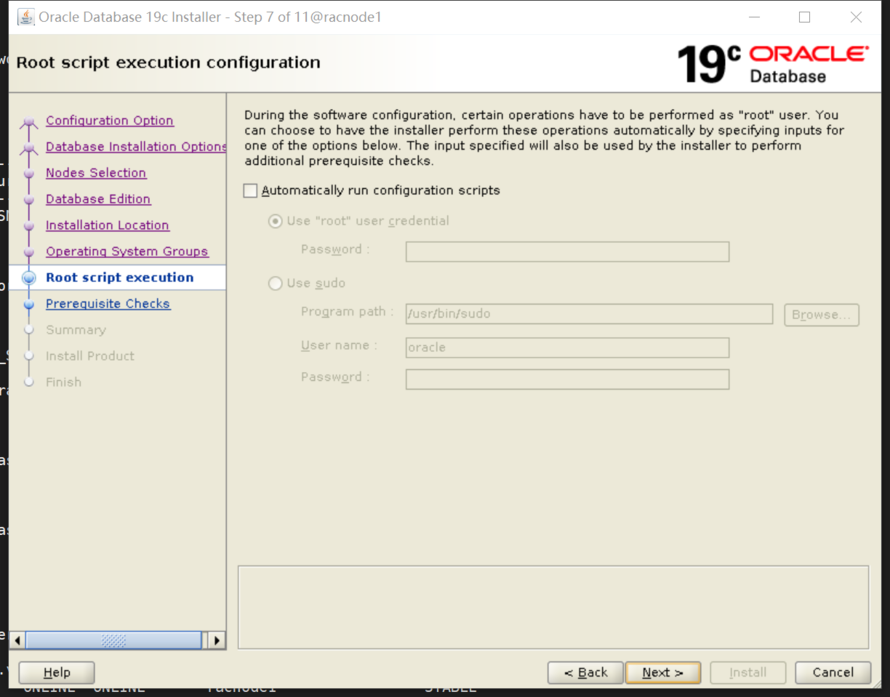
step8:
step9:

step10:

step11:
4、建库
export CV_ASSUME_DISTID=RHEL7.6
export SSH_AUTH_SOCK=0
export
export DISPLAY=192.168.11.1:0.0
dbca
step1:
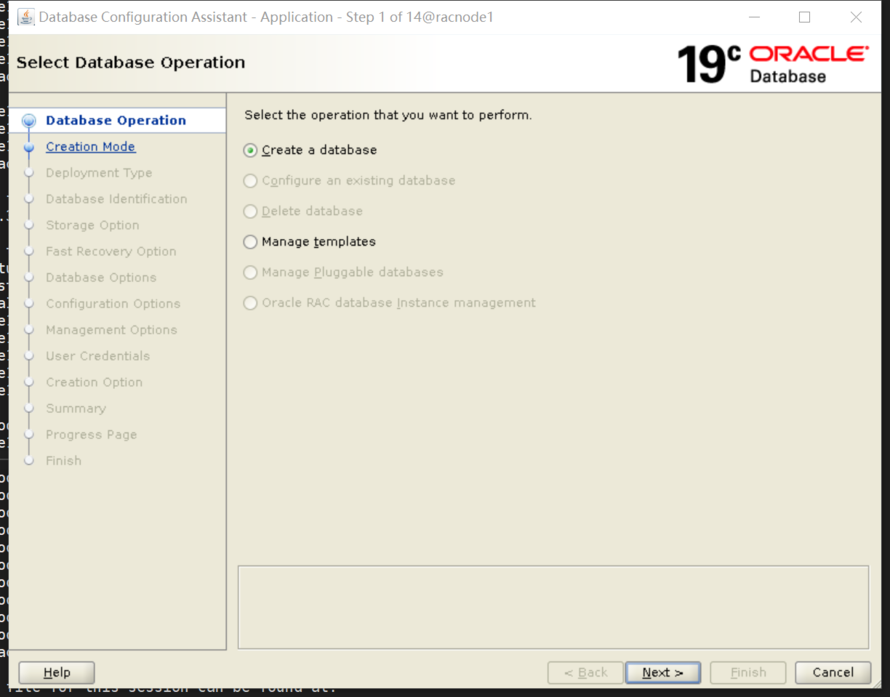
step2:
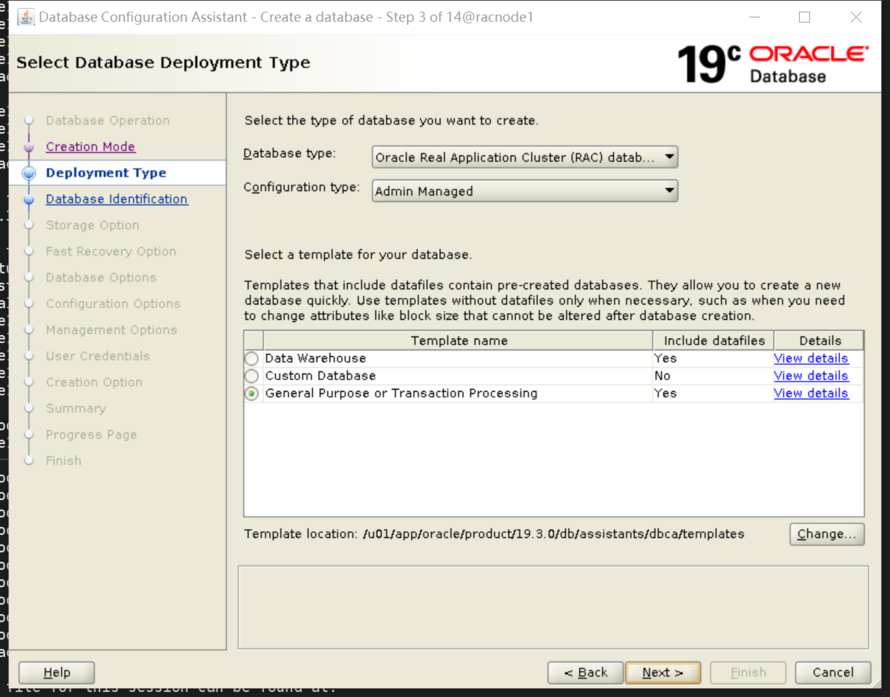
step3:
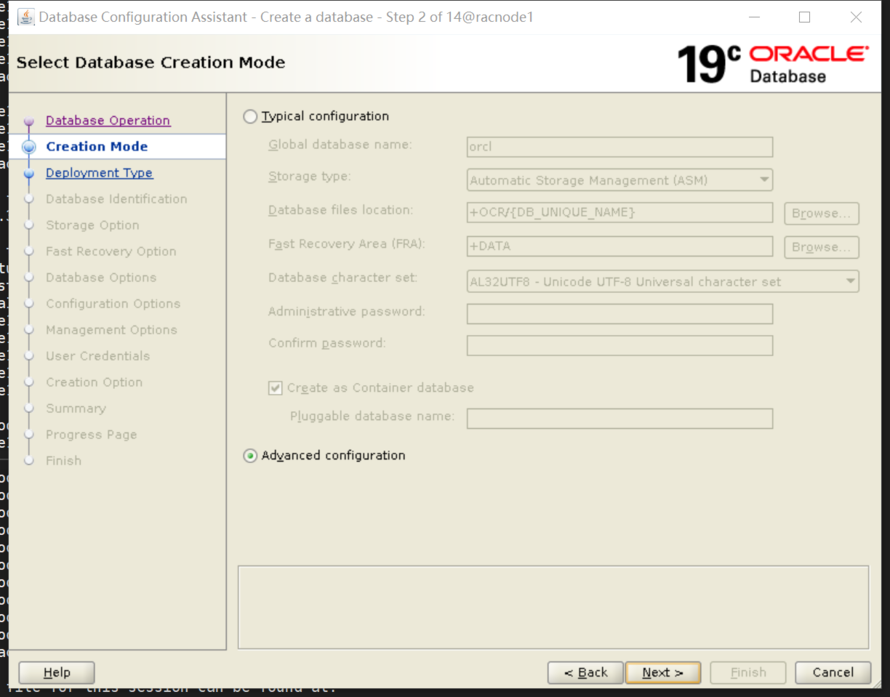
step4:
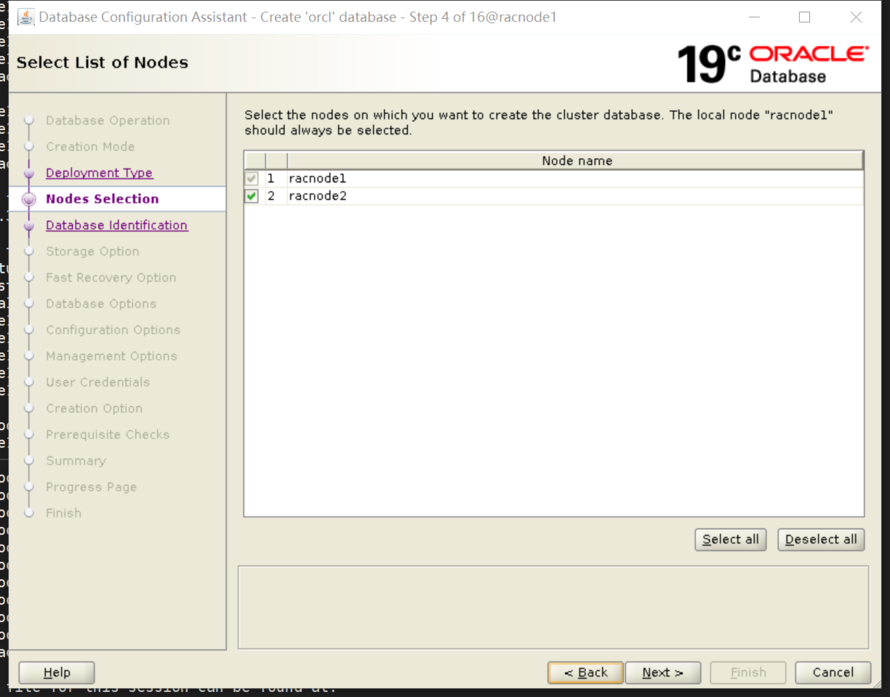
step5:

step6:

step7:
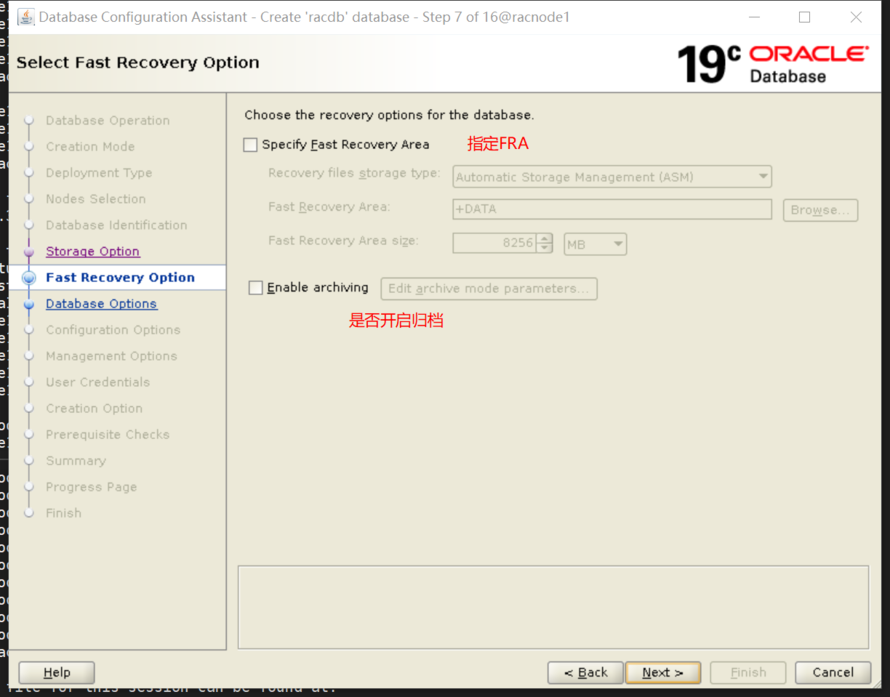
step8:
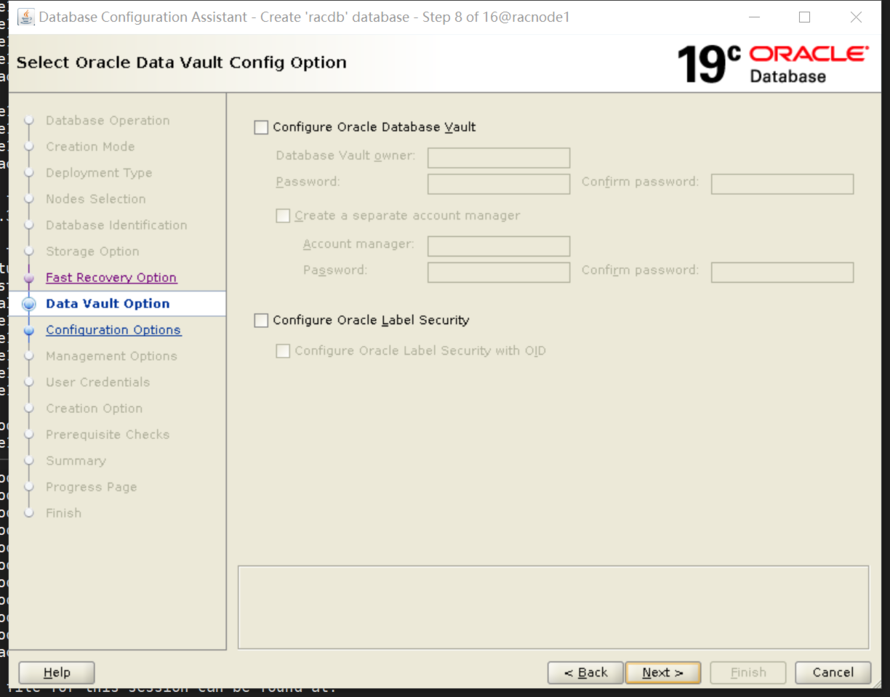
step9:
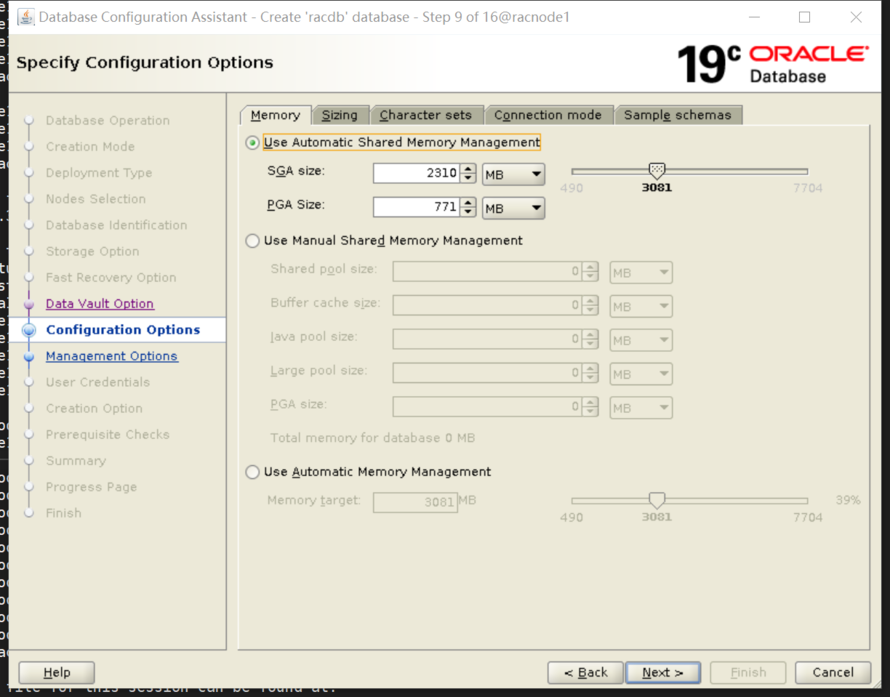
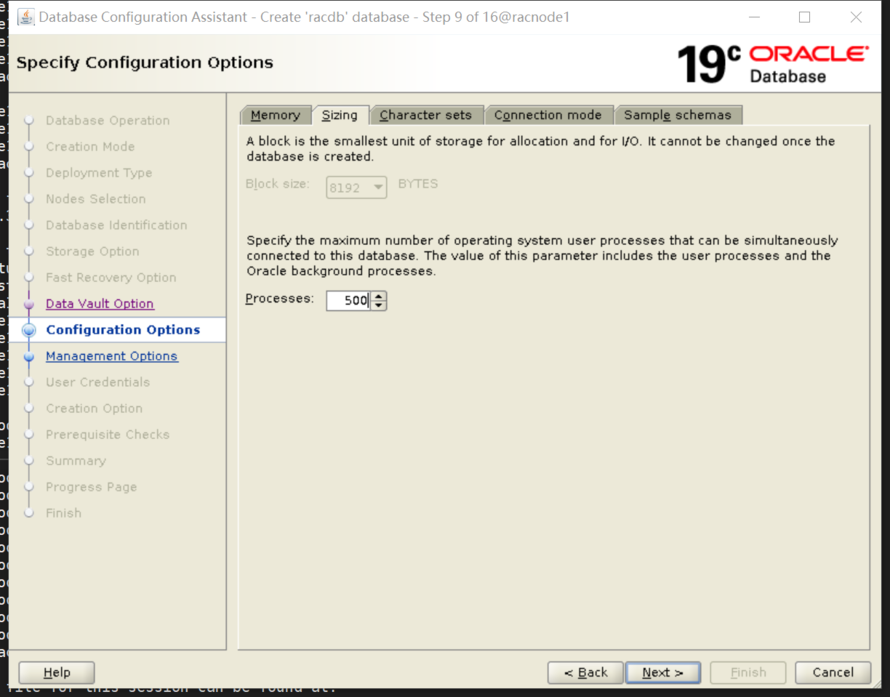


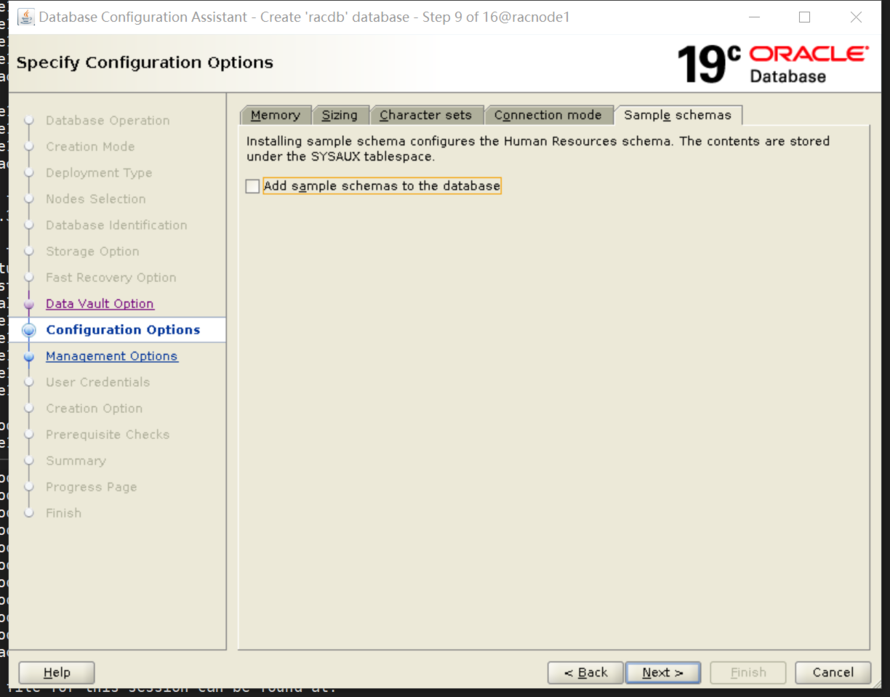
step10:

step11:
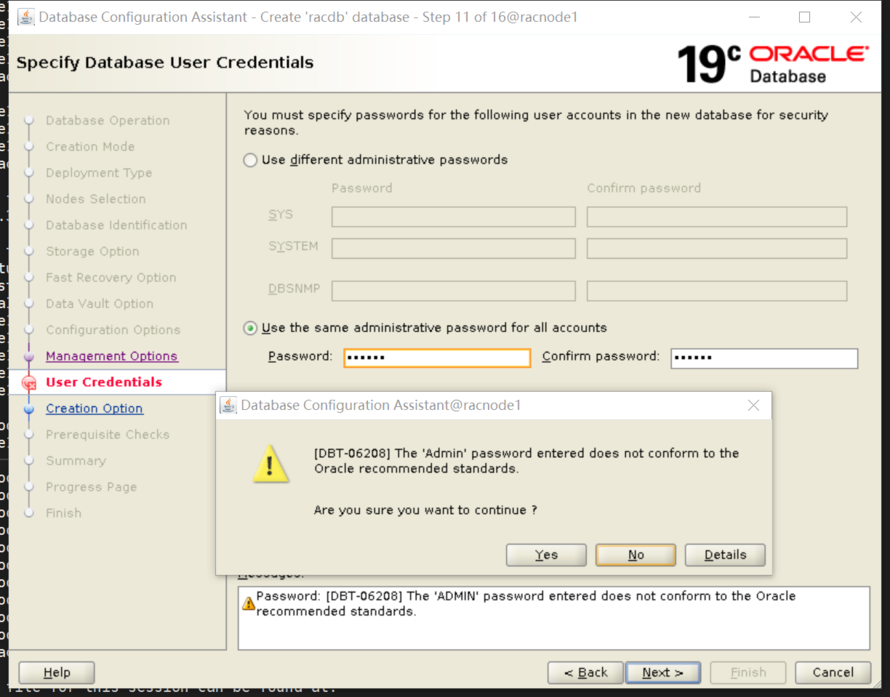
step12:


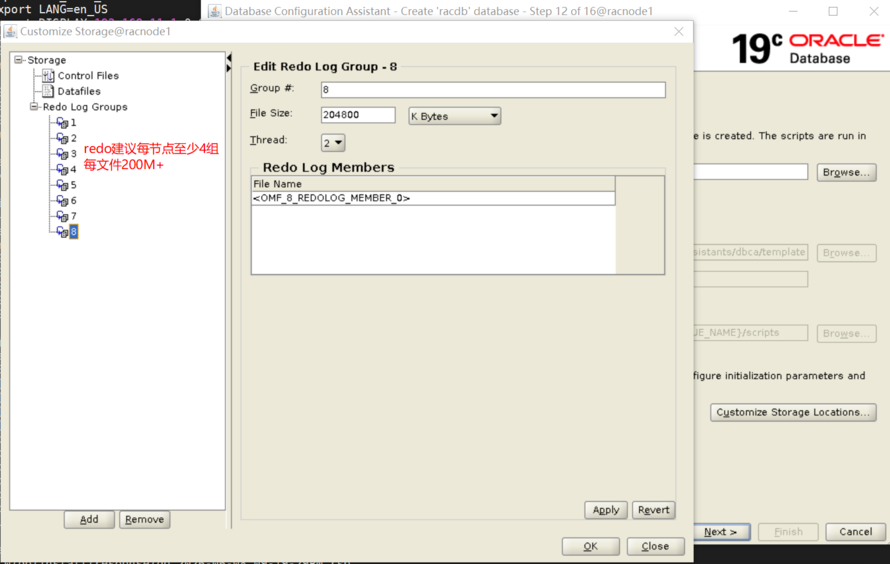
step13:
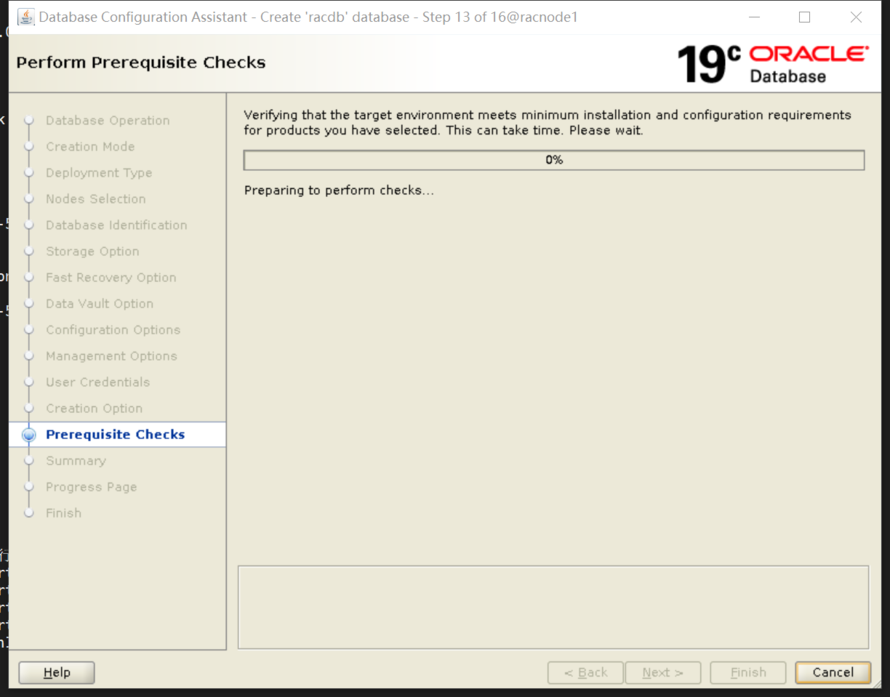


step14:
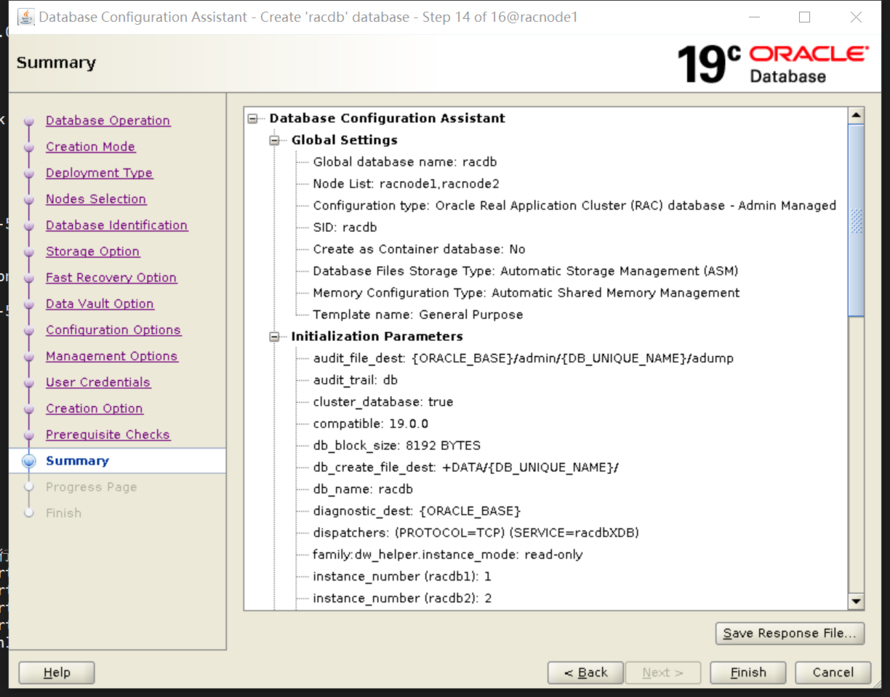
step15:
此图遗漏了
step16:
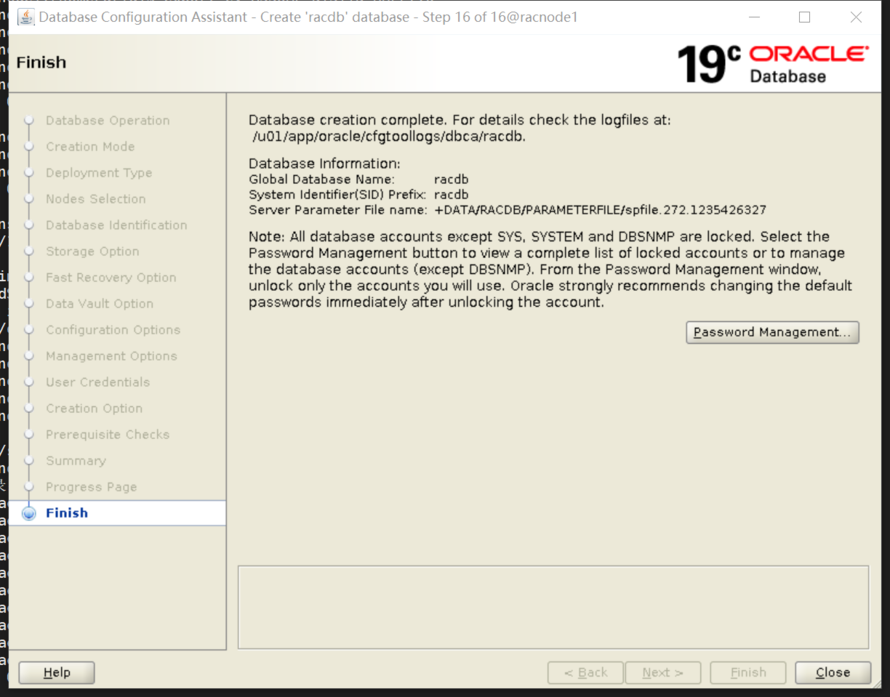
至此安装完毕。
打补丁 略
来自 “ ITPUB博客 ” ,链接:https://blog.itpub.net/15404498/viewspace-3173335/ ,如需转载,请注明出处,否则将追究法律责任。

最新文章
- oracle 26ai rac silent 安装
- DG Broker crete far_sync/prepare database
- Duplicate for Standby fails with RMAN-05535
- oracle adg手工搭建+dg broker
- Oracle 26ai 静默安装 单机
- suse11sp4 + oracle 11g rac + silent
- redhat6.5 + oracle 11g rac + silent:
- suse12sp5 + oracle 11g rac + silent
- oracle 19c rac静默安装
- 19c gateway for informix & msql
