《从零开始:TiDB TEM 敏捷模式单节点及 MySQL 安装部署全流程》
个人简介
作者: ShunWah
公众号: “顺华星辰运维栈”主理人。持有认证: OceanBase OBCA/OBCP、MySQL OCP、OpenGauss、崖山 DBCA、亚信 AntDBCA、翰高 HDCA、GBase 8a | 8c | 8s、Galaxybase GBCA、Neo4j Graph Data Science Certification、NebulaGraph NGCI & NGCP、东方通 TongTech TCPE 等多项权威认证。
获奖经历: 在OceanBase&墨天轮征文大赛、OpenGauss、TiDB、YashanDB、Kingbase、KWDB 征文等赛事中多次斩获一、二、三等奖,原创技术文章常年被墨天轮、CSDN、ITPUB 等平台首页推荐。
- 公众号_ID:顺华星辰运维栈
- CSDN_ID: shunwahma
- 墨天轮_ID:shunwah
- ITPUB_ID: shunwah
- IFClub_ID:shunwah
前言
在当今数据驱动的时代,数据库作为企业核心基础设施,其性能、可扩展性和易用性直接影响业务发展。平凯星辰推出的TiDB作为一款分布式HTAP融合型数据库,以其出色的水平扩展能力、强一致性和MySQL协议兼容性,成为传统关系型数据库的重要替代方案。而TiDB Enterprise Manager(TEM)作为平凯数据库的核心管理平台,提供了从集群部署、监控告警到备份恢复的全生命周期管理能力,极大简化了分布式数据库的运维复杂度。
本文档旨在提供一份完整的实践指南,详细阐述如何在单节点环境中并行部署MySQL 8.0.42(作为传统数据库对照组)和平凯TiDB TEM敏捷模式(作为新型分布式数据库实验组)。通过从基础环境准备、组件安装、服务配置到最终验证的全流程记录,帮助读者理解两种数据库架构的部署差异,掌握TEM平台的核心管理功能,并为后续的性能对比测试奠定基础。
文档涵盖CentOS 7系统下的标准化部署流程,包括环境初始化、依赖处理、安全配置等关键步骤,所有操作均附有实际命令执行结果和截图验证,确保可重复性和可靠性。
Tidb | 版本 VERSION()
+---------------------------------+
| 8.0.11-TiDB-v7.1.8-5.2-20250630 |
MySQL 版本 :Server version: 8.0.42
一、测试环境与对比基准
1. 基础环境配置(分步执行命令)
在开展平凯TiDB数据库TEM敏捷模式单节点与MySQL的安装部署工作前,必须先完成系统环境的初始化操作。这一步的核心目标是消除系统层面的依赖冲突、权限限制等潜在问题,为后续数据库部署搭建稳定、合规的运行基础。以下涉及的所有命令需以 root用户身份逐行执行,确保每一步操作生效后再进行下一步,避免因操作顺序混乱导致环境配置失败。
-
关闭防火墙(避免端口拦截):
数据库服务运行过程中需要占用特定端口(如TiDB的4000端口、MySQL的3306端口),系统默认启用的防火墙可能会拦截这些端口的通信,导致客户端无法正常连接数据库。因此需先关闭防火墙并禁用其开机自启。# 临时关闭防火墙(立即生效,重启后失效,用于快速解除当前端口拦截)systemctl stop firewalld
[root@instance2 opt]# systemctl stop firewalld
[root@instance2 opt]#

# 永.久禁用防火墙(修改系统服务配置,重启后仍保持禁用状态,确保环境稳定性)systemctl disable firewalld
[root@instance2 opt]# systemctl disable firewalld
[root@instance2 opt]#

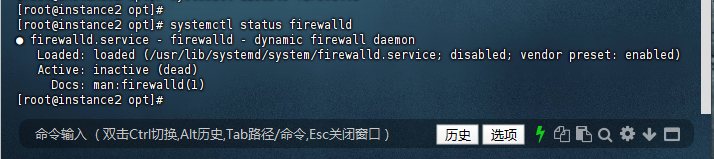
# 验证防火墙状态(需确保输出结果中“Active”字段显示为“inactive (dead)”,即防火墙已成功关闭)systemctl status firewalld
[root@instance2 opt]# systemctl status firewalld
● firewalld.service - firewalld - dynamic firewall daemon
   Loaded: loaded (/usr/lib/systemd/system/firewalld.service; disabled; vendor preset: enabled)
   Active: inactive (dead)
     Docs: man:firewalld(1)
[root@instance2 opt]#
-
关闭SELinux(避免权限限制):
SELinux(Security-Enhanced Linux)是Linux系统的安全增强机制,默认处于“enforcing”(强制)模式,可能会对数据库进程访问文件、网络资源等操作施加额外权限限制,导致部署或运行失败。因此需将其临时关闭并配置永.久禁用。# 临时关闭SELinux(立即生效,重启后失效,用于快速解除当前权限限制)setenforce 0
[root@instance2 opt]# setenforce 0
setenforce: SELinux is disabled
[root@instance2 opt]#

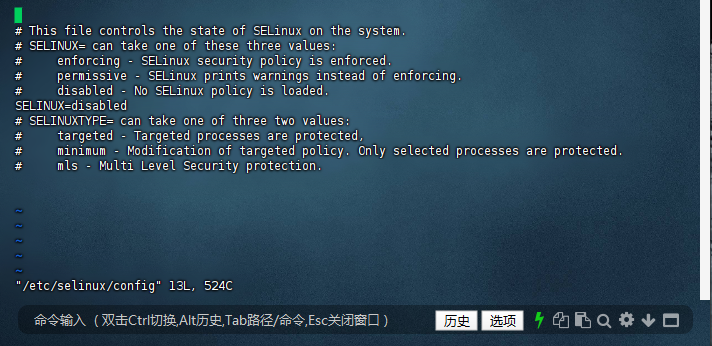
# 永.久关闭SELinux(编辑系统配置文件,需重启后生效,确保长期无权限干扰)vi /etc/selinux/config# 在文件中找到“SELINUX=enforcing”这一行,将其修改为“SELINUX=disabled”
[root@instance2 opt]# vi /etc/selinux/config
[root@instance2 opt]#
# This file controls the state of SELinux on the system.
# SELINUX= can take one of these three values:
#     enforcing - SELinux security policy is enforced.
#     permissive - SELinux prints warnings instead of enforcing.
#     disabled - No SELinux policy is loaded.
SELINUX=disabled
# SELINUXTYPE= can take one of three two values:
#     targeted - Targeted processes are protected,
#     minimum - Modification of targeted policy. Only selected processes are protected.
#     mls - Multi Level Security protection.
~
~
~
~
~
"/etc/selinux/config" 13L, 524C
# 保存并退出配置文件:按键盘“Esc”键切换至命令模式,输入“:wq”(表示“write写入”和“quit退出”),最后按回车键完成操作# 验证SELinux当前状态(输出“Disabled”表示已临时关闭,若此前已配置过永.久禁用,此处会直接显示“Disabled”;若未配置,临时关闭后会显示“Permissive”)getenforce
[root@instance2 opt]# getenforce
Disabled
[root@instance2 opt]#

-
安装基础依赖包(支撑TEM与数据库运行):
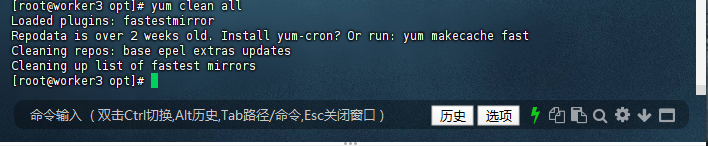
TiDB的TEM敏捷模式及MySQL运行过程中,依赖多个系统工具和库文件(如IO优化库、CPU调度工具、编译工具等)。部分系统默认未安装这些依赖,需通过yum包管理器手动安装,同时清理并更新yum缓存以确保安装的依赖为最新版本。# 清理yum缓存(删除旧的缓存数据,避免因缓存过期导致依赖安装版本错误或失败)yum clean all
[root@worker3 opt]# yum clean all
Loaded plugins: fastestmirror
Repodata is over 2 weeks old. Install yum-cron? Or run: yum makecache fast
Cleaning repos: base epel extras updates
Cleaning up list of fastest mirrors
[root@worker3 opt]#
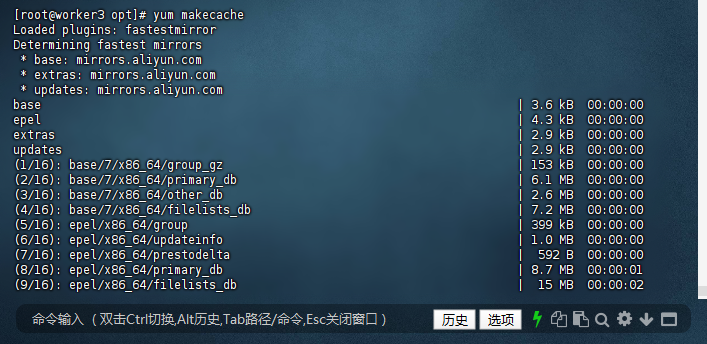
# 生成新的yum缓存(从官方或配置的镜像源拉取最新的依赖包索引,加速后续安装过程)yum makecache
[root@worker3 opt]# yum makecache
Loaded plugins: fastestmirror
Determining fastest mirrors
 * base: mirrors.aliyun.com
 * extras: mirrors.aliyun.com
 * updates: mirrors.aliyun.com
base                                                                    | 3.6 kB  00:00:00
epel                                                                    | 4.3 kB  00:00:00
extras                                                                  | 2.9 kB  00:00:00
updates                                                                 | 2.9 kB  00:00:00
(1/16): base/7/x86_64/group_gz                                          | 153 kB  00:00:00
(2/16): base/7/x86_64/primary_db                                        | 6.1 MB  00:00:00
(3/16): base/7/x86_64/other_db                                          | 2.6 MB  00:00:00
(4/16): base/7/x86_64/filelists_db                                      | 7.2 MB  00:00:00
(5/16): epel/x86_64/group                                               | 399 kB  00:00:00
(6/16): epel/x86_64/updateinfo                                          | 1.0 MB  00:00:00
(7/16): epel/x86_64/prestodelta                                         |  592 B  00:00:00
(8/16): epel/x86_64/primary_db                                          | 8.7 MB  00:00:01
(9/16): epel/x86_64/filelists_db                                        |  15 MB  00:00:02
(10/16): extras/7/x86_64/filelists_db                                   | 305 kB  00:00:00
(11/16): extras/7/x86_64/primary_db                                     | 253 kB  00:00:00
(12/16): extras/7/x86_64/other_db                                       | 154 kB  00:00:00
(13/16): epel/x86_64/other_db                                           | 4.1 MB  00:00:00
(14/16): updates/7/x86_64/filelists_db                                  |  15 MB  00:00:02
(15/16): updates/7/x86_64/other_db                                      | 1.6 MB  00:00:00
(16/16): updates/7/x86_64/primary_db                                    |  27 MB  00:00:04
Metadata Cache Created
[root@worker3 opt]#
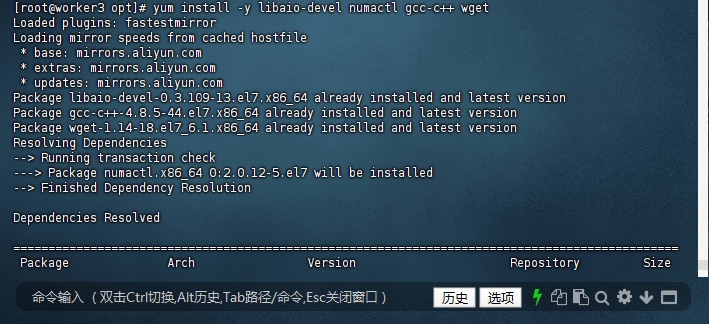
# 安装核心依赖包(各包作用说明:libaio-devel为异步IO开发库,优化数据库IO性能;numactl用于CPU亲和性配置,提升数据库CPU资源利用率;gcc-c++为C/C++编译工具,支撑部分组件编译;wget用于下载远程安装包)yum install -y libaio-devel numactl gcc-c++ wget
[root@worker3 opt]# yum install -y libaio-devel numactl gcc-c++ wget
Loaded plugins: fastestmirror
Loading mirror speeds from cached hostfile
 * base: mirrors.aliyun.com
 * extras: mirrors.aliyun.com
 * updates: mirrors.aliyun.com
Package libaio-devel-0.3.109-13.el7.x86_64 already installed and latest version
Package gcc-c++-4.8.5-44.el7.x86_64 already installed and latest version
Package wget-1.14-18.el7_6.1.x86_64 already installed and latest version
Resolving Dependencies
--> Running transaction check
---> Package numactl.x86_64 0:2.0.12-5.el7 will be installed
--> Finished Dependency Resolution
Dependencies Resolved
===============================================================================================
 Package              Arch                Version                      Repository         Size
===============================================================================================
Installing:
 numactl              x86_64              2.0.12-5.el7                 base               66 k
Transaction Summary
===============================================================================================
Install  1 Package
Total download size: 66 k
Installed size: 141 k
Downloading packages:
numactl-2.0.12-5.el7.x86_64.rpm                                         |  66 kB  00:00:00
Running transaction check
Running transaction test
Transaction test succeeded
Running transaction
  Installing : numactl-2.0.12-5.el7.x86_64                                                 1/1
  Verifying  : numactl-2.0.12-5.el7.x86_64                                                 1/1
Installed:
  numactl.x86_64 0:2.0.12-5.el7
Complete!
[root@worker3 opt]#
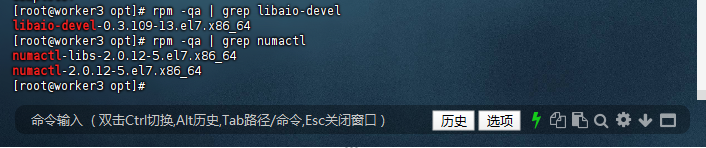
# 验证依赖是否安装成功(通过rpm命令查询已安装的包,若能输出对应包名及版本,说明安装成功;若无输出,则需重新执行安装命令)rpm -qa | grep libaio-devel
rpm -qa | grep numactl
[root@worker3 opt]# rpm -qa | grep libaio-devel
libaio-devel-0.3.109-13.el7.x86_64
[root@worker3 opt]# rpm -qa | grep numactl
numactl-libs-2.0.12-5.el7.x86_64
numactl-2.0.12-5.el7.x86_64
[root@worker3 opt]#
-
磁盘分区与目录创建(规范存储路径):
为便于后续数据库数据、日志的管理与维护,需创建统一的专用目录结构,将TiDB和MySQL的核心数据文件、日志文件分别存储,同时配置合理的目录权限,确保数据库进程具备读写权限。# 创建数据库专用目录(-p参数表示递归创建多级目录,避免因父目录不存在导致创建失败;目录规划说明:/data/pingkai/data用于存储TiDB数据,/data/pingkai/log用于存储TiDB日志,/data/pingkai/mysql/data用于存储MySQL数据)mkdir -p /data/pingkai/data /data/pingkai/log /data/pingkai/mysql/data# 配置目录权限(755权限表示目录所有者拥有读、写、执行权限,同组用户和其他用户拥有读、执行权限,确保数据库进程可正常访问目录)chmod 755 -R /data/
[root@worker3 opt]# mkdir -p /data/pingkai/data /data/pingkai/log /data/pingkai/mysql/data
[root@worker3 opt]# chmod 755 -R /data/
[root@worker3 opt]#

二、MySQL 8.0.42单节点部署(对照组)
为保证后续与平凯TiDB数据库TEM敏捷模式的性能对比结果真实可靠,需先完成MySQL 8.0.42单节点的标准化部署。本章节基于CentOS 7系统,采用RPM包安装方式,从环境清理、依赖准备到服务配置、登录验证逐步推进,所有操作需严格按顺序执行,避免因步骤遗漏或顺序错乱导致部署失败,确保对照组环境稳定可用。
1. 环境预清理(消除冲突与残留)
MySQL与系统默认预装的MariaDB存在组件依赖冲突,且若系统曾安装过旧版本MySQL,残留的文件和配置可能干扰新安装,因此需先完成环境清理。
1.1 检查已安装的MariaDB相关包
首先通过rpm命令排查系统中是否存在MariaDB组件,这是避免后续安装冲突的关键第一步:
[root@worker3 software]# rpm -qa | grep -E 'mariadb'
[root@worker3 software]#

(注:本案例中命令无输出,说明系统无MariaDB组件,可直接进入下一步;若有输出,需执行1.2步骤移除)
1.2 移除冲突的MariaDB包
若上一步检测到MariaDB组件,需通过yum命令强制移除,确保无残留冲突;若未检测到,则会提示“无匹配包”,无需额外操作:
[root@worker3 software]# yum remove -y mariadb-libs
Loaded plugins: fastestmirror
No Match for argument: mariadb-libs
No Packages marked for removal
[root@worker3 software]#

1.3 清理旧版本MySQL残留文件和配置
即使系统无MariaDB,若曾安装过MySQL,残留的数据目录和配置文件仍可能影响新安装,需通过rm命令彻底删除:
# 删除MySQL默认数据目录和核心配置文件,避免旧数据干扰新安装[root@worker3 software]# rm -rf /var/lib/mysql/[root@worker3 software]# rm -rf /etc/my.cnf /etc/my.cnf.d/[root@worker3 software]#

2. 安装MySQL核心依赖包
MySQL 8.0.42运行依赖
numactl-libs(用于CPU亲和性调度,提升资源利用率)和
libaio(用于异步IO操作,优化数据库读写性能),需提前通过yum安装,确保后续组件安装无依赖缺失:
[root@worker3 software]# yum install -y numactl-libs libaioLoaded plugins: fastestmirror
Loading mirror speeds from cached hostfile
 * base: mirrors.aliyun.com
 * extras: mirrors.aliyun.com
 * updates: mirrors.aliyun.com
base                                                                    | 3.6 kB  00:00:00
epel                                                                    | 4.3 kB  00:00:00
extras                                                                  | 2.9 kB  00:00:00
updates                                                                 | 2.9 kB  00:00:00
Package numactl-libs-2.0.12-5.el7.x86_64 already installed and latest version
Package libaio-0.3.109-13.el7.x86_64 already installed and latest version
Nothing to do[root@worker3 software]#
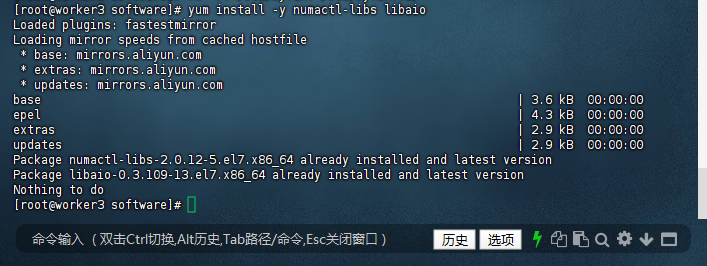
(注:本案例中系统已预装这些依赖,提示“已安装且为最新版本”,无需重复操作;若未安装,yum会自动下载并安装)
3. 解压MySQL RPM Bundle压缩包
MySQL 8.0.42的RPM安装包以“bundle”压缩包形式提供,包含所有组件的独立RPM包,需先通过tar命令解压,才能进行后续组件安装:
[root@worker3 software]# tar -xvf mysql-8.0.42-1.el7.x86_64.rpm-bundle.tarmysql-community-client-8.0.42-1.el7.x86_64.rpm
mysql-community-client-plugins-8.0.42-1.el7.x86_64.rpm
mysql-community-common-8.0.42-1.el7.x86_64.rpm
mysql-community-debuginfo-8.0.42-1.el7.x86_64.rpm
mysql-community-devel-8.0.42-1.el7.x86_64.rpm
mysql-community-embedded-compat-8.0.42-1.el7.x86_64.rpm
mysql-community-icu-data-files-8.0.42-1.el7.x86_64.rpm
mysql-community-libs-8.0.42-1.el7.x86_64.rpm
mysql-community-libs-compat-8.0.42-1.el7.x86_64.rpm
mysql-community-server-8.0.42-1.el7.x86_64.rpm
mysql-community-server-debug-8.0.42-1.el7.x86_64.rpm
mysql-community-test-8.0.42-1.el7.x86_64.rpm
[root@worker3 software]#
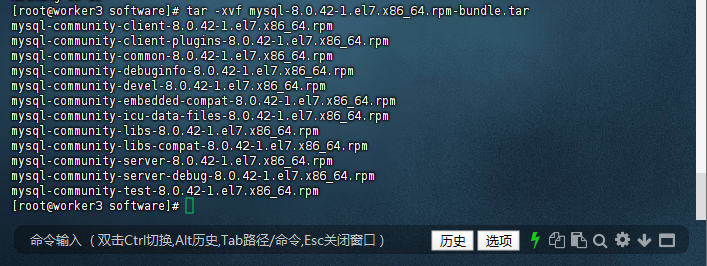
(注:解压后生成12个RPM包,其中“debuginfo”“test”“devel”等为非核心包,无需安装,仅需关注“common”“libs”“server”等核心组件)
4. 按依赖顺序安装MySQL核心组件
MySQL各组件存在严格依赖关系,必须按“common→client-plugins→libs→libs-compat→icu-data-files→client→server”的顺序安装,否则会出现依赖报错,导致安装失败。
4.1 查看解压后的RPM包列表
先通过ls命令确认解压后的包是否完整,避免因包缺失导致后续安装失败,同时定位核心包位置:
[root@worker3 software]# ls
amd64
amd64.zip
__MACOSX
mysql-8.0.42-1.el7.x86_64.rpm-bundle.tar
mysql-community-client-8.0.42-1.el7.x86_64.rpm
mysql-community-client-plugins-8.0.42-1.el7.x86_64.rpm
mysql-community-common-8.0.42-1.el7.x86_64.rpm
mysql-community-debuginfo-8.0.42-1.el7.x86_64.rpm
mysql-community-devel-8.0.42-1.el7.x86_64.rpm
mysql-community-embedded-compat-8.0.42-1.el7.x86_64.rpm
mysql-community-icu-data-files-8.0.42-1.el7.x86_64.rpm
mysql-community-libs-8.0.42-1.el7.x86_64.rpm
mysql-community-libs-compat-8.0.42-1.el7.x86_64.rpm
mysql-community-server-8.0.42-1.el7.x86_64.rpm
mysql-community-server-debug-8.0.42-1.el7.x86_64.rpm
mysql-community-test-8.0.42-1.el7.x86_64.rpm
tem-amd64.tar
tem-package-v3.1.0-linux-amd64
[root@worker3 software]# rpm -ivh mysql-community-common-8.0.42-1.el7.x86_64.rpm
warning: mysql-community-common-8.0.42-1.el7.x86_64.rpm: Header V4 RSA/SHA256 Signature, key ID a8d3785c: NOKEY
Preparing...                          ################################# [100%]
Updating / installing...
   1:mysql-community-common-8.0.42-1.e################################# [100%]
[root@worker3 software]#
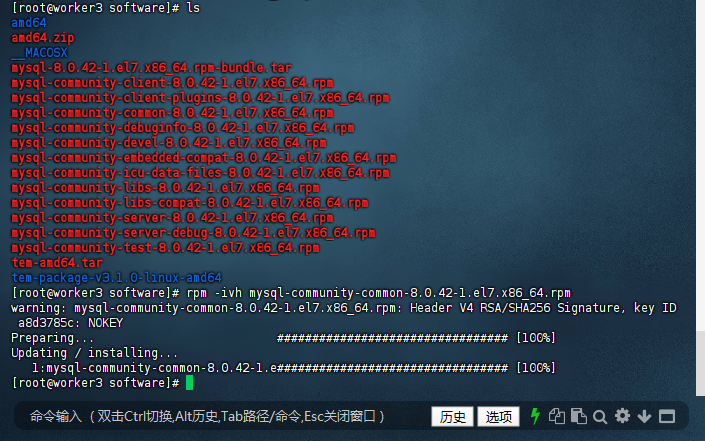
(注:
mysql-community-common为共享基础包,提供MySQL通用配置和文件,是所有组件的前置依赖,需最.先安装)
4.2 安装客户端插件(解决libs依赖)
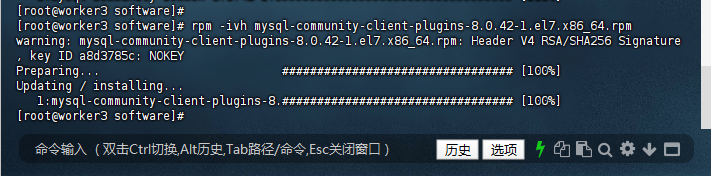
MySQL 8.0新增
client-plugins包,包含客户端连接所需的插件,是后续安装
libs包的必要依赖,需优先安装:
[root@worker3 software]# rpm -ivh mysql-community-client-plugins-8.0.42-1.el7.x86_64.rpm
warning: mysql-community-client-plugins-8.0.42-1.el7.x86_64.rpm: Header V4 RSA/SHA256 Signature, key ID a8d3785c: NOKEY
Preparing...                          ################################# [100%]
Updating / installing...
   1:mysql-community-client-plugins-8.################################# [100%]
[root@worker3 software]#
4.3 安装基础库(libs)
mysql-community-libs包提供MySQL运行所需的核心库文件,是服务端与客户端正常运行的基础,需在客户端插件安装完成后执行:
[root@worker3 software]#
[root@worker3 software]# rpm -ivh mysql-community-libs-8.0.42-1.el7.x86_64.rpm
warning: mysql-community-libs-8.0.42-1.el7.x86_64.rpm: Header V4 RSA/SHA256 Signature, key ID a8d3785c: NOKEY
Preparing...                          ################################# [100%]
Updating / installing...
   1:mysql-community-libs-8.0.42-1.el7################################# [100%]
[root@worker3 software]#

4.4 安装兼容库(libs-compat)
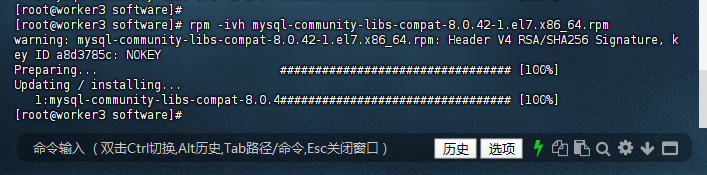
mysql-community-libs-compat包用于兼容旧版本MySQL客户端,避免因版本差异导致第三方工具连接数据库失败,需依赖基础库安装完成后执行:
[root@worker3 software]# rpm -ivh mysql-community-libs-compat-8.0.42-1.el7.x86_64.rpm
warning: mysql-community-libs-compat-8.0.42-1.el7.x86_64.rpm: Header V4 RSA/SHA256 Signature, key ID a8d3785c: NOKEY
Preparing...                          ################################# [100%]
Updating / installing...
   1:mysql-community-libs-compat-8.0.4################################# [100%]
[root@worker3 software]#
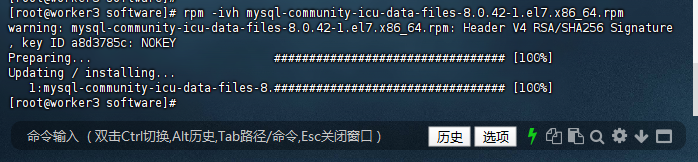
4.5 安装ICU数据文件(关键依赖)
mysql-community-icu-data-files包提供国际化字符集支持(如UTF-8编码),是MySQL服务端启动的必要依赖,缺失会导致服务启动失败:
rpm -ivh mysql-community-icu-data-files-8.0.42-1.el7.x86_64.rpm # 关键依赖,必须安装
[root@worker3 software]# rpm -ivh mysql-community-icu-data-files-8.0.42-1.el7.x86_64.rpm
warning: mysql-community-icu-data-files-8.0.42-1.el7.x86_64.rpm: Header V4 RSA/SHA256 Signature, key ID a8d3785c: NOKEY
Preparing...                          ################################# [100%]
Updating / installing...
   1:mysql-community-icu-data-files-8.################################# [100%]
[root@worker3 software]#
4.6 安装客户端和服务端(核心组件)
最后安装
client(用于本地连接数据库)和
server(数据库核心服务进程),完成MySQL基础安装:
[root@worker3 software]# rpm -ivh mysql-community-client-8.0.42-1.el7.x86_64.rpm
warning: mysql-community-client-8.0.42-1.el7.x86_64.rpm: Header V4 RSA/SHA256 Signature, key ID a8d3785c: NOKEY
Preparing...                          ################################# [100%]
Updating / installing...
   1:mysql-community-client-8.0.42-1.e################################# [100%]
[root@worker3 software]# rpm -ivh mysql-community-server-8.0.42-1.el7.x86_64.rpm
warning: mysql-community-server-8.0.42-1.el7.x86_64.rpm: Header V4 RSA/SHA256 Signature, key ID a8d3785c: NOKEY
Preparing...                          ################################# [100%]
Updating / installing...
   1:mysql-community-server-8.0.42-1.e################################# [100%]
[root@worker3 software]#

5. 处理GPG密钥警告与数据目录权限
5.1 导入MySQL官方GPG密钥
安装过程中出现的“NOKEY”警告,是因系统未验证RPM包签名,虽不影响使用,但导入官方密钥可消除警告并确保包的完整性:
# 导入MySQL 2022版官方GPG密钥,消除签名警告rpm --import https://repo.mysql.com/RPM-GPG-KEY-mysql-2022
warning: mysql-community-client-8.0.42-1.el7.x86_64.rpm: Header V4 RSA/SHA256 Signature, key ID a8d3785c: NOKEY
warning: mysql-community-server-8.0.42-1.el7.x86_64.rpm: Header V4 RSA/SHA256 Signature, key ID a8d3785c: NOKE
[root@worker3 software]# rpm --import https://repo.mysql.com/RPM-GPG-KEY-mysql-2022
[root@worker3 software]#

6. 配置MySQL数据目录权限(确保服务可读写)
MySQL服务运行时需对数据目录拥有读写权限,若权限配置不当会导致服务启动失败。需分别对系统默认数据目录(
/var/lib/mysql)和自定义数据目录(
/data/pingkai/mysql)配置正确权限,确保
mysql用户(MySQL服务运行用户)拥有所有权。
6.1 配置默认数据目录权限
系统默认数据目录
/var/lib/mysql用于存储MySQL核心数据文件,需通过
chown赋予
mysql用户及用户组所有权,通过
chmod设置750权限(仅所有者可读写执行,同组用户可读执行,其他用户无权限):
[root@worker3 software]# chown -R mysql:mysql /var/lib/mysql
[root@worker3 software]# chmod -R 750 /var/lib/mysql
[root@worker3 software]#

6.2 创建并配置自定义数据目录权限
为便于后续数据管理与维护,额外创建自定义目录
/data/pingkai/mysql,分别用于存储MySQL数据(
data子目录)和日志(
log子目录),并配置与默认目录一致的权限:
[root@worker3 software]# mkdir -p /data/pingkai/mysql/{data,log}  # 递归创建自定义数据、日志子目录
[root@worker3 software]# chown -R mysql:mysql /data/pingkai/mysql  # 赋予mysql用户所有权
[root@worker3 software]# chmod -R 750 /data/pingkai/mysql  # 配置安全权限
[root@worker3 software]#

7. 验证MySQL组件安装完整性
完成组件安装后,需通过
rpm命令检查已安装的MySQL社区版包,确认核心组件(common、libs、client、server等)均已成功安装,避免因组件缺失导致后续服务异常:
# 筛选已安装的mysql-community系列包,验证核心组件完整性rpm -qa | grep mysql-community
[root@worker3 software]# rpm -qa | grep mysql-community
mysql-community-client-plugins-8.0.42-1.el7.x86_64
mysql-community-libs-8.0.42-1.el7.x86_64
mysql-community-icu-data-files-8.0.42-1.el7.x86_64
mysql-community-common-8.0.42-1.el7.x86_64
mysql-community-server-8.0.42-1.el7.x86_64
mysql-community-libs-compat-8.0.42-1.el7.x86_64
mysql-community-client-8.0.42-1.el7.x86_64
[root@worker3 software]#
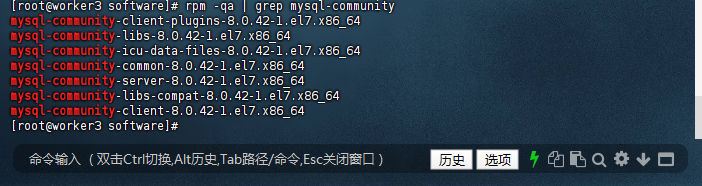
(注:输出结果需包含上述7个核心包,说明组件安装完整;若缺失某一包,需重新执行对应包的安装命令)
8. 初始化MySQL服务(生成核心数据文件)
MySQL首.次启动前需执行初始化操作,通过
mysqld --initialize命令生成系统表、临时密码等核心数据文件,若未初始化直接启动服务会失败。需指定
mysql用户执行,同时明确安装目录(
--basedir)和数据目录(
--datadir):
[root@worker3 software]# mysqld --initialize --user=mysql --basedir=/usr --datadir=/var/lib/mysql
[root@worker3 software]#

(注:命令无报错输出即初始化成功;若提示“权限不足”,需重新检查
/var/lib/mysql目录权限)
9. 启动MySQL服务并设置开机自启
初始化完成后,通过
systemctl命令启动MySQL服务,并配置开机自启,确保系统重启后服务可自动恢复,无需手动操作:
[root@worker3 software]# systemctl start mysqld # 启动MySQL服务[root@worker3 software]# systemctl enable mysqld # 设置开机自启(创建系统服务链接)[root@worker3 software]#

10. 最终验证MySQL服务状态与版本
10.1 检查MySQL服务运行状态
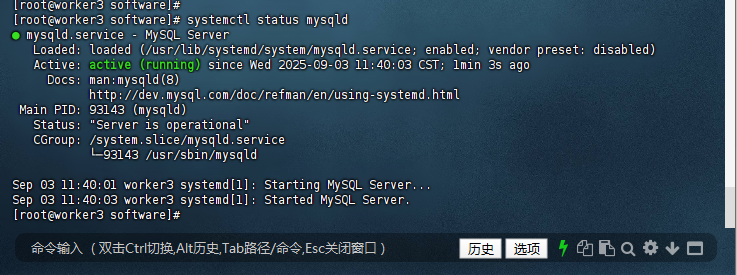
通过
systemctl status mysqld查看服务状态,需确保“Active”字段显示“active (running)”,表示服务正常运行;若显示“failed”,需查看日志排查错误:
# 查看MySQL服务实时状态systemctl status mysqld
[root@worker3 software]# systemctl status mysqld
● mysqld.service - MySQL Server
   Loaded: loaded (/usr/lib/systemd/system/mysqld.service; enabled; vendor preset: disabled)
   Active: active (running) since Wed 2025-09-03 11:40:03 CST; 1min 3s ago
     Docs: man:mysqld(8)
           http://dev.mysql.com/doc/refman/en/using-systemd.html
 Main PID: 93143 (mysqld)
   Status: "Server is operational"
   CGroup: /system.slice/mysqld.service
           └─93143 /usr/sbin/mysqld
Sep 03 11:40:01 worker3 systemd[1]: Starting MySQL Server...
Sep 03 11:40:03 worker3 systemd[1]: Started MySQL Server.
[root@worker3 software]#
10.2 验证MySQL安装版本
通过
mysql --version命令确认安装版本为8.0.42,与预期版本一致,确保未安装旧版本或错误版本:
# 查看MySQL客户端版本(与服务端版本一致)mysql --version
[root@worker3 software]# mysql --version
mysql  Ver 8.0.42 for Linux on x86_64 (MySQL Community Server - GPL)
[root@worker3 software]#

11. 获取MySQL临时密码并首.次登录
MySQL初始化时会自动生成
root用户的临时密码,存储在
/var/log/mysqld.log日志文件中,需先获取临时密码才能首.次登录,且临时密码仅有效一次,登录后需立即修改。
11.1 提取临时密码
通过
grep命令筛选日志中“temporary password”关键字,获取临时密码(示例中最新密码为“?_k%y-mkV5aa”):
[root@worker3 software]# grep 'temporary password' /var/log/mysqld.log
2025-08-30T12:12:45.142832Z 6 [Note] [MY-010454] [Server] A temporary password is generated for root@localhost: JZ?*3Xau9wgp
2025-09-03T03:38:46.316909Z 6 [Note] [MY-010454] [Server] A temporary password is generated for root@localhost: ?_k%y-mkV5aa
[root@worker3 software]#

(注:若多次执行初始化,日志会生成多个临时密码,需选择最新时间戳对应的密码)
11.2 使用临时密码登录MySQL
通过
mysql -uroot -p命令登录,输入临时密码时需注意特殊字符(如“?、_、%”)需完整输入,避免因字符缺失导致登录失败:
# 登录命令格式:mysql -u用户名 -p'临时密码'(密码含特殊字符需加单引号)mysql -uroot -p'?_k%y-mkV5aa'
[root@worker3 software]# mysql -uroot -p'?_k%y-mkV5aa'
mysql: [Warning] Using a password on the command line interface can be insecure.
Welcome to the MySQL monitor.  Commands end with ; or \g.
Your MySQL connection id is 8
Server version: 8.0.42
Copyright (c) 2000, 2025, Oracle and/or its affiliates.
Oracle is a registered trademark of Oracle Corporation and/or its
affiliates. Other names may be trademarks of their respective
owners.
Type 'help;' or '\h' for help. Type '\c' to clear the current input statement.
mysql>

(注:“Using a password on the command line interface can be insecure”为安全提示,不影响登录,生产环境建议通过配置文件或客户端工具输入密码)
12. 修改MySQL root用户密码(替换临时密码)
首.次登录后,MySQL强制要求修改临时密码才能执行其他操作,需通过
ALTER USER语句设置新密码,且默认启用密码复杂度策略(需包含大小写字母、数字、特殊字符,长度不小于8位):
-- 修改root@localhost用户密码,新密码需符合复杂度策略ALTER USER 'root'@'localhost' IDENTIFIED BY 'umyVrT2!@B?xPItz';
mysql> ALTER USER 'root'@'localhost' IDENTIFIED BY 'umyVrT2!@B?xPItz';
Query OK, 0 rows affected (0.02 sec)
mysql>

13. 验证新密码登录有效性
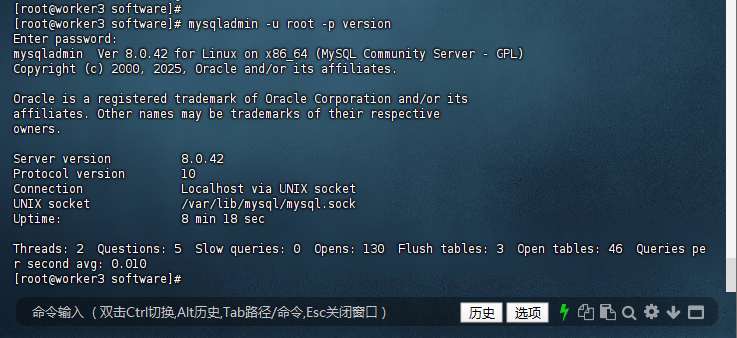
修改密码后,退出当前会话,通过
mysqladmin -u root -p version命令验证新密码是否可用,同时确认服务版本与运行状态,确保密码修改成功且服务正常:
# 验证命令:输入新密码后,若输出服务版本、运行时间等信息,说明登录有效mysqladmin -u root -p version
[root@worker3 software]# mysqladmin -u root -p version
Enter password:
mysqladmin  Ver 8.0.42 for Linux on x86_64 (MySQL Community Server - GPL)
Copyright (c) 2000, 2025, Oracle and/or its affiliates.
Oracle is a registered trademark of Oracle Corporation and/or its
affiliates. Other names may be trademarks of their respective
owners.
Server version          8.0.42
Protocol version        10
Connection              Localhost via UNIX socket
UNIX socket             /var/lib/mysql/mysql.sock
Uptime:                 8 min 18 sec
Threads: 2  Questions: 5  Slow queries: 0  Opens: 130  Flush tables: 3  Open tables: 46  Queries per second avg: 0.010
[root@worker3 software]#
14. MySQL部署关键注意事项
-
密码策略:默认启用
validate_password插件,新密码需满足“大小写字母+数字+特殊字符”组合,长度≥8位;若需简化策略,可登录后执行SET GLOBAL validate_password.policy=LOW;调整。 - 临时密码有效性:临时密码仅支持首.次登录,登录后未修改密码前无法执行任何业务操作,需优先完成密码修改。
-
安全加固:推荐执行
mysql_secure_installation命令,通过交互方式删除匿名用户、禁用root远程登录、移除测试数据库,进一步提升数据库安全性。 -
错误排查:若服务启动失败或登录报错,可通过
cat /var/log/mysqld.log查看详细日志,定位权限、数据目录、配置文件等问题。
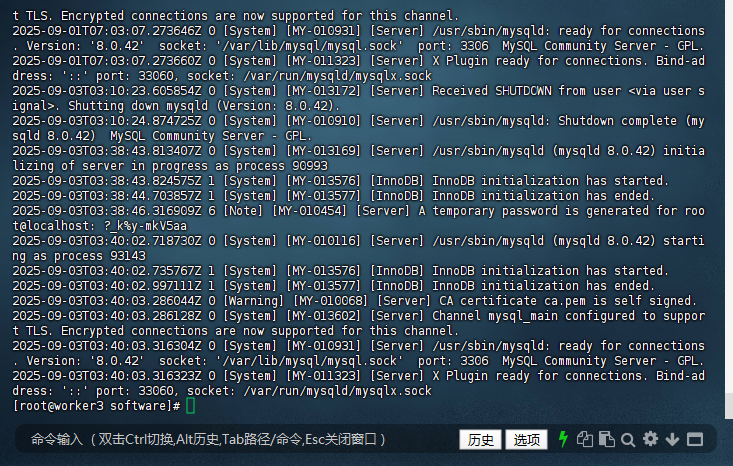
# 查看MySQL详细运行日志,用于排查部署或运行中的错误
[root@worker3 software]# cat /var/log/mysqld.log
三、TEM平台安装(分步执行)
TEM是平凯数据库的核心管理工具,需先独立安装,步骤如下:
1. 获取并解压TEM安装包
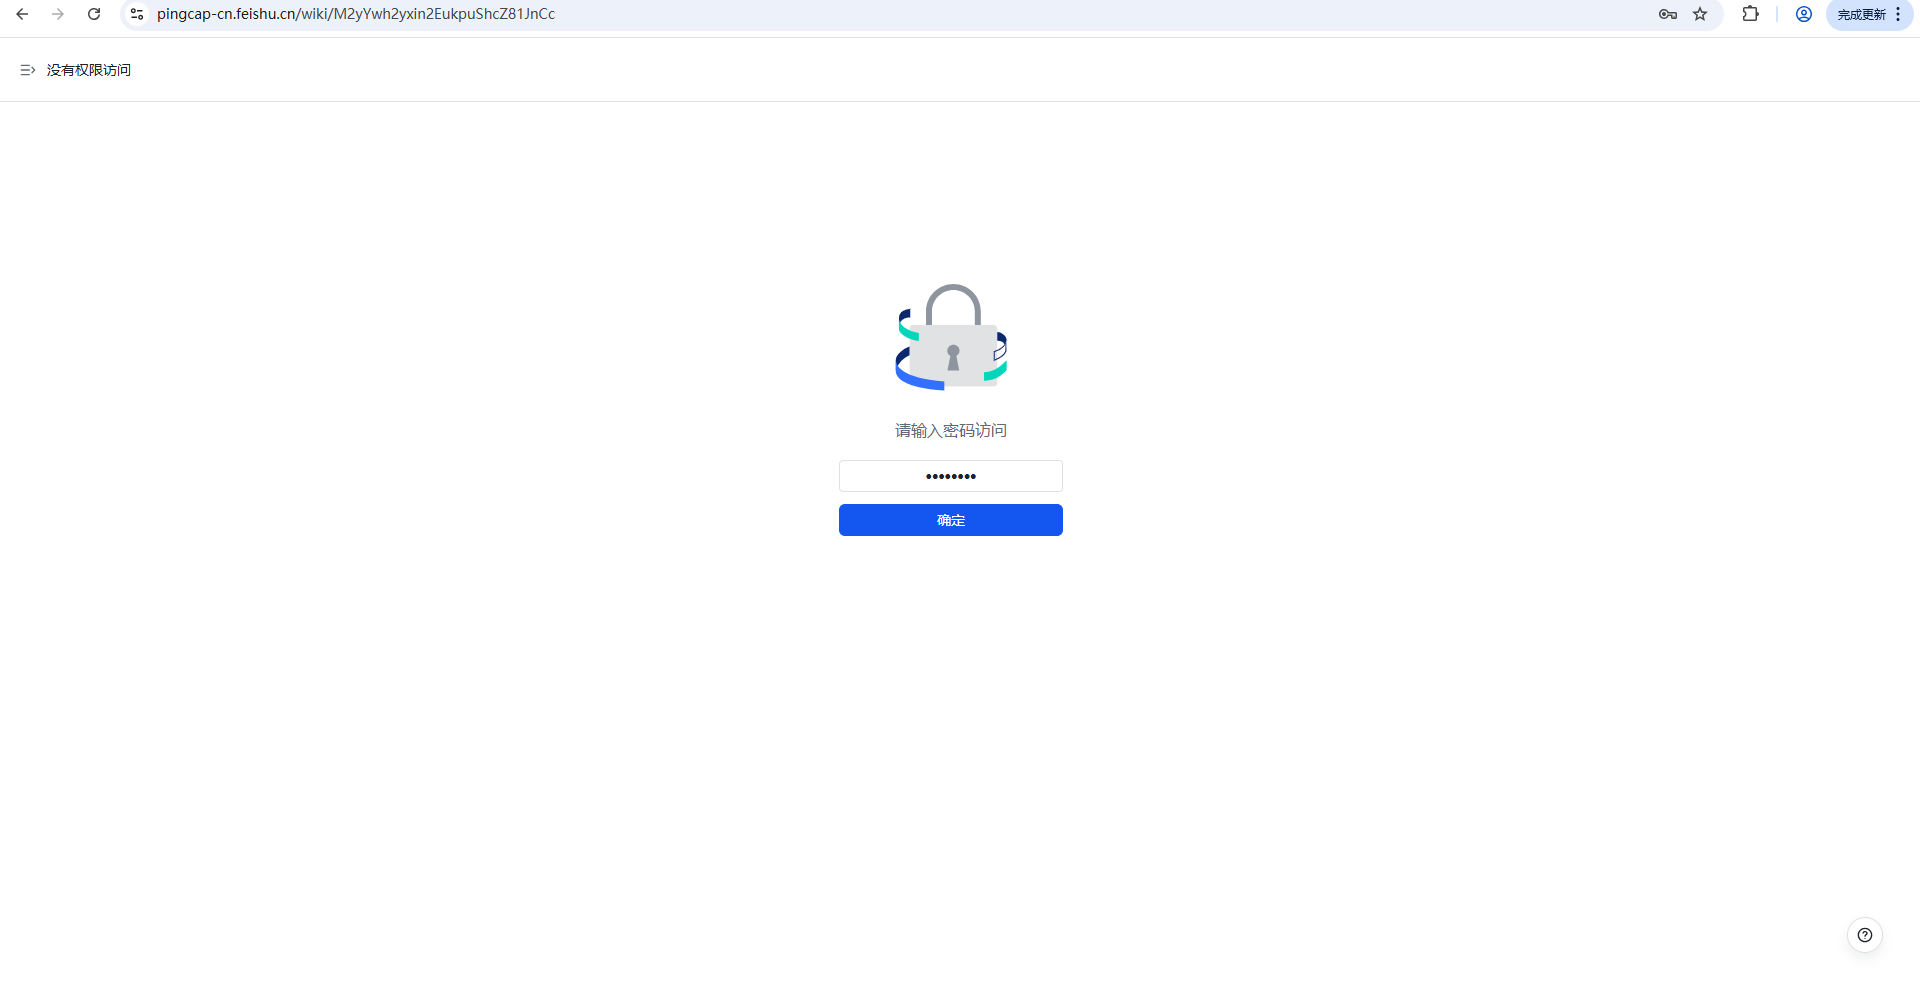
1.1 访问平凯数据库安装包下载&部署&测试指南:(从平凯官方获取链接,替换下方URL):
https://pingcap-cn.feishu.cn/wiki/M2yYwh2yxin2EukpuShcZ81JnCc(密码:b6&58452)
1.2 下载 TEM 安装包
下载平凯数据库敏捷模式安装包

1.3 下载到本机
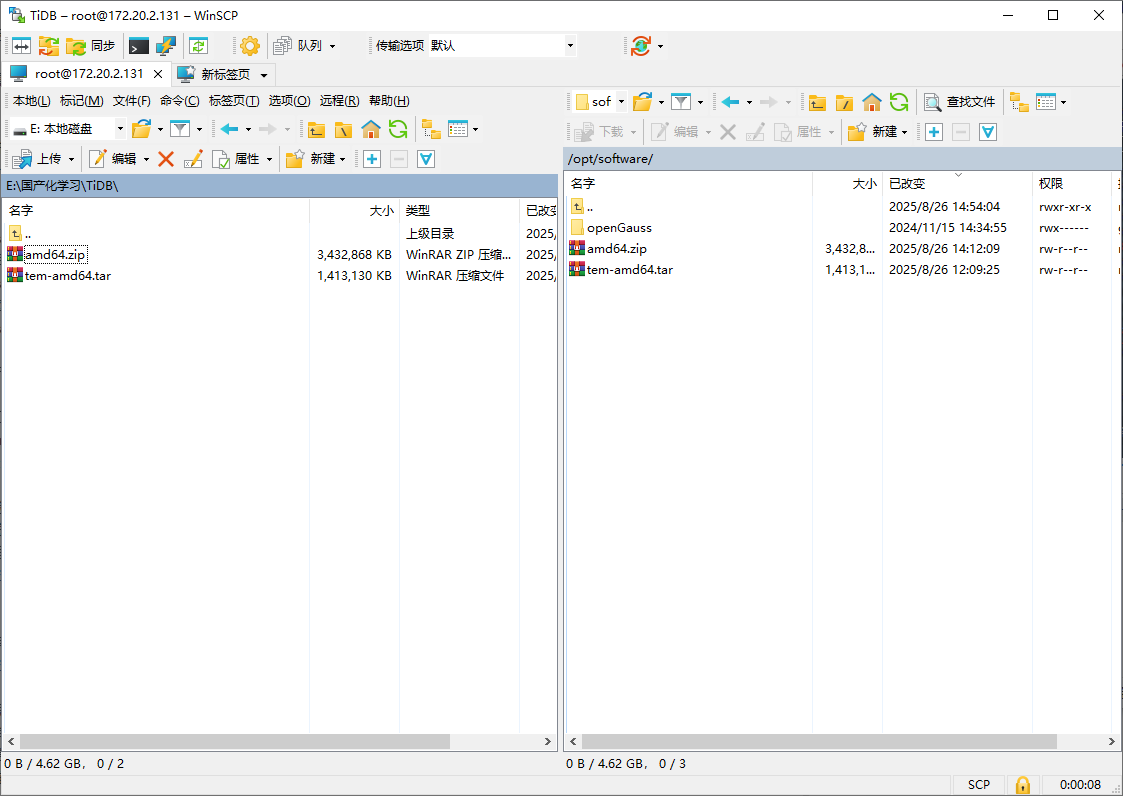
1.4 上传到服务器
进入/opt目录(软件安装统一路径)
[root@worker3 ~]# cd /opt/software/
[root@worker3 software]# ls
amd64.zip  tem-amd64.tar
[root@worker3 software]#

1.5 验证下载是否完整(查看文件大小,与官方一致即正常)
[root@worker3 software]# ls -lh tem-amd64.tar
-rw-r--r-- 1 root root 1.4G Aug 26 12:09 tem-amd64.tar
[root@worker3 software]#

2. 部署 TEM
注意:在启动 TEM 的过程中,会默认启动一套TiDB作为元数据库,元数据库的配置请见:附录-元数据库配置文件
(在部署过程中,如发现元数据库对应端口被占用,请编辑 附录-元数据库配置文件)
2.1 将 TEM 安装包解压后进入目录内
[root@worker3 software]# ls
amd64.zip  tem-amd64.tar
[root@worker3 software]# tar xvf tem-amd64.tar
tem-package-v3.1.0-linux-amd64/
tem-package-v3.1.0-linux-amd64/tem-v3.1.0-linux-amd64.tar.gz
tem-package-v3.1.0-linux-amd64/build_tiup.sh
tem-package-v3.1.0-linux-amd64/install_uos1031.sh
tem-package-v3.1.0-linux-amd64/set_owner.sh
tem-package-v3.1.0-linux-amd64/install_tiup_common.sh
tem-package-v3.1.0-linux-amd64/stop.sh
tem-package-v3.1.0-linux-amd64/migrate_tiup.sh
tem-package-v3.1.0-linux-amd64/ssh_rsa.sh
tem-package-v3.1.0-linux-amd64/version
tem-package-v3.1.0-linux-amd64/topo_macro_template.xlsb
tem-package-v3.1.0-linux-amd64/uninstall.sh
tem-package-v3.1.0-linux-amd64/root.json
tem-package-v3.1.0-linux-amd64/uninstall_uos.sh
tem-package-v3.1.0-linux-amd64/init_tiup.sh
tem-package-v3.1.0-linux-amd64/install.sh
tem-package-v3.1.0-linux-amd64/host_template.csv
tem-package-v3.1.0-linux-amd64/refresh_tem_rbac.sh
tem-package-v3.1.0-linux-amd64/update.sh
tem-package-v3.1.0-linux-amd64/host_information_template.xlsx
tem-package-v3.1.0-linux-amd64/tidb-toolkit-v3.1.0-linux-amd64.tar.gz
tem-package-v3.1.0-linux-amd64/install_tcm.sh
tem-package-v3.1.0-linux-amd64/tem-toolkit-v3.1.0-linux-amd64.tar.gz
tem-package-v3.1.0-linux-amd64/display.sh
tem-package-v3.1.0-linux-amd64/init_tiup_repo.sh
tem-package-v3.1.0-linux-amd64/tiup-v1.14.0-linux-amd64.tar.gz
tem-package-v3.1.0-linux-amd64/mount_tidb_disk.sh
tem-package-v3.1.0-linux-amd64/get_device_by_ip.sh
tem-package-v3.1.0-linux-amd64/scale-out.sh
tem-package-v3.1.0-linux-amd64/upgrade_tiup.sh
tem-package-v3.1.0-linux-amd64/assistant
tem-package-v3.1.0-linux-amd64/start.sh
tem-package-v3.1.0-linux-amd64/tiup-tem-v3.1.0-linux-amd64.tar.gz
tem-package-v3.1.0-linux-amd64/patch.sh
tem-package-v3.1.0-linux-amd64/keys.tar.gz
tem-package-v3.1.0-linux-amd64/check_os_arch.sh
tem-package-v3.1.0-linux-amd64/ssh_trust.sh
tem-package-v3.1.0-linux-amd64/scale-in.sh
tem-package-v3.1.0-linux-amd64/restart.sh
tem-package-v3.1.0-linux-amd64/config.yaml
tem-package-v3.1.0-linux-amd64/metadb_topology.yaml
[root@worker3 software]#

2.2 查看解压后目录
[root@worker3 software]# ls
amd64.zip  tem-amd64.tar  tem-package-v3.1.0-linux-amd64
[root@worker3 software]# cd tem-package-v3.1.0-linux-amd64/
[root@worker3 tem-package-v3.1.0-linux-amd64]# ls
assistant                       keys.tar.gz           stop.sh
build_tiup.sh                   metadb_topology.yaml  tem-toolkit-v3.1.0-linux-amd64.tar.gz
check_os_arch.sh                migrate_tiup.sh       tem-v3.1.0-linux-amd64.tar.gz
config.yaml                     mount_tidb_disk.sh    tidb-toolkit-v3.1.0-linux-amd64.tar.gz
display.sh                      patch.sh              tiup-tem-v3.1.0-linux-amd64.tar.gz
get_device_by_ip.sh             refresh_tem_rbac.sh   tiup-v1.14.0-linux-amd64.tar.gz
host_information_template.xlsx  restart.sh            topo_macro_template.xlsb
host_template.csv               root.json             uninstall.sh
init_tiup_repo.sh               scale-in.sh           uninstall_uos.sh
init_tiup.sh                    scale-out.sh          update.sh
install.sh                      set_owner.sh          upgrade_tiup.sh
install_tcm.sh                  ssh_rsa.sh            version
install_tiup_common.sh          ssh_trust.sh
install_uos1031.sh              start.sh
[root@worker3 tem-package-v3.1.0-linux-amd64]#
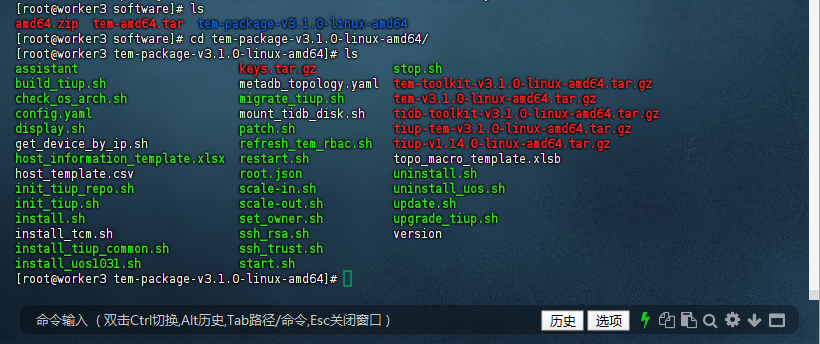
配置文件:TEM 本身以及连接元数据库的配置参数,需要调整请见:附录-TEM 配置文件;否则,请忽略 。
3. 执⾏部署 TEM 命令
为了避免部署时出现异常,请确保部署 TEM 的所有主机上没有被部署其他的 TiUP 软件
3.1 使⽤ root 或者具有 sudo 权限的账户执⾏该脚本。
[root@worker3 tem-package-v3.1.0-linux-amd64]# ./install.sh
#### Please make sure that you have edited user ####
#### in config.yaml as you want, and don't #
#### The user is 'tidb' by default, which will be ###
#### used as the owner to deploy TEM service.     ####
#### If you have installed TEM before, make sure  ####
#### that the user is consistent with the old one. #
#### After install.sh is run, a config.yaml file ####
#### will be generated under /home/<user>/, and  ####
#### please don't edit this file.                ####
Do you want to continue? [y/N]
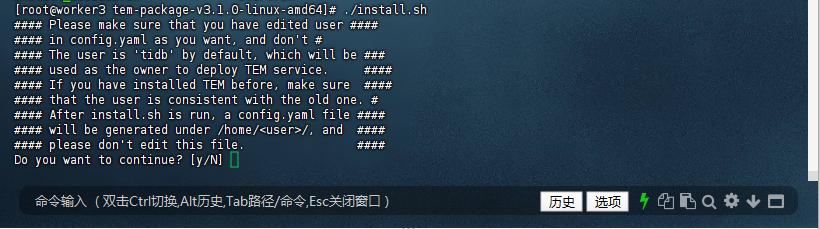
初始化与准备:脚本提示确认 config.yaml 中的用户配置(默认 tidb 用户),检测到系统为 linux amd64。由于 tidb 用户已存在,添加用户步骤跳过相关创建操作,但生成 SSH 密钥对时发现 /home/tidb/.ssh/id_rsa 已存在,这里需要你手动输入 y 或 n 决定是否覆盖(不过日志中未显示你输入的选择结果,但从后续步骤看似乎是接受了现有密钥对)。之后检查了 ssh - copy - id、scp 和 ssh 等依赖工具。
3.2 输入y 继续安装
[root@worker3 software]# ls
amd64.zip  tem-amd64.tar  tem-package-v3.1.0-linux-amd64
[root@worker3 software]# cd tem-package-v3.1.0-linux-amd64/
[root@worker3 tem-package-v3.1.0-linux-amd64]# ls
assistant                       keys.tar.gz           stop.sh
build_tiup.sh                   metadb_topology.yaml  tem-toolkit-v3.1.0-linux-amd64.tar.gz
check_os_arch.sh                migrate_tiup.sh       tem-v3.1.0-linux-amd64.tar.gz
config.yaml                     mount_tidb_disk.sh    tidb-toolkit-v3.1.0-linux-amd64.tar.gz
display.sh                      patch.sh              tiup-tem-v3.1.0-linux-amd64.tar.gz
get_device_by_ip.sh             refresh_tem_rbac.sh   tiup-v1.14.0-linux-amd64.tar.gz
host_information_template.xlsx  restart.sh            topo_macro_template.xlsb
host_template.csv               root.json             uninstall.sh
init_tiup_repo.sh               scale-in.sh           uninstall_uos.sh
init_tiup.sh                    scale-out.sh          update.sh
install.sh                      set_owner.sh          upgrade_tiup.sh
install_tcm.sh                  ssh_rsa.sh            version
install_tiup_common.sh          ssh_trust.sh
install_uos1031.sh              start.sh
[root@worker3 tem-package-v3.1.0-linux-amd64]# ./install.sh
#### Please make sure that you have edited user ####
#### in config.yaml as you want, and don't #
#### The user is 'tidb' by default, which will be ###
#### used as the owner to deploy TEM service.     ####
#### If you have installed TEM before, make sure  ####
#### that the user is consistent with the old one. #
#### After install.sh is run, a config.yaml file ####
#### will be generated under /home/<user>/, and  ####
#### please don't edit this file.                ####
Do you want to continue? [y/N] y
start installing
Check linux amd64
##### install version v3.1.0 #####
##### metadb_topology.yaml exists, will install metadb #####
##### add user tidb started #####
useradd: user 'tidb' already exists
Last login: Thu Aug 28 09:54:43 CST 2025 on pts/0
Generating public/private rsa key pair.
/home/tidb/.ssh/id_rsa already exists.
Overwrite (y/n)? ##### ssh-keygen ~/.ssh/id_rsa #####
##### cat ~/.ssh/authorized_keys  #####
##### user chmod .ssh finished #####
##### add user tidb finished #####
##### add PrivateKey /home/tidb/.ssh/id_rsa #####
##### add PublicKey /home/tidb/.ssh/id_rsa.pub #####
##### check depends tar started #####
Last login: Thu Aug 28 10:01:51 CST 2025
Dependency check check_ssh-copy-id proceeding.
Dependency check check_ssh-copy-id end.
Dependency check check_scp proceeding.
Dependency check check_scp end.
Dependency check check_ssh proceeding.
Dependency check check_ssh end.
##### check depends tar finished #####
##### check env started: before possible metadb installation #####
assistant check  {"level":"debug","msg":"ssh"}
strategyName Check
NetWorkStatus Start: 1756346513
NetWorkStatus End  : 1756346516
Net Status , OK
SSHCheck 0.0.0.0 authorized_keys
id_rsa
id_rsa.pub

success
TEM assistant check {"level":"debug","msg":"ssh"} strategyName Check NetWorkStatus Start: 1756346513 NetWorkStatus End : 1756346516 Net Status , OK SSHCheck 0.0.0.0 authorized_keys id_rsa id_rsa.pub success
##### check env finished: before possible metadb installation #####
##### deploy_tiup  started #####
##### prepare TiDB AND TEM TIUP_HOME started #####
##### mkdir /tem-deploy/.tiup finished #####
##### mkdir /tem-deploy/.tem finished #####
##### mkdir /tem-deploy/.tiup/bin finished #####
##### mkdir /tem-deploy/.tem/bin finished #####
##### mkdir /tem-data/tidb-repo finished #####
##### mkdir /tem-data/tem-repo finished #####
##### mkdir /tem-deploy/monitor finished #####
##### mkdir /home/tidb/.temmeta finished #####
##### mkdir /home/tidb/.temmeta/bin finished #####
##### mkdir /home/tidb/tidb-repo finished #####
##### prepare TiDB AND TEM TIUP_HOME finished #####
##### deploy_binary started #####
##### mkdir /tem-deploy/tem-package finished #####
##### mkdir /tem-deploy/tem-package/tem-toolkit-v3.1.0-linux-amd64 finished #####
##### mkdir /tem-deploy/tem-package/tidb-toolkit-v3.1.0-linux-amd64 finished #####
##### deploy_binary finished #####
##### install tiup binary to /tem-deploy/.tiup/bin /tem-deploy/.tem/bin started #####
##### install tiup binary to /tem-deploy/.tiup/bin /tem-deploy/.tem/bin finished #####
##### install TiUP to /usr/local/bin started #####
##### install TiUP to /usr/local/bin finished #####
##### init tem mirror /tem-data/tem-repo started #####
##### build_mirror started #####
##### build_mirror repo_dir /tem-data/tem-repo #####
##### build_mirror home_dir /tem-deploy/.tem #####
##### build_mirror tiup_bin /usr/local/bin/tiup #####
##### build_mirror toolkit_dir /tem-deploy/tem-package/tem-toolkit-v3.1.0-linux-amd64 #####
##### build_mirror deploy_user tidb #####
Last login: Thu Aug 28 10:01:53 CST 2025
./
./local_install.sh
./tem-v3.1.0-linux-amd64.tar.gz
./node-exporter-v1.2.2-linux-amd64.tar.gz
./1.prometheus.json
./1.alertmanager.json
./grafana-v7.5.15-linux-amd64.tar.gz
./1.grafana.json
./keys/
./keys/b7a47c72bf7ff51f-root.json
./keys/8d862a21510f57fe-timestamp.json
./keys/92686f28f94bcc9c-snapshot.json
./keys/cd6238bf63753458-root.json
./keys/d9da78461bae5fb8-root.json
./keys/87cc8597ba186ab8-pingcap.json
./keys/c181aeb3996f7bfe-index.json
./root.json
./1.tiup.json
./1.tem-server.json
./1.index.json
./1.root.json
./alertmanager-v0.23.0-linux-amd64.tar.gz
./prometheus-v2.29.2-linux-amd64.tar.gz
./tiup-v1.14.0-linux-amd64.tar.gz
./tem-server-v3.1.0-linux-amd64.tar.gz
./tiup-linux-amd64.tar.gz
./snapshot.json
./1.tem.json
./timestamp.json
./1.node-exporter.json
Successfully set mirror to /tem-data/tem-repo
##### init tem mirror /tem-data/tem-repo finished #####
##### init tidb mirror /tem-data/tidb-repo started #####
##### build_mirror started #####
##### build_mirror repo_dir /tem-data/tidb-repo #####
##### build_mirror home_dir /tem-deploy/.tiup #####
##### build_mirror tiup_bin /usr/local/bin/tiup #####
##### build_mirror toolkit_dir /tem-deploy/tem-package/tidb-toolkit-v3.1.0-linux-amd64 #####
##### build_mirror deploy_user tidb #####
Last login: Thu Aug 28 10:01:57 CST 2025
./
./local_install.sh
./prometheuse-v6.5.0-linux-amd64.tar.gz
./1.br-ee.json
./alertmanager-v0.17.0-linux-amd64.tar.gz
./1.alertmanager.json
./br-v7.1.5-linux-amd64.tar.gz
./1.cluster.json
./br-v8.1.0-linux-amd64.tar.gz
./1.tikv.json
./br-v6.1.7-linux-amd64.tar.gz
./keys/
./keys/bd73fb49a9fe4c1f-root.json
./keys/ccb014427c930f35-root.json
./keys/0ef7038b19901f8d-root.json
./keys/e80212bba0a0c5d7-timestamp.json
./keys/cdc237d3f9580e59-index.json
./keys/704b6a90d209834a-pingcap.json
./keys/37ae6a6f7c3ae619-root.json
./keys/42859495dc518ea9-snapshot.json
./keys/6f1519e475e9ae65-root.json
./keys/bfc5831da481f289-index.json
./keys/4fa53899faebf9d9-root.json
./keys/928bfc0ffaa29a53-timestamp.json
./keys/7b99f462f7931ade-snapshot.json
./keys/24f464d5e96770ca-pingcap.json
./1.prometheuse.json
./br-v6.5.10-linux-amd64.tar.gz
./root.json
./1.tidb.json
./1.tiup.json
./1.pd.json
./1.index.json
./1.root.json
./tikv-v6.5.0-linux-amd64.tar.gz
./pd-v6.5.0-linux-amd64.tar.gz
./cluster-v1.14.0-linux-amd64.tar.gz
./blackbox_exporter-v0.21.1-linux-amd64.tar.gz
./5.br.json
./br-v7.5.2-linux-amd64.tar.gz
./tiup-v1.14.0-linux-amd64.tar.gz
./1.node_exporter.json
./1.insight.json
./tiup-linux-amd64.tar.gz
./insight-v0.4.2-linux-amd64.tar.gz
./br-ee-v7.1.1-3-linux-amd64.tar.gz
./snapshot.json
./node_exporter-v1.3.1-linux-amd64.tar.gz
./tidb-v6.5.0-linux-amd64.tar.gz
./1.blackbox_exporter.json
./timestamp.json
Successfully set mirror to /tem-data/tidb-repo
##### init tidb mirror /tem-data/tidb-repo finished #####
##### init temmeta mirror /home/tidb/tidb-repo started #####
##### build_mirror started #####
##### build_mirror repo_dir /home/tidb/tidb-repo #####
##### build_mirror home_dir /home/tidb/.temmeta #####
##### build_mirror tiup_bin /usr/local/bin/tiup #####
##### build_mirror toolkit_dir /tem-deploy/tem-package/tidb-toolkit-v3.1.0-linux-amd64 #####
##### build_mirror deploy_user tidb #####
Last login: Thu Aug 28 10:01:59 CST 2025
./
./local_install.sh
./prometheuse-v6.5.0-linux-amd64.tar.gz
./1.br-ee.json
./alertmanager-v0.17.0-linux-amd64.tar.gz
./1.alertmanager.json
./br-v7.1.5-linux-amd64.tar.gz
./1.cluster.json
./br-v8.1.0-linux-amd64.tar.gz
./1.tikv.json
./br-v6.1.7-linux-amd64.tar.gz
./keys/
./keys/bd73fb49a9fe4c1f-root.json
./keys/ccb014427c930f35-root.json
./keys/0ef7038b19901f8d-root.json
./keys/e80212bba0a0c5d7-timestamp.json
./keys/cdc237d3f9580e59-index.json
./keys/704b6a90d209834a-pingcap.json
./keys/37ae6a6f7c3ae619-root.json
./keys/42859495dc518ea9-snapshot.json
./keys/6f1519e475e9ae65-root.json
./keys/bfc5831da481f289-index.json
./keys/4fa53899faebf9d9-root.json
./keys/928bfc0ffaa29a53-timestamp.json
./keys/7b99f462f7931ade-snapshot.json
./keys/24f464d5e96770ca-pingcap.json
./1.prometheuse.json
./br-v6.5.10-linux-amd64.tar.gz
./root.json
./1.tidb.json
./1.tiup.json
./1.pd.json
./1.index.json
./1.root.json
./tikv-v6.5.0-linux-amd64.tar.gz
./pd-v6.5.0-linux-amd64.tar.gz
./cluster-v1.14.0-linux-amd64.tar.gz
./blackbox_exporter-v0.21.1-linux-amd64.tar.gz
./5.br.json
./br-v7.5.2-linux-amd64.tar.gz
./tiup-v1.14.0-linux-amd64.tar.gz
./1.node_exporter.json
./1.insight.json
./tiup-linux-amd64.tar.gz
./insight-v0.4.2-linux-amd64.tar.gz
./br-ee-v7.1.1-3-linux-amd64.tar.gz
./snapshot.json
./node_exporter-v1.3.1-linux-amd64.tar.gz
./tidb-v6.5.0-linux-amd64.tar.gz
./1.blackbox_exporter.json
./timestamp.json
Successfully set mirror to /home/tidb/tidb-repo
##### init temmeta mirror /home/tidb/tidb-repo finished #####
##### deploy_tiup /tem-deploy/.tem finished #####
##### install metadb started #####
Last login: Thu Aug 28 10:02:06 CST 2025
The component `prometheus` not found (may be deleted from repository); skipped
tiup is checking updates for component cluster ...
A new version of cluster is available:
   The latest version:         v1.14.0
   Local installed version:
   Update current component:   tiup update cluster
   Update all components:      tiup update --all
The component `cluster` version  is not installed; downloading from repository.
Starting component `cluster`: /home/tidb/.temmeta/components/cluster/v1.14.0/tiup-cluster deploy tem_metadb v6.5.0 metadb_topology.yaml -u tidb -i /home/tidb/.ssh/id_rsa --yes
+ Detect CPU Arch Name
  - Detecting node 127.0.0.1 Arch info ... Done
+ Detect CPU OS Name
  - Detecting node 127.0.0.1 OS info ... Done
+ Generate SSH keys ... Done
+ Download TiDB components
  - Download pd:v6.5.0 (linux/amd64) ... Done
  - Download tikv:v6.5.0 (linux/amd64) ... Done
  - Download tidb:v6.5.0 (linux/amd64) ... Done
  - Download node_exporter: (linux/amd64) ... Done
  - Download blackbox_exporter: (linux/amd64) ... Done
+ Initialize target host environments
  - Prepare 127.0.0.1:22 ... Done
+ Deploy TiDB instance
  - Copy pd -> 127.0.0.1 ... Done
  - Copy tikv -> 127.0.0.1 ... Done
  - Copy tidb -> 127.0.0.1 ... Done
  - Deploy node_exporter -> 127.0.0.1 ... Done
  - Deploy blackbox_exporter -> 127.0.0.1 ... Done
+ Copy certificate to remote host
+ Init instance configs
  - Generate config pd -> 127.0.0.1:2379 ... Done
  - Generate config tikv -> 127.0.0.1:20160 ... Done
  - Generate config tidb -> 127.0.0.1:4000 ... Done
+ Init monitor configs
  - Generate config node_exporter -> 127.0.0.1 ... Done
  - Generate config blackbox_exporter -> 127.0.0.1 ... Done
Enabling component pd
        Enabling instance 127.0.0.1:2379
        Enable instance 127.0.0.1:2379 success
Enabling component tikv
        Enabling instance 127.0.0.1:20160
        Enable instance 127.0.0.1:20160 success
Enabling component tidb
        Enabling instance 127.0.0.1:4000
        Enable instance 127.0.0.1:4000 success
Enabling component node_exporter
        Enabling instance 127.0.0.1
        Enable 127.0.0.1 success
Enabling component blackbox_exporter
        Enabling instance 127.0.0.1
        Enable 127.0.0.1 success
Cluster `tem_metadb` deployed successfully, you can start it with command: `tiup cluster start tem_metadb --init`
tiup is checking updates for component cluster ...
Starting component `cluster`: /home/tidb/.temmeta/components/cluster/v1.14.0/tiup-cluster start tem_metadb
Starting cluster tem_metadb...
+ [ Serial ] - SSHKeySet: privateKey=/home/tidb/.temmeta/storage/cluster/clusters/tem_metadb/ssh/id_rsa, publicKey=/home/tidb/.temmeta/storage/cluster/clusters/tem_metadb/ssh/id_rsa.pub
+ [Parallel] - UserSSH: user=tidb, host=127.0.0.1
+ [Parallel] - UserSSH: user=tidb, host=127.0.0.1
+ [Parallel] - UserSSH: user=tidb, host=127.0.0.1
+ [ Serial ] - StartCluster
Starting component pd
        Starting instance 127.0.0.1:2379
        Start instance 127.0.0.1:2379 success
Starting component tikv
        Starting instance 127.0.0.1:20160
        Start instance 127.0.0.1:20160 success
Starting component tidb
        Starting instance 127.0.0.1:4000
        Start instance 127.0.0.1:4000 success
Starting component node_exporter
        Starting instance 127.0.0.1
        Start 127.0.0.1 success
Starting component blackbox_exporter
        Starting instance 127.0.0.1
        Start 127.0.0.1 success
+ [ Serial ] - UpdateTopology: cluster=tem_metadb
Started cluster `tem_metadb` successfully
##### install metadb finished #####
##### check env started: after metadb installation #####
assistant check  {"level":"debug","msg":"ssh"}
strategyName Check
success for 127.0.0.1:4000
success
NetWorkStatus Start: 1756346568
NetWorkStatus End  : 1756346571
Net Status , OK
SSHCheck 0.0.0.0 authorized_keys
id_rsa
id_rsa.pub

success
TEM assistant check {"level":"debug","msg":"ssh"} strategyName Check success for 127.0.0.1:4000 success NetWorkStatus Start: 1756346568 NetWorkStatus End : 1756346571 Net Status , OK SSHCheck 0.0.0.0 authorized_keys id_rsa id_rsa.pub success
##### check env finished: after metadb installation #####
##### generate config /home/tidb/config.yaml started #####
assistant run  {"level":"debug","msg":"ssh"}
strategyName Install
success for 127.0.0.1:4000
success
success
TEM assistant run {"level":"debug","msg":"ssh"} strategyName Install success for 127.0.0.1:4000 success success
##### assistant run  /home/tidb/config.yaml {"level":"debug","msg":"ssh"}
strategyName Install
success for 127.0.0.1:4000
success
success finished #####
Detected shell: bash
Shell profile:  /home/tidb/.bash_profile
Last login: Thu Aug 28 10:02:26 CST 2025
tiup is checking updates for component tem ...
Starting component `tem`: /tem-deploy/.tem/components/tem/v3.1.0/tiup-tem tls-gen tem-servers
TLS certificate for cluster tem-servers generated
tiup is checking updates for component tem ...
Starting component `tem`: /tem-deploy/.tem/components/tem/v3.1.0/tiup-tem deploy tem-servers v3.1.0 /home/tidb/config.yaml -u tidb -i /home/tidb/.ssh/id_rsa --yes
+ Generate SSH keys ... Done
+ Download components
  - Download tem-server:v3.1.0 (linux/amd64) ... Done
+ Initialize target host environments
  - Prepare 0.0.0.0:22 ... Done
+ Copy files
  - Copy tem-server -> 0.0.0.0 ... Done
Enabling component tem-server
        Enabling instance 0.0.0.0:8080
        Enable instance 0.0.0.0:8080 success
Cluster `tem-servers` deployed successfully, you can start it with command: `TIUP_HOME=/home/<user>/.tem tiup tem start tem-servers`, where user is defined in config.yaml. by default: `TIUP_HOME=/home/tidb/.tem tiup tem start tem-servers`
tiup is checking updates for component tem ...
Starting component `tem`: /tem-deploy/.tem/components/tem/v3.1.0/tiup-tem start tem-servers
Starting cluster tem-servers...
+ [ Serial ] - SSHKeySet: privateKey=/tem-deploy/.tem/storage/tem/clusters/tem-servers/ssh/id_rsa, publicKey=/tem-deploy/.tem/storage/tem/clusters/tem-servers/ssh/id_rsa.pub
+ [Parallel] - UserSSH: user=tidb, host=0.0.0.0
+ [ Serial ] - StartCluster
Starting cluster ComponentName tem-server...
Starting component tem-server
        Starting instance 0.0.0.0:8080
        Start instance 0.0.0.0:8080 success
Started tem `tem-servers` successfully
tiup is checking updates for component tem ...
Starting component `tem`: /tem-deploy/.tem/components/tem/v3.1.0/tiup-tem display tem-servers
Cluster type:       tem
Cluster name:       tem-servers
Cluster version:    v3.1.0
Deploy user:        tidb
SSH type:           builtin
WebServer URL:
ID            Role        Host     Ports  OS/Arch       Status  Data Dir                   Deploy Dir
--            ----        ----     -----  -------       ------  --------                   ----------
0.0.0.0:8080  tem-server  0.0.0.0  8080   linux/x86_64  Up      /tem-data/tem-server-8080  /tem-deploy/tem-server-8080
Total nodes: 1
/home/tidb/.bash_profile has been modified to to add tiup to PATH
open a new terminal or source /home/tidb/.bash_profile to use it
Installed path: /usr/local/bin/tiup
=====================================================================
TEM service has been deployed on host <ip addresses> successfully, please use below
      command check the status of TEM service:
1. Switch user:  su - tidb
2. source /home/tidb/.bash_profile
3. Have a try:   TIUP_HOME=/tem-deploy/.tem tiup tem display tem-servers
====================================================================
[root@worker3 tem-package-v3.1.0-linux-amd64]#
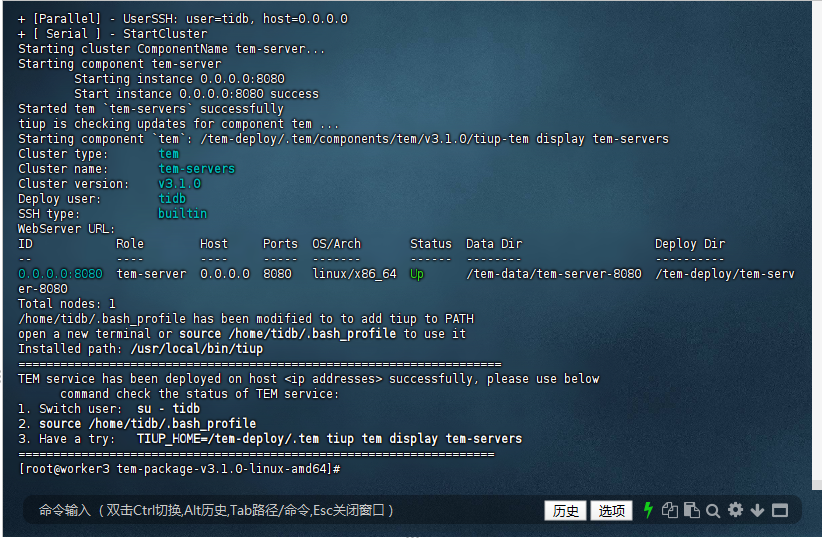
3.3 安装过程总结:
初始化与准备:脚本提示确认 config.yaml 中的用户配置(默认 tidb 用户),检测到系统为 linux amd64。由于 tidb 用户已存在,添加用户步骤跳过相关创建操作,但生成 SSH 密钥对时发现 /home/tidb/.ssh/id_rsa 已存在,这里需要你手动输入 y 或 n 决定是否覆盖(不过日志中未显示你输入的选择结果,但从后续步骤看似乎是接受了现有密钥对)。之后检查了 ssh - copy - id、scp 和 ssh 等依赖工具。
TiUP 相关部署:创建了 TiUP 和 TEM 相关的目录,如 /tem - deploy/.tiup、/tem - deploy/.tem 等,并将 TiUP 二进制文件安装到指定目录,同时初始化了 TEM、TiDB 和 TEMMeta 的镜像仓库。
MetaDB 安装:检测到 metadb_topology.yaml 文件存在,开始安装 MetaDB(一个用于存储 TEM 元数据的 TiDB 集群)。下载并部署了 pd、tikv、tidb、node_exporter 和 blackbox_exporter 组件到本地节点 127.0.0.1,配置并成功启动了 tem_metadb 集群。
TEM 服务器部署:再次检查环境,生成 config.yaml 文件,为 tem - servers 集群生成 TLS 证书,然后部署并成功启动了 tem - servers 集群,状态显示为 Up。最后,脚本修改了 tidb 用户的 .bash_profile 文件,将 TiUP 添加到路径中,并提示安装成功以及检查服务状态的方法。
成功确认与后续操作:
安装成功确认:从日志结尾部分 “TEM service has been deployed on host successfully” 以及 tem - servers 集群状态为 Up 来看,TiDB TEM 敏捷模式安装成功。
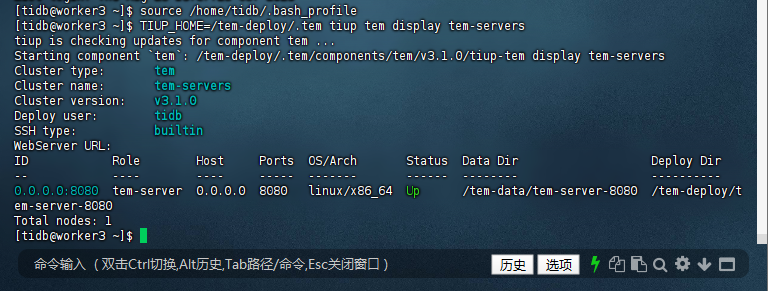
3.4 后续操作:按照提示,若要检查 TEM 服务状态,可以进行以下操作:
切换到 tidb 用户:su - tidb。
加载修改后的 .bash_profile:source /home/tidb/.bash_profile。
查看 tem - servers 集群状态:TIUP_HOME=/tem - deploy/.tem tiup tem display tem - servers。
[tidb@worker3 ~]$ source /home/tidb/.bash_profile
[tidb@worker3 ~]$ TIUP_HOME=/tem-deploy/.tem tiup tem display tem-servers
tiup is checking updates for component tem ...
Starting component `tem`: /tem-deploy/.tem/components/tem/v3.1.0/tiup-tem display tem-servers
Cluster type:       tem
Cluster name:       tem-servers
Cluster version:    v3.1.0
Deploy user:        tidb
SSH type:           builtin
WebServer URL:
ID            Role        Host     Ports  OS/Arch       Status  Data Dir                   Deploy Dir
--            ----        ----     -----  -------       ------  --------                   ----------
0.0.0.0:8080  tem-server  0.0.0.0  8080   linux/x86_64  Up      /tem-data/tem-server-8080  /tem-deploy/tem-server-8080
Total nodes: 1
[tidb@worker3 ~]$
3.5 检查路径设置:
确认 tiup 二进制文件的实际路径。在安装日志中可以看到,tiup 被安装到了 /usr/local/bin 以及 /tem - deploy/.tiup/bin 和 /tem - deploy/.tem/bin 等目录。你可以通过 echo $PATH 查看当前 PATH 环境变量,确认这些目录是否在其中。如果不在,可以手动将 /usr/local/bin、/tem - deploy/.tiup/bin 和 /tem - deploy/.tem/bin 添加到 PATH 中。例如,在 bash 中可以执行
[tidb@worker3 ~]$ export PATH=/usr/local/bin:/tem-deploy/.tiup/bin:/tem-deploy/.tem/bin:$PATH
[tidb@worker3 ~]$

再次执行 source /home/tidb/.bash_profile 确保修改生效,然后重新尝试执行 TIUP_HOME=/tem - deploy/.tem tiup tem display tem - servers 命令。
4. 安装后检查 TEM 服务
部署完成之后,TEM 服务会⾃动启动,请使⽤下⾯的地址访问 TEM。
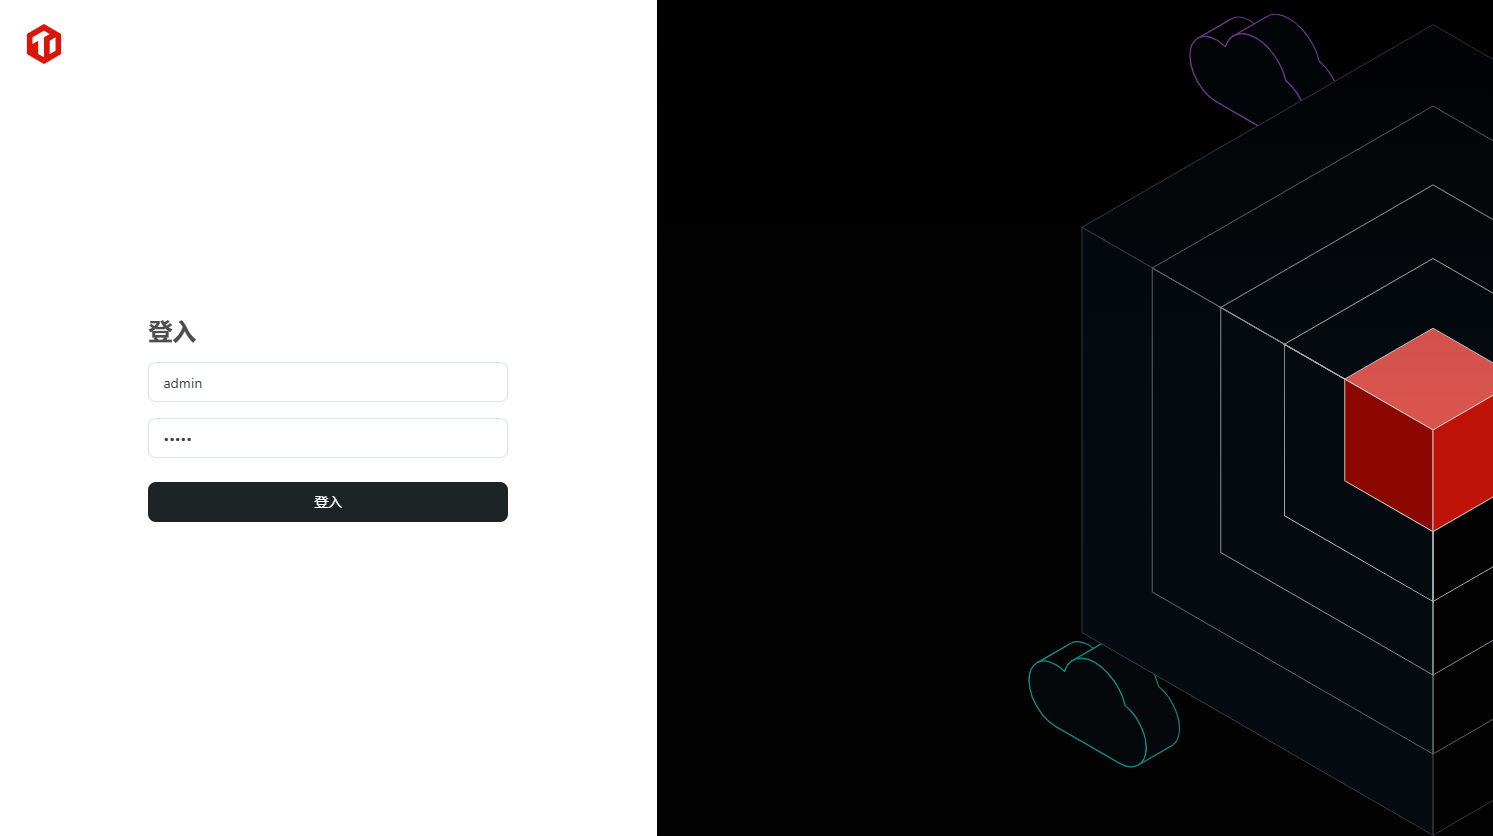
4.1 访问 TEM http://<TEM 部署ip地址>:/login
http://127.0.0.1:8080/login
4.2 登录 TEM
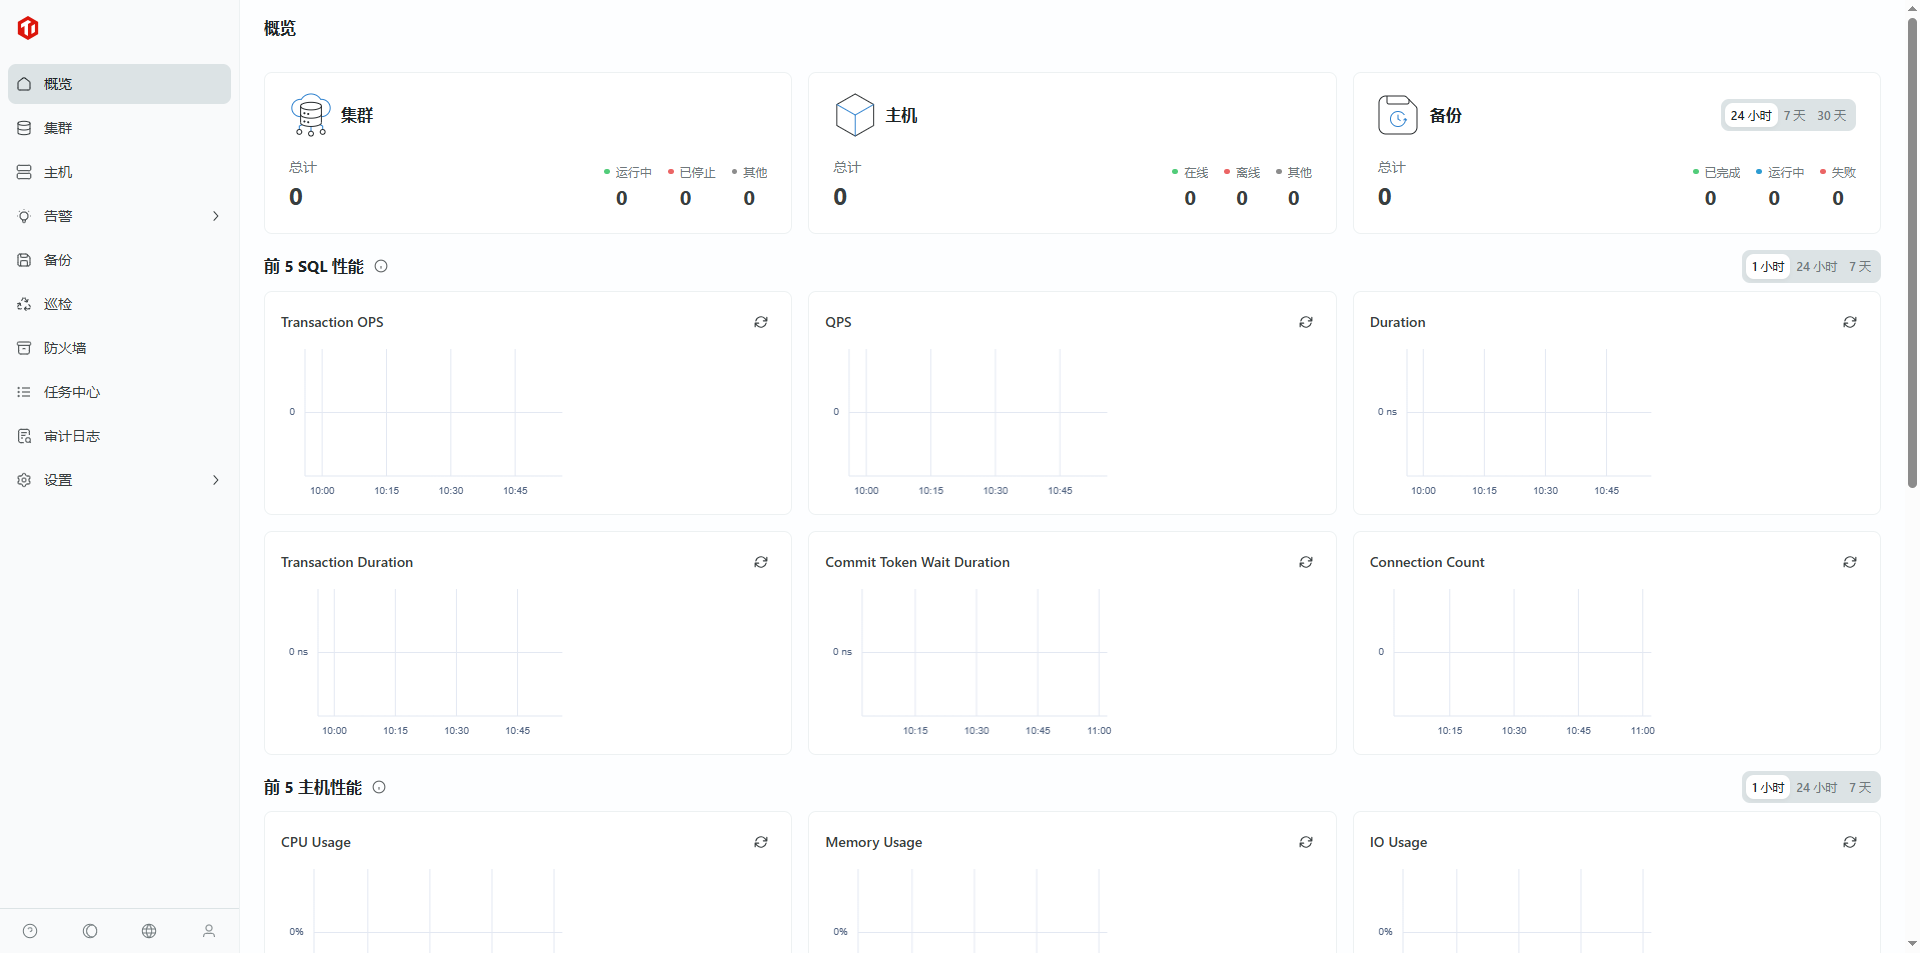
TEM 默认⽤户为 admin, 默认密码为 admin(请在登录后在 TEM 页面-设置-用户与角色-用户尽快修改)。
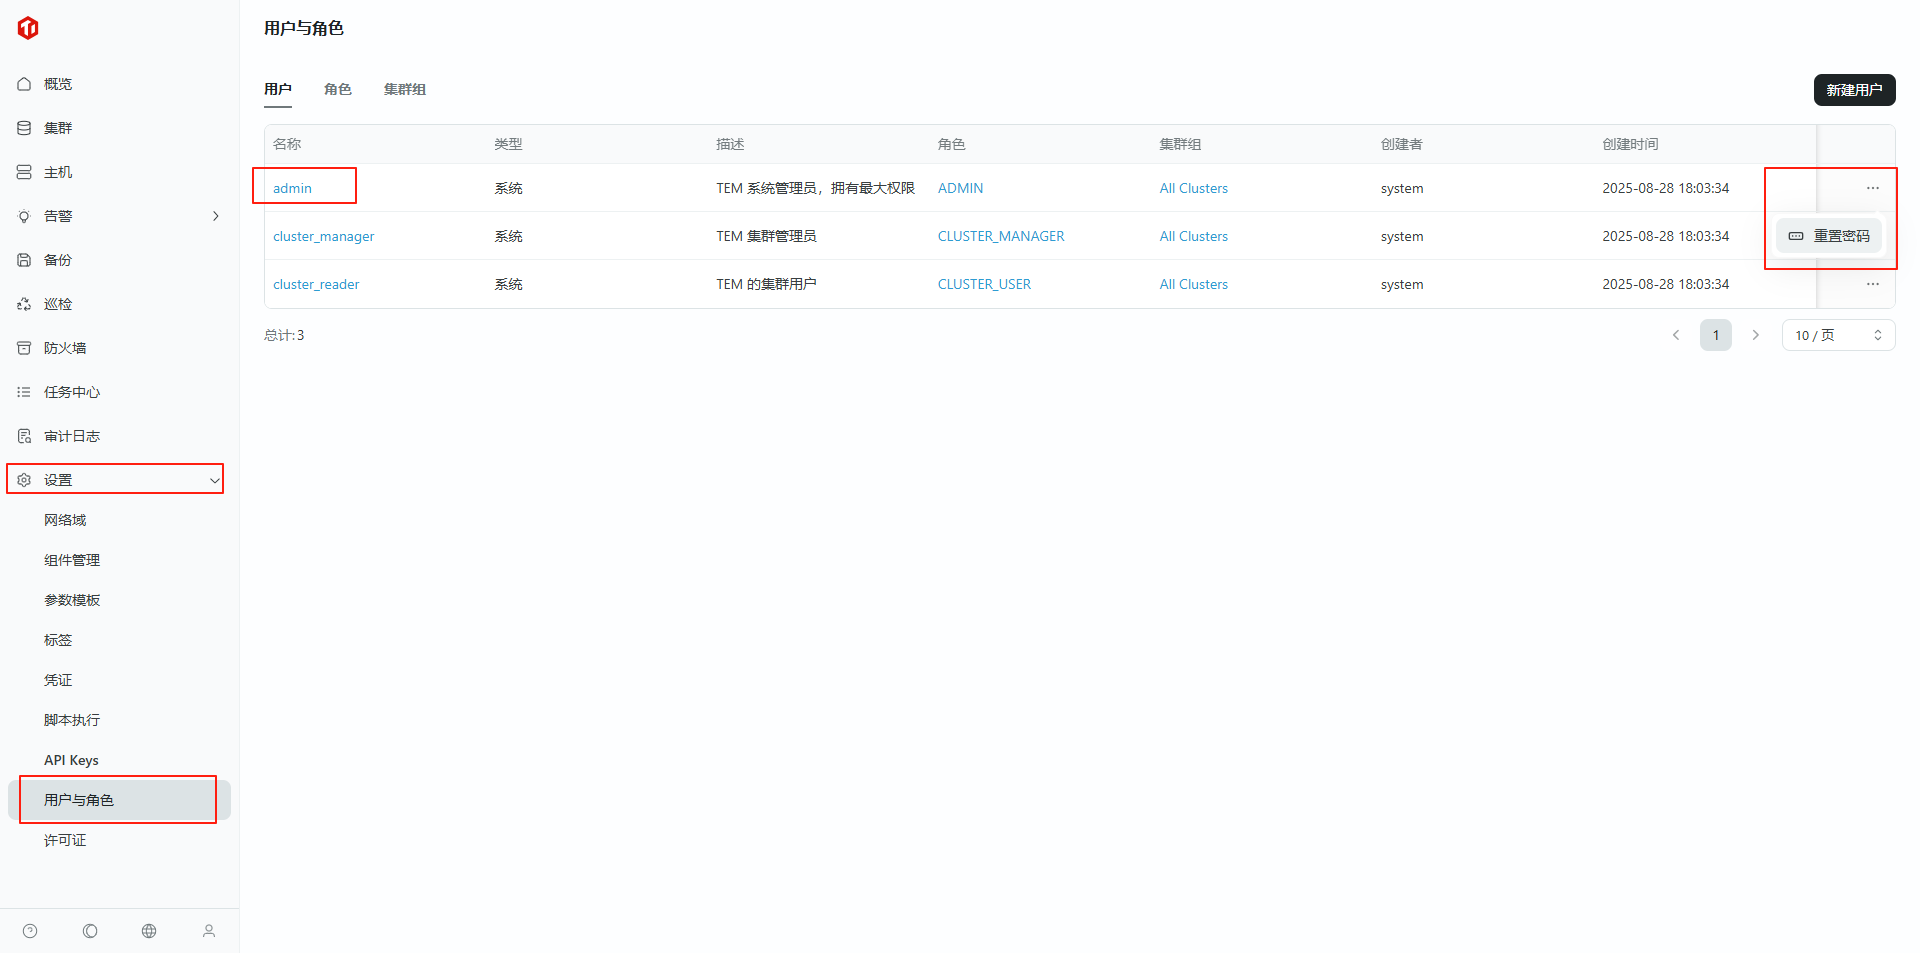
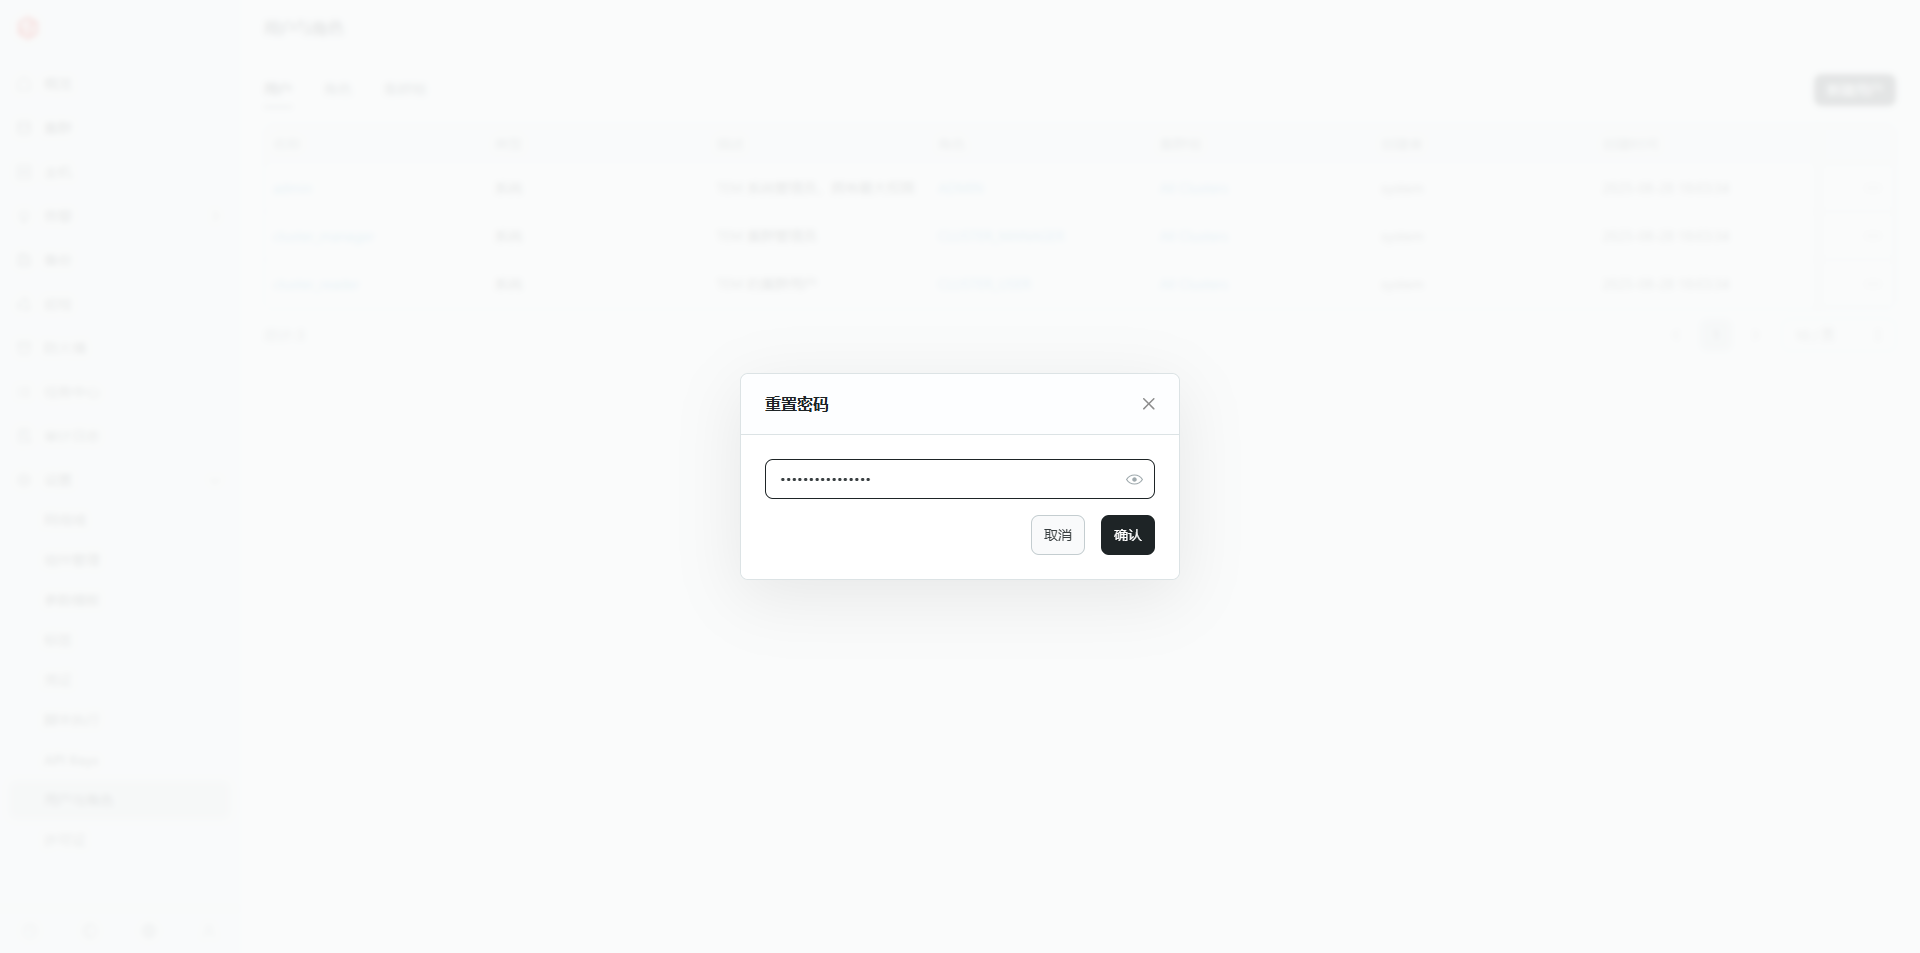
4.3 重置密码
5.验证 TEM 服务
5.1 检查 TEM 进程
[root@worker3 tem-package-v3.1.0-linux-amd64]# ps aux | grep tem
root          1  0.2  0.0 191672  4696 ?        Ss   Aug20  25:41 /usr/lib/systemd/systemd --switched-root --system --deserialize 22
root        634  0.1  0.0  65084 24484 ?        Ss   Aug20  15:30 /usr/lib/systemd/systemd-journald
root        673  0.0  0.0  46184  2600 ?        Ss   Aug20   0:00 /usr/lib/systemd/systemd-udevd
root        893  0.0  0.0  27200  2652 ?        Ss   Aug20   1:20 /usr/lib/systemd/systemd-logind
dbus        914  0.0  0.0  62616  4148 ?        Ss   Aug20   9:25 /usr/bin/dbus-daemon --system --address=systemd: --nofork --nopidfile --systemd-activation
root        989  0.0  0.0  22036  1236 ?        Ss   Aug20   0:41 /usr/lib/systemd/systemd-machined
admin     59273  146 14.5 5034908 4203872 ?     Ssl  Aug20 16392:37 /data/demo/oceanbase-ce/bin/observer -r 127.0.0.1:2882:2881 -p 2881 -P 2882 -z zone1 -n demo -c 1755677666 -d /data/demo/oceanbase-ce/store -I 127.0.0.1 -o __min_full_resource_pool_memory=1073741824,enable_syslog_wf=False,max_syslog_file_count=16,memory_limit=6G,system_memory=1G,cpu_count=8,datafile_size=2G,datafile_maxsize=8G,datafile_next=2G,log_disk_size=14G,enable_record_trace_log=False,enable_syslog_recycle=1
tidb      84329  1.1  0.2 1315668 83288 ?       Ssl  10:53   0:04 bin/tem --config conf/tem.toml --html bin/html
tidb      84332  0.0  0.0 113284   628 ?        S    10:53   0:00 /bin/bash /tem-deploy/tem-server-8080/scripts/run_tem-server.sh
tidb      84333  0.0  0.0 108056   676 ?        S    10:53   0:00 tee -i -a /tem-deploy/tem-server-8080/log/tem-sys.log
root      96115  0.0  0.0 112816   976 pts/0    R+   11:00   0:00 grep --color=auto tem
tidb     105727  0.0  0.0 716468 11232 ?        Ssl  10:02   0:00 bin/node_exporter/node_exporter --web.listen-address=:9100 --collector.tcpstat --collector.systemd --collector.mountstats --collector.meminfo_numa --collector.interrupts --collector.buddyinfo --collector.vmstat.fields=^.* --log.level=info
[root@worker3 tem-package-v3.1.0-linux-amd64]# ps aux | grep -E 'tidb|tikv|pd|tem'
root          1  0.2  0.0 191672  4696 ?        Ss   Aug20  25:41 /usr/lib/systemd/systemd --switched-root --system --deserialize 22
root         60  0.0  0.0      0     0 ?        S    Aug20   0:04 [kswapd0]
root        634  0.1  0.0  65084 24528 ?        Ss   Aug20  15:30 /usr/lib/systemd/systemd-journald
root        673  0.0  0.0  46184  2600 ?        Ss   Aug20   0:00 /usr/lib/systemd/systemd-udevd
root        862  0.0  0.0  84556  1108 ?        S<sl Aug20   1:23 /sbin/audispd
root        893  0.0  0.0  27200  2652 ?        Ss   Aug20   1:20 /usr/lib/systemd/systemd-logind
dbus        914  0.0  0.0  62616  4148 ?        Ss   Aug20   9:25 /usr/bin/dbus-daemon --system --address=systemd: --nofork --nopidfile --systemd-activation
root        989  0.0  0.0  22036  1236 ?        Ss   Aug20   0:41 /usr/lib/systemd/systemd-machined
root       4123  0.0  0.0 586296  9820 ?        Ssl  Aug20   0:34 /usr/libexec/fwupd/fwupd
admin     59273  146 14.5 5034652 4203492 ?     Ssl  Aug20 16392:55 /data/demo/oceanbase-ce/bin/observer -r 127.0.0.1:2882:2881 -p 2881 -P 2882 -z zone1 -n demo -c 1755677666 -d /data/demo/oceanbase-ce/store -I 127.0.0.1 -o __min_full_resource_pool_memory=1073741824,enable_syslog_wf=False,max_syslog_file_count=16,memory_limit=6G,system_memory=1G,cpu_count=8,datafile_size=2G,datafile_maxsize=8G,datafile_next=2G,log_disk_size=14G,enable_record_trace_log=False,enable_syslog_recycle=1
tidb      84329  1.0  0.2 1315668 83288 ?       Ssl  10:53   0:04 bin/tem --config conf/tem.toml --html bin/html
tidb      84332  0.0  0.0 113284   628 ?        S    10:53   0:00 /bin/bash /tem-deploy/tem-server-8080/scripts/run_tem-server.sh
tidb      84333  0.0  0.0 108056   676 ?        S    10:53   0:00 tee -i -a /tem-deploy/tem-server-8080/log/tem-sys.log
root      96485  0.0  0.0 113284  1208 ?        Ss   11:01   0:00 /bin/sh -c /sbin/ntpdate -u 172.20.2.89 2>&1 1>>/tmp/ntpdate.log
root      96488  0.0  0.0  19420  1352 ?        S<   11:01   0:00 /sbin/ntpdate -u 172.20.2.89
root      96573  0.0  0.0 112816   984 pts/0    R+   11:01   0:00 grep --color=auto -E tidb|tikv|pd|tem
tidb     104969 15.6  0.4 11154496 115692 ?     Ssl  10:02   9:07 bin/pd-server --name=pd-127.0.0.1-2379 --client-urls=http://0.0.0.0:2379 --advertise-client-urls=http://127.0.0.1:2379 --peer-urls=http://0.0.0.0:2380 --advertise-peer-urls=http://127.0.0.1:2380 --data-dir=/tidb-data/pd-2379 --initial-cluster=pd-127.0.0.1-2379=http://127.0.0.1:2380 --config=conf/pd.toml --log-file=/tidb-deploy/pd-2379/log/pd.log
tidb     105038  4.1  6.1 3083164 1772968 ?     Ssl  10:02   2:27 bin/tikv-server --addr 0.0.0.0:20160 --advertise-addr 127.0.0.1:20160 --status-addr 0.0.0.0:20180 --advertise-status-addr 127.0.0.1:20180 --pd 127.0.0.1:2379 --data-dir /tidb-data/tikv-20160 --config conf/tikv.toml --log-file /tidb-deploy/tikv-20160/log/tikv.log
tidb     105357  3.6  0.8 1709408 255412 ?      Ssl  10:02   2:06 bin/tidb-server -P 4000 --status=10080 --host=0.0.0.0 --advertise-address=127.0.0.1 --store=tikv --initialize-insecure --path=127.0.0.1:2379 --log-slow-query=/tidb-deploy/tidb-4000/log/tidb_slow_query.log --config=conf/tidb.toml --log-file=/tidb-deploy/tidb-4000/log/tidb.log
tidb     105727  0.0  0.0 716468 11232 ?        Ssl  10:02   0:00 bin/node_exporter/node_exporter --web.listen-address=:9100 --collector.tcpstat --collector.systemd --collector.mountstats --collector.meminfo_numa --collector.interrupts --collector.buddyinfo --collector.vmstat.fields=^.* --log.level=info
tidb     105728  0.0  0.0 113284   624 ?        S    10:02   0:00 /bin/bash /tidb-deploy/monitor-9100/scripts/run_node_exporter.sh
tidb     105729  0.0  0.0 108056   668 ?        S    10:02   0:00 tee -i -a /tidb-deploy/monitor-9100/log/node_exporter.log
tidb     105790  0.0  0.0 717628 13144 ?        Ssl  10:02   0:00 bin/blackbox_exporter/blackbox_exporter --web.listen-address=:9115 --log.level=info --config.file=conf/blackbox.yml
tidb     105791  0.0  0.0 113284   596 ?        S    10:02   0:00 /bin/bash /tidb-deploy/monitor-9100/scripts/run_blackbox_exporter.sh
tidb     105792  0.0  0.0 108056   672 ?        S    10:02   0:00 tee -i -a /tidb-deploy/monitor-9100/log/blackbox_exporter.log
[root@worker3 tem-package-v3.1.0-linux-amd64]#
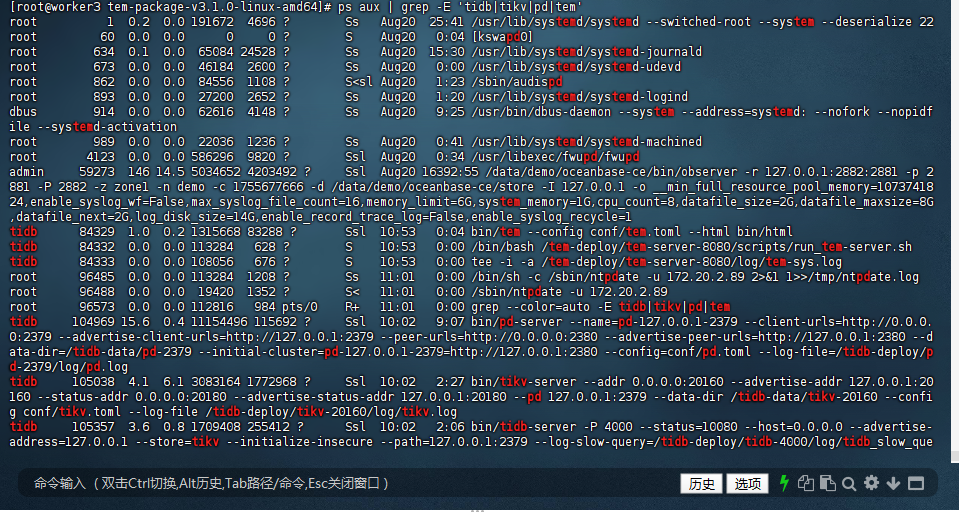
5.2 验证端口监听:
查看8080端口是否被TEM占用(显示“LISTEN”即成功)
[root@worker3 tem-package-v3.1.0-linux-amd64]# netstat -tuln | grep 8080
tcp6       0      0 :::8080                 :::*                    LISTEN
[root@worker3 tem-package-v3.1.0-linux-amd64]#

四、用 TEM 部署平凯 TiDB 数据库敏捷模式:
1. 配置凭证
配置凭证用于访问中控机或主机,配置步骤如下:
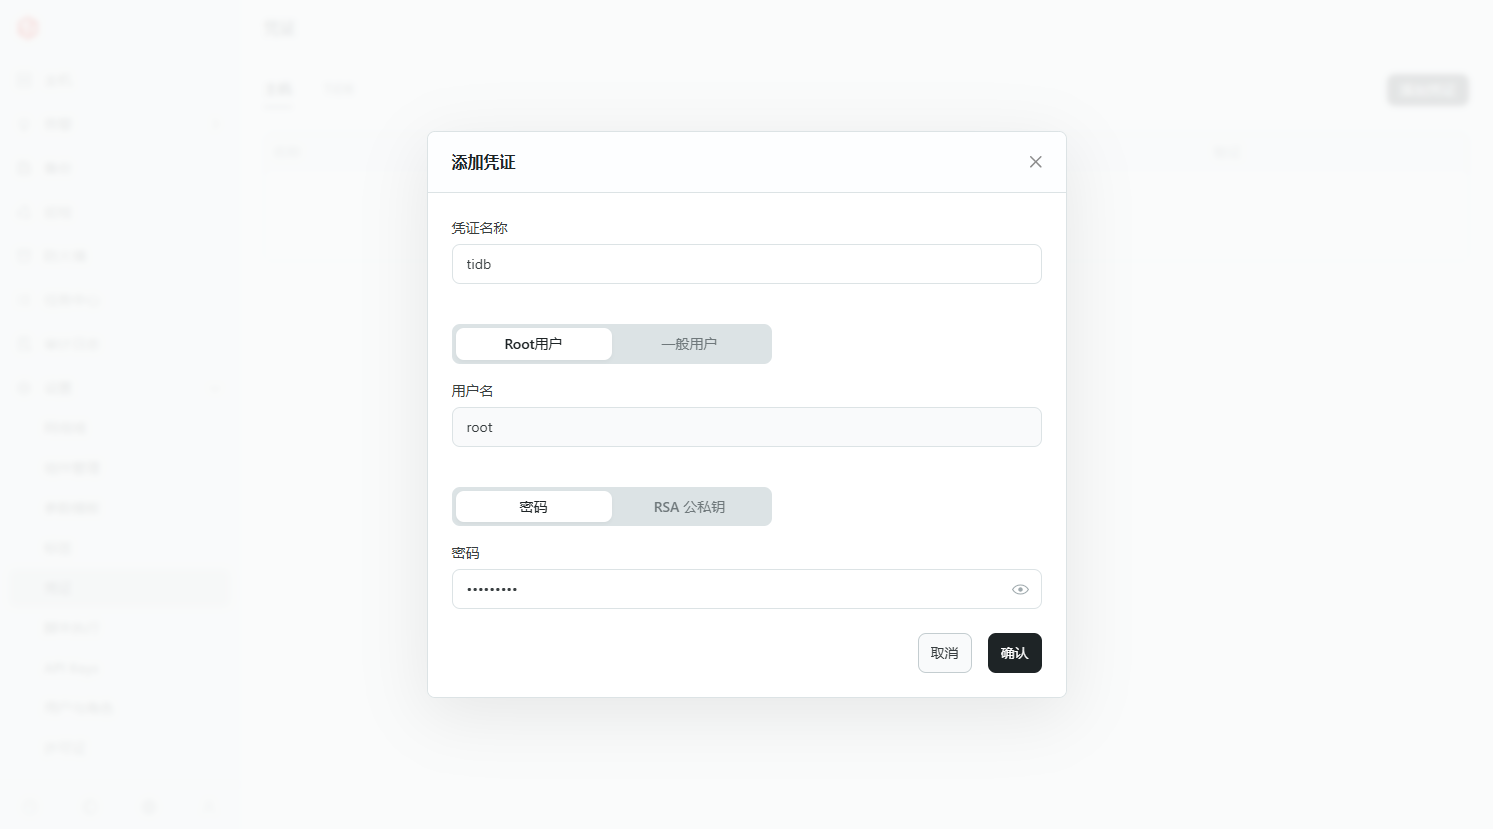
1.1 点击“设置 -> 凭证 -> 主机 -> 添加凭证”

1.2 添加凭证
填写被控主机/中控机的 ssh 登录凭证,点击“确认”添加
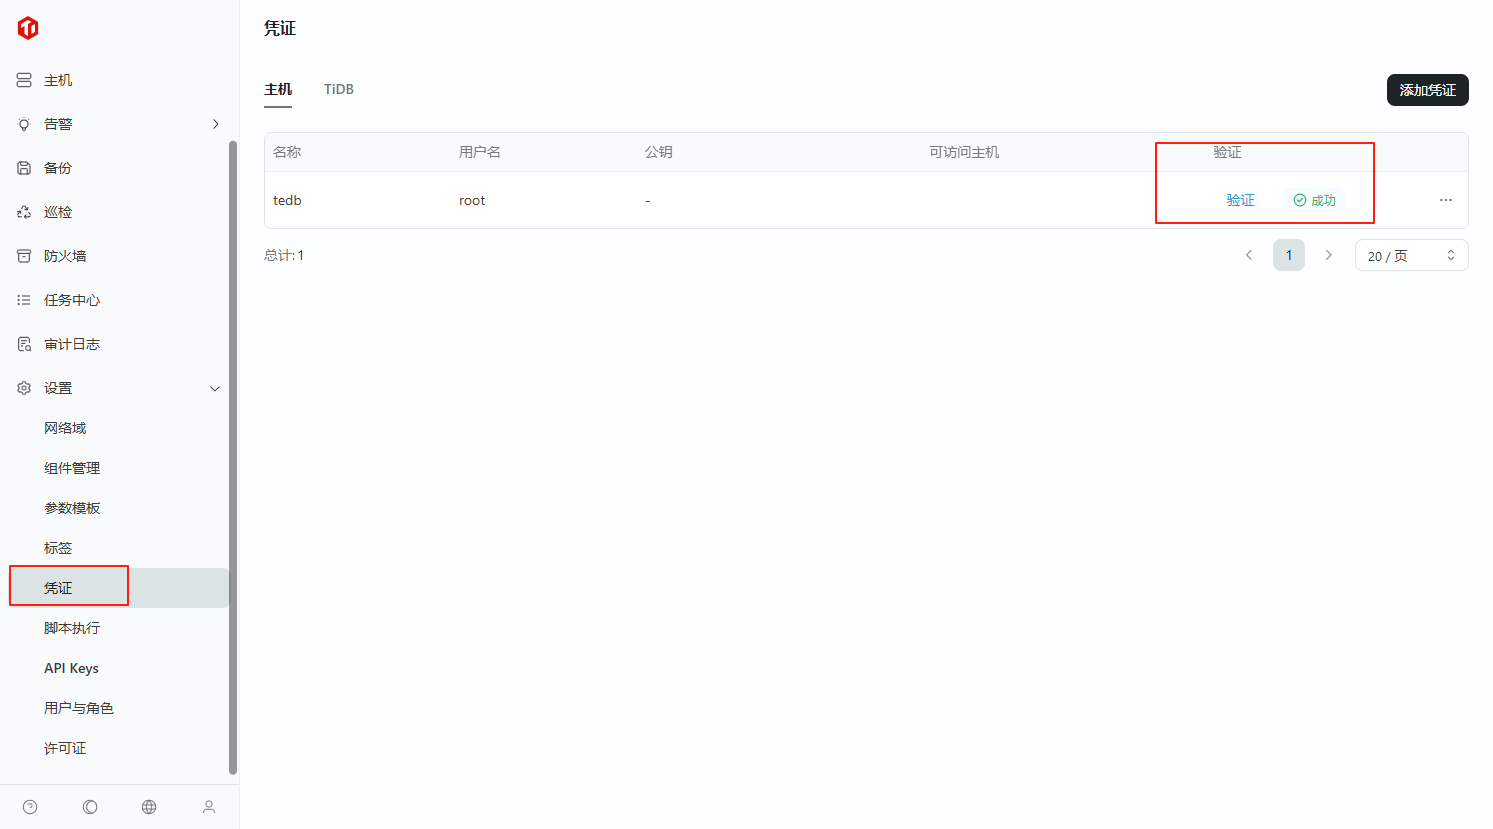
1.3 检查凭证是否添加成功,添加成功
2. 下载敏捷模式安装包,进行组件管理
2.1 下载平凯数据库敏捷模式安装包(有效期180 天),用于导入到 TEM 中
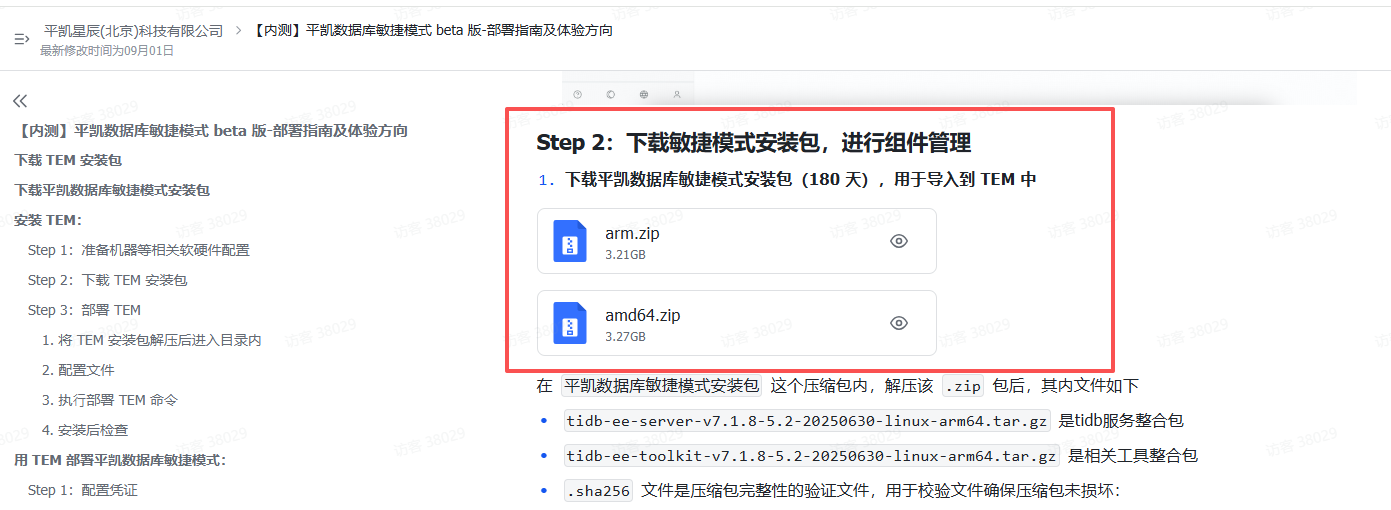

在 平凯数据库敏捷模式安装包 这个压缩包内,解压该 .zip 包后,其内文件如下
- tidb-ee-server-v7.1.8-5.2-20250630-linux-arm64.tar.gz 是tidb服务整合包
- tidb-ee-toolkit-v7.1.8-5.2-20250630-linux-arm64.tar.gz 是相关工具整合包
- .sha256 文件是压缩包完整性的验证文件,用于校验文件确保压缩包未损坏:
2.2 检查 tidb-ee-server 压缩包
[root@worker3 software]# ls
amd64  amd64.zip  __MACOSX  tem-amd64.tar  tem-package-v3.1.0-linux-amd64
[root@worker3 software]# cd amd64/
[root@worker3 amd64]# ls
tidb-ee-server-v7.1.8-5.2-20250630-linux-amd64.tar.gz         tidb-ee-toolkit-v7.1.8-5.2-20250630-linux-amd64.tar.gz
tidb-ee-server-v7.1.8-5.2-20250630-linux-amd64.tar.gz.sha256  tidb-ee-toolkit-v7.1.8-5.2-20250630-linux-amd64.tar.gz.sha256
[root@worker3 amd64]# sha256sum -c tidb-ee-server-v7.1.8-5.2-20250630-linux-amd64.tar.gz.sha256
sha256sum: tidb-ee-server-v7.1.8-5.2-20250630-linux-amd64.tar.gz.sha256: no properly formatted SHA256 checksum lines found

2.3 检查 tidb-ee-toolkit 压缩包
[root@worker3 amd64]# sha256sum -c tidb-ee-toolkit-v7.1.8-5.2-20250630-linux-amd64.tar.gz.sha256
sha256sum: tidb-ee-toolkit-v7.1.8-5.2-20250630-linux-amd64.tar.gz.sha256: no properly formatted SHA256 checksum lines found
[root@worker3 amd64]#

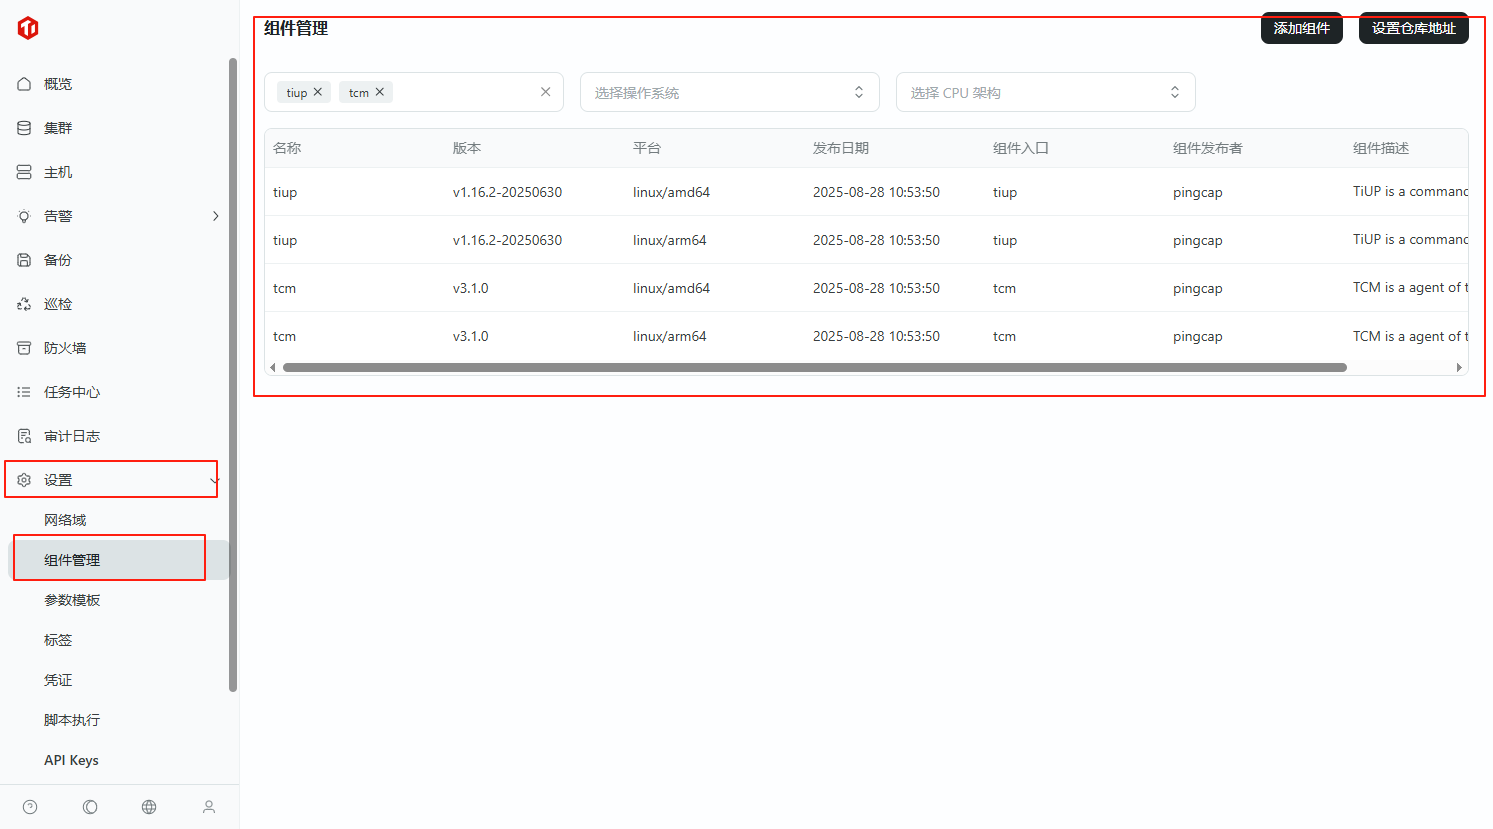
3.添加组件
点击“设置 -> 组件管理 -> 添加组件”,
3.1 进入组件
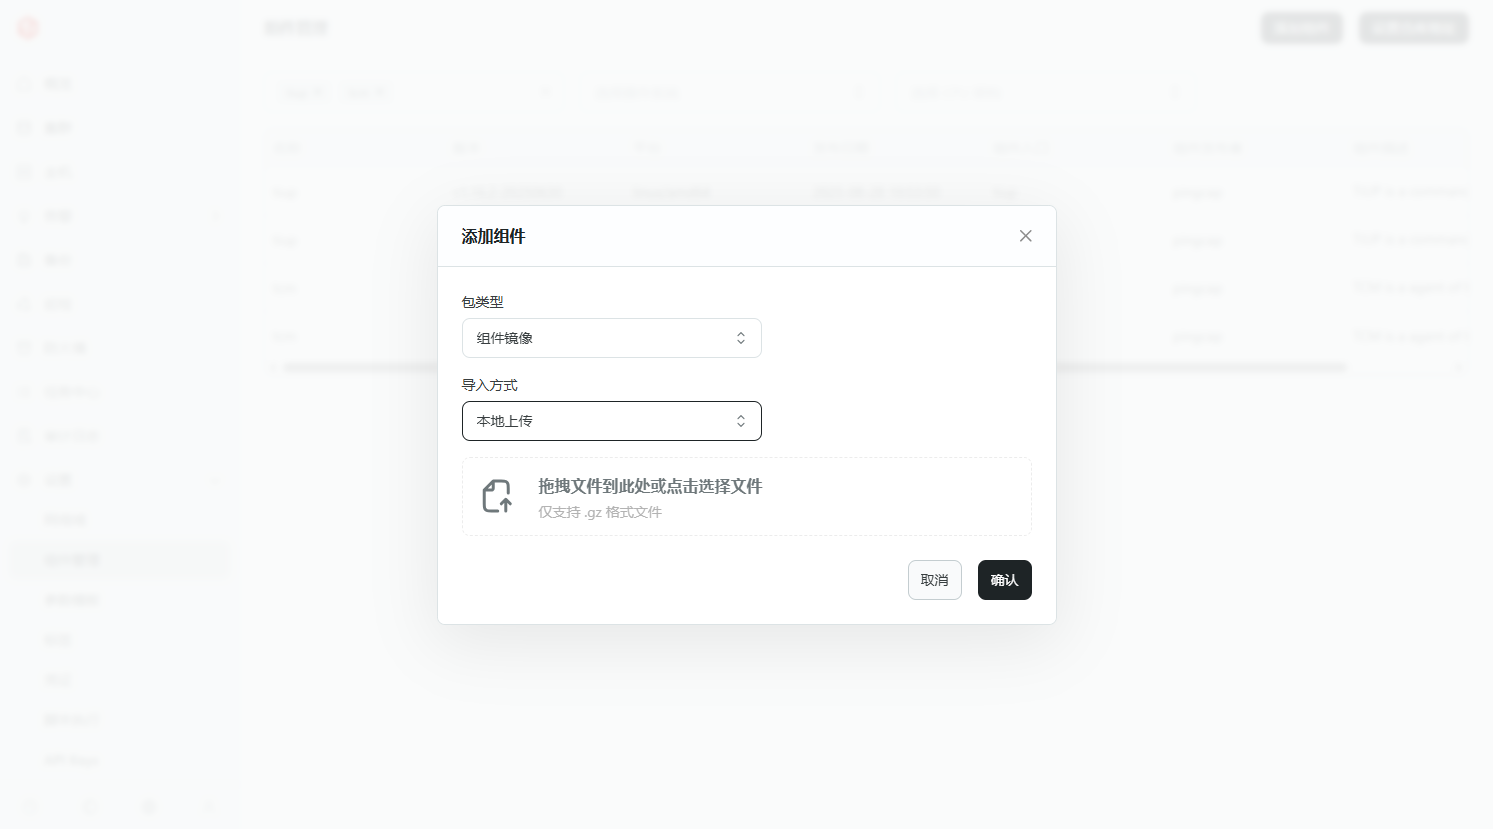
3.2 添加组件
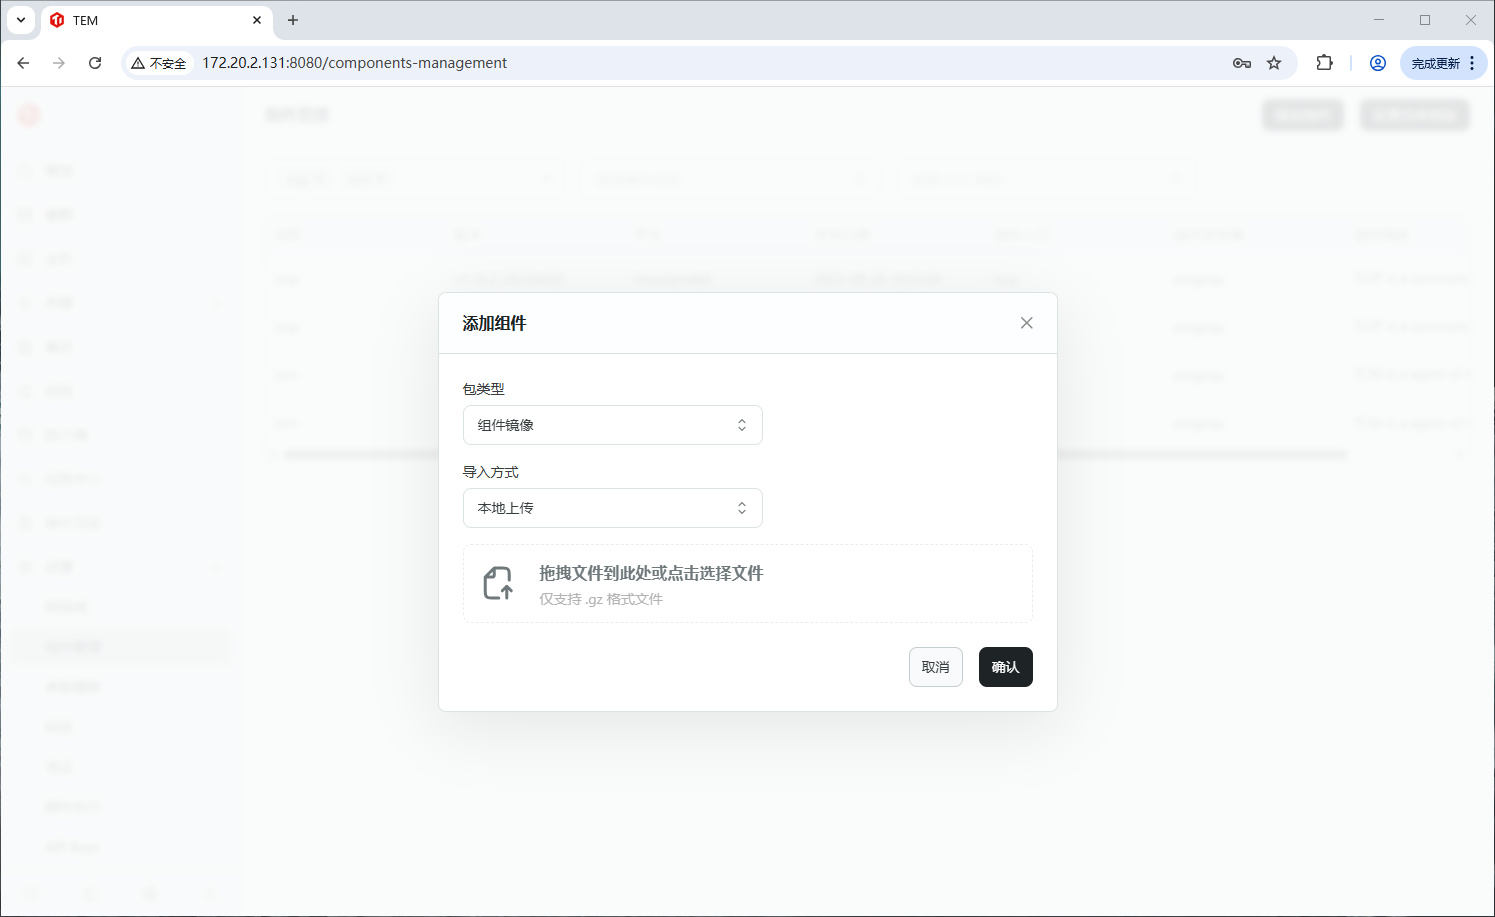
3.3 选择“组件镜像”
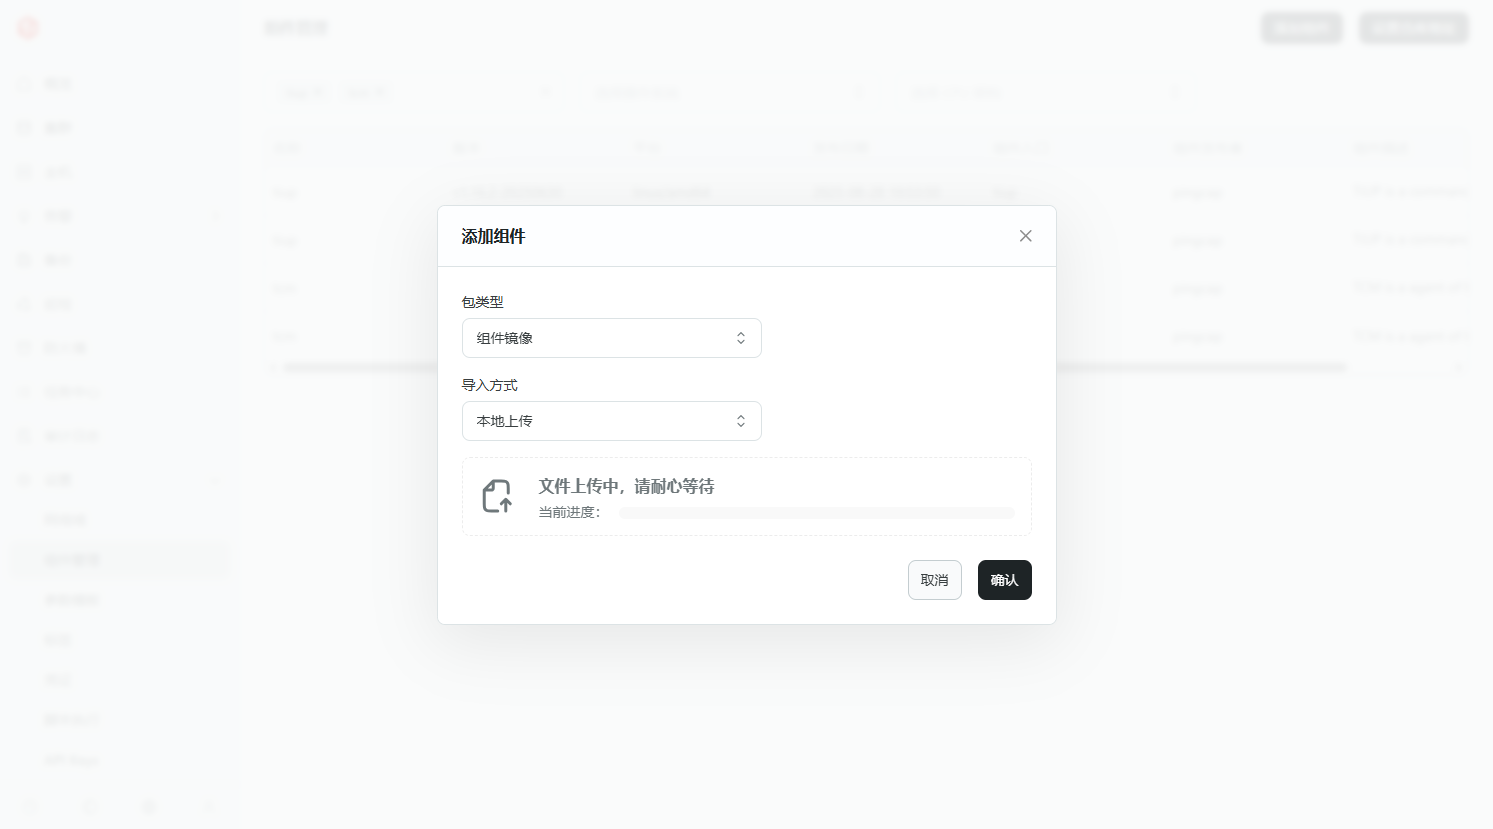
3.4 选择本地上传(上传刚下载的平凯数据库敏捷模式安装包)
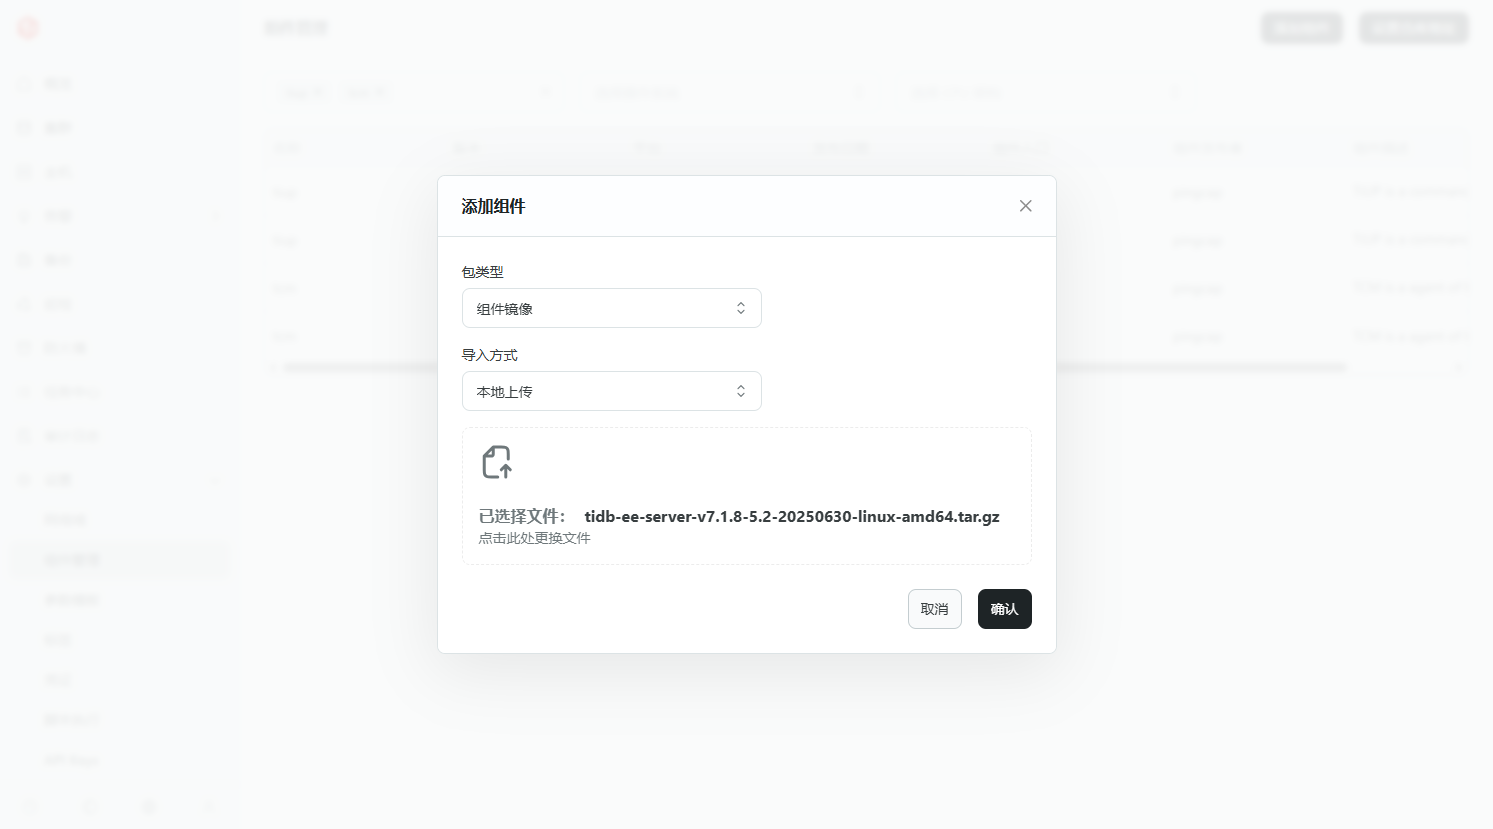
3.5 添加成功

注意添加过程关系到网络,窗口无法关闭或操作,如需要操作,可以复制浏览器地址,重新开启一个浏览器页面,进行操作。
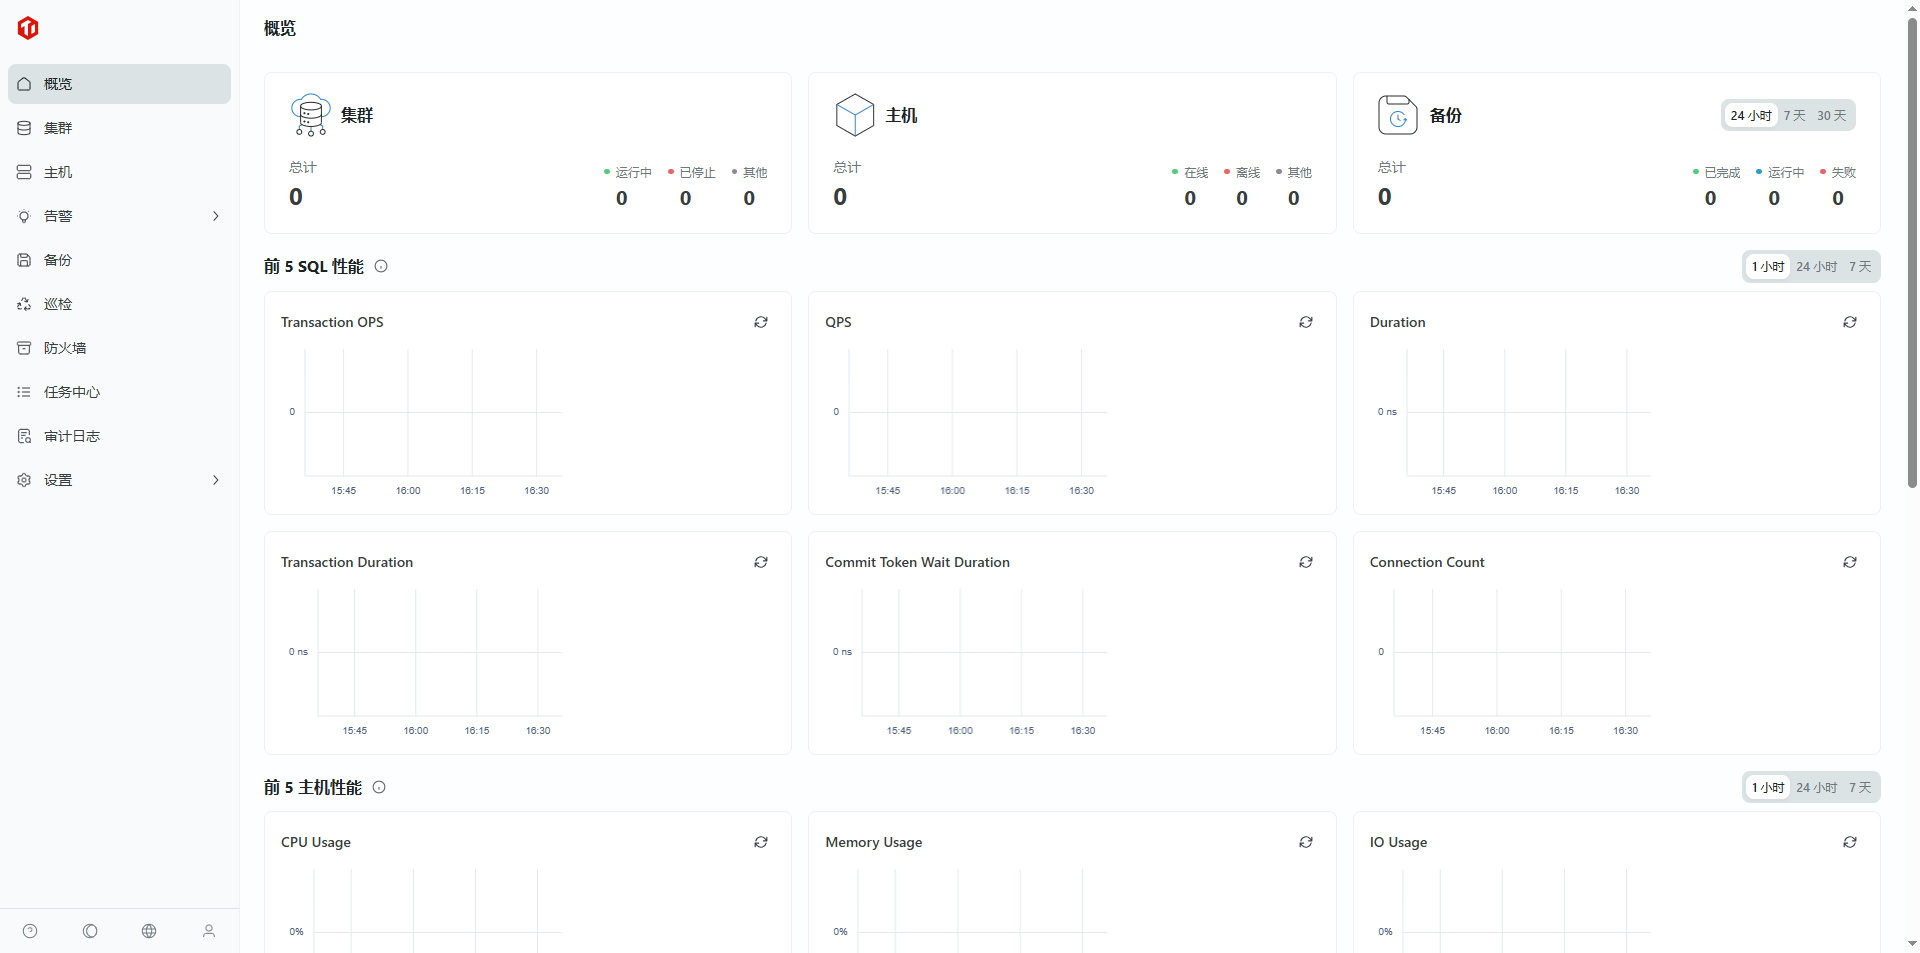
4. 配置中控机
接下来配置集群中控机,配置步骤如下:
4.1 点击“主机 -> 集群管理中控机 -> 添加中控机”
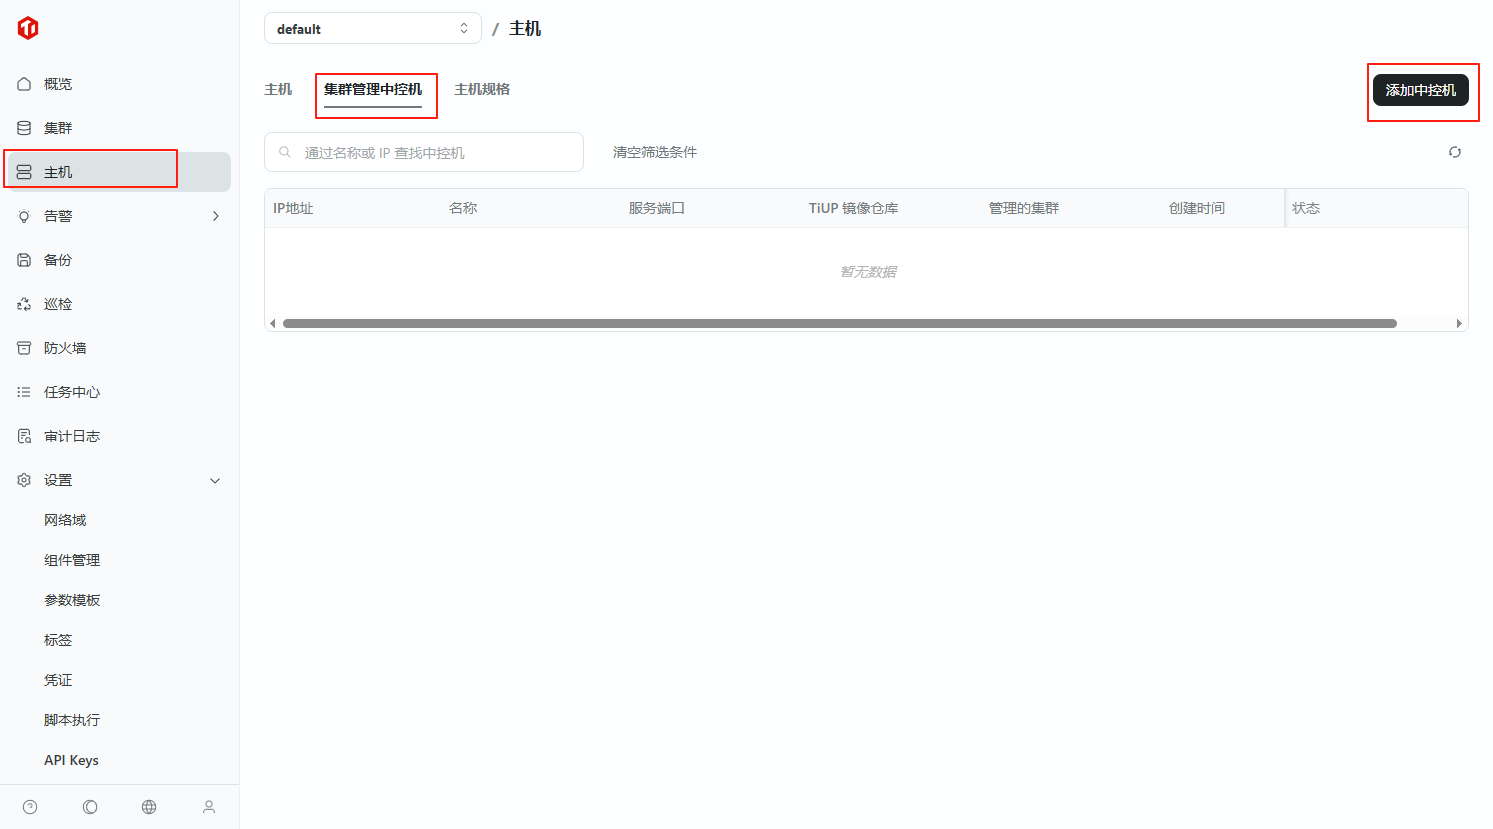
4.2 填写中控机信息

- IP 地址:中控机 IP
- 名称:自定义
- SSH 端口:中控机 SSH 端口,默认 22,若有冲突可修改
- 服务端口:中控机被控后提供服务的端口,默认 9090,若有冲突可修改
- 凭证:上一个步骤中添加的 SSH 登录凭证
- 服务根目录:中控机被控后提供服务进程的安装目录,可设为 /root/tidb-cm-service 或自行指定
- 是否自动安装 TiUP:建议安装
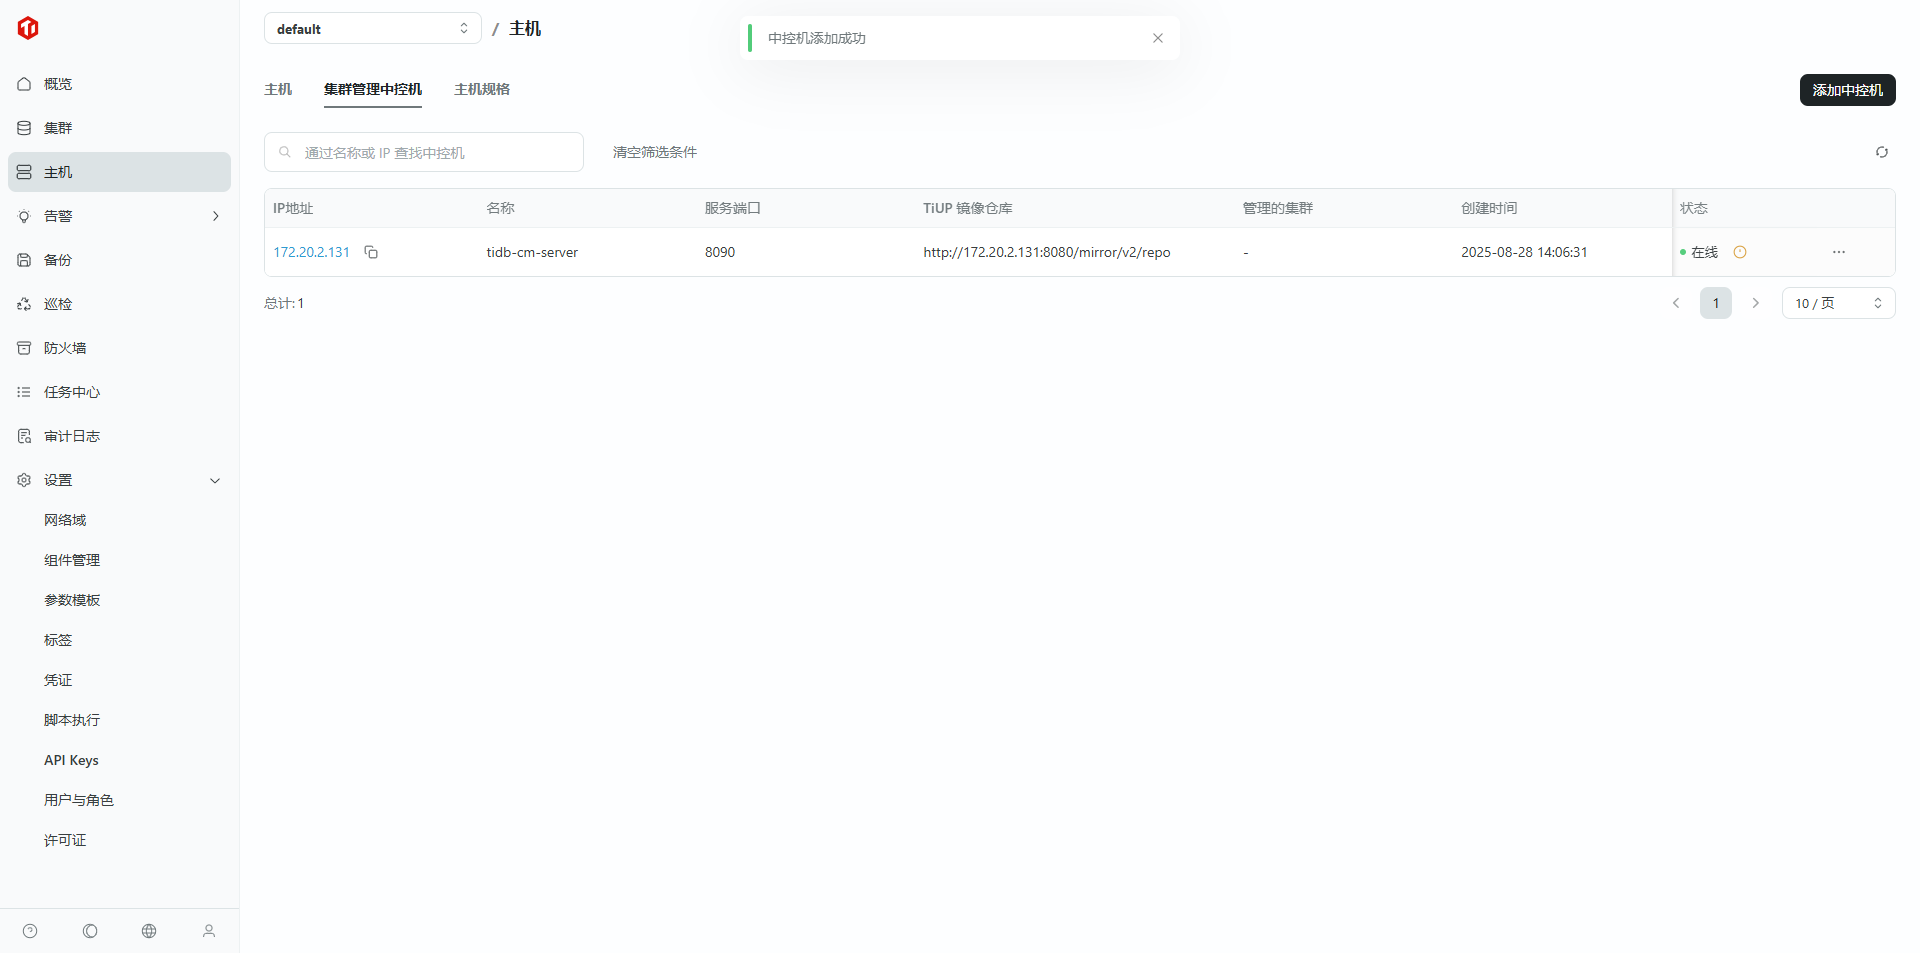
- TiUP 镜像仓库:这里指定 TEM 使用的组件来源,仓库类型选 TEM 镜像仓库,在“设置 -> 组件管理 -> 设置仓库地址”可以拿到仓库地址(注意:一旦在此处设置了自定义的仓库地址,则“创建中控机 -> TiUP 镜像仓库 -> TEM 镜像仓库”选项对应的地址是“自定义的仓库地址”而不是“默认的仓库地址”。因此,如果默认的仓库地址可以使用,则不需要设置自定义的仓库地址,如果设置了,则要确保自定义的地址也是可连通的。)
4.2.1 此处报错,/root/.tiup 目录有文件残留
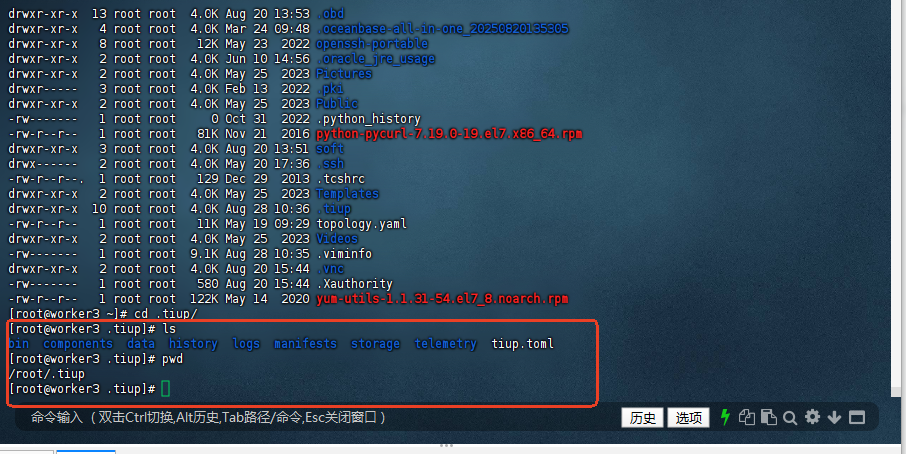
4.2.2 解决办法:更换目录就可以
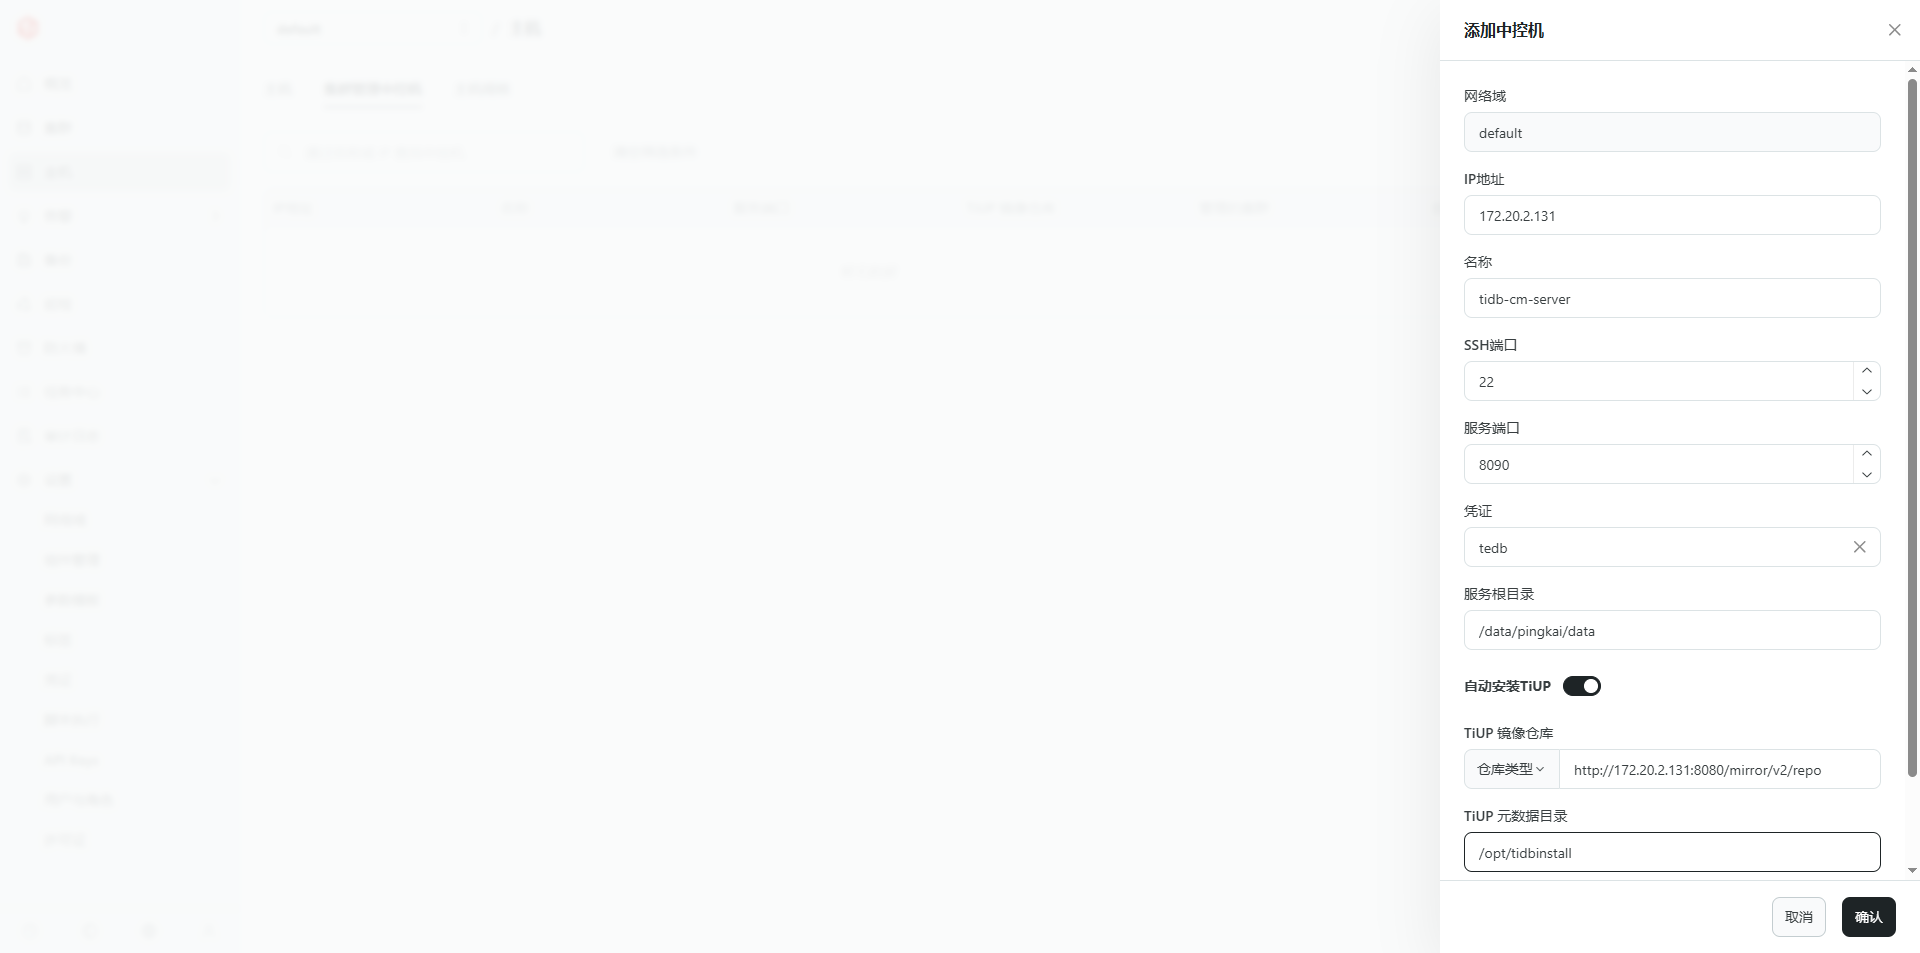
4.2.3 或清空删除目录文件
[root@worker3 ~]# rm -rf .tiup/
[root@worker3 ~]#
4.2.4 再次测试添加成功
- TiUP 元数据目录:指定 TiUP 元数据安装的目录
- 标签:自定义(可选)
5. 设置仓库地址
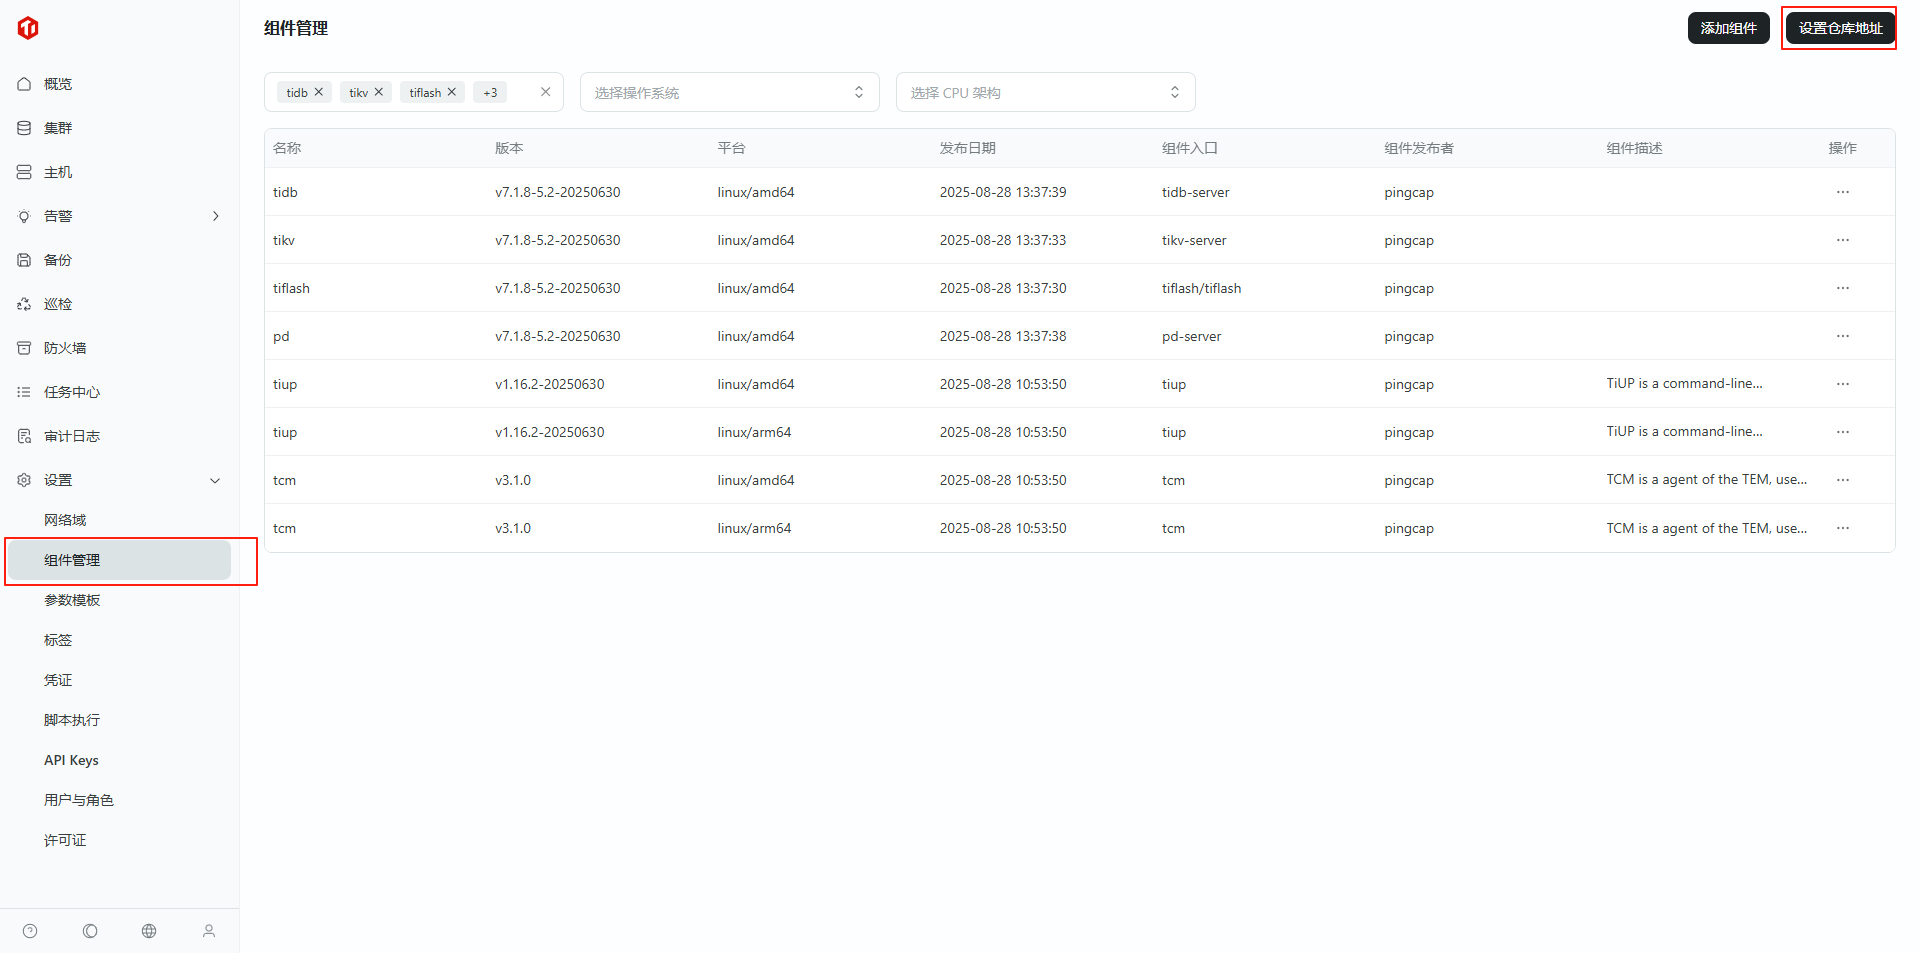
5.1 添加仓库
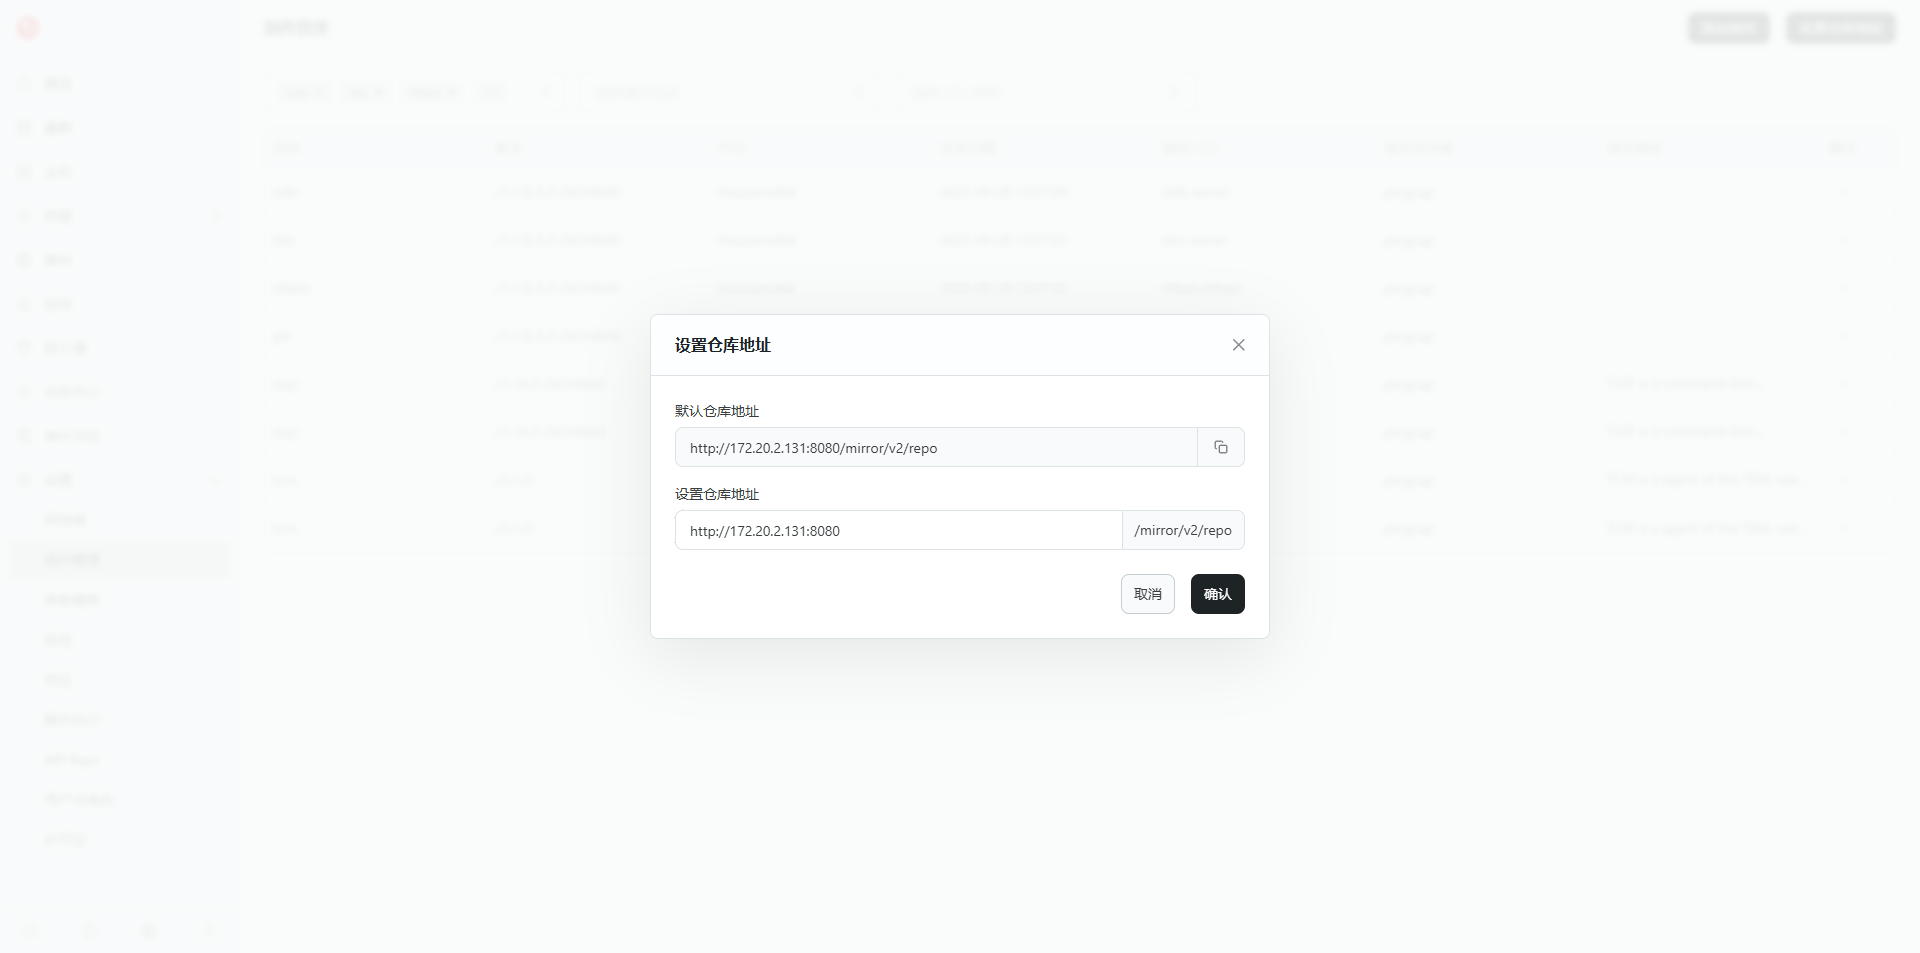
5.2 添加仓库设置仓库成功

6. 配置集群主机
6.1 点击“主机 -> 主机 -> 添加共享主机”
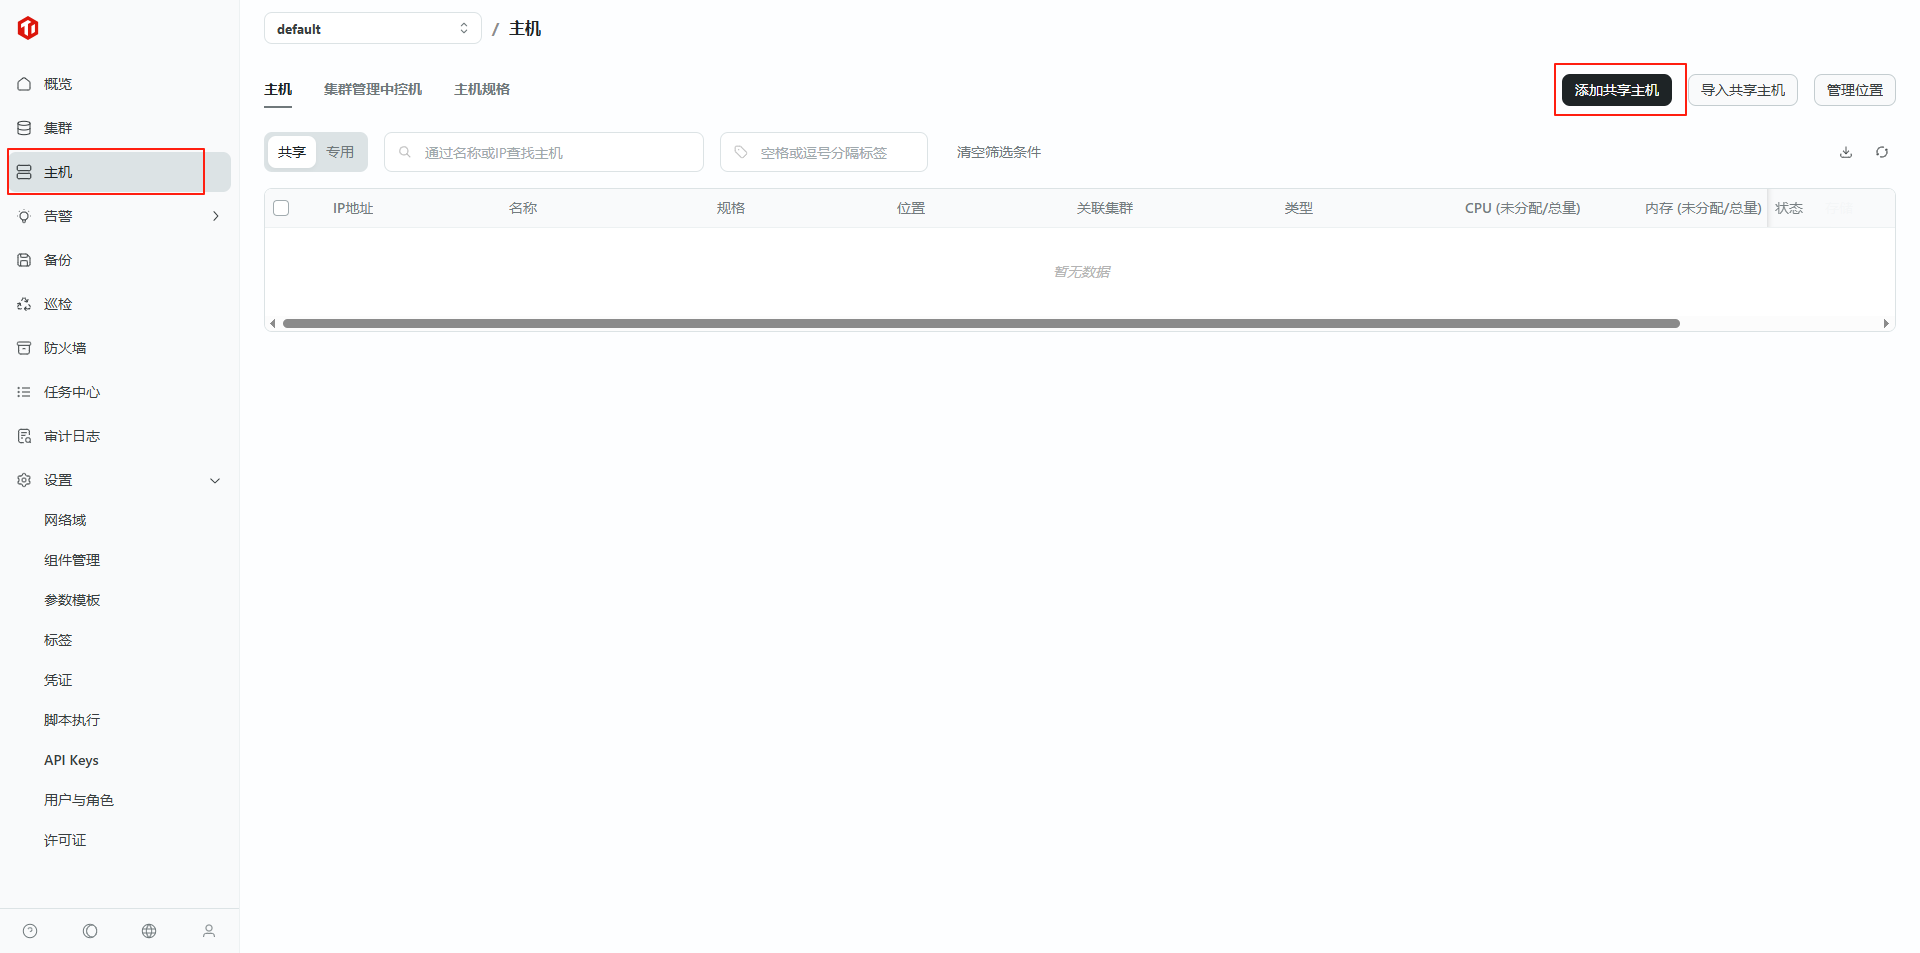
6.2 填写主机信息,点击“预览”,预览无误后点击“确认添加”
- IP 地址:主机 IP
- SSH 端口:中控机 SSH 端口
- 凭证:之前步骤添加的 SSH 登录凭证
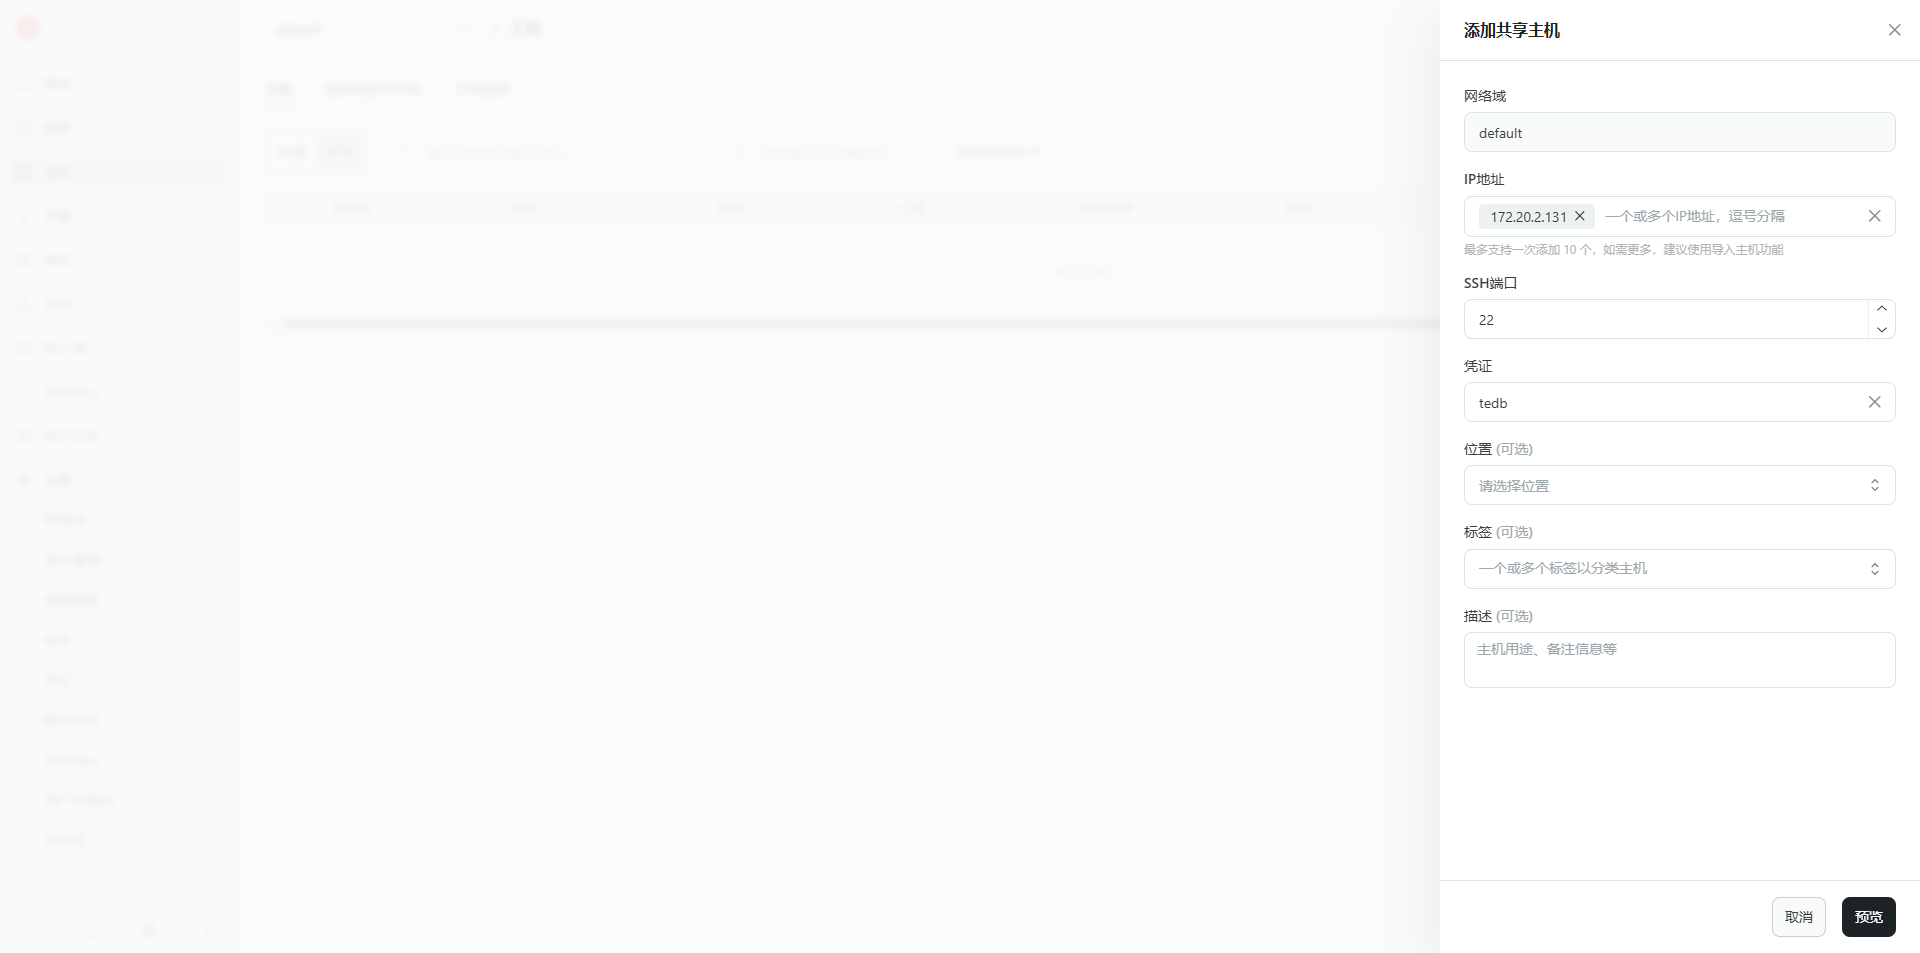
6.2.1 添加主机报错
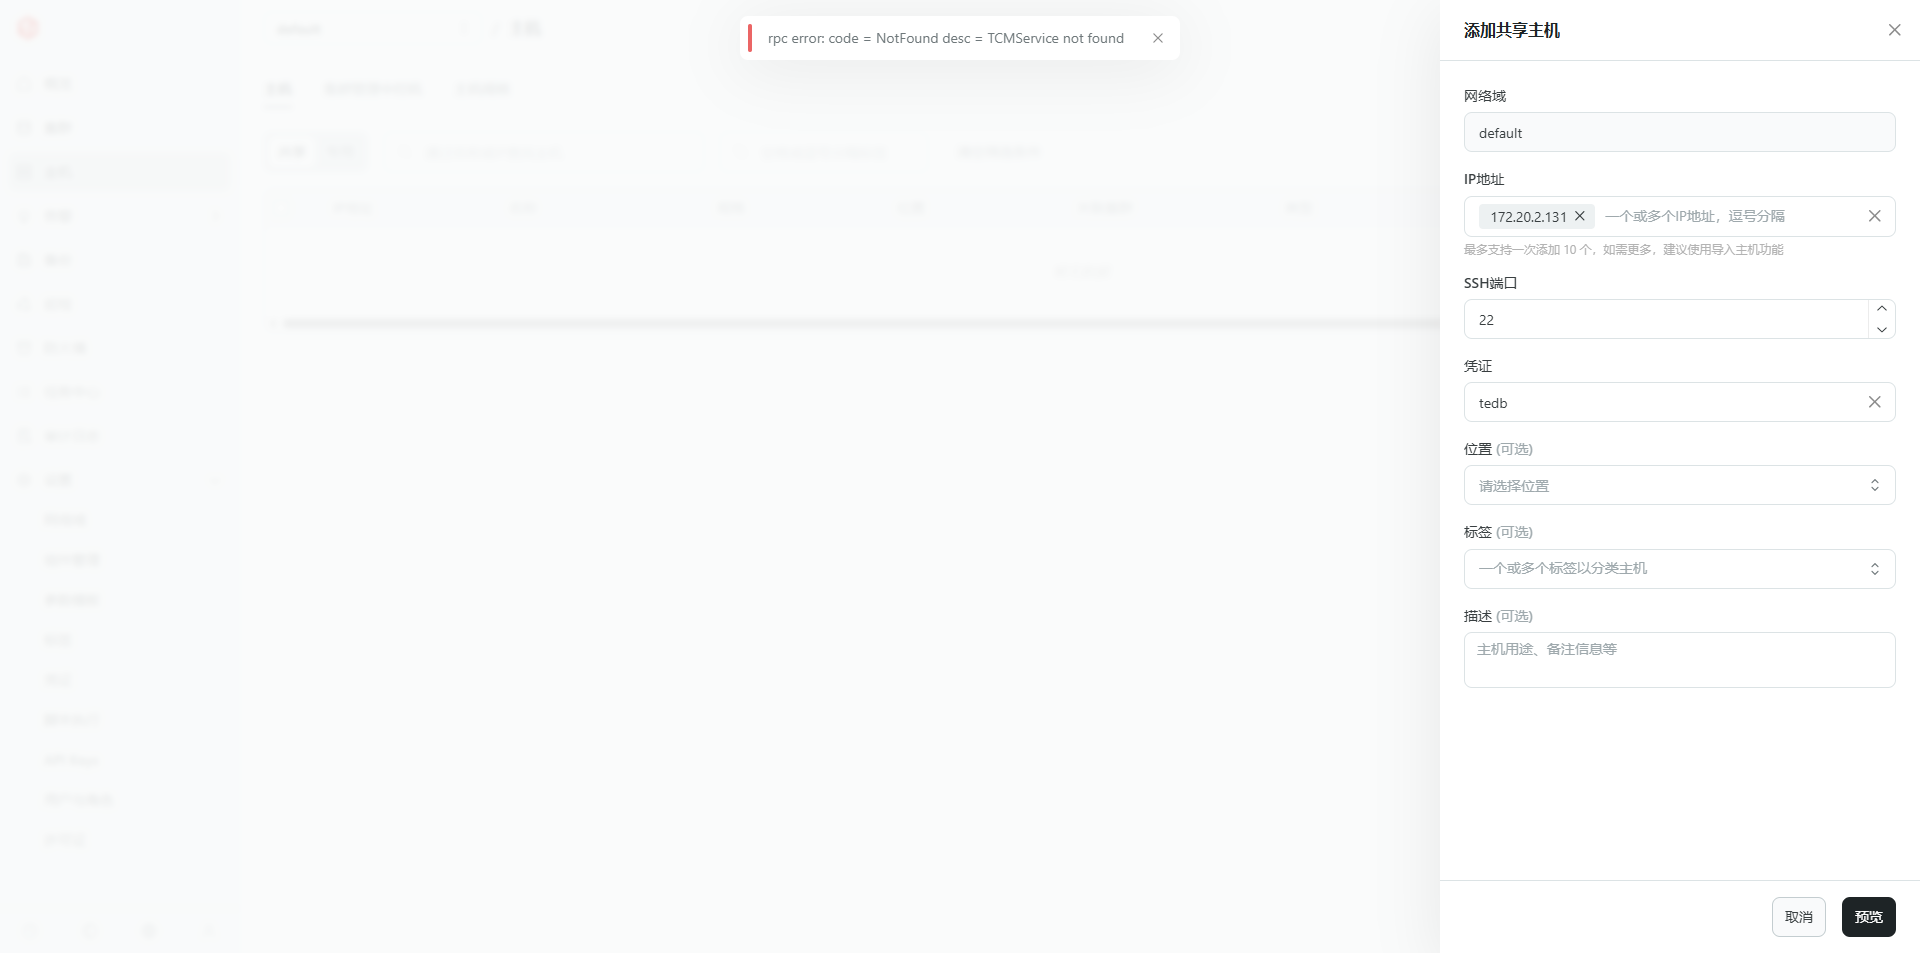
解决办法:凭证之前步骤添加的 SSH 登录凭证(大小写或特殊符号问题,始终连接不了,更新简单密码马上可以连接了)
添加的 SSH 登录凭证,验证好像是有问题的,不管添加的密码对或错,都能验证成功(后期是否能优化)
6.2.2 重新添加新用户,再添加主机
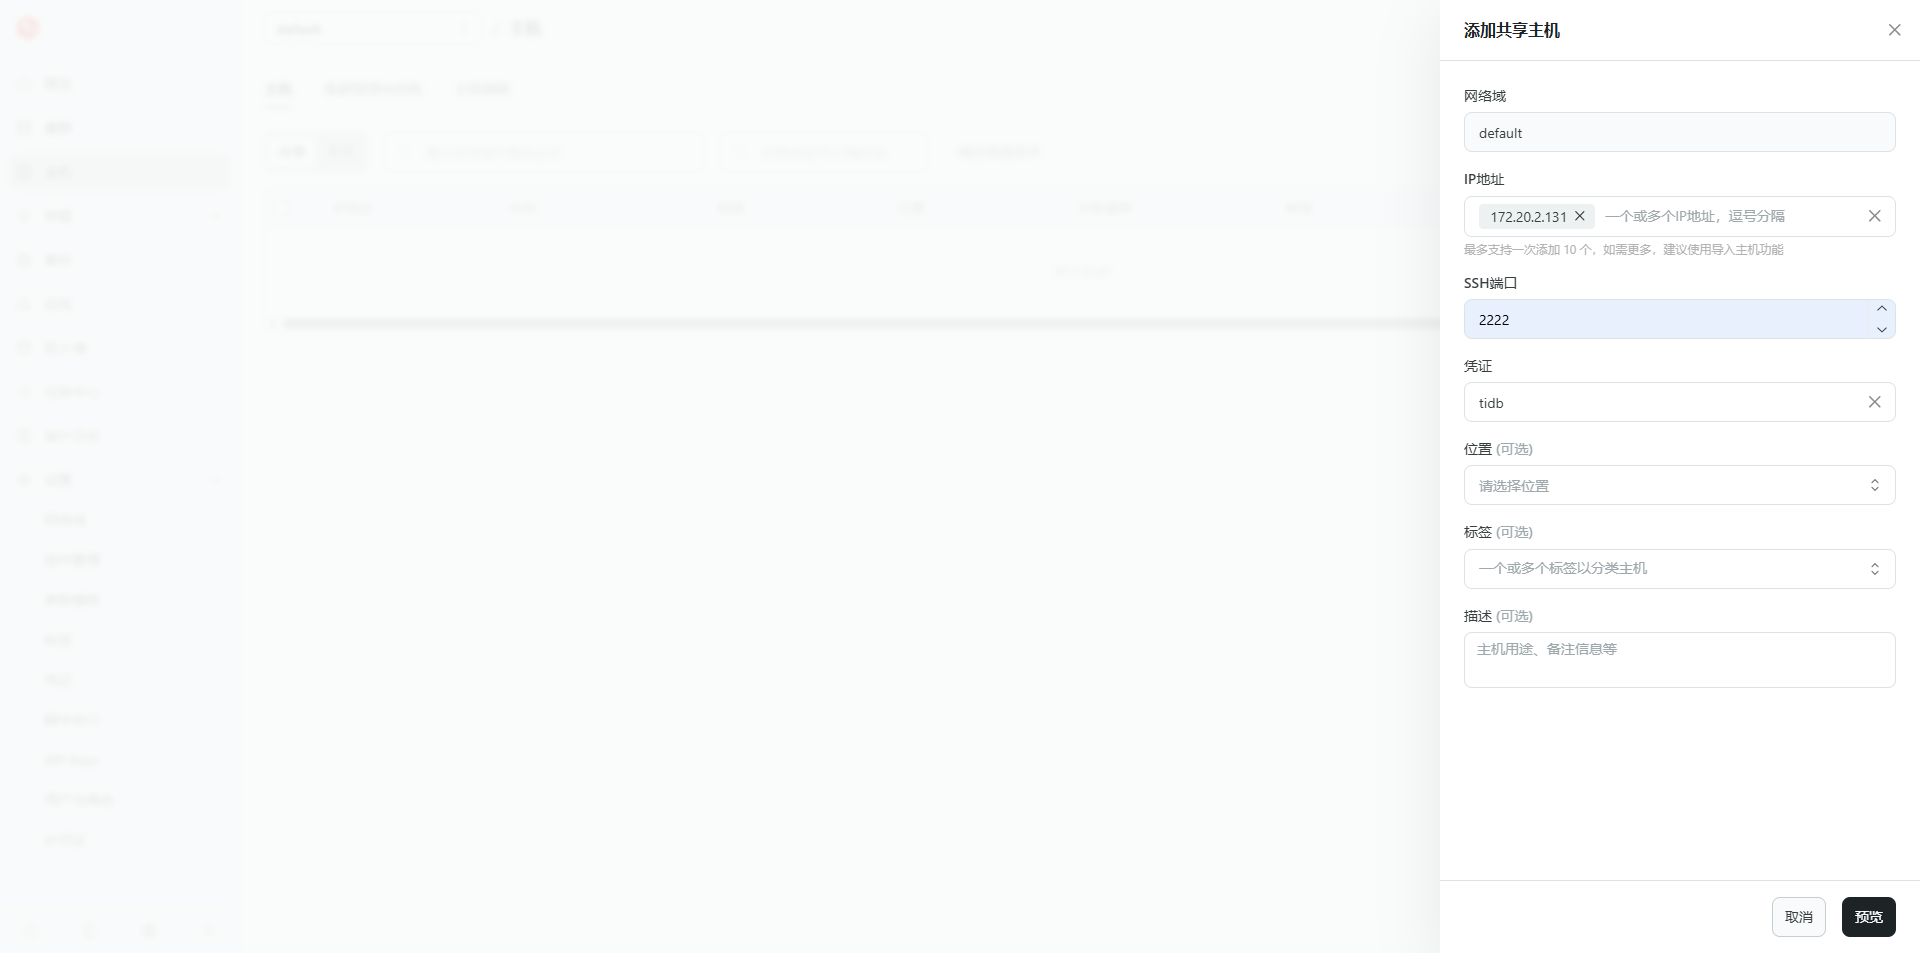
6.2.3 预览将被添加的主机(状态可连接)

6.3 添加主机成功
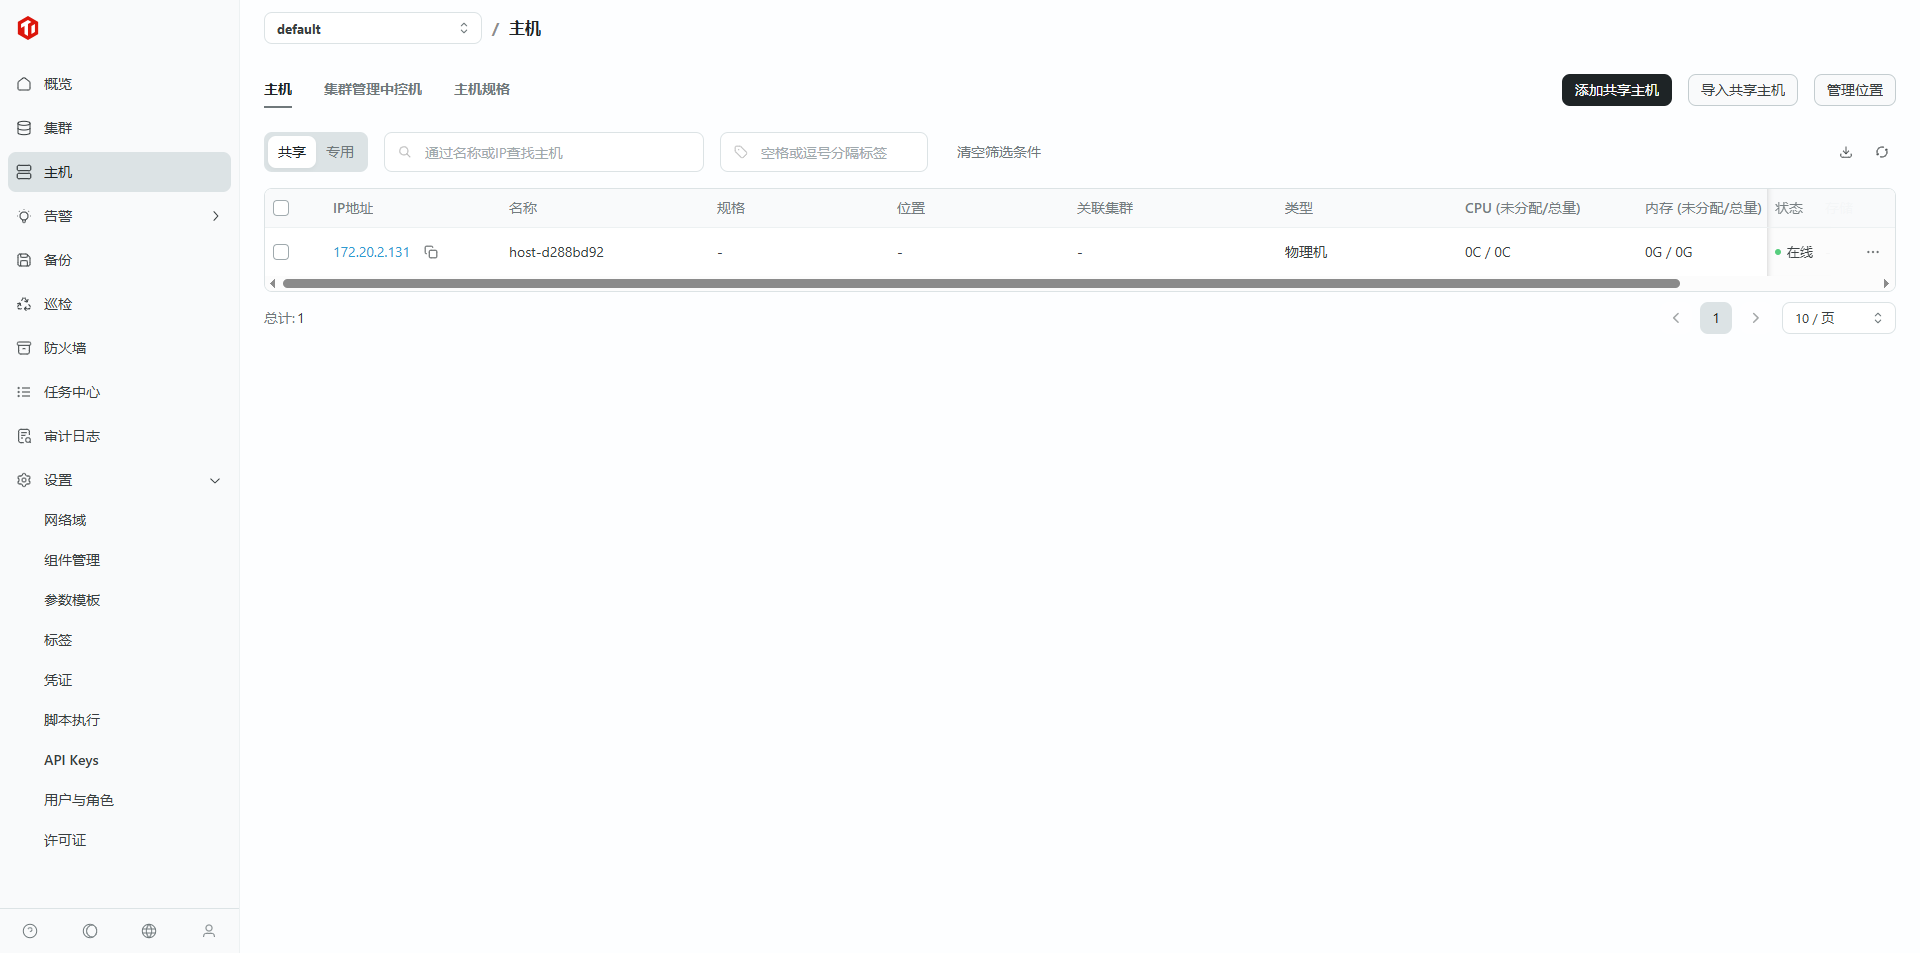
7. 创建集群
7.1 点击“集群 -> 创建集群”

7.2 设定集群基础配置
7.2.1 填写集群基础信息
集群名称:自定义 (tidb_tem)
Root 用户密码:该集群的数据库 Root 用户密码,后续会在集群内的“ SQL 编辑器”和“数据闪回”功能中用到,记得保存
随机生成
CPU 架构:选择部署机器的芯片架构
部署用户:用于启动部署的集群的用户,若该字段指定的用户在目标机器上不存在,则会尝试自动创建

7.2.2 选择集群中控机
可用集群版本:这里下拉框中的可选项取决于该中控机的镜像地址中包含的版本包,若在“组件管理”功能中为其配置了固定的资源包,则需要将“组件管理”的镜像仓库地址更新到中控机的信息中,否则默认新建的中控机的镜像地址指向平凯开源的镜像仓库。(组件管理镜像仓库地址获取方法见“第三步:配置中控机)”。
[图片]
选择集群种类:敏捷模式

7.2.3 选择部署模式
根据需求选择部署模式为“专用”或“共享”,并选择主机规格。
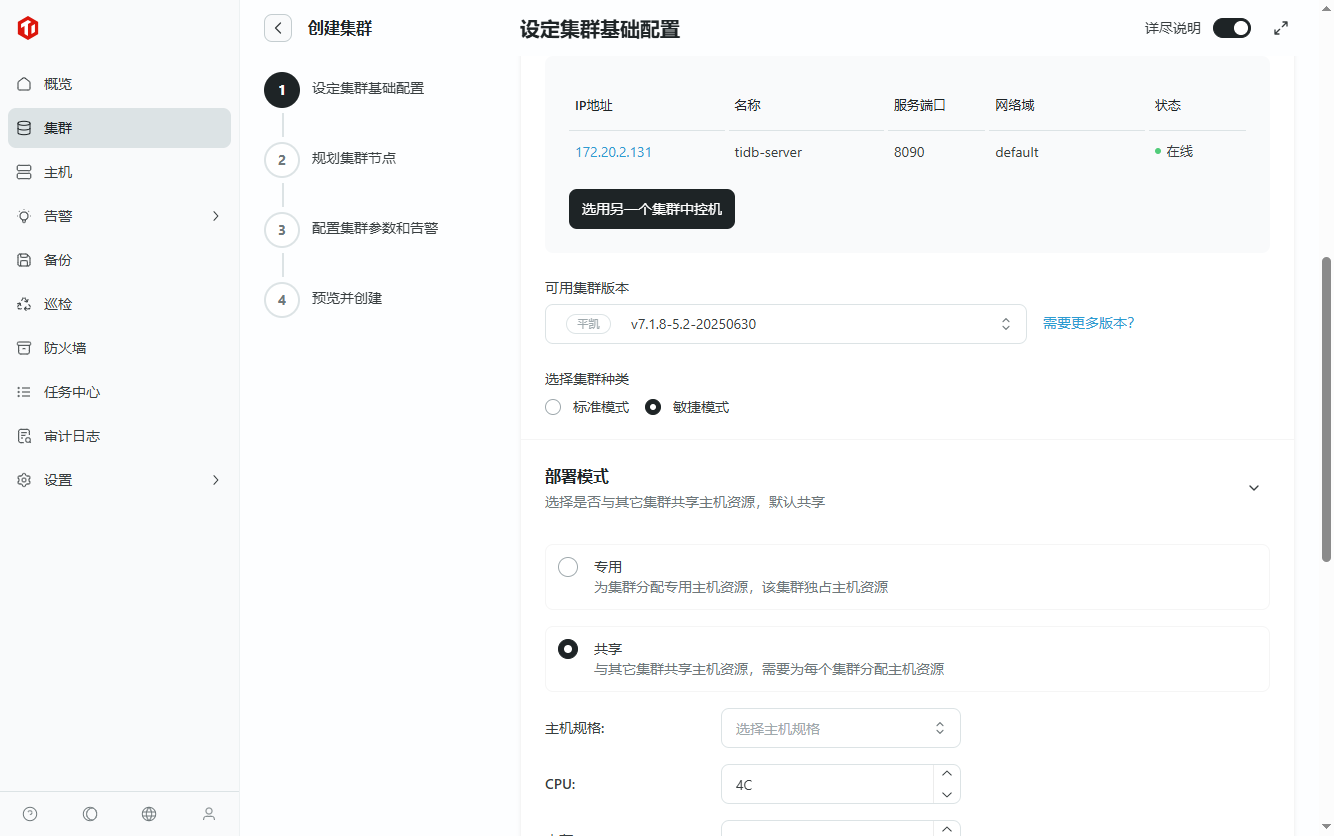
7.2.4 其余选项默认配置即可,点击下一步
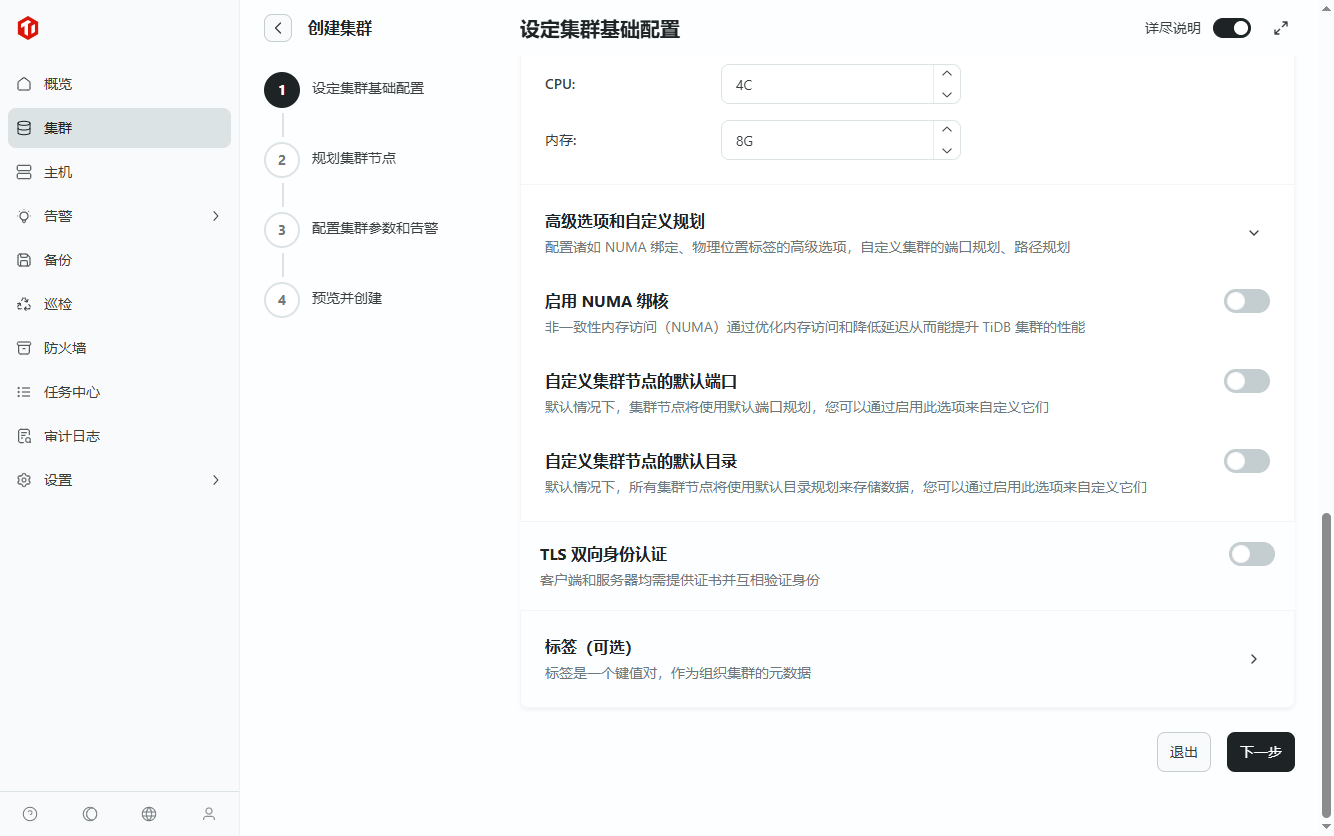
8. 规划集群节点
8.1 点击添加节点,进行具体规划
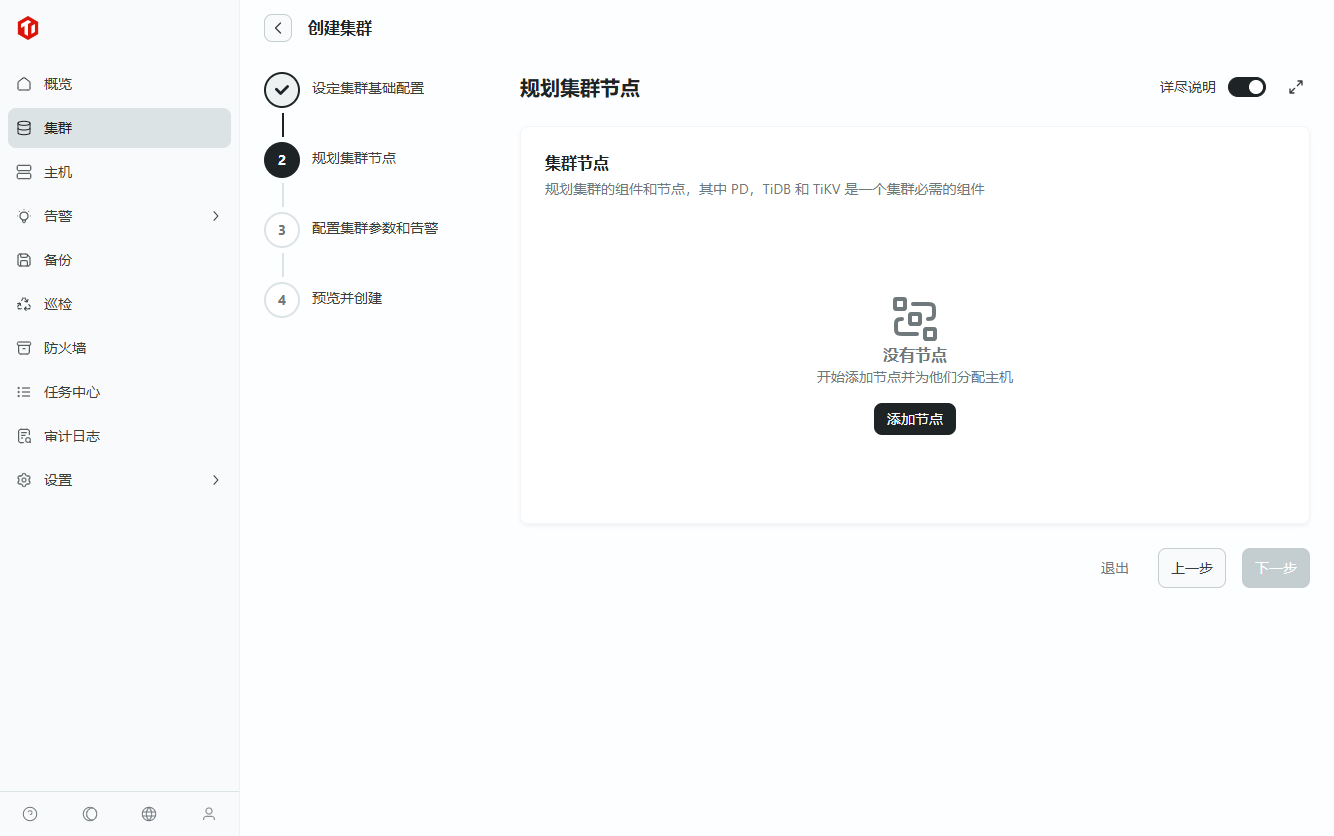
8.1 选择组件和要部署的主机后,点击确定,进行下一个组件的添加
注意:
PingKaiDB Fusion:必须添加(节点配额限制为 10)
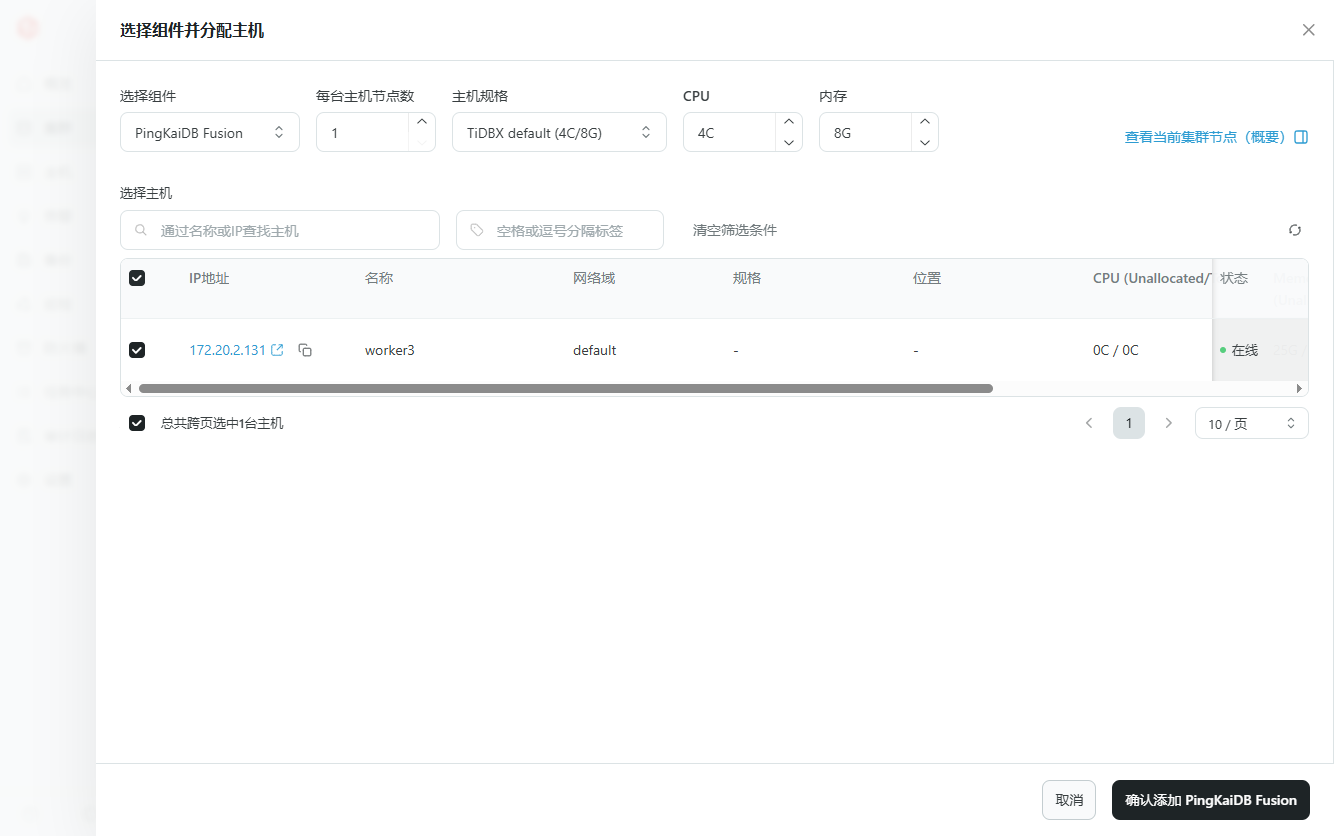
Grafana:必须添加(才能使用监控功能)

Prometheus 以及 Alertmanager:必须添加(才能使用告警功能)
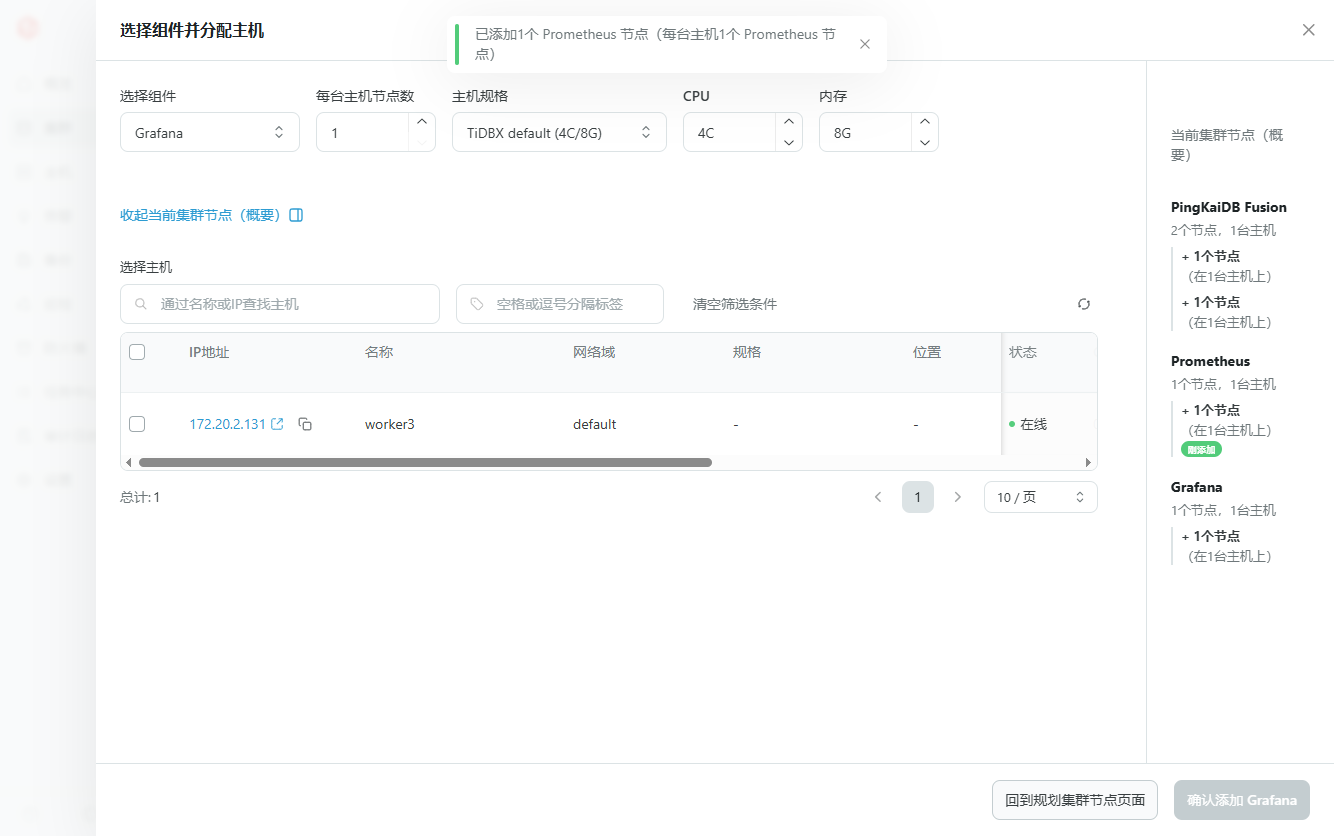
TiFlash:可选(如果需要测试平凯数据库敏捷模式的 HTAP 功能,需要添加)
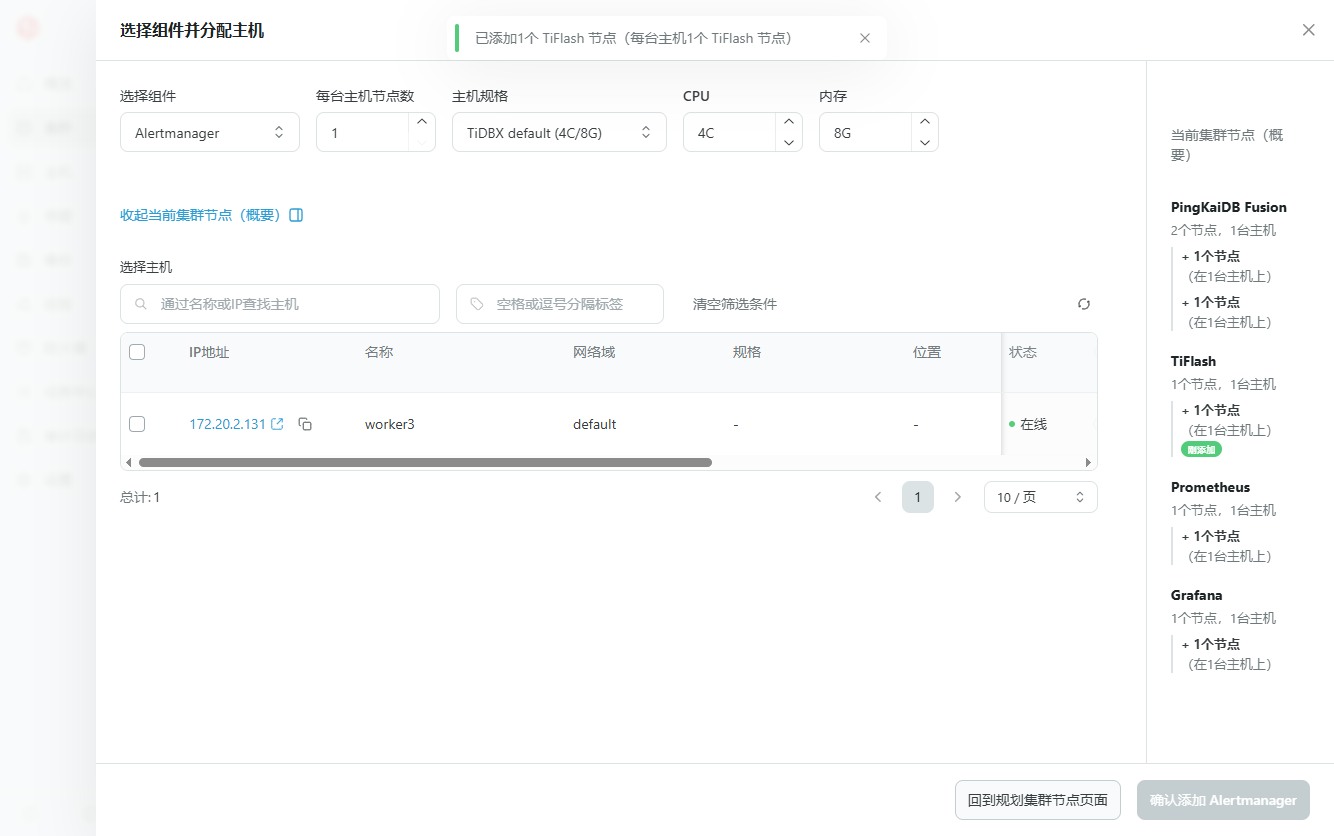
Pump 和 Drainer 组件:不建议添加

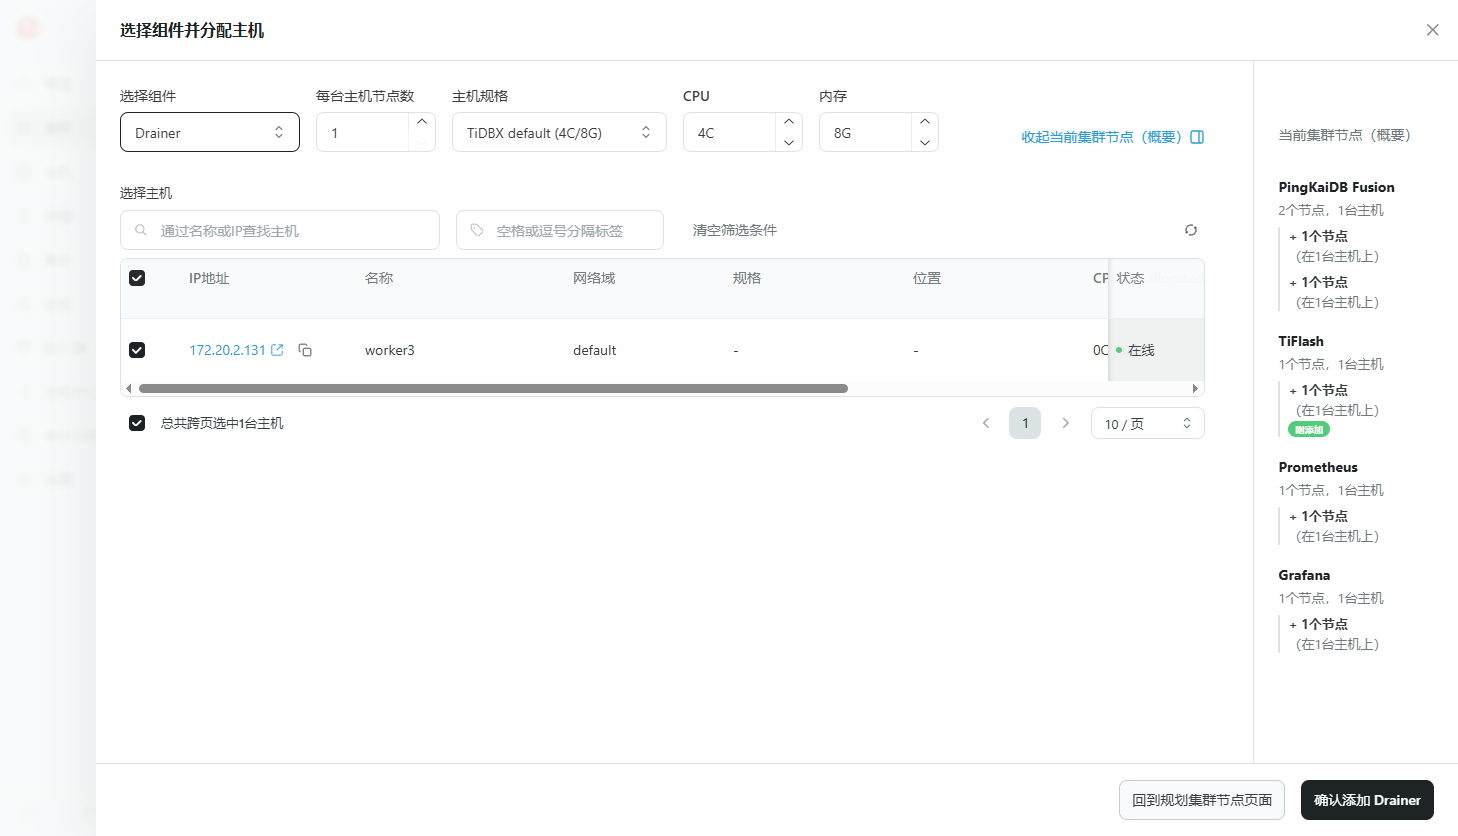
8.3 当添加完需要的组件后,点击“回到规划集群节点页面”按钮
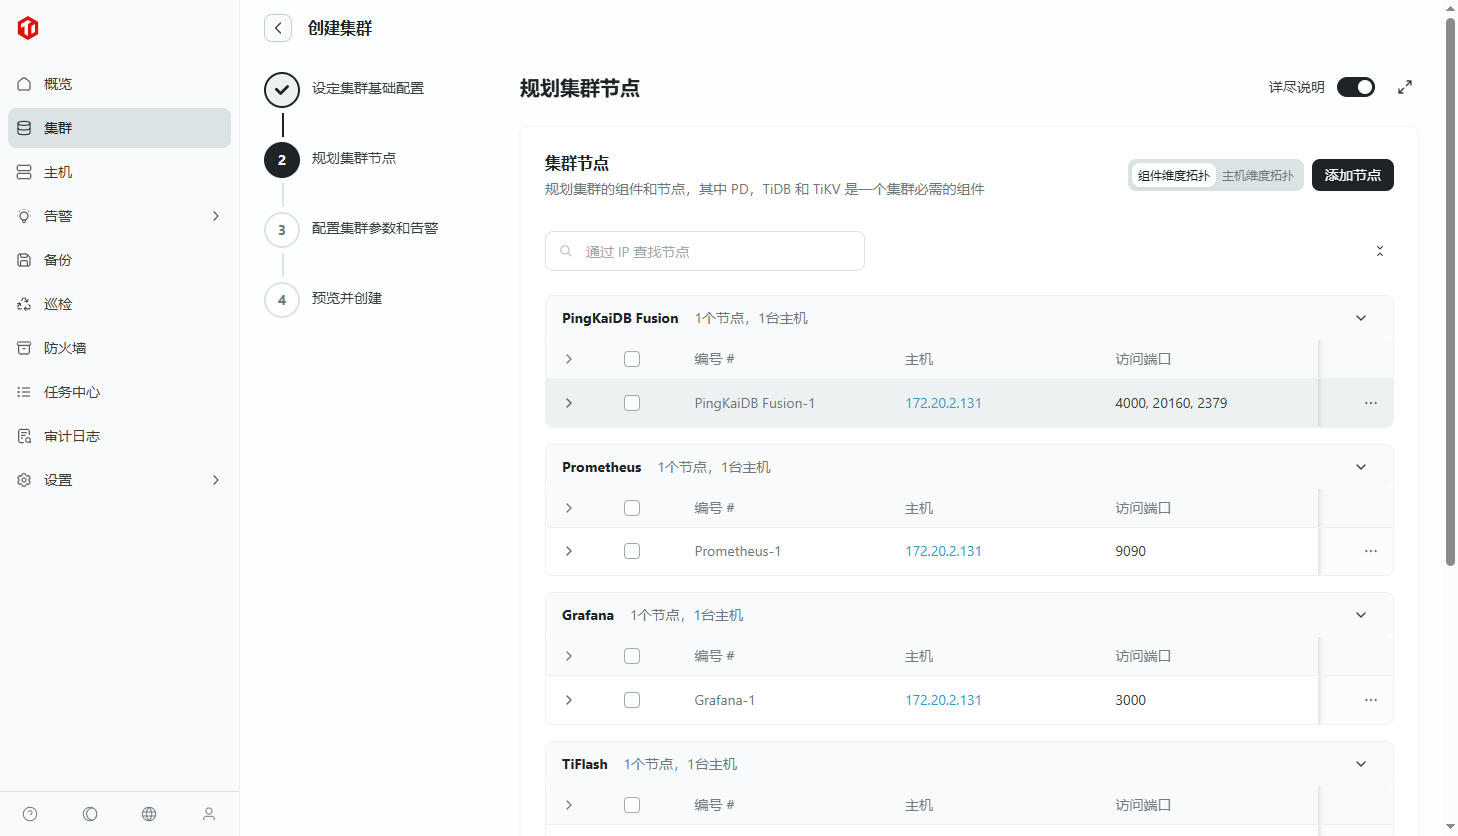
8.4 点击“下一步”按钮,进行集群节点的配置修改和预检查
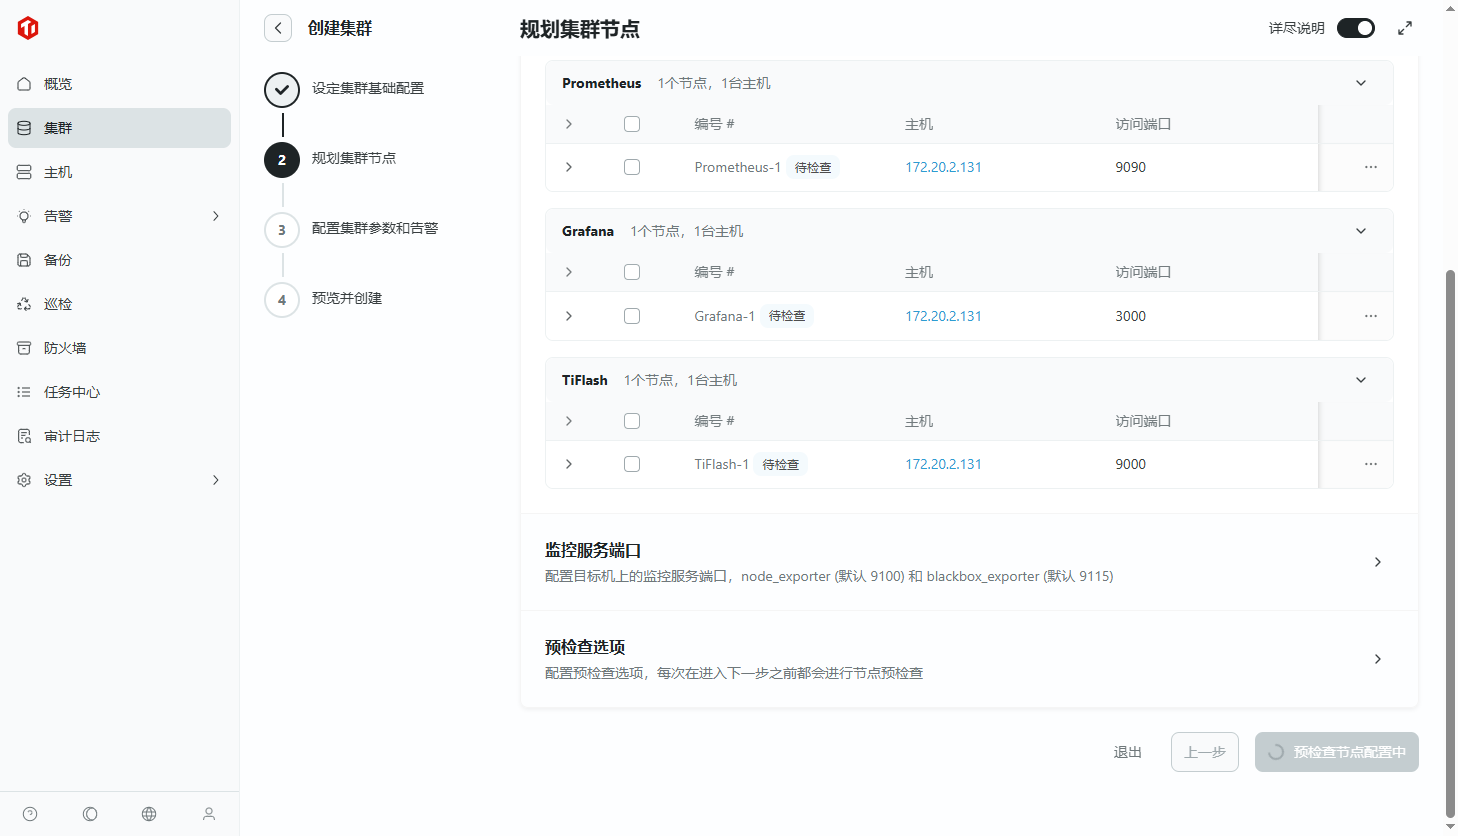
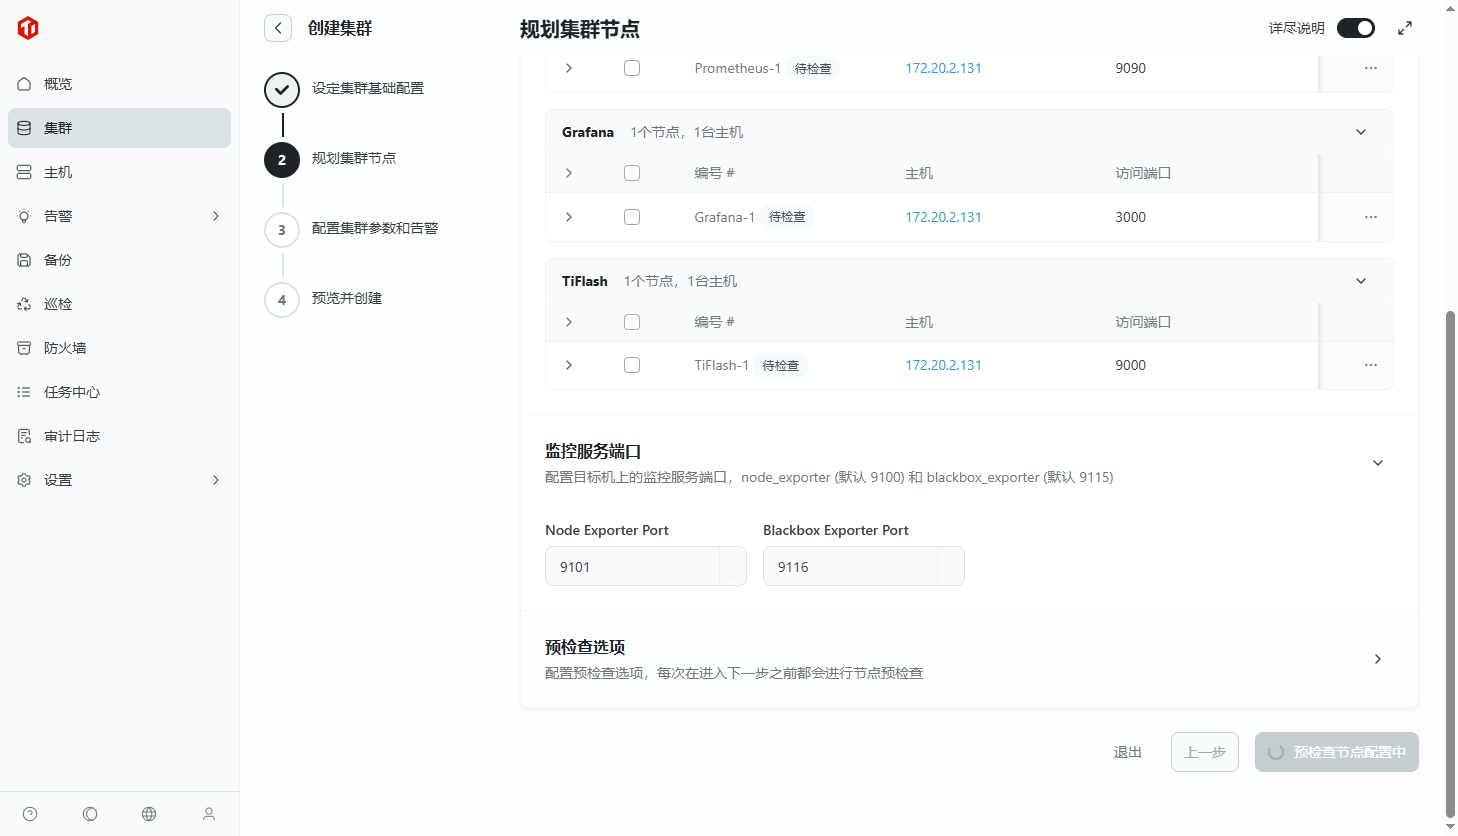
如果检查时出现端口冲突的问题, 请将端口号修改为一个未使用过的;一般情况下,端口和目录的名称是保持一致的,但如果只改了端口没有改目录,则会出现“目录已存在”的警告,若想覆盖该目录中的数据,则可勾选下面的“预检查选项”。
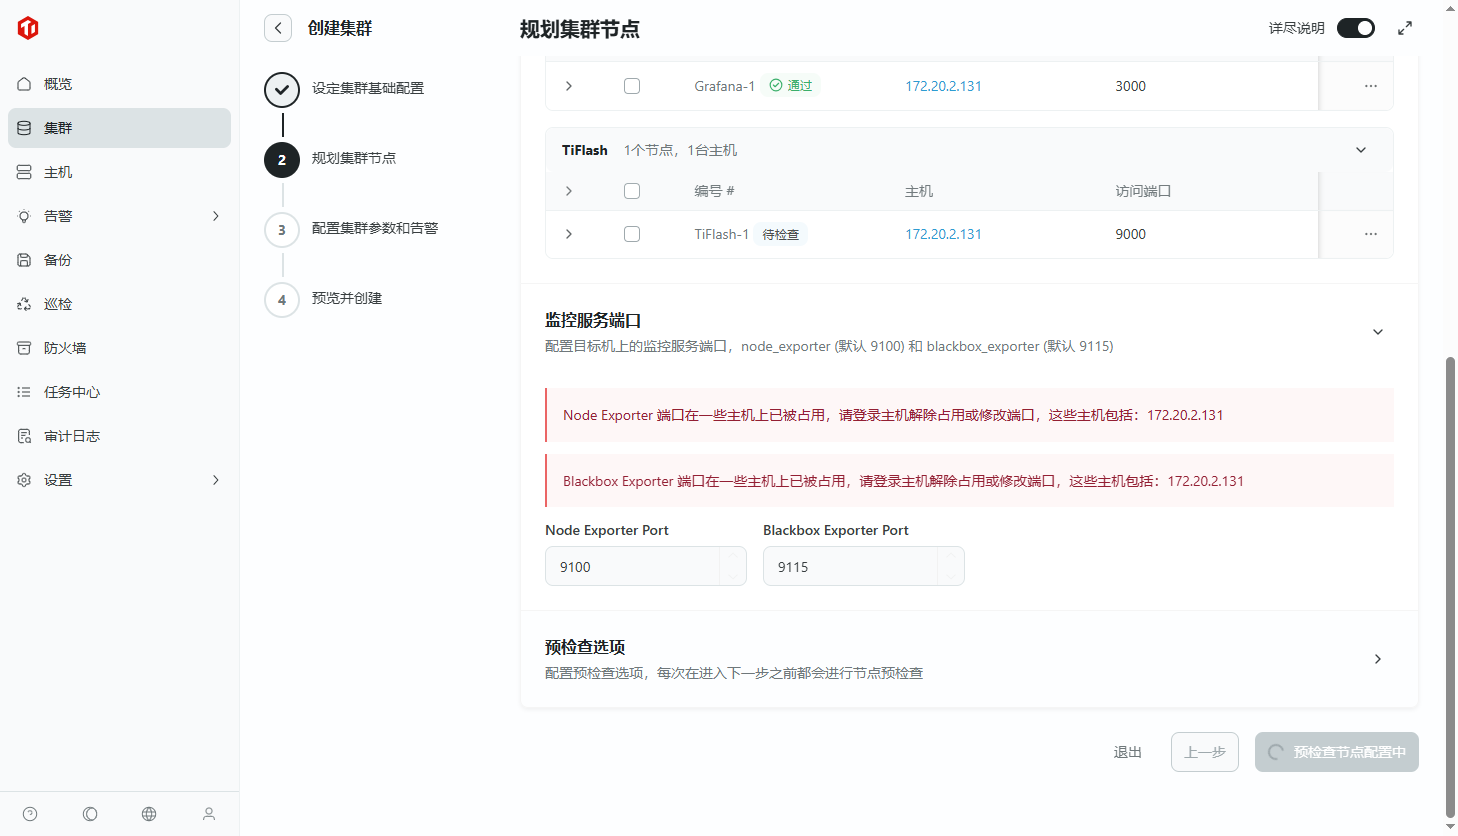
报错端口占用,重新分配端口即可
8.5 配置集群参数和告警
选择社区用户设置

默认参数模版和告警模版即可,点击下一步

8.6 预览创建配置,确认无误后点击“创建”按钮启动创建任务

8.7 创建过程的具体日志可点击“查看详情”,或在“任务中心”中点击相应的任务进行查看
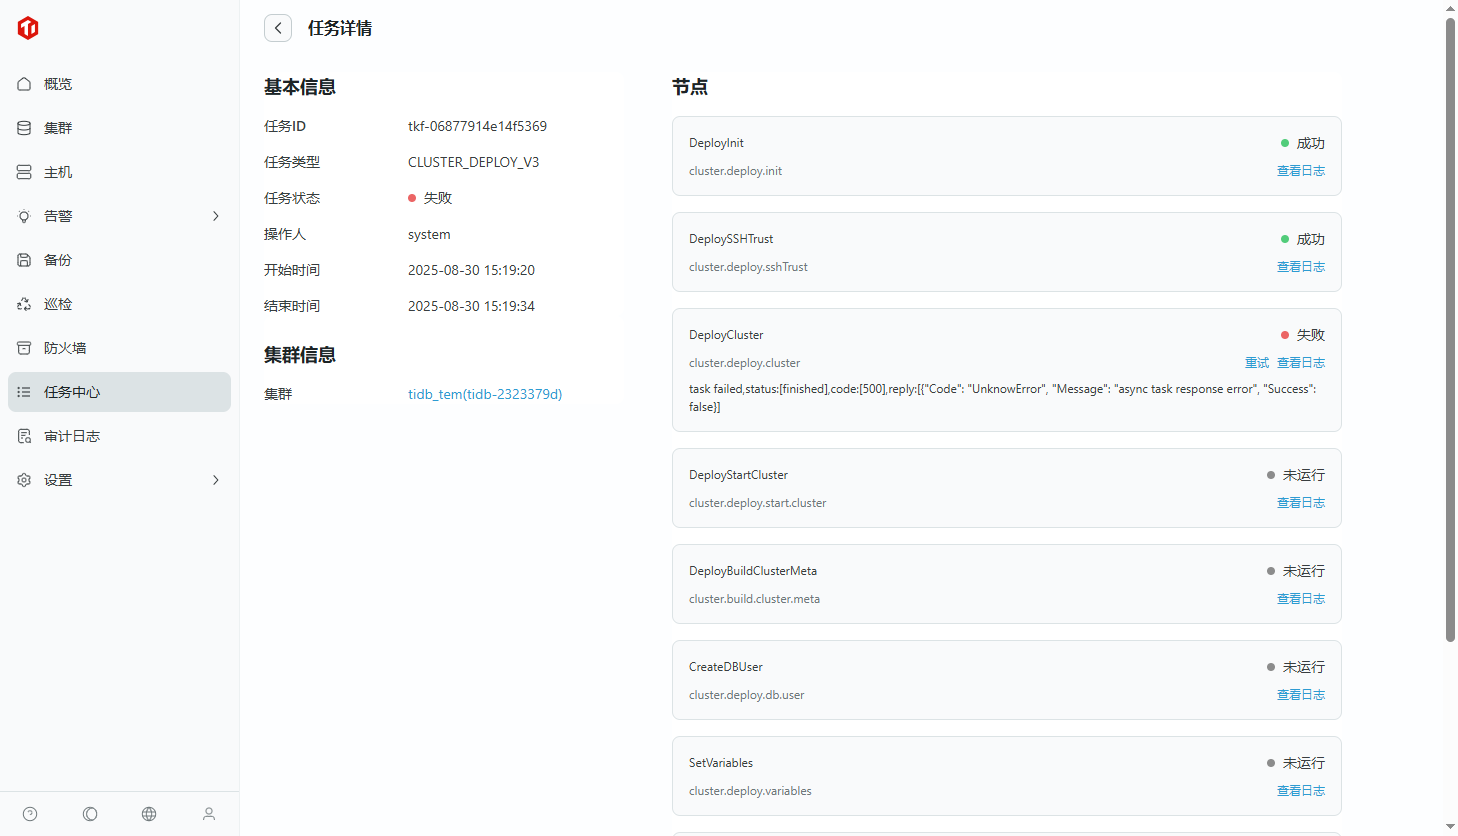
8.7.1 创建失败

8.7.2 失败原因,端口为2222 ,创建集群时显示Port 22无法连接
[root@worker3 tem-package]# vim /etc/ssh/sshd_config
[root@worker3 tem-package]# systemctl restart sshd
[root@worker3 tem-package]# ssh -V
OpenSSH_9.8p1, OpenSSL 3.0.14 4 Jun 2024
[root@worker3 tem-package]# vim /etc/ssh/sshd_config
[root@worker3 tem-package]#
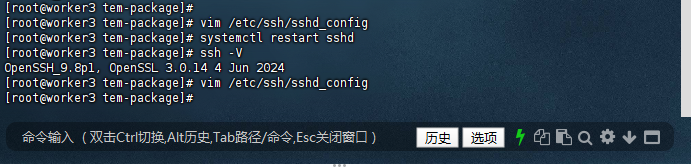
8.7.3 解决办法:只能把 /etc/ssh/sshd_config 的 2222端口改回22端口
(在集群配置里面没有找到修改端口的地方)
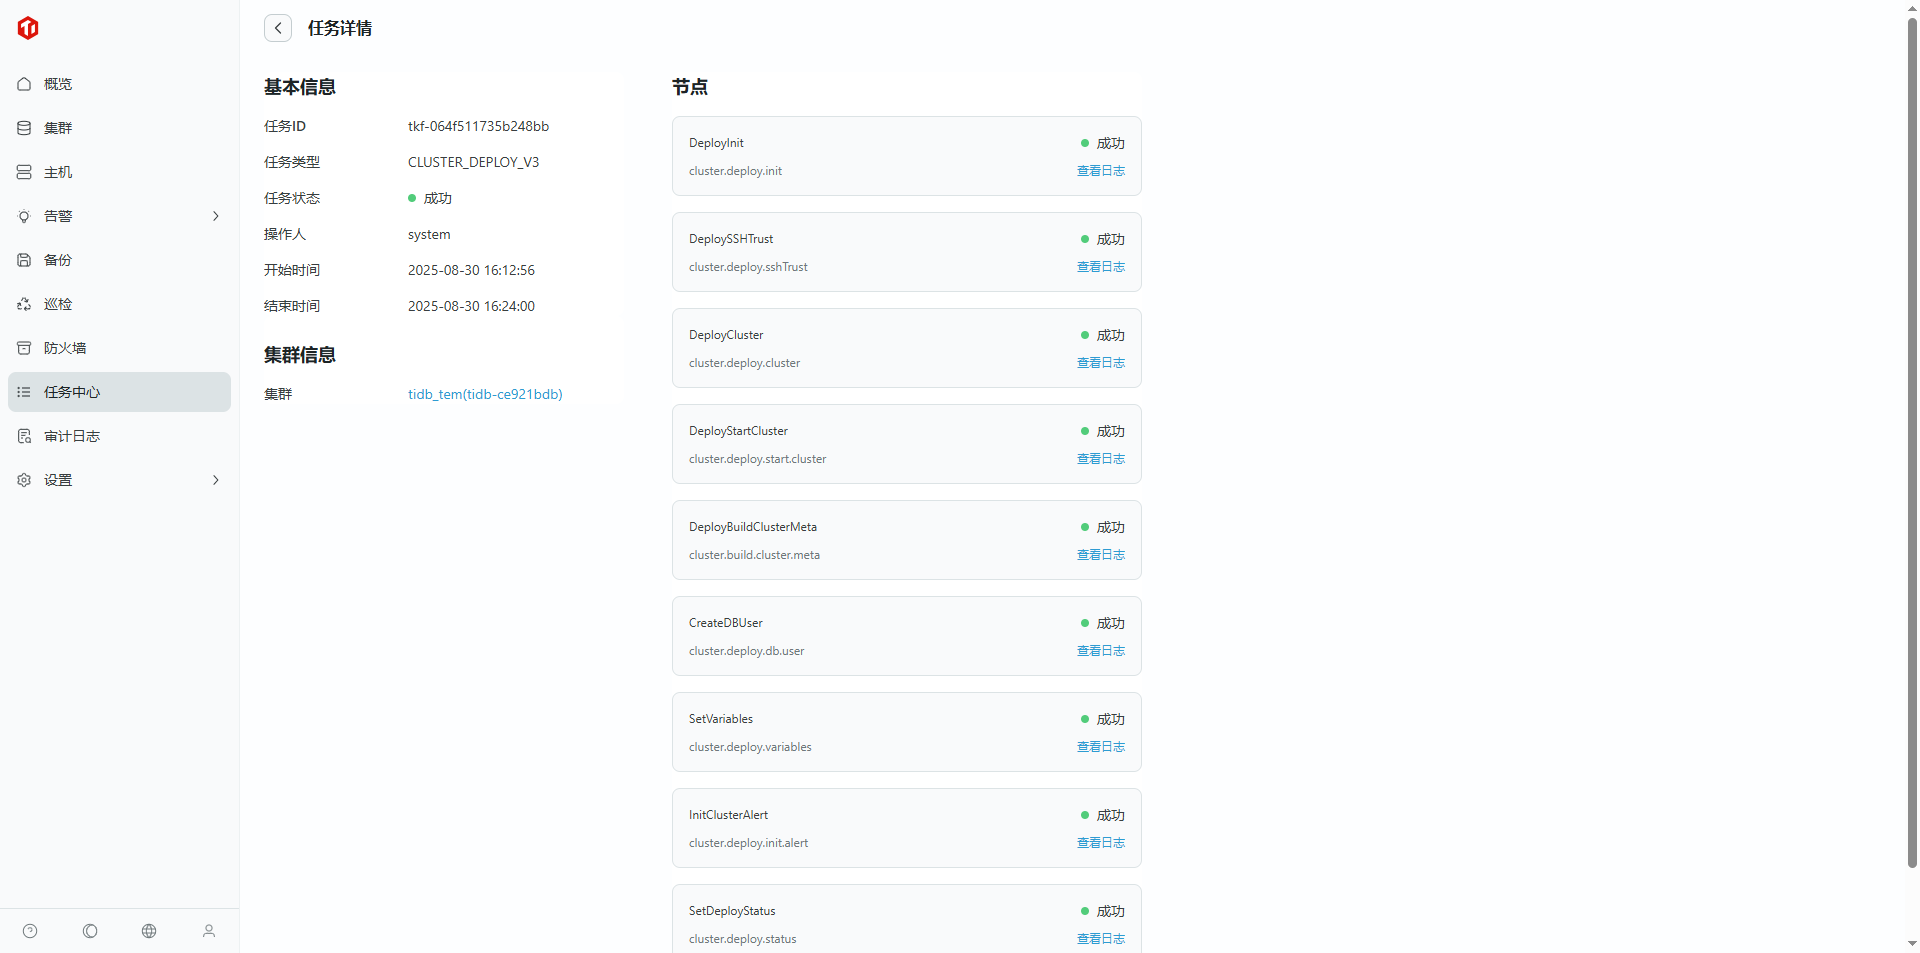
8.8 集群创建并纳管成功
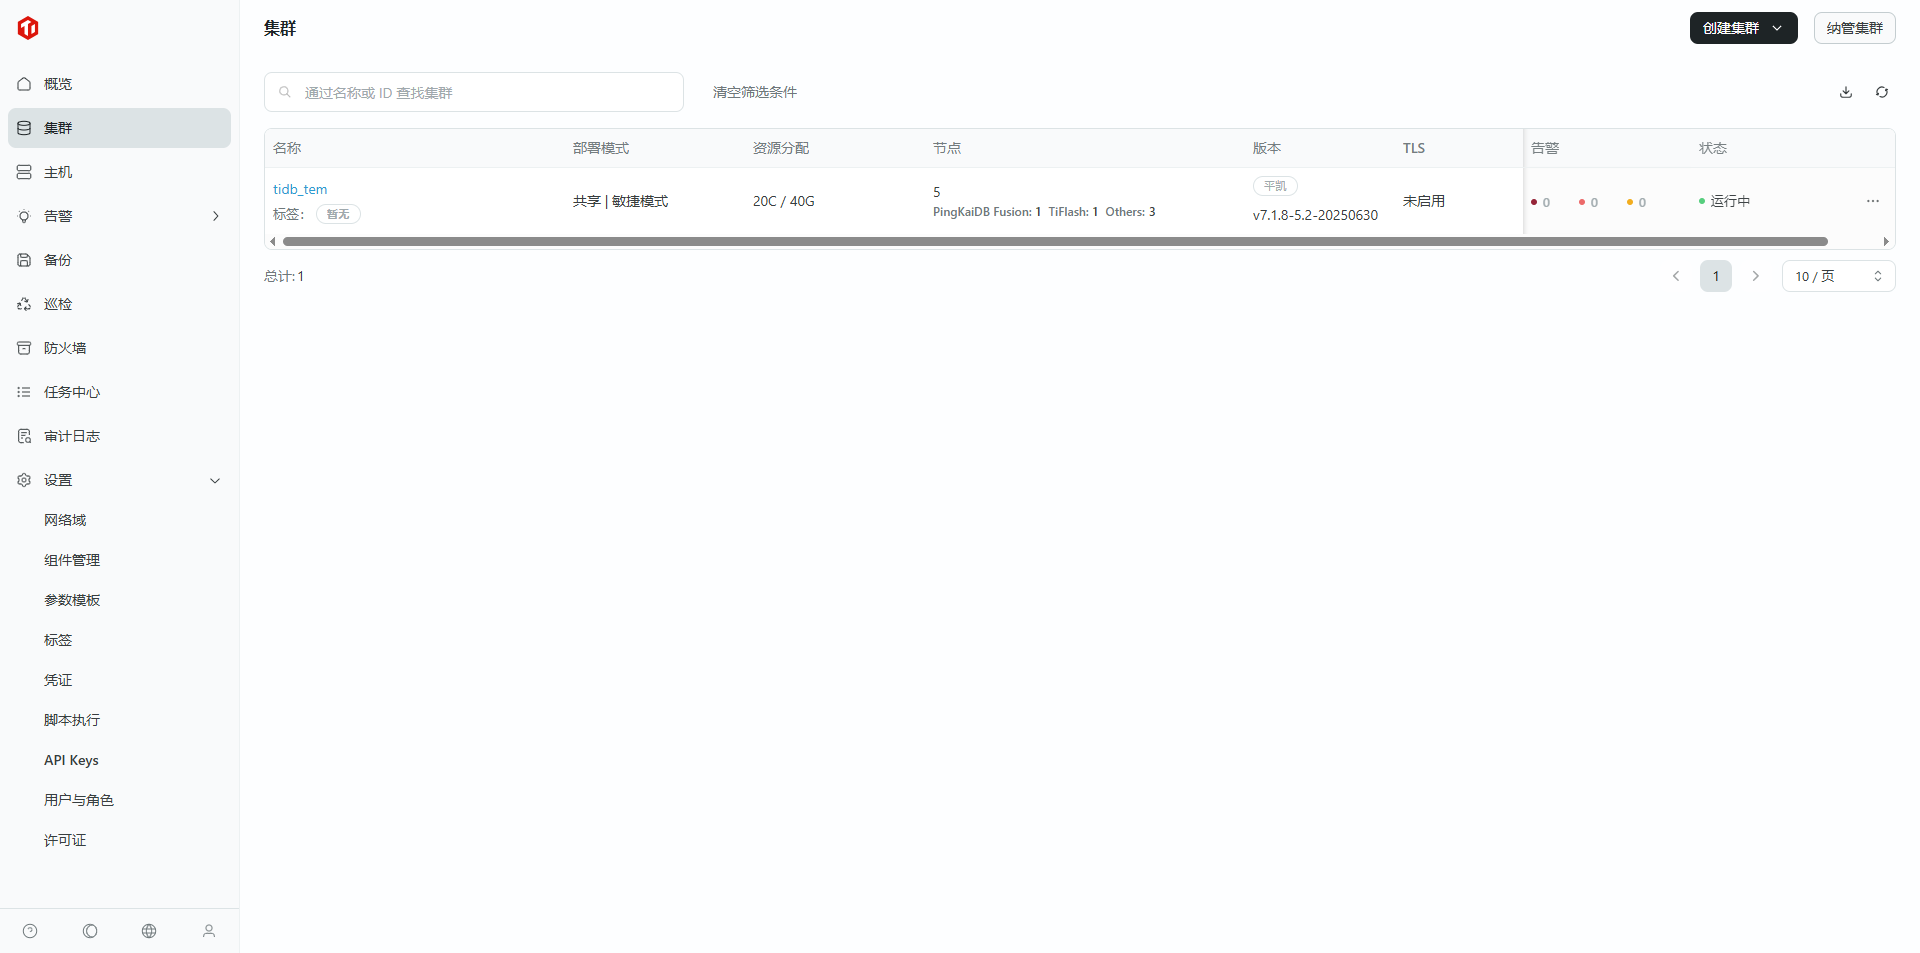
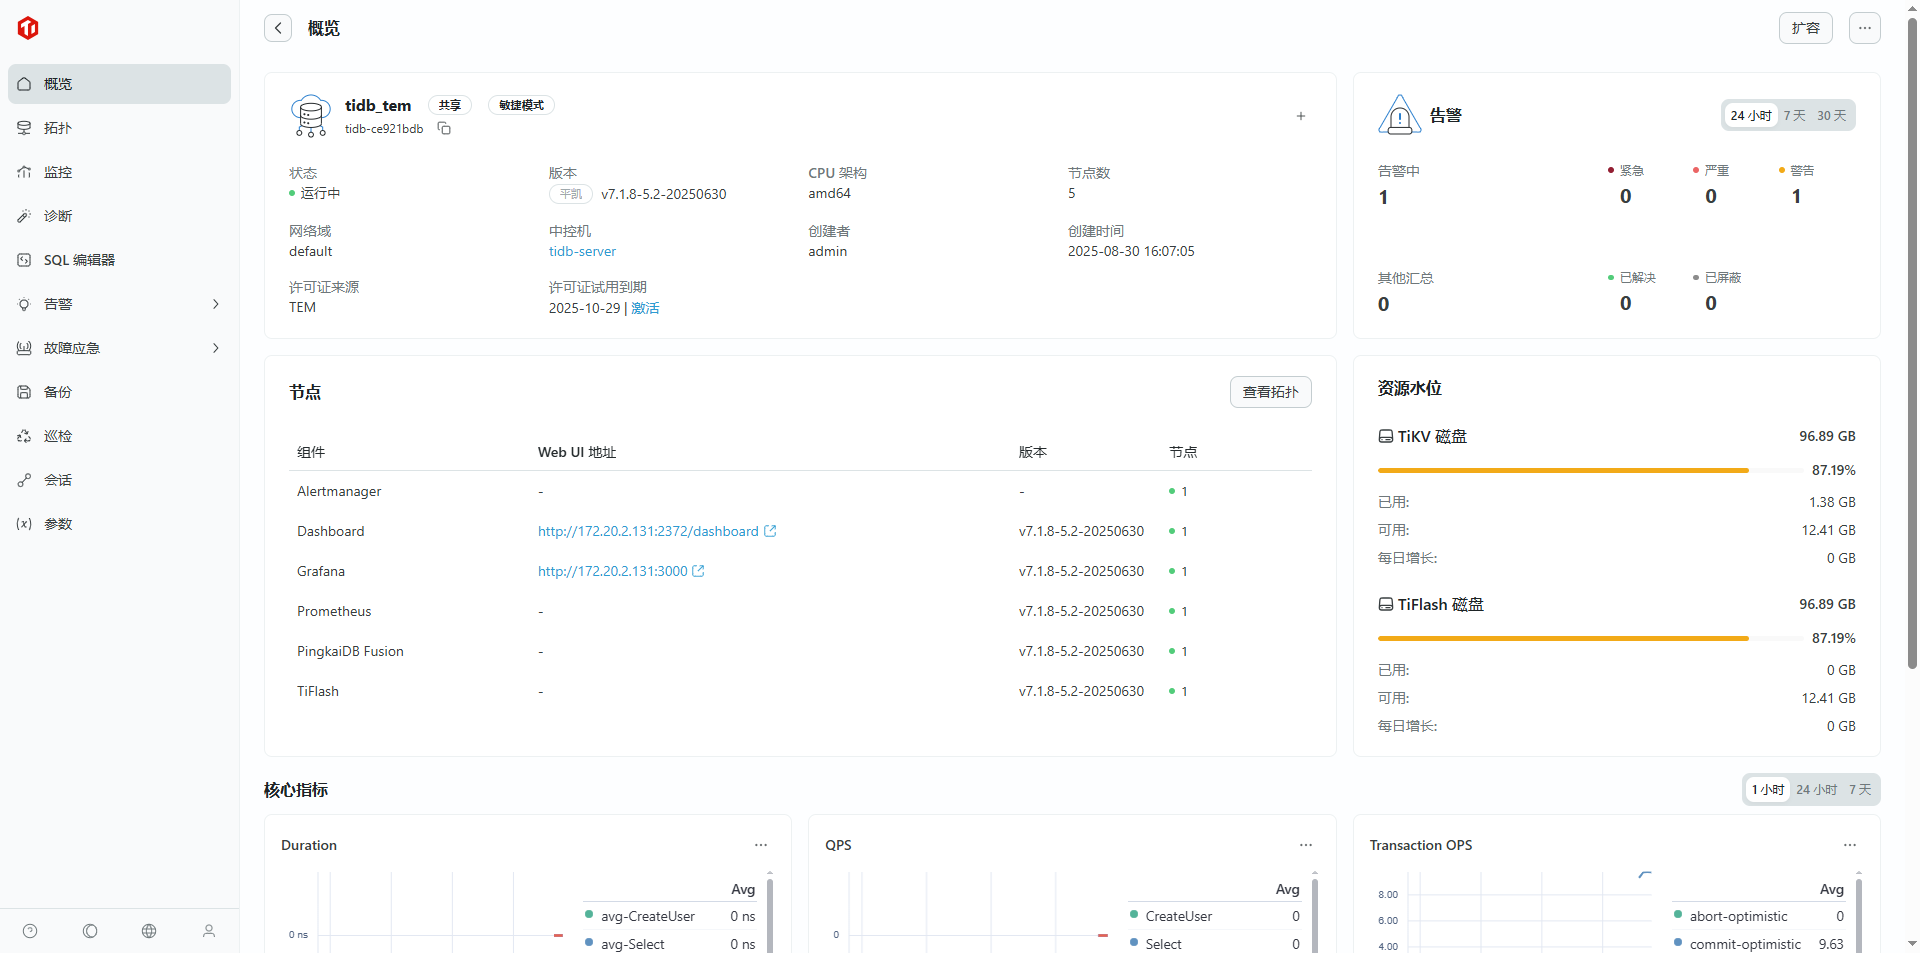
8.9 查看集群
9. 调整下平凯数据库敏捷模式全局变量(建议)

完成平凯数据库敏捷模式部署后,使用 MySQL 客户端连接平凯数据库敏捷模式,输入以下命令
这里使用在 TEM SQL 编辑器客户端连接平凯数据库敏捷模式
9.1 root 用户登录数据库
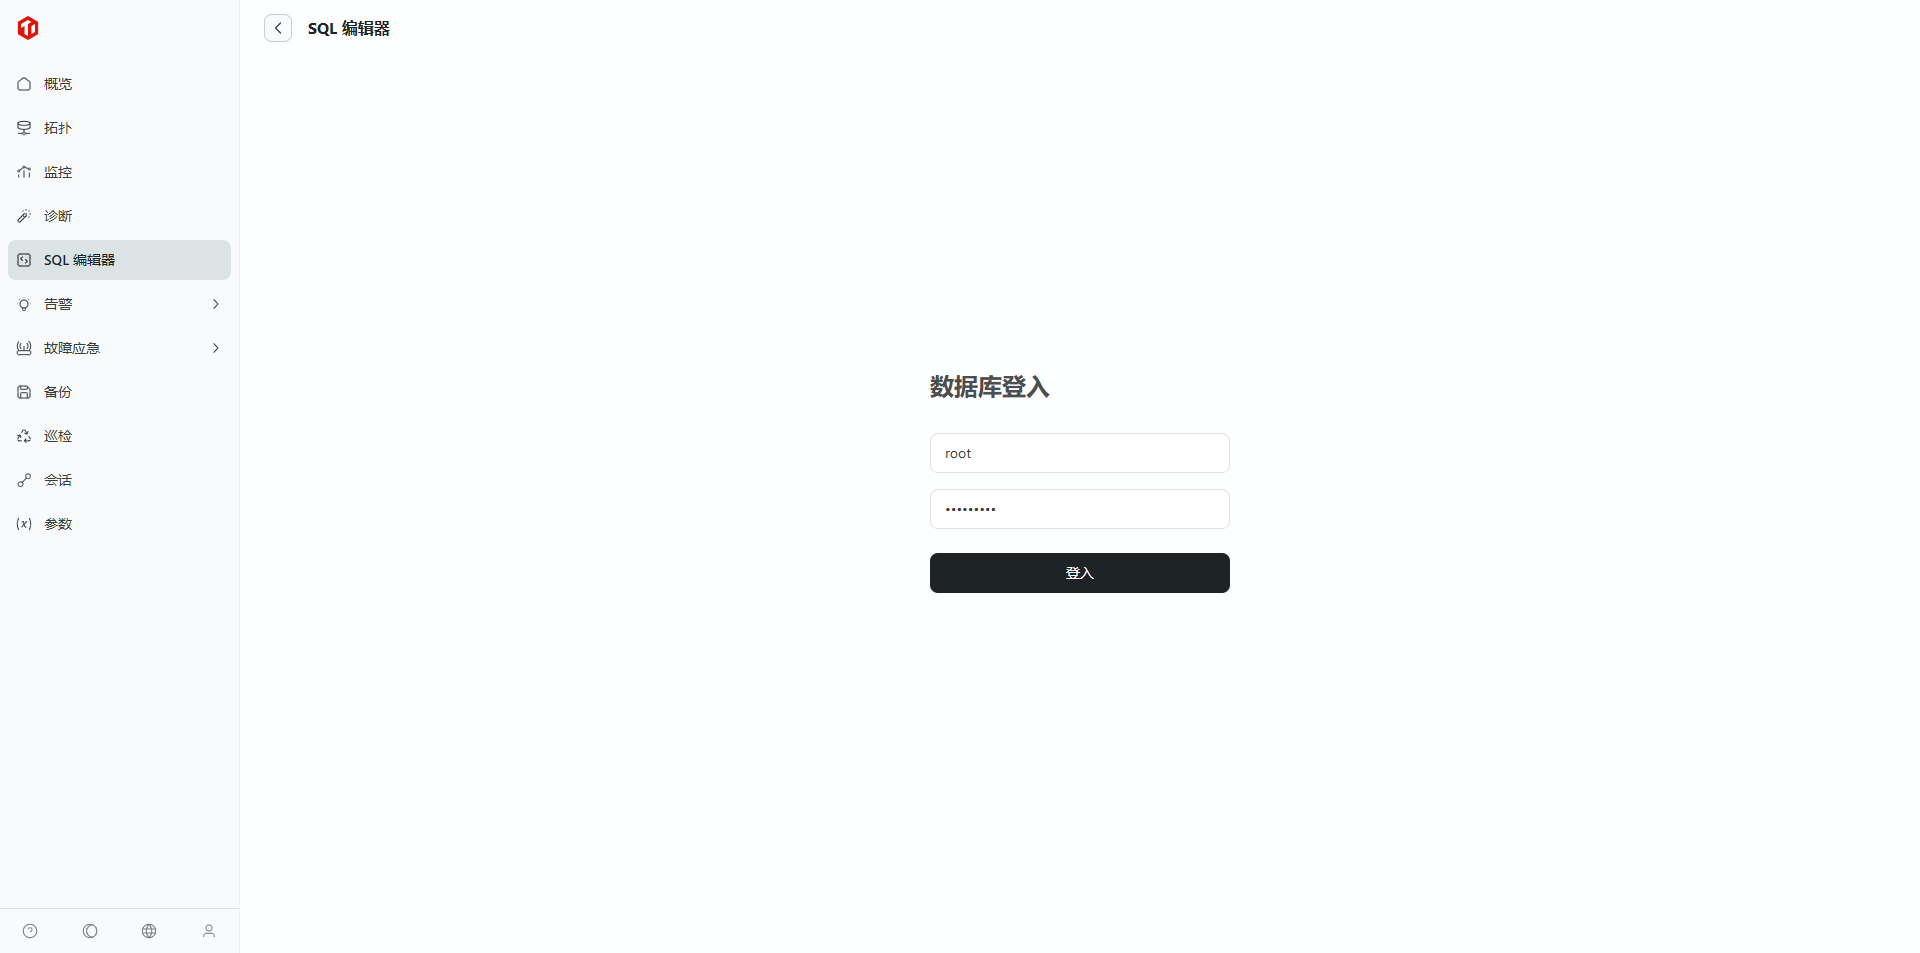
9.2 进入 TEM SQL 编辑器

9.3 创建表

9.3.1 执行失败

9.3.2 解决方法:每一条步骤需要分开执行
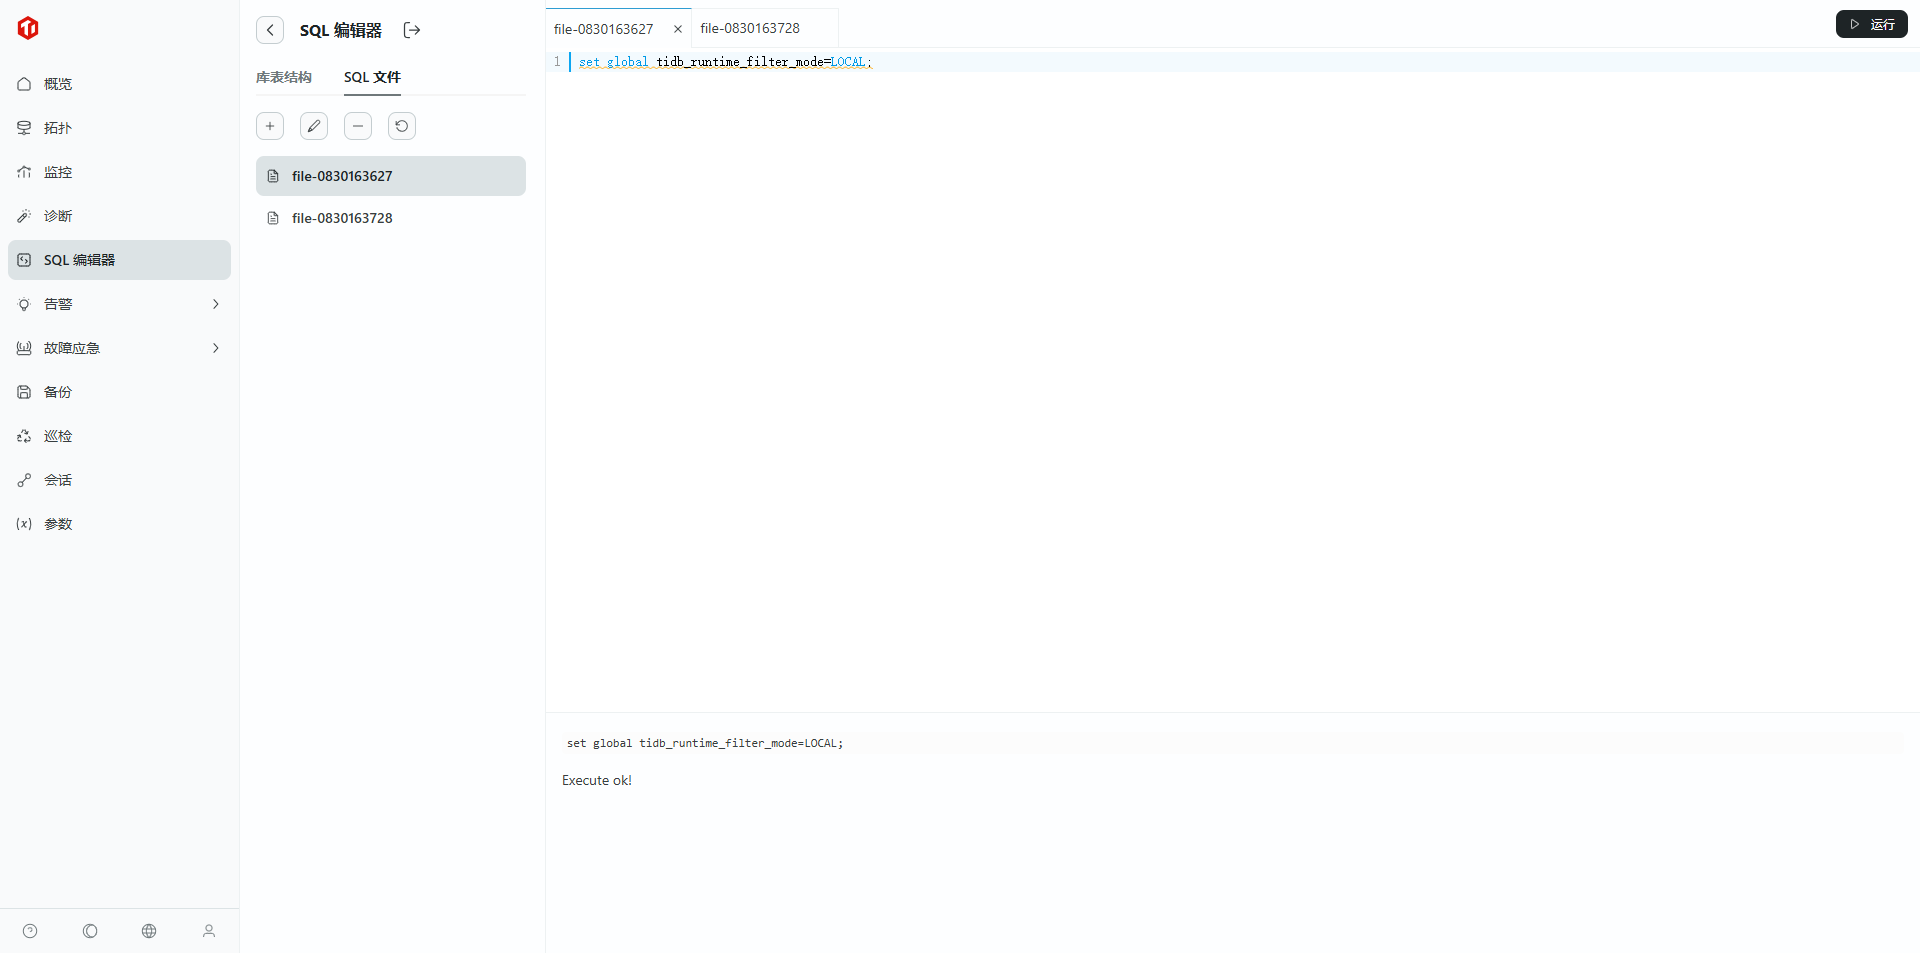
set global tidb_runtime_filter_mode=LOCAL;
set global tidb_opt_enable_mpp_shared_cte_execution=on;
set global tidb_rc_read_check_ts=on;
set global tidb_analyze_skip_column_types=“json,blob,mediumblob,longblob,mediumtext,longtext”;
set global tidb_enable_collect_execution_info=off;
set global tidb_enable_instance_plan_cache=on;
set global tidb_instance_plan_cache_max_size=2GiB;
set global tidbx_enable_tikv_local_call=on;
set global tidbx_enable_pd_local_call=on;
set global tidb_schema_cache_size=0;
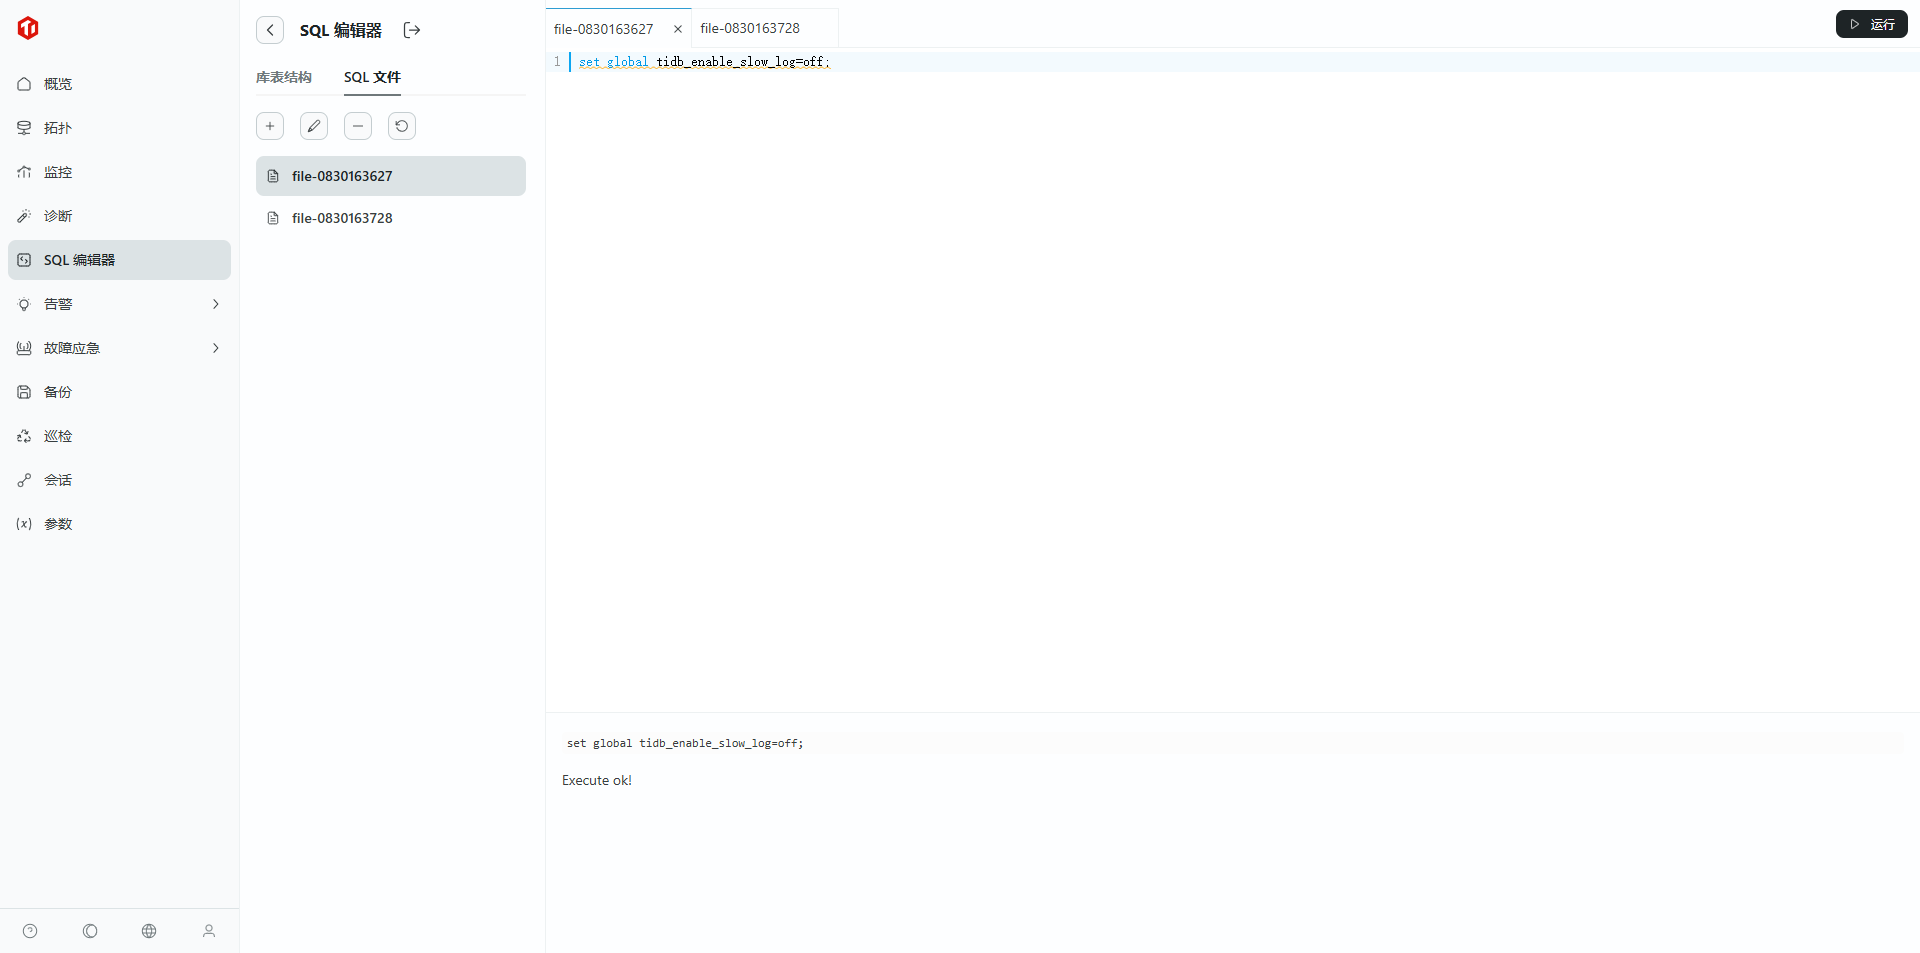
9.3.4 是否持久化到集群:否,仅作用于当前连接的 TiDB 实例
set global tidb_enable_slow_log=off;
集群创建完毕,接下来就可以开始测试体验啦!
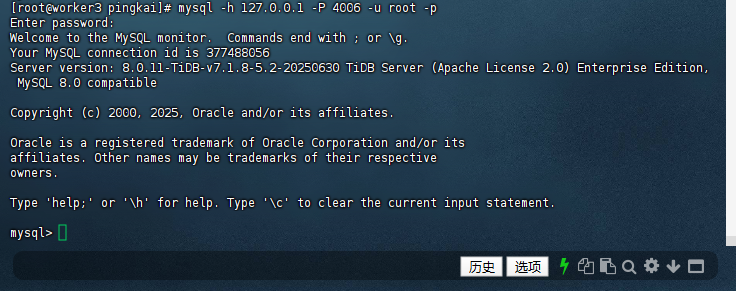
10. 命令行验证数据库连接:
10.1 登录平凯数据库
[root@worker3 pingkai]# mysql -h 127.0.0.1 -P 4006 -u root -p
Enter password:
Welcome to the MySQL monitor.  Commands end with ; or \g.
Your MySQL connection id is 377488054
Server version: 8.0.11-TiDB-v7.1.8-5.2-20250630 TiDB Server (Apache License 2.0) Enterprise Edition, MySQL 8.0 compatible
Copyright (c) 2000, 2025, Oracle and/or its affiliates.
Oracle is a registered trademark of Oracle Corporation and/or its
affiliates. Other names may be trademarks of their respective
owners.
Type 'help;' or '\h' for help. Type '\c' to clear the current input statement.
mysql>
10.2 查看版本
若进入“mysql>”命令行,执行“select version();”显示平凯版本,即部署成功
mysql> select version();
+---------------------------------+
| version()                       |
+---------------------------------+
| 8.0.11-TiDB-v7.1.8-5.2-20250630 |
+---------------------------------+
1 row in set (0.00 sec)
mysql>

通过以上详细的步骤,我们成功完成了TEM(TiDB Enterprise Manager)平台的安装部署以及平凯数据库敏捷模式的集群创建。整个安装过程涵盖了从获取安装包、环境准备、TEM服务部署、Web控制台访问,到使用TEM创建和管理数据库集群的完整流程。
安装过程中的关键成功指标包括:TEM服务进程正常启动、8080端口监听成功、Web控制台可正常访问、元数据库集群(tem_metadb)和TEM服务集群(tem-servers)状态均为Up。通过TEM平台,我们进一步完成了凭证配置、组件管理、中控机部署、主机管理,并最终成功创建了平凯数据库集群。
五、ssh可能会遇到的问题及解决办法
SSH 连接 127.0.0.1:2222 失败排查指南
针对
ssh: handshake failed: unable to authenticate 及端口连接问题,以下是按逻辑优先级排序的完整排查步骤,已删除重复内容并统一编号:
1. 验证 SSH 命令格式与端口参数
1.1 用正确格式测试手动登录
SSH 端口参数需用
小写
-p(大写
-P 为非标准格式,部分环境不支持),执行以下命令并观察过程:
# 加 -vvv 打印详细调试日志,便于定位认证问题ssh -vvv -p 2222 root@127.0.0.1
- 关键观察点:输出中是否出现
debug1: Next authentication method: password(确认进入密码认证流程); - 输入密码时需注意:特殊字符(如
@、#)是否正确,大小写是否匹配。
1.2 用 sshpass 快速验证密码(可选,仅测试用)
若手动输入密码频繁失败,可通过
sshpass 直接传入密码测试(避免输入失误):
# 替换 'your_password' 为实际 root 密码sshpass -p 'your_password' ssh -p 2222 root@127.0.0.1
- 若成功登录 → 密码正确,问题可能出在交互式输入或配置;
- 若失败 → 密码错误或服务端拒绝密码认证。
2. 检查目标节点 SSH 服务配置(核心)
2.1 确认 SSH 服务监听 2222 端口
登录目标节点
127.0.0.1(若当前无法登录,需通过控制台/远程管理工具进入),执行以下命令验证端口监听:
# 查看 2222 端口是否处于 LISTEN 状态ss -tuln | grep 2222
- 预期输出(表示端口正常监听):
tcp LISTEN 0 128 0.0.0.0:2222 0.0.0.0:*
- 若无输出 → 需检查 SSH 配置文件,确认端口是否正确设置。
2.2 启用服务端密码认证(关键配置)
目标节点上检查
/etc/ssh/sshd_config 中密码认证相关配置,确保允许密码登录:
# 查看密码认证与 root 登录权限配置grep -E "PasswordAuthentication|PermitRootLogin" /etc/ssh/sshd_config
- 正确配置(需满足以下两项):
PasswordAuthentication yes # 允许密码认证(默认可能为 no)PermitRootLogin yes # 允许 root 用户登录(默认可能为 prohibit-password)
- 若配置不符:
- 编辑配置文件:
vi /etc/ssh/sshd_config,修改上述两项为yes; - 重启 SSH 服务生效:
systemctl restart sshd。
- 编辑配置文件:
3. 验证网络连通性与端口开放
3.1 测试客户端到目标节点 2222 端口的连通性
在执行 SSH 命令的客户端机器上,用
nc 或
telnet 测试端口是否可达(排除防火墙/路由问题):
# 方法 1:用 nc 测试(推荐,输出更清晰)nc -zv 127.0.0.1 2222# 方法 2:用 telnet 测试telnet 127.0.0.1 2222
- 预期结果:
Ncat: Connected to 127.0.0.1:2222或Connected to 127.0.0.1; - 若失败 → 需检查目标节点防火墙或安全组规则。
3.2 检查目标节点防火墙规则
目标节点上执行以下命令,确认 2222 端口已放行:
# 情况 1:使用 firewalld(CentOS/RHEL 7+)firewall-cmd --list-ports | grep 2222# 若未放行,临时添加(重启后失效):firewall-cmd --add-port=2222/tcp# 永.久添加(推荐):firewall-cmd --add-port=2222/tcp --permanent && firewall-cmd --reload# 情况 2:使用 iptables(无 firewalld 时)iptables -L -n | grep 2222# 若未放行,添加规则:iptables -A INPUT -p tcp --dport 2222 -j ACCEPT
4. 排查 SELinux 限制(Linux 系统特有)
4.1 检查 SELinux 状态
SELinux 可能会阻止非默认 SSH 端口(22)的连接,目标节点上执行:
getenforce
- 若输出
Enforcing→ SELinux 处于启用状态,需添加 2222 端口到 SSH 允许列表; - 若输出
Permissive或Disabled→ 跳过此步骤。
4.2 允许 SELinux 放行 2222 端口
目标节点上执行以下命令,将 2222 端口注册为 SSH 服务端口:
# 安装 semanage 工具(若未安装)yum install -y policycoreutils-python-utils# 添加 2222 端口到 SELinux SSH 端口组semanage port -a -t ssh_port_t -p tcp 2222# 验证添加结果semanage port -l | grep ssh_port_t
- 预期输出包含
2222/tcp,表示配置生效。
5. 高级调试:查看服务端日志定位根因
5.1 查看目标节点 SSH 服务日志
目标节点上查看
/var/log/secure(CentOS/RHEL)或
/var/log/auth.log(Debian/Ubuntu),获取认证失败的具体原因:
# 实时查看日志,同时在客户端执行 SSH 登录命令tail -f /var/log/secure | grep -i "ssh\|password"
- 常见错误日志及含义:
-
Failed password for root from x.x.x.x port xxxx ssh2→ 密码错误; -
Connection closed by authenticating user root x.x.x.x port xxxx [preauth]→ 认证流程被中断(可能是配置禁止密码); -
SELinux is preventing /usr/sbin/sshd from name_bind access on the port 2222→ SELinux 阻止端口绑定。
-
6. 替代方案:使用 SSH 密钥认证(推荐,规避密码问题)
若密码认证持续失败,可改用密钥认证(更安全且避免密码输入问题):
6.1 客户端生成密钥对
# 生成 ed25519 类型密钥(安全性更高,默认路径 ~/.ssh/id_ed25519)ssh-keygen -t ed25519# 按提示回车(无需设置密码,或按需设置密钥密码)
6.2 将公钥上传到目标节点
# 用 ssh-copy-id 自动上传公钥到目标节点 2222 端口ssh-copy-id -i ~/.ssh/id_ed25519.pub -p 2222 root@127.0.0.1# 输入目标节点 root 密码(仅首.次上传需输入)
6.3 测试密钥登录
ssh -i ~/.ssh/id_ed25519 -p 2222 root@127.0.0.1
- 若成功登录 → 密钥认证生效,可后续通过密钥进行 TiUP 集群操作。
7. 平凯数据库(TiDB 企业版)敏捷模式试用反馈
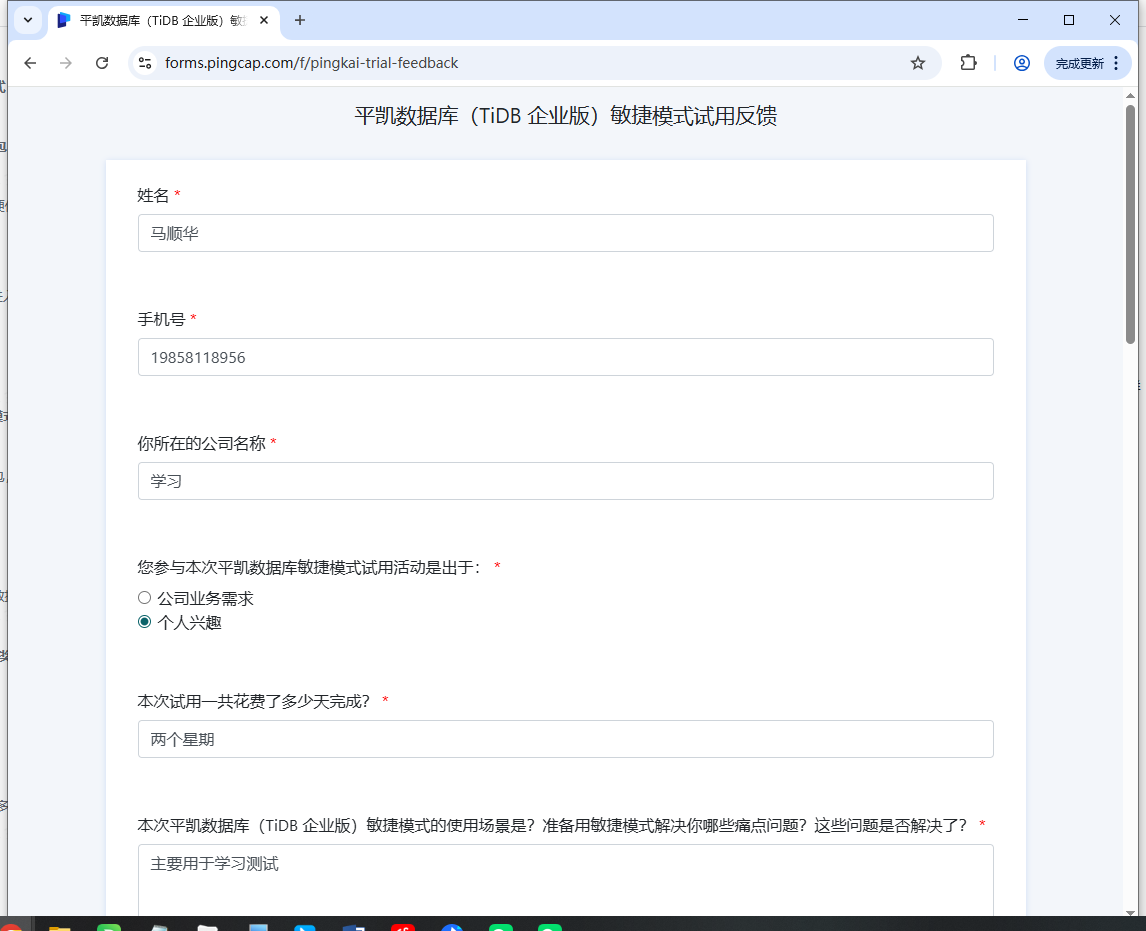
为帮助我们更好地优化平凯数据库(TiDB 企业版)敏捷模式的产品体验,诚邀您填写试用反馈问卷。您的每一条建议,都是我们迭代升级的重要参考!
反馈问卷链接:
https://forms.pingcap.com/f/pingkai-trial-feedback
试用奖励领取:
完成反馈后,可联系工作人员童童领取专属试用奖励(微信:Joy13416427731),感谢您的宝贵时间与真实反馈!
8. 诚挚感谢
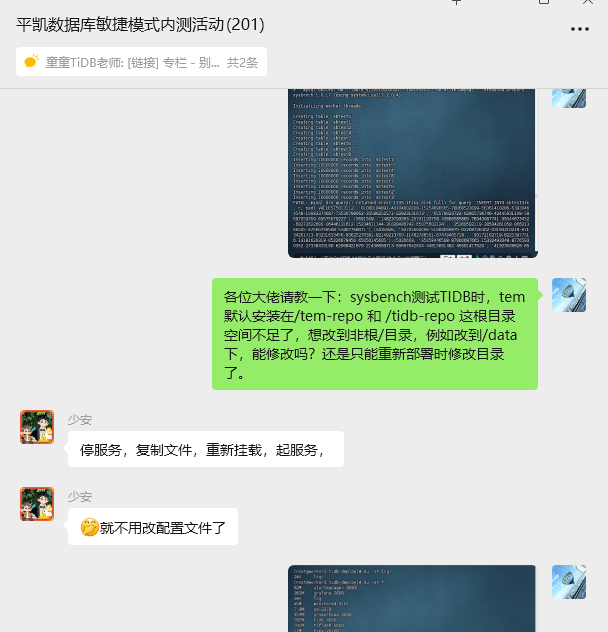
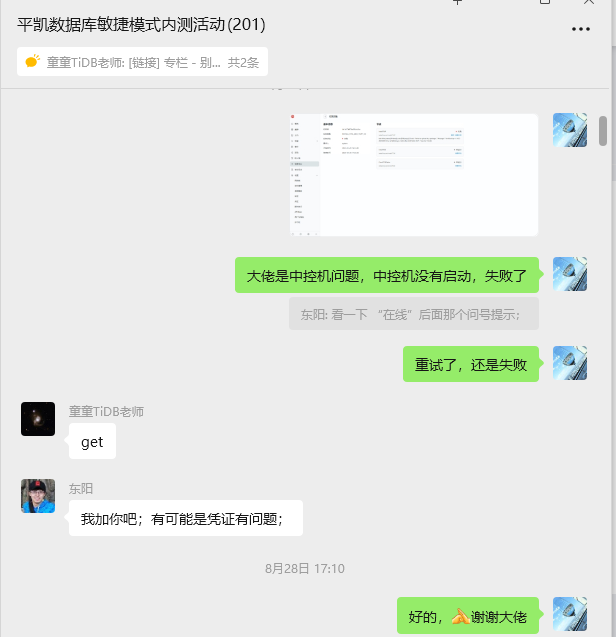
本次平凯数据库(TiDB 企业版)敏捷模式部署与测试工作的顺利推进,离不开多方支持与帮助,在此致以最诚挚的谢意:
- 感谢 TiDB 社区提供的技术交流平台与技术资源支持,为实践过程中的问题解决提供了广阔思路;
- 感谢童童、表妹在试用对接与反馈环节的耐心协助,让流程高效顺畅;
- 特别鸣谢东阳老师、xjh老师:从问题咨询到实操指导,无论是群内即时解答、专属视频演示,还是单独拉群深度沟通,都给予了专业且细致的支持,有效扫清了技术障碍;
- 同时感谢少安老师、kii老师及其他社区伙伴:在测试(TiDB 企业版)敏捷模式时提供的宝贵经验,让本次内容输出更具实用性与参考价值。
正是有了各位的鼎力支持,本次 TiDB 敏捷模式部署测试才得以顺利完成,相关内容呈现给大家。


通过以上步骤,即可完成 TEM 敏捷模式下 TiDB 集群的自动化部署与基础管理。若需探索更多高阶功能(如集群扩容、性能监控、故障排查等),建议参考 TiDB 官方文档,获取更全面的技术指导。
作者注:
——本文所有操作及测试均基于 TEM 敏捷模式自动化部署 TiDB-v7.1.8-5.2-20250630 版本完成。请注意,TEM 和 TiDB-v7.1.8-5.2-20250630 版本处于持续迭代中,部分语法或功能可能随更新发生变化,请以 TiDB 官方文档最新内容为准。
——以上仅为个人思考与建议,不代表行业普适观点。以上所有操作均需在具备足够权限的环境下执行,涉及生产环境时请提前做好备份与测试。文中案例与思路仅供参考,若与实际情况巧合,纯属无意。期待与各位从业者共同探讨更多可能!
来自 “ ITPUB博客 ” ,链接:https://blog.itpub.net/70042915/viewspace-3095630/ ,如需转载,请注明出处,否则将追究法律责任。

