<template>
  <div class="container" ref="container">

  </div>
</template>

<script >
import * as THREE from "three";
import { ref } from "vue";
//添加一个轨道控制器
import { OrbitControls} from "three/examples/jsm/controls/OrbitControls";
//导入动画库
import gsap from "gsap";
//导入dat.gui
import * as dat from "dat.gui";


export default {
  name: 'App',
  data() {
    return {
      renderer: null,
      scene: null,
      camera: null,
      cube: null,
      clock: null,
      animate1: null,
      controls: null,
      gui: null,
      directionalLight: null
    }
  },
  mounted() {
    //1.创建场景

    const scene = new THREE.Scene();
    const gui = new dat.GUI();
    this.gui=gui;

    //2.创建相机(透视相机)
    /**
     * 构造器
     * PerspectiveCamera( fov : Number, aspect : Number, near : Number, far : Number )
     * fov — 摄像机视锥体垂直视野角度
     * aspect — 摄像机视锥体长宽比
     * near — 摄像机视锥体近端面
     * far — 摄像机视锥体远端面
     */
    const camera = new THREE.PerspectiveCamera(
    75,
    window.innerWidth / window.innerHeight,
    0.1,
    1000
    );
    //设置相机位置:x,y,z轴位置
    camera.position.set(0,0,10);
    //添加相机到场景中
    scene.add(camera);
    this.scene=scene;this.camera=camera;

    //设置cube纹理加载器
    const cubeTextureLoader = new THREE.CubeTextureLoader();
    const envMapTexture =  cubeTextureLoader.load([
      "static/textures/environmentMaps/1/px.jpg",
      "static/textures/environmentMaps/1/nx.jpg",
      "static/textures/environmentMaps/1/py.jpg",
      "static/textures/environmentMaps/1/ny.jpg",
      "static/textures/environmentMaps/1/pz.jpg",
      "static/textures/environmentMaps/1/nz.jpg",
    ]);

    //创建物体
    const sphereGeometry = new THREE.SphereBufferGeometry(1,20,20);
    //创建材质
    const material = new THREE.MeshStandardMaterial({
  /*    metalness: 0.7,//金属
      roughness: 0.1,//光滑 */
   //   envMap: envMapTexture,
    }

    );
    const sphere = new THREE.Mesh(sphereGeometry,material);
    //球体投射阴影
    sphere.castShadow = true;
    scene.add(sphere);

    const planeGeometry = new THREE.PlaneBufferGeometry(10,10);
    const plane = new THREE.Mesh(planeGeometry,material);
    plane.position.set(0,-1,0);
    plane.rotation.x = -Math.PI/2;
    //接收阴影
    plane.receiveShadow = true;
    scene.add(plane);


//标准材质必须要有光
    //添加灯光
    //环境光
    const light = new THREE.AmbientLight(0xffffff,0.5);//0.1强度
    scene.add(light);

    //直线光源
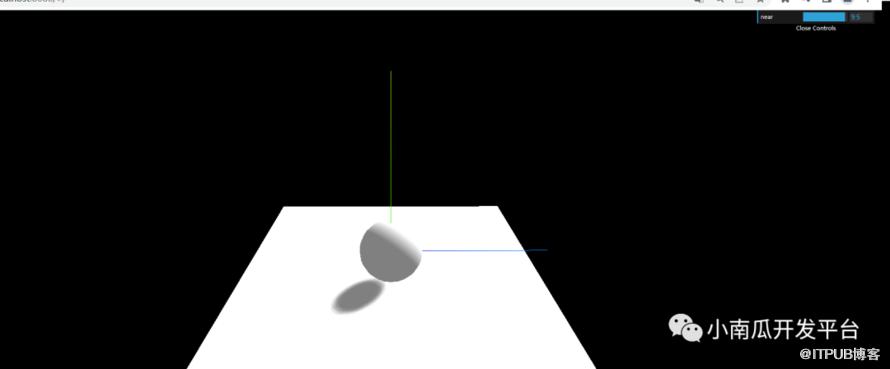
    const directionalLight = new THREE.DirectionalLight;


    directionalLight.position.set(5,5,5);
    directionalLight.castShadow= true;//开启阴影渲染

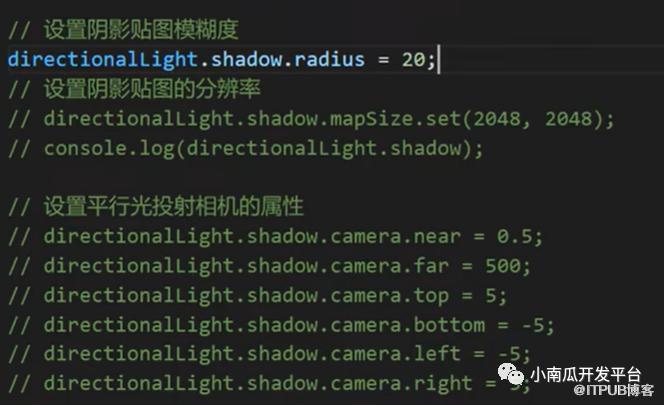
    //设置阴影贴图模糊度
    directionalLight.shadow.radius=20;
    //设置阴影贴图的分辨率
    directionalLight.shadow.mapSize.set(2048,2048);

    //设置阴影相机属性
    directionalLight.shadow.camera.near =0.5;
    directionalLight.shadow.camera.far =100;
    directionalLight.shadow.camera.top =5;
    directionalLight.shadow.camera.buttom =-5;
    directionalLight.shadow.camera.left =-5;
    directionalLight.shadow.camera.right =5;

    scene.add(directionalLight);


    gui.add(directionalLight.shadow.camera,"near")
    .min(0)
    .max(10)
    .step(0.1)
    .onChange(() => {
      console.log("至膝盖了/。。。。")
      directionalLight.shadow.camera.updateProjectionMatrix();
    });


    //4.初始化渲染器
    const renderer = new THREE.WebGLRenderer();
      //设置渲染器的尺寸大小
    renderer.setSize(window.innerWidth,window.innerHeight);
    //开启场景中的阴影贴图
    renderer.shadowMap.enabled = true;

    this.renderer=renderer;
      //将webgl渲染的canvas内容添加到div
      //document.body.append(renderer.domElement);
    this.$refs['container'].appendChild(renderer.domElement);


      //使用渲染器,通过相机将场景渲染进来
      renderer.render(scene,camera);

    //5.创建轨道控制器
    const  controls = new OrbitControls(camera,renderer.domElement);
    //设置控制器阻尼,让控制器更有真实效果,必须在动画循环调用update
    controls.enableDamping = true;
    this.controls=controls;

    //6.添加坐标轴辅助器
      //size -- (可选的) 表示代表轴的线段长度. 默认为 1.
    const axesHelper = new THREE.AxesHelper( 5 );
    scene.add( axesHelper );

    //双击控制屏幕进入全屏、退出全屏
    window.addEventListener("dblclick",()=>{
      const fullScreenElement =document.fullscreenElement;

      if(!fullScreenElement){
        //让画布对象全屏
        this.renderer.domElement.requestFullscreen();
      }else{
        //退出全屏,使用document对象
        document.exitFullscreen();
      }

    })

    //监听画面变化,更新渲染画面
    window.addEventListener("resize",()=>{
      console.log("画面变化了");
      //更新摄像头
      this.camera.aspect = window.innerWidth /window.innerHeight;
      //更新摄像机的投影矩阵
      this.camera.updateProjectionMatrix();
      //更新渲染器
      this.renderer.setSize(window.innerWidth,window.innerHeight);
      //设置渲染器的像素比
      this.renderer.setPixelRatio(window.devicePixelRatio);

    })

    this.renders();
  },
  methods: {
    renders(){


       this.controls.update();
       this.renderer.render(this.scene,this.camera);
    //  requestAnimationFrame(this.renders());//此行代码会出现threejs requestAnimationFrame 导致的call stack超出上限的问题
       requestAnimationFrame(this.renders.bind(this));

    },

  }
}
</script>

<style>
  *{
    margin: 0;
    padding: 0;
  }
.container{
  height: 100vh;
  width: 100vw;
  background-color: #f0f0f0;
}
</style>
原文作者:小南瓜开发平台;如有侵权,请联系管理员删除。

请登录后发表评论
登录
全部评论
