Hessian像RMI一样,使用二进制消息进行客户端和服务端的交互,它的二进制消息可以移植到其他非Java的语言中包括PHP、Python、C++和C#。因为Hessian是基于HTTP的,所以HessianSeriviceExporter实现为一个Spring MVC控制器。

HessianSeriviceExporter是一个SpringMVC控制器,它可以接收Hessian请求,并将这些请求翻译成对POJO的调用来,从而将POJO导出为一个Hessian服务
为了使用导出Hessian服务,我们需要执行两个额外的配置步骤:
1、在web.xml中配置Spring的DispatcherServlet,并把我们的应用部署为Web应用;
2、在Spring的配置文件中配置一个URL处理器,将Hessian服务的URL分发给对应的Hessian服务Bean。
Hessian入门(与Spring集成)
说明 :
1. 讲述如何配置Hessian的服务器端(与Spring集成).
2. 讲述客户端如何调用
① 使用HessianProxyFactory Hessian代理工厂直接调用
② 使用HessianProxyFactoryBean Hessian代理工厂Bean来完成接口调用.
1. 讲述如何配置Hessian的服务器端(与Spring集成).
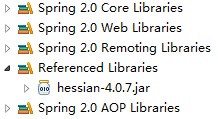
接口定义类: com.nice.isay. Isay:
- package com.nice.isay;
- public interface Isay {
- public String sayHello(String arg1,String arg2);
- }
接口具体实现类: com.nice.isay. IsayImpl
- package com.nice.isay;
- public class IsayImpl implements Isay {
- public String sayHello(String arg1, String arg2) {
- return "Hello:" + arg1 + arg2;
- }
- }
配置Web.xml:
点击(此处)折叠或打开
-
<?xml version="1.0" encoding="UTF-8"?>
-
<web-app version="3.0"
-
xmlns="http://java.sun.com/xml/ns/javaee"
-
xmlns:xsi="http://www.w3.org/2001/XMLSchema-instance"
-
xsi:schemaLocation="http://java.sun.com/xml/ns/javaee
-
http://java.sun.com/xml/ns/javaee/web-app_3_0.xsd">
-
<display-name></display-name>
-
<welcome-file-list>
-
<welcome-file>index.jsp</welcome-file>
-
</welcome-file-list>
-
<listener>
-
<listener-class>
-
org.springframework.web.context.ContextLoaderListener
-
</listener-class>
-
</listener>
-
<!-- 在此处配置刚刚写的spring-hessian.xml的位置 -->
-
<context-param>
-
<param-name>contextConfigLocation</param-name>
-
<param-value>
-
classpath:/spring-hessian.xml
-
</param-value>
-
</context-param>
-
-
-
<servlet>
-
<!-- servlet-name保持与spring-hessian.xml中一致 -->
-
<servlet-name>HelloServiceExporter</servlet-name>
-
<servlet-class>org.springframework.web.context.support.HttpRequestHandlerServlet</servlet-class>
-
</servlet>
-
<servlet-mapping>
-
<servlet-name>HelloServiceExporter</servlet-name>
-
<url-pattern>/HelloService</url-pattern>
-
</servlet-mapping>
-
- </web-app>
- <servlet>
- <servlet-name>remote</servlet-name>
- <!-- 使用Spring的代理Servlet -->
- <servlet-class>org.springframework.web.servlet.DispatcherServlet</servlet-class>
- <init-param>
- <param-name>namespace</param-name>
- <param-value>classes/remote-servlet</param-value>
- </init-param>
- <load-on-startup>1</load-on-startup>
- </servlet>
- <servlet-mapping>
- <servlet-name>remote</servlet-name>
- <url-pattern>/remote/*</url-pattern>
- </servlet-mapping>
配置remote-servlet.xml[该文件位于src目录下,即编译后存在与classes下]:
点击(此处)折叠或打开
点击(此处)折叠或打开
-
<?xml version="1.0" encoding="UTF-8"?>
-
<beans xmlns="http://www.springframework.org/schema/beans"
-
xmlns:xsi="http://www.w3.org/2001/XMLSchema-instance"
-
xmlns:jee="http://www.springframework.org/schema/jee"
-
xmlns:tx="http://www.springframework.org/schema/tx"
-
xmlns:context="http://www.springframework.org/schema/context"
-
xmlns:aop="http://www.springframework.org/schema/aop"
-
xmlns:p="http://www.springframework.org/schema/p"
-
xsi:schemaLocation="http://www.springframework.org/schema/beans
-
http://www.springframework.org/schema/beans/spring-beans-3.0.xsd
-
http://www.springframework.org/schema/tx
-
http://www.springframework.org/schema/tx/spring-tx-3.0.xsd
-
http://www.springframework.org/schema/jee
-
http://www.springframework.org/schema/jee/spring-jee-3.0.xsd
-
http://www.springframework.org/schema/aop
-
http://www.springframework.org/schema/aop/spring-aop-3.0.xsd
-
http://www.springframework.org/schema/context
-
http://www.springframework.org/schema/context/spring-context-3.0.xsd
-
http://activemq.apache.org/schema/core
-
http://activemq.apache.org/schema/core/activemq-core.xsd"
-
default-lazy-init="true">
-
-
<context:annotation-config />
-
<!-- 组件扫描,使用annotation 自动注册bean,并检查@Required,@Autowired的属性已被注入 -->
-
<context:component-scan base-package="hessian" />
-
-
<!-- 自动装配 -->
-
<bean class="org.springframework.beans.factory.annotation.AutowiredAnnotationBeanPostProcessor" />
-
-
-
<!-- Name保持与web.xml中的一致,web.xml下文中描述 -->
-
<bean name="HelloServiceExporter"
-
class="org.springframework.remoting.caucho.HessianServiceExporter">
-
<!-- service的ref与HelloServiceImpl中@Service中配置的一致 -->
-
<property name="service" ref="helloService" />
-
<!-- 接口的路径 -->
-
<property name="serviceInterface"
-
value="hessian.HelloService" />
-
</bean>
- </beans>
- <!DOCTYPE beans PUBLIC "-//SPRING//DTD BEAN//EN" "http://www.springframework.org/dtd/spring-beans.dtd">
- <beans>
- <!-- 接口的具体实现类 -->
- <bean id="impl" class="com.nice.isay.IsayImpl" />
- <!-- 使用Spring的HessianServie做代理 -->
- <bean name="/helloSpring"
- class="org.springframework.remoting.caucho.HessianServiceExporter">
- <!-- service引用具体的实现实体Bean-->
- <property name="service" ref="impl" />
- <property name="serviceInterface" value="com.nice.isay.Isay" />
- </bean>
- <!-- 可以配置多个HessianServiceExporter代理Bean -->
- </beans>
注:
这个文件为什么叫remote-servlet.xml呢?
因为我们在web.xml中有配置:<servlet-name>remote</servlet-name>。
所以remote-servlet.xml的文件名必须以
<servlet-name>中配置的servlet-name作为文件名的开头,
且文件名的格式必须是[servlet-name]-servlet.xml格式,否则检测不到。
即:
<param-value>classes/remote-servlet</param-value>
所以文件名为remote-servlet.xml。
2. 讲述客户端如何调用
① 使用HessianProxyFactory Hessian代理工厂直接调用
即:
- package com.nice.test;
- import java.net.MalformedURLException;
- import com.caucho.hessian.client.HessianProxyFactory;
- import com.nice.isay.Isay;
- public class NormalClient {
- public static void main(String[] args) throws MalformedURLException {
- //Spring Hessian代理Servelet
- String url = "http://localhost:8080/HessianSpring/remote/helloSpring";
- HessianProxyFactory factory = new HessianProxyFactory();
- Isay api = (Isay) factory.create(Isay.class, url);
- System.out.println(api.sayHello("chen", "xin"));
- }
- }
输出Hello:chenxin
2. 讲述客户端如何调用
② 使用HessianProxyFactoryBean Hessian代理工厂Bean来完成接口调用.
配置客户端 remote-client.xml:
- <!DOCTYPE beans PUBLIC "-//SPRING//DTD BEAN//EN" "http://www.springframework.org/dtd/spring-beans.dtd">
- <beans>
- <!-- 客户端Hessian代理工厂Bean -->
- <bean id="clientSpring" class="org.springframework.remoting.caucho.HessianProxyFactoryBean">
- <!-- 请求代理Servlet路径 -->
- <property name="serviceUrl">
- <value>http://localhost:8080/HessianSpring/remote/helloSpring</value>
- </property>
- <!-- 接口定义 -->
- <property name="serviceInterface">
- <value>com.nice.isay.Isay</value>
- </property>
- </bean>
- </beans>
调用:
- package com.nice.test;
- import org.springframework.context.ApplicationContext;
- import org.springframework.context.support.ClassPathXmlApplicationContext;
- import com.nice.isay.Isay;
- public class SpringClient {
- public static void main(String[] args) {
- ApplicationContext contex = new ClassPathXmlApplicationContext(
- "remote-client.xml");
- // 获得客户端的Hessian代理工厂bean
- Isay i = (Isay) contex.getBean("clientSpring");
- System.out.println(i.sayHello("chen", "xin"));
- }
- }
输出Hello:chenxin
来自 “ ITPUB博客 ” ,链接:https://blog.itpub.net/9399028/viewspace-2076250/ ,如需转载,请注明出处,否则将追究法律责任。

