别再踩坑!一篇搞定海量数据 Vastbase G100 安装
作者: ShunWah
公众号: "shunwah星辰数智社"主理人。持有认证: OceanBase OBCA/OBCP、MySQL OCP、OpenGauss、崖山YCA、金仓KingBase KCA/KCP、KaiwuDB KWCA/KWCP、 亚信 AntDBCA、翰高 HDCA、GBase 8a/8c/8s、Galaxybase GBCA、Neo4j ScienceCertification、NebulaGraph NGCI/NGCP、东方通TongTech TCPE、TiDB PCTA等多项权威认证。
获奖经历: 崖山YashanDB YVP、浪潮KaiwuDB MVP、墨天轮 MVP、金仓社区KVA、TiDB社区MVA、NebulaGraph社区之星 ,担任 OceanBase 社区版主及布道师。曾在OceanBase&墨天轮征文大赛、OpenGauss、TiDB、YashanDB、Kingbase、KWDB、Navicat Premium × 金仓数据库征文等赛事中多次斩获一、二、三等奖,原创技术文章常年被墨天轮、CSDN、ITPUB 等平台首页推荐。
- CSDN_ID: shunwahma
- 墨天轮_ID:shunwah
- ITPUB_ID: shunwah
- IFClub_ID:shunwah

前言
在数据库国产化全面提速的行业浪潮下,北京海量数据技术股份有限公司持续深耕数据库领域,旗下旗舰产品 Vastbase G100已成为企业级关系型数据库国产化的标杆方案。作为面向关键业务的企业级版本,Vastbase G100 V3.0.8PSU4 完成架构与引擎的深度迭代,兼具高性能、高并发、高可用、高安全、高兼容五大核心特性,融合向量、空间等多模态数据处理引擎,可精准匹配政务、金融、制造等重点行业的数字化转型与信创改造需求。
单机部署是企业落地国产化数据库的核心第一步,海量数据官方推荐的 Installer 安装方式,凭借标准化流程、高效执行效率及批量部署适配性,成为单机场景的首选方案。本文聚焦 Vastbase G100 V3.0.8PSU4 单机 Installer 部署全流程,从服务器环境准备到命令行实操验证,每一步均搭配技术解析与核心逻辑拆解,助力技术人员快速掌握部署要点,实现数据库平稳落地与业务无缝衔接。
本文实操环境适配
硬件架构:海光、英特尔x86
操作系统:Linux
安装包规格:267MB
基于海量数据官方标准流程优化,兼顾实操性与技术深度,确保部署合规性与稳定性。
一、安装前置准备:底层环境的核心要求与配置
Vastbase G100 V3.0.8PSU4 installer 安装的核心前提是保证服务器环境满足产品适配标准,前置准备的完整性直接决定安装过程是否顺畅,主要包含服务器基础检查、操作系统与CPU核验、第三方依赖包安装、系统与环境参数配置四大核心环节,每一步均需通过命令行完成精准校验与配置。
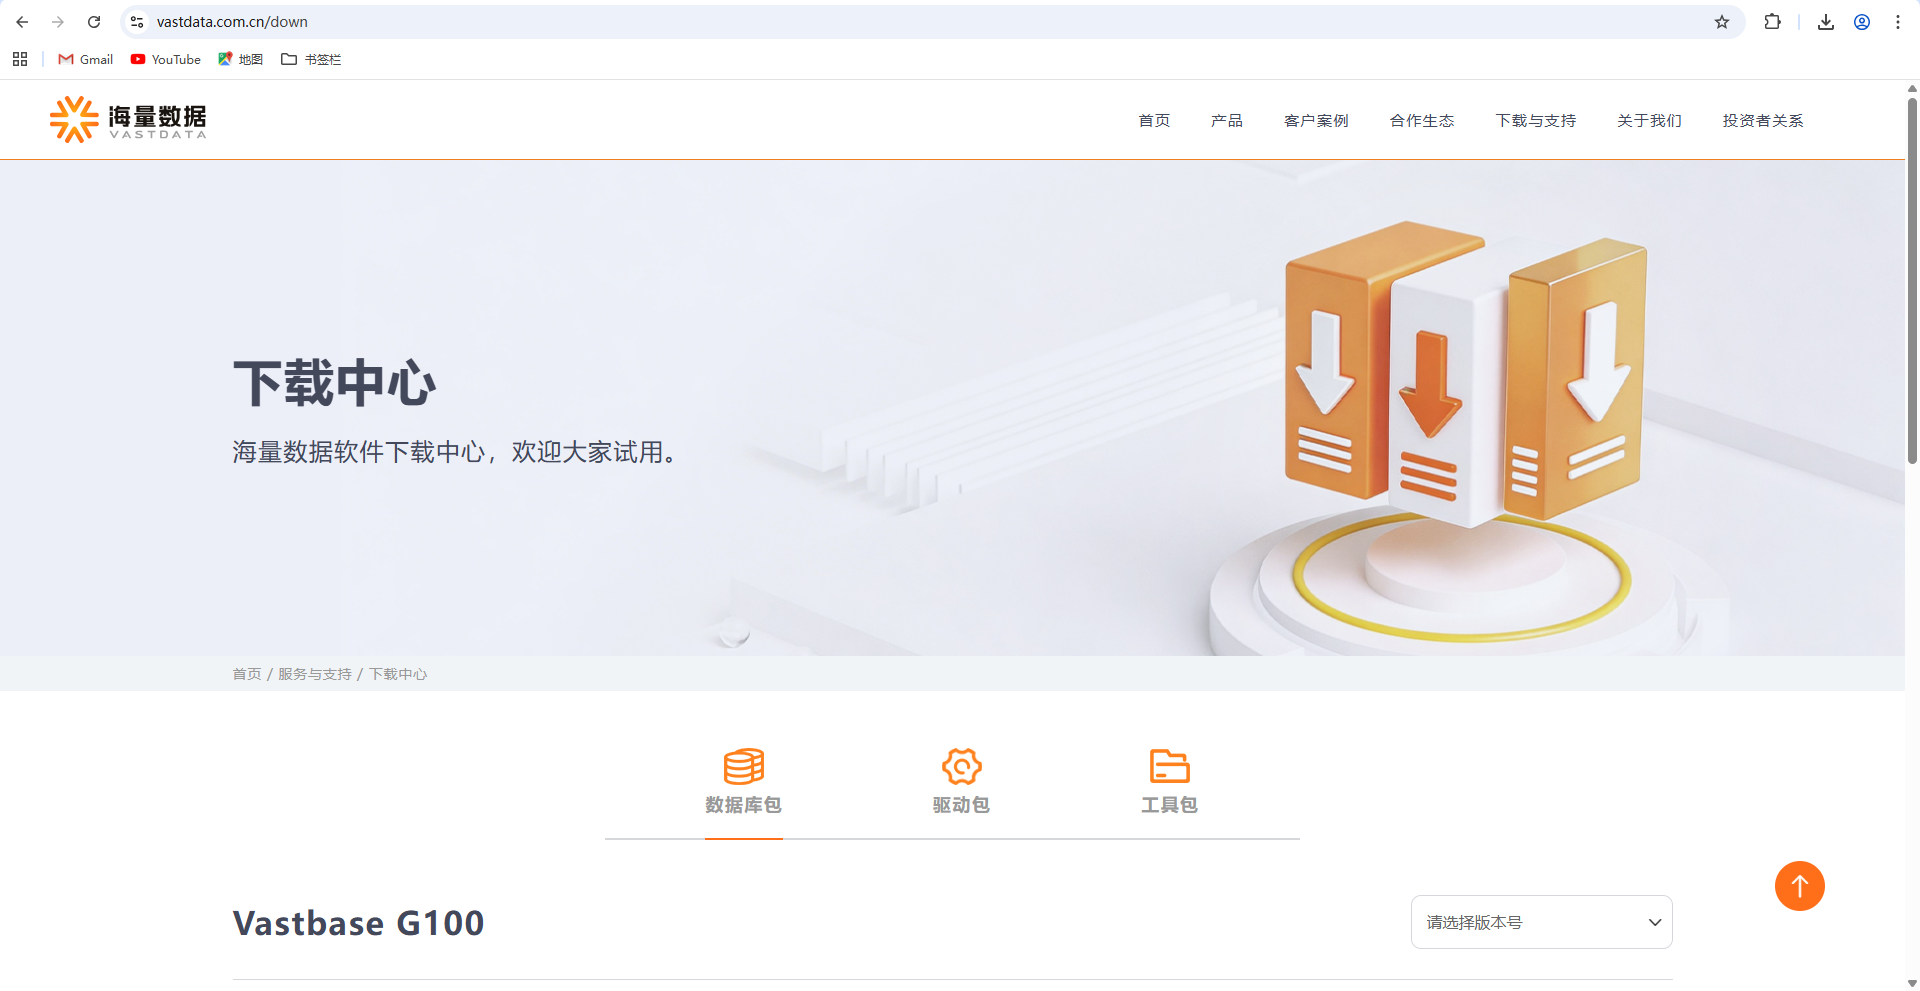
1.1 官方下载:Vastbase G100 V3.0.8PSU4安装包获取
安装前需先从海量数据官方下载中心获取对应版本安装包,以下为完整下载流程:
- 目标版本:Vastbase G100 V3.0.8PSU4
- 适配架构:海光、英特尔x86_Linux
- 安装包信息:tar格式,大小267MB
- 官方下载地址: https://www.vastdata.com.cn/down
- 官方知识库参考: https://docs.vastdata.com.cn/zh_CN/VastbaseG100/V3.0.8/1/6b1b8576c7e5459b95d8da12a138a47e
1.2 下载申请与获取步骤
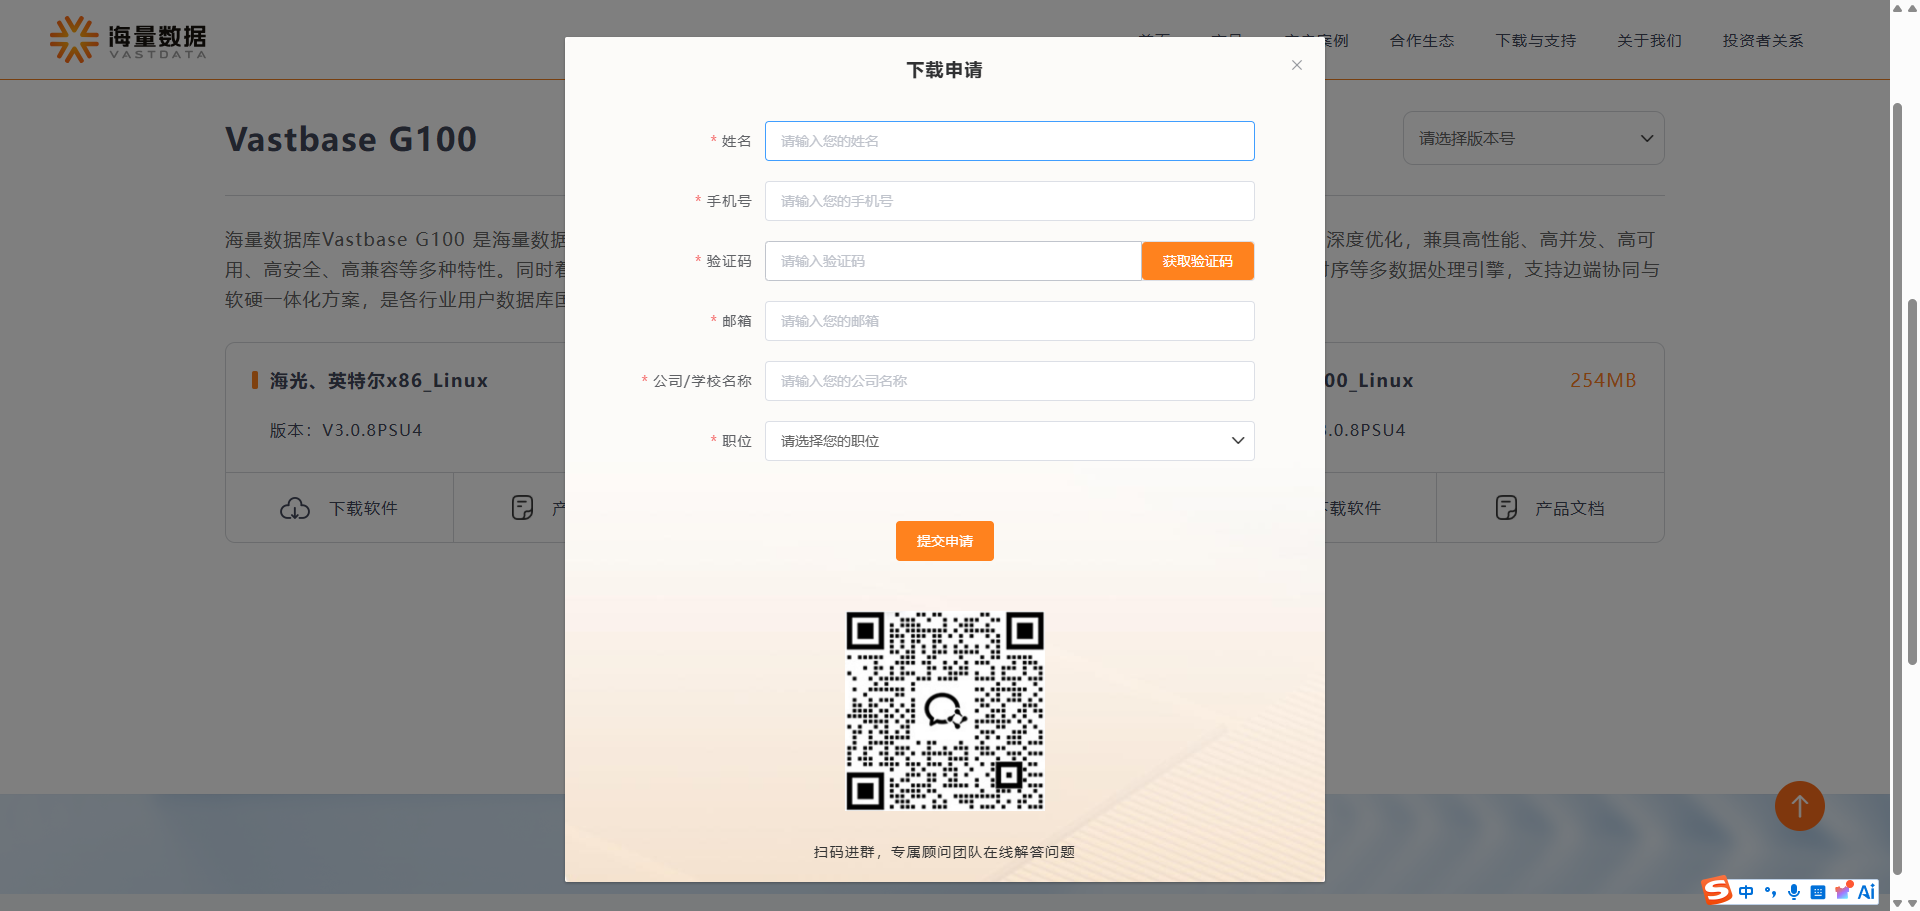
- 访问官方下载中心:打开浏览器输入下载地址,进入海量数据Vastbase官方下载页面;
- 查找目标版本:在下载中心找到“Vastbase G100”产品系列,筛选版本为“V3.0.8PSU4”,选择适配架构“海光/英特尔x86_Linux”;
- 提交下载申请:点击“下载”按钮后,按提示填写相关信息(如企业名称、联系人、联系方式等),完成下载申请提交;
- 审核与获取:申请提交后,等待官方审核(通常1-3个工作日),审核通过后将收到下载链接或相关通知,点击链接即可获取267MB的tar格式安装包;
- 校验安装包:下载完成后,建议通过官方提供的校验方式(如MD5校验)验证安装包完整性,避免因文件损坏导致安装失败。
说明:若访问下载地址时出现解析异常,可尝试更换浏览器或联系海量数据官方技术支持获取协助,确保安装包来源正规。
1.3 服务器基础资源检查
Vastbase G100 V3.0.8PSU4对服务器硬件资源有基础阈值要求,需保证CPU、内存、磁盘满足最小部署标准,通过以下命令行完成资源核查,同时解析命令核心作用:
1.3.1 实操命令
# 查看CPU核心数,要求不低于2核[root@worker3 ~]# lscpu | grep "CPU(s)"CPU(s):                8
On-line CPU(s) list:   0-7
NUMA node0 CPU(s):     0-7
[root@worker3 ~]#

# 查看内存总大小,要求不低于8GB[root@worker3 ~]# free -h | grep "Mem"Mem:            27G        2.0G        3.3G        1.5G         22G         22G
[root@worker3 ~]#

# 查看磁盘可用空间(安装目录建议/opt),要求不低于50GB[root@worker3 ~]# df -h /dataFilesystem      Size  Used Avail Use% Mounted on
/dev/sdb1       200G   16G  185G   8% /data
[root@worker3 ~]#

# 查看系统内核版本,要求适配Linux 3.10及以上[root@worker3 ~]# uname -r3.10.0-693.el7.x86_64
[root@worker3 ~]#

1.3.2 技术解析
-
lscpu | grep "CPU(s)":通过lscpu获取CPU硬件信息,管道符过滤核心数字段,数据库的并发处理能力与CPU核心数强相关,2核为单机部署最小阈值,生产环境建议4核及以上。 -
free -h:以人类可读的格式展示内存信息,Vastbase G100的实例运行、数据缓存均需占用一定内存,8GB为基础保障,避免内存不足导致实例启动失败。 -
df -h /opt:检查指定安装目录的磁盘空间,数据库安装包解压、实例文件、日志文件均会占用磁盘,50GB预留空间可满足基础部署与后续轻量业务运行。 -
uname -r:查看Linux内核版本,Vastbase G100,对内核版本有适配性要求,3.10及以上版本可保证内核与数据库底层驱动的兼容性。
1.4 操作系统与CPU兼容性核验
本次安装包适配 海光、英特尔x86 架构,需通过命令行确认CPU架构与操作系统发行版,避免因架构不匹配导致安装包解压或运行失败:
1.4.1 实操命令
# 查看CPU架构[root@worker3 ~]# archx86_64
[root@worker3 ~]#

# 查看操作系统发行版与版本[root@worker3 ~]# cat /etc/os-release | grep -E "NAME|VERSION"NAME="CentOS Linux"VERSION="7 (Core)"VERSION_ID="7"PRETTY_NAME="CentOS Linux 7 (Core)"CPE_NAME="cpe:/o:centos:centos:7"CENTOS_MANTISBT_PROJECT_VERSION="7"REDHAT_SUPPORT_PRODUCT_VERSION="7"[root@worker3 ~]#

1.4.2 技术解析
-
arch:返回x86_64则为英特尔x86架构,返回aarch64需确认是否为海光架构,安装包与架构严格绑定,非适配架构会出现执行文件无法运行的错误。 -
cat /etc/os-release:读取系统发行版信息,Vastbase G100 V3.0.8PSU4适配CentOS、openEuler、麒麟等主流国产Linux发行版,需确认发行版在官方适配列表内。
1.5 第三方依赖包安装
Vastbase G100的运行依赖部分Linux系统基础库,缺失依赖会导致安装程序执行中断,需通过yum/yast等包管理器安装核心依赖,以yum为例:
1.5.1 实操命令
# 升级包管理器并安装核心依赖yum update -y && yum install -y gcc libaio-devel flex bison perl perl-devel readline-devel zlib-devel openssl-devel pam-devel libxml2-devel libxslt-devel python3 python3-devel
[root@worker3 tmp]# yum update -y && yum install -y gcc libaio-devel flex bison perl perl-devel readline-devel zlib-devel openssl-devel pam-devel libxml2-devel libxslt-devel python3 python3-develLoaded plugins: fastestmirror
Loading mirror speeds from cached hostfile
No packages marked for update
Loaded plugins: fastestmirror
Loading mirror speeds from cached hostfile
Package gcc-4.8.5-44.el7.x86_64 already installed and latest version
Package libaio-devel-0.3.109-13.el7.x86_64 already installed and latest version
Package flex-2.5.37-6.el7.x86_64 already installed and latest version
Package bison-3.0.4-2.el7.x86_64 already installed and latest version
Package 4:perl-5.16.3-299.el7_9.x86_64 already installed and latest version
Package readline-devel-6.2-11.el7.x86_64 already installed and latest version
Package zlib-devel-1.2.7-21.el7_9.x86_64 already installed and latest version
Package 1:openssl-devel-1.0.2k-26.el7_9.x86_64 already installed and latest version
Resolving Dependencies
--> Running transaction check

# 验证依赖是否安装成功[root@worker3 tmp]# rpm -qa | grep libaio-devellibaio-devel-0.3.109-13.el7.x86_64
[root@worker3 tmp]#

1.5.1 技术解析
- 核心依赖中,
libaio-devel为异步I/O库,是数据库处理数据读写的基础依赖;openssl-devel为加密库,保障数据库的网络传输安全;python3-devel为Python开发库,Vastbase G100的部分脚本基于Python开发。 -
rpm -qa | grep 依赖名:通过RPM包管理器验证依赖是否成功安装,返回包名与版本则说明安装完成,无返回则需重新执行安装命令。
1.6 系统与环境核心配置
为保证数据库实例的稳定运行,需对系统内核参数、文件描述符、用户权限进行配置,核心是创建数据库专用用户与用户组,避免使用root用户运行实例带来的安全风险:
1.6.1 实操命令
# 1. 创建数据库用户组vgadmin与专用用户vastbase[root@worker3 tmp]# groupadd vgadmin[root@worker3 tmp]# useradd -g vgadmin -m -d /home/vastbase -s /bin/bash vastbase[root@worker3 tmp]#

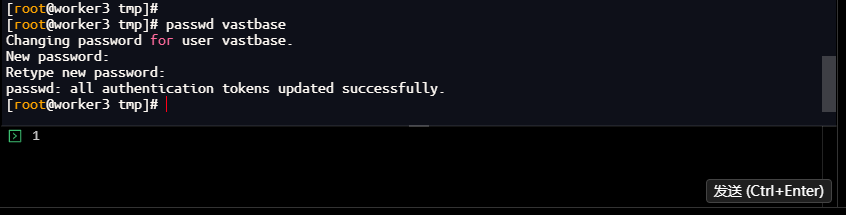
# 2. 设置vastbase用户密码 hdHX0%Xz5xHIsetg[root@worker3 tmp]# passwd vastbaseChanging password for user vastbase.
New password:
Retype new password:
passwd: all authentication tokens updated successfully.
[root@worker3 tmp]#
# 赋予用户sudo权限(可选,方便后续操作)[root@worker3 tmp]# echo "vastbase ALL=(ALL) NOPASSWD: ALL" >> /etc/sudoers[root@worker3 tmp]#

# 刷新sudo配置visudo -c
[root@worker3 tmp]# visudo -c/etc/sudoers: parsed OK
/etc/sudoers.d/tidb: bad permissions, should be mode 0440
[root@worker3 tmp]#

技术解析:独立的数据库用户可实现权限隔离,避免数据库进程拥有系统最高权限,降低因程序漏洞导致的系统安全风险,家目录用于存放用户的环境配置与数据库相关脚本。
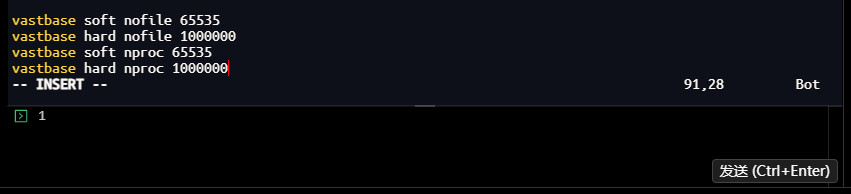
# 3. 修改文件描述符限制[root@worker3 tmp]# vim /etc/security/limits.conf

添加以下配置:
vastbase soft nofile 65535
vastbase hard nofile 1000000
vastbase soft nproc 65535
vastbase hard nproc 1000000
# 4. 配置内核参数,生效并保存[root@worker3 tmp]# sysctl -w kernel.sem="250 32000 100 128"kernel.sem = 250 32000 100 128
[root@worker3 tmp]# sysctl -w kernel.shmmax=17179869184kernel.shmmax = 17179869184
[root@worker3 tmp]# sysctl -pfs.aio-max-nr = 1048576
fs.file-max = 6815744
kernel.shmall = 2097152
kernel.shmmax = 4294967295
kernel.shmmni = 4096
kernel.sem = 250 32000 100 128
net.ipv4.ip_local_port_range = 9000 65500
net.core.rmem_default = 262144
net.core.rmem_max = 4194304
net.core.wmem_default = 262144
net.core.wmem_max = 1048576
kernel.sem = 5010 641280 5010 256
kernel.shmall = 2097152
kernel.shmmax = 53687091200
kernel.shmmni = 8192
vm.mmap_min_addr = 65536
vm.dirty_writeback_centisecs = 100
vm.dirty_background_ratio = 10
vm.dirty_ratio = 60
vm.swappiness = 20
vm.min_free_kbytes = 512000
vm.vfs_cache_pressure = 200
fs.aio-max-nr = 1048576
fs.file-max = 76724600
fs.nr_open = 2097152
net.core.netdev_max_backlog = 32768
net.core.rmem_default = 262144
net.core.rmem_max = 4194304
net.core.somaxconn = 4096
net.core.wmem_default = 262144
net.core.wmem_max = 4194304
net.ipv4.ip_local_port_range = 9000 65500
net.ipv4.route.gc_timeout = 100
net.ipv4.tcp_keepalive_time = 1200
net.ipv4.tcp_keepalive_probes = 3
net.ipv4.tcp_keepalive_intvl = 30
net.ipv4.tcp_max_syn_backlog = 4096
net.ipv4.tcp_max_tw_buckets = 6000
net.ipv4.tcp_synack_retries = 2
net.ipv4.tcp_syn_retries = 2
net.ipv4.tcp_fin_timeout = 30
net.ipv4.tcp_wmem = 8192 436600 873200
net.ipv4.tcp_rmem = 32768 436600 873200
net.ipv4.tcp_mem = 94500000 91500000 92700000
net.ipv4.tcp_max_orphans = 3276800
[root@worker3 tmp]#
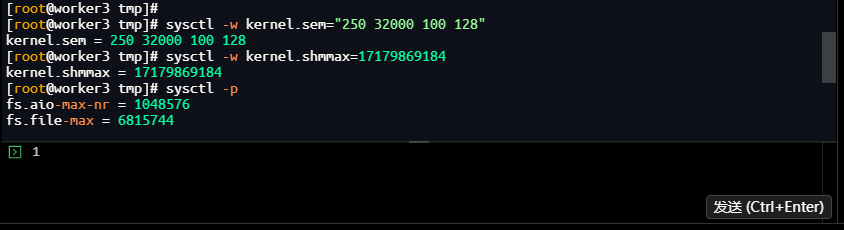
# 5. 给安装目录赋予vastbase用户权限[root@worker3 tmp]# mkdir -p /data/vastbase[root@worker3 tmp]# chown -R vastbase:vgadmin /data/vastbase[root@worker3 tmp]#

# 创建安装目录和数据目录[root@worker3 vastbase]# mkdir -p /data/vastbase/local /data/vastbase/data[root@worker3 vastbase]# chown -R vastbase:vgadmin /data/vastbase[root@worker3 vastbase]# chmod 700 /data/vastbase/data[root@worker3 vastbase]#
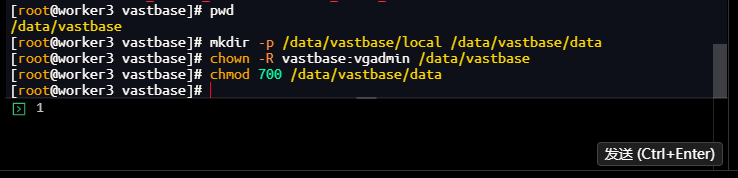
安装目录规划:
安装目录配置:
/data/vastbase/local
数据目录配置:
/data/vastbase/data
1.6.2 技术解析
- 数据库专用用户
vastbase:避免root用户运行实例,降低系统权限泄露风险,-g指定用户组,-d指定家目录,-s指定默认shell。 - 文件描述符设置为65535:数据库运行过程中会打开大量文件、网络连接,默认文件描述符数量不足会导致连接失败,
soft为软限制,hard为硬限制,修改limits.conf实现永.久生效。 - 内核参数
kernel.sem为信号量配置,kernel.shmmax为最大共享内存大小,优化后可满足数据库实例的内存调度与进程通信需求,sysctl -p让内核参数立即生效。 - 安装目录权限赋予:确保vastbase用户拥有安装包解压、文件写入的权限,避免因权限不足导致安装失败。
二、installer安装核心流程:实例化安装(推荐)
Vastbase G100的installer安装分为 实例化安装与 非实例化安装,实例化安装会在安装过程中直接初始化数据库实例,安装完成后可直接启动使用,是单机部署的首选方式。本章节采用 交互安装模式(兼顾新手友好性),搭配命令行实操与每一步技术解析,同时补充静默安装的核心命令,适配批量部署场景。
2.1 上传安装包到服务器
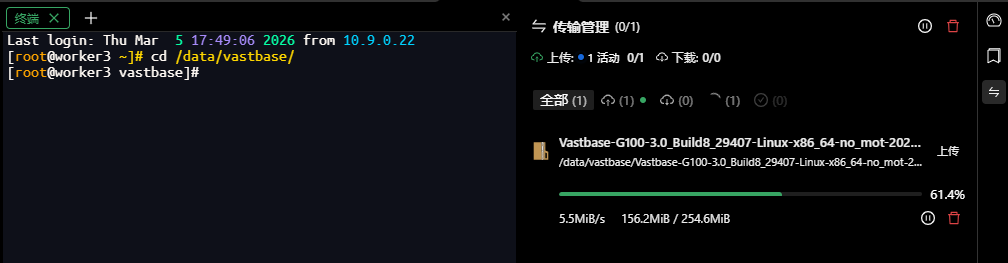
前置准备:将Vastbase G100 V3.0.8PSU4安装包上传至服务器
/opt目录,切换为vastbase用户(禁止root用户安装):
# 切换为vastbase用户# 进入安装目录[root@worker3 vastbase]# su - vastbase[vastbase@worker3 ~]$ cd /data/vastbase/
[vastbase@worker3 vastbase]$ ls
Vastbase-G100-3.0_Build8_29407-Linux-x86_64-no_mot-202512072036.tar
[vastbase@worker3 vastbase]$

# 解压安装包[vastbase@worker3 vastbase]$ ls
Vastbase-G100-3.0_Build8_29407-Linux-x86_64-no_mot-202512072036.tar
[vastbase@worker3 vastbase]$ tar -xvf Vastbase-G100-3.0_Build8_29407-Linux-x86_64-no_mot-202512072036.tar
vastbase-installer/
vastbase-installer/vastbase_installer
vastbase-installer/locales/
vastbase-installer/locales/messages.en-US.json
vastbase-installer/locales/messages.zh-CN.json
vastbase-installer/Vastbase-G100-3.0_Build8_29407-Linux-x86_64-no_mot.tar.gz
vastbase-installer/.checksum
[vastbase@worker3 vastbase]$

# 进入解压后的安装目录[vastbase@worker3 vastbase]$ ls
Vastbase-G100-3.0_Build8_29407-Linux-x86_64-no_mot-202512072036.tar
vastbase-installer
[vastbase@worker3 vastbase]$ cd vastbase-installer/
[vastbase@worker3 vastbase-installer]$ ls
locales  Vastbase-G100-3.0_Build8_29407-Linux-x86_64-no_mot.tar.gz  vastbase_installer
[vastbase@worker3 vastbase-installer]$

2.2 交互模式:installer实例化安装全步骤
交互安装通过图形化的命令行交互完成配置,每一步均有明确的提示,新手可根据提示完成配置,核心命令为执行安装程序
./installer,以下为全交互步骤+实操命令+技术解析:
2.2.1 步骤1:启动安装程序,选择安装类型
# 启动installer安装程序[vastbase@worker3 vastbase-installer]$ ls
locales  Vastbase-G100-3.0_Build8_29407-Linux-x86_64-no_mot.tar.gz  vastbase_installer
[vastbase@worker3 vastbase-installer]$ ./vastbase_installer
===============================================================================
Welcome to the installation tool (V1.0) and start installing Vastbase.
===============================================================================
Check whether the installation package is complete
---------------
ok
===============================================================================
Type <Enter> to continue:

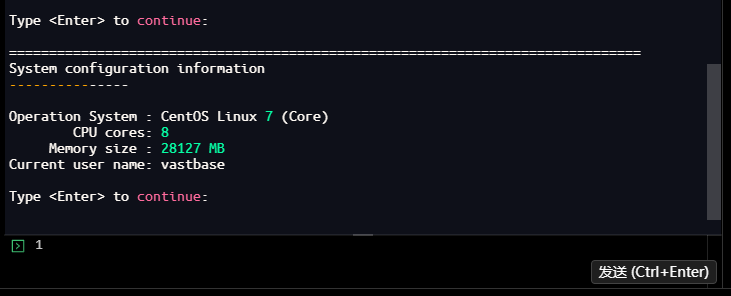
2.2.2 步骤2:检查系统配置
Type <Enter> to continue:
===============================================================================
System configuration information
---------------
Operation System : CentOS Linux 7 (Core)
        CPU cores: 8
     Memory size : 28127 MB
Current user name: vastbase
Type <Enter> to continue:
2.2.3 步骤3:依赖检查
===============================================================================
Dependency check
---------------
  readline : 6.2
    python : 2.7.5
    libicu : 50.2
  cracklib : 2.9.0
   libxslt : 1.1.28
       tcl : 8.5.13
      perl : 5.16.3
  openldap : 2.4.44
       pam : 1.1.8
systemd-libs : 219
     bzip2 : 1.0.6
   gettext : 0.19.8.1
    libaio : 0.3.109
ncurses-libs : 5.9
Type <Enter> to continue:
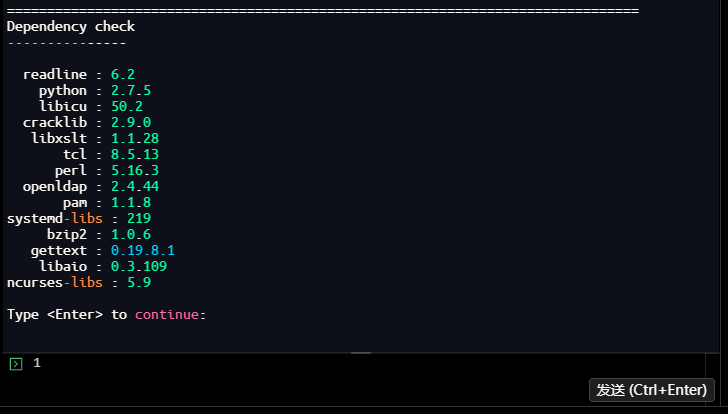
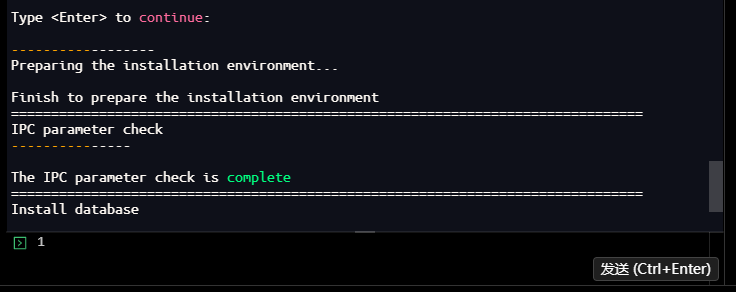
2.2.4 步骤4:IPC参数检查(如遇报错,参考第四章避坑指南)
Type <Enter> to continue:
------------------
Preparing the installation environment...
Finish to prepare the installation environment
===============================================================================
IPC parameter check
---------------
The IPC parameter check is complete
===============================================================================
2.2.5 步骤5:选择实例化安装
===============================================================================
Install database
---------------
Whether to instantiate the database (Y/N): Y
Select installation type
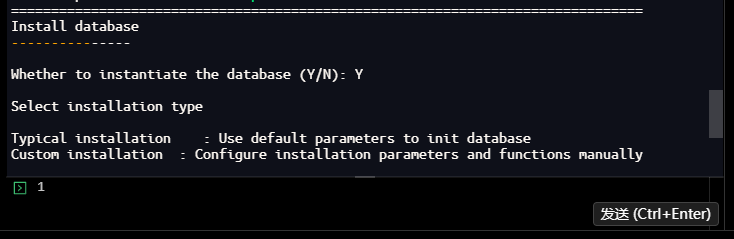
技术解析
- 实例化安装:安装程序会自动完成数据库软件安装+实例初始化,生成数据库服务、监听端口、默认数据库等,安装完成后可直接连接使用。
- 非实例化安装:仅安装数据库软件,不初始化实例,后续需通过手动命令初始化实例,适用于需要自定义实例配置的高级场景。
2.2.6 步骤6:选择安装类型(典型/自定义)
Select installation typeTypical installation    : Use default parameters to init database
Custom installation  : Configure installation parameters and functions manually
  -> 1- Typical installation
     2- Custom installation
Select the installation type, or type <Enter> to select the default (1):

2.2.7 步骤7:设置数据库初始化用户密码
输入密码
hdHX0%Xz5x(示例)
Database Initialization User Password (Press the backspace key to go back)
---------------
Enter the password of database initialization user (vastbase): ****************
Please enter your password again: ****************
===============================================================================
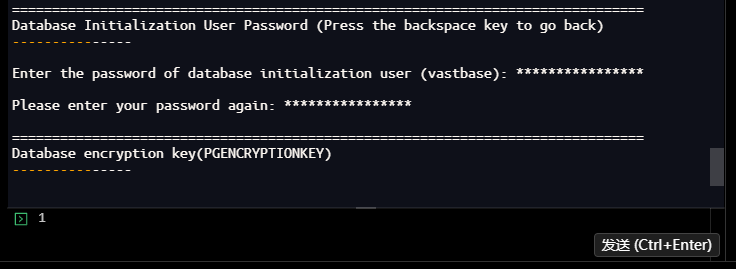
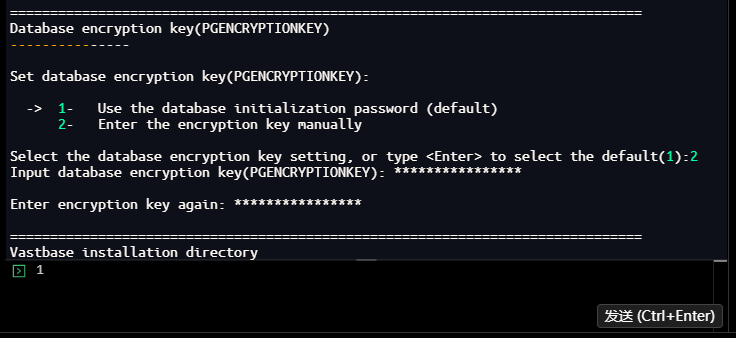
2.2.8 步骤8:设置数据库加密密钥
选择手动输入密钥,密钥
Vast@1658%(注意:密钥不建议超过15位)
===============================================================================
Database encryption key(PGENCRYPTIONKEY)
---------------
Set database encryption key(PGENCRYPTIONKEY):
  ->  1-   Use the database initialization password (default)
      2-   Enter the encryption key manually
Select the database encryption key setting, or type <Enter> to select the default(1):2
Input database encryption key(PGENCRYPTIONKEY): ****************
Enter encryption key again: ****************
===============================================================================
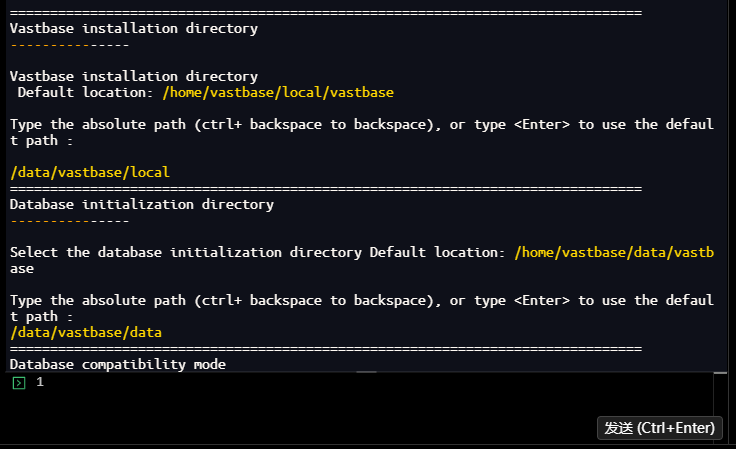
2.2.9 步骤9:指定安装目录和数据目录
===============================================================================
Vastbase installation directory
---------------
Vastbase installation directory
 Default location: /home/vastbase/local/vastbase
Type the absolute path (ctrl+ backspace to backspace), or type <Enter> to use the default path :
/data/vastbase/local===============================================================================
Database initialization directory
---------------
Select the database initialization directory Default location: /home/vastbase/data/vastbase
Type the absolute path (ctrl+ backspace to backspace), or type <Enter> to use the default path :
/data/vastbase/data
===============================================================================
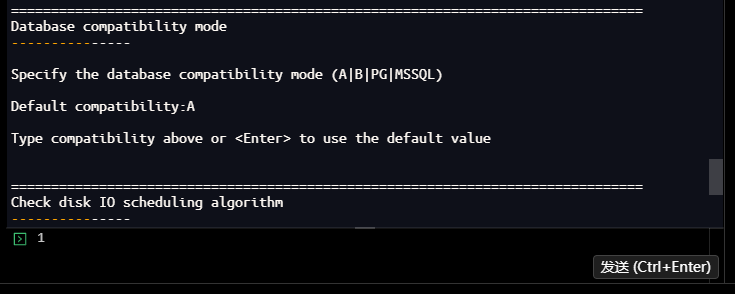
2.2.10 步骤10:选择数据库兼容模式
===============================================================================
Database compatibility mode
---------------
Specify the database compatibility mode (A|B|PG|MSSQL)
Default compatibility:A
Type compatibility above or <Enter> to use the default value
===============================================================================
2.2.11 步骤11:检查磁盘IO调度算法,显示安装摘要
===============================================================================
Check disk IO scheduling algorithm
---------------
The disk IO scheduling algorithm to which directory /data/vastbase/data belongs is being checked
The scheduling algorithm of disk IO is checked
===============================================================================
Installation summary
---------------
Vastbase installation directory:
    /data/vastbase/localVastbase directory:
    /data/vastbase/data
Database initialization user :
    vastbase
Database initialization parameter :
   listen_addresses='*'
   max_connections=500
   shared_buffers=7031MB
   max_process_memory=18704MB
   work_mem=4MB
Type <Enter> to continue:
Installation underway, please wait...
Initialize database successfully, data directory :/data/vastbase/data

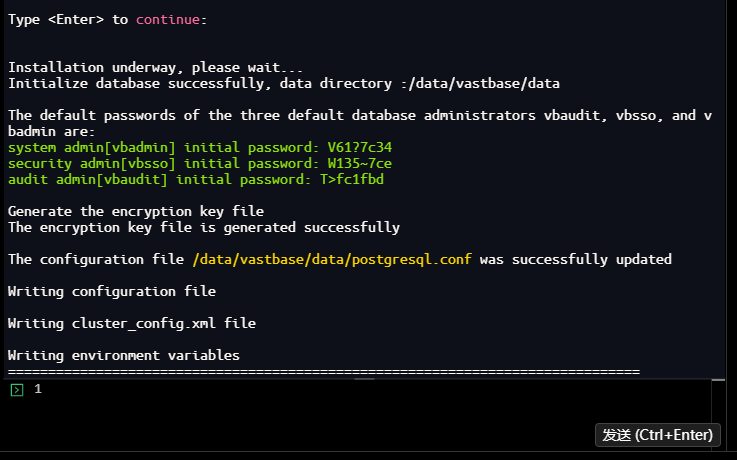
2.2.12 步骤12:安装完成,生成默认管理员密码
Type <Enter> to continue:
Installation underway, please wait...
Initialize database successfully, data directory :/data/vastbase/data
The default passwords of the three default database administrators vbaudit, vbsso, and vbadmin are:
system admin[vbadmin] initial password: V61?7c34
security admin[vbsso] initial password: W135~7ce
audit admin[vbaudit] initial password: T>fc1fbd
Generate the encryption key file
The encryption key file is generated successfully
The configuration file /data/vastbase/data/postgresql.conf was successfully updated
Writing configuration file
Writing cluster_config.xml file
Writing environment variables
===============================================================================
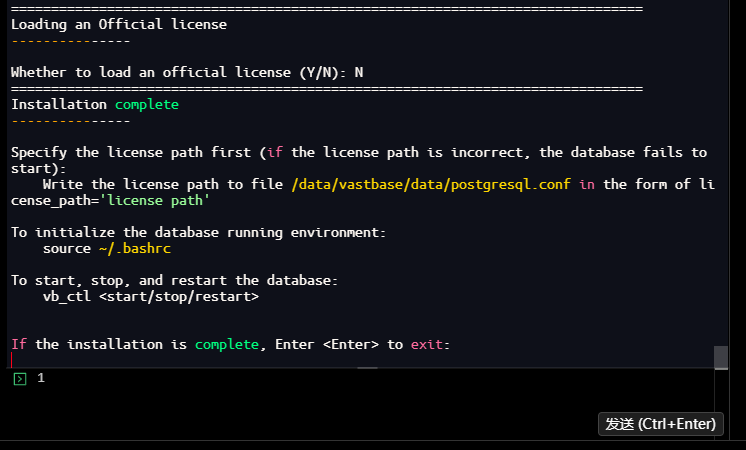
2.2.13 步骤13:加载官方许可证(可选)
===============================================================================
Loading an Official license
---------------
Whether to load an official license (Y/N): N
===============================================================================
Installation complete
---------------
Specify the license path first (if the license path is incorrect, the database fails to start):
    Write the license path to file /data/vastbase/data/postgresql.conf in the form of license_path='license path'To initialize the database running environment:    source ~/.bashrc
To start, stop, and restart the database:
    vb_ctl <start/stop/restart>
If the installation is complete, Enter <Enter> to exit:
分场景选择建议:
- 测试/验证环境(无正式许可证):选择 N(不加载),安装后进入试用模式,核心功能不受限。
- 生产环境(已有正式许可证):选择 Y(加载),并输入许可证文件路径。
2.3 安装完成后,需刷新环境变量:
[vastbase@worker3 vastbase-installer]$ source /home/vastbase/.bashrc
[vastbase@worker3 vastbase-installer]$

三、安装后验证与基础功能测试
3.1 手动启动数据库实例
# 直接执行启动命令(需指定数据目录,环境变量可能未完全生效)/data/vastbase/local/bin/vb_ctl start -D /data/vastbase/data
[vastbase@worker3 vastbase-installer]$ /data/vastbase/local/bin/vb_ctl start -D /data/vastbase/data
[2026-03-06 14:59:00.411][40762][][vb_ctl]: vb_ctl started,datadir is /data/vastbase/data
[2026-03-06 14:59:00.522][40762][][vb_ctl]: waiting for server to start...
.setting _JAVA_SR_SIGNUM=14 success.
[2026-03-06 14:59:02.690][40762][][vb_ctl]:  done[2026-03-06 14:59:02.690][40762][][vb_ctl]: server started (/data/vastbase/data)
[vastbase@worker3 vastbase-installer]$
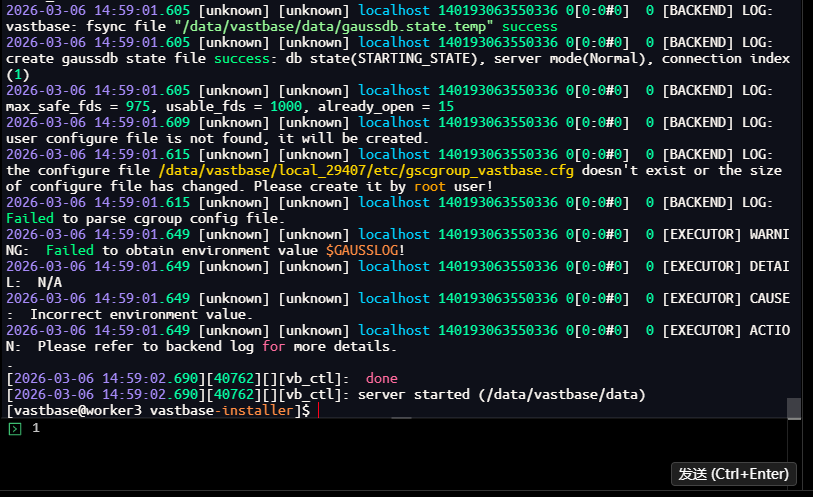
结论:Vastbase G100 V3.0.8PSU4 已完全启动成功!
3.2 验证数据库启动状态
# 再次查看状态[vastbase@worker3 vastbase-installer]$ /data/vastbase/local/bin/vb_ctl status -D /data/vastbase/data
[2026-03-06 15:12:21.626][42362][][vb_ctl]: vb_ctl status,datadir is /data/vastbase/data
vb_ctl: server is running (PID: 40766)
/data/vastbase/local/bin/vastbase "-D" "/data/vastbase/data"[vastbase@worker3 vastbase-installer]$

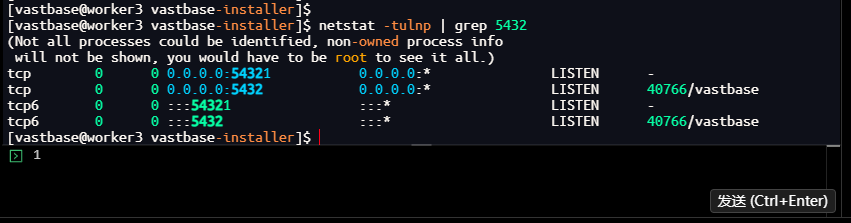
同时验证端口监听:
[vastbase@worker3 vastbase-installer]$ netstat -tulnp | grep 5432
(Not all processes could be identified, non-owned process info
 will not be shown, you would have to be root to see it all.)
tcp        0      0 0.0.0.0:54321           0.0.0.0:*               LISTEN      -
tcp        0      0 0.0.0.0:5432            0.0.0.0:*               LISTEN      40766/vastbase
tcp6       0      0 :::54321                :::*                    LISTEN      -
tcp6       0      0 :::5432                 :::*                    LISTEN      40766/vastbase
[vastbase@worker3 vastbase-installer]$
3.3 成功连接数据库
# 用完整路径执行gsql,指定用户、端口、数据库[vastbase@worker3 vastbase-installer]$ gsql -d postgres -p 5432 -U vbadmin -h 127.0.0.1
Password for user vbadmin:
gsql ((Vastbase G100 V3.0 (Build 8) Release) compiled at 2025-12-07 20:41:30 commit 29407 last mr  )
Non-SSL connection (SSL connection is recommended when requiring high-security)
Type "help" for help.
postgres=#
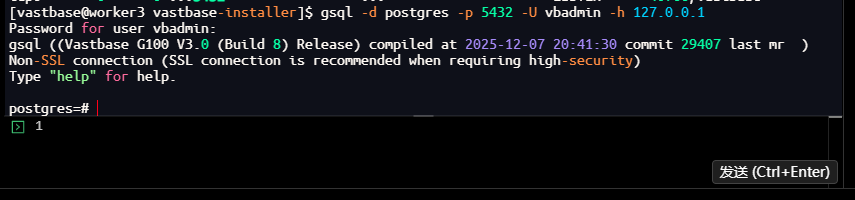
输入安装日志中生成的
vbadmin默认密码:
V61?7c34(注意根据实际生成密码输入)。
成功进入数据库交互提示符:
-- 查看数据库版本postgres=# SELECT version();
                                   version
------------------------------------------------------------------------------
 PostgreSQL 9.2.4 on x86_64-pc-linux-gnu, compiled by g++ (GCC) 7.3.0, 64-bit
(1 row)
postgres=#

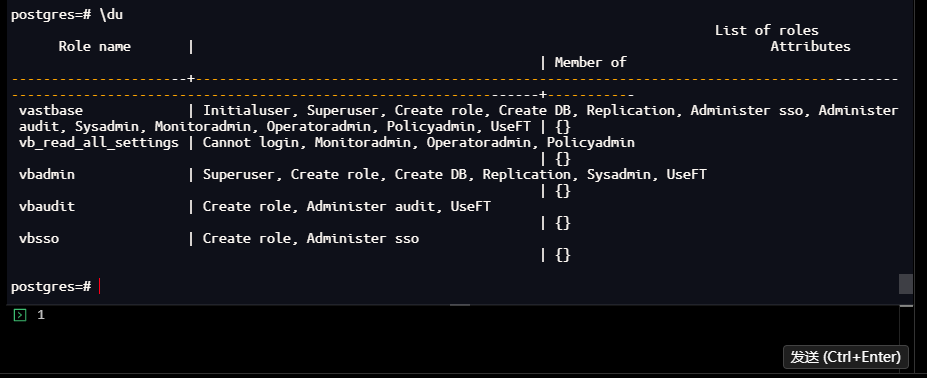
查看用户列表:
postgres=# \du
                                                                                        List of roles
      Role name       |                                                                        Attributes
                                                                  | Member of
----------------------+----------------------------------------------------------------------------------------------------------------------------------------------------------+-----------
 vastbase             | Initialuser, Superuser, Create role, Create DB, Replication, Administer sso, Administer
 audit, Sysadmin, Monitoradmin, Operatoradmin, Policyadmin, UseFT | {}
 vb_read_all_settings | Cannot login, Monitoradmin, Operatoradmin, Policyadmin
                                                                  | {}
 vbadmin              | Superuser, Create role, Create DB, Replication, Sysadmin, UseFT
                                                                  | {}
 vbaudit              | Create role, Administer audit, UseFT
                                                                  | {}
 vbsso                | Create role, Administer sso
                                                                  | {}
postgres=#
3.4 基础SQL操作测试:验证数据库数据处理能力
进入数据库命令行后,执行基础的SQL操作,验证数据库的基础数据处理能力。
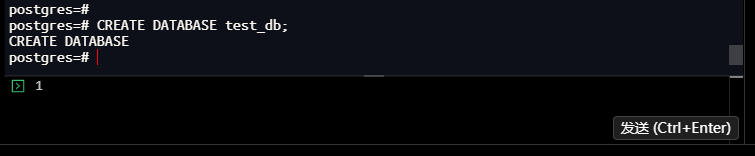
-- 1. 创建测试数据库postgres=# CREATE DATABASE test_db;CREATE DATABASEpostgres=#
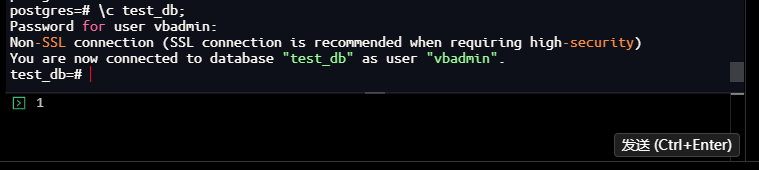
-- 切换到test_dbpostgres=# \c test_db;Password for user vbadmin:
Non-SSL connection (SSL connection is recommended when requiring high-security)
You are now connected to database "test_db" as user "vbadmin".
test_db=#
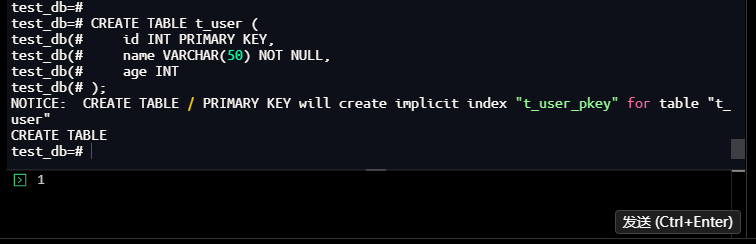
-- 2. 创建测试表t_usertest_db=# CREATE TABLE t_user (test_db(# id INT PRIMARY KEY,test_db(# name VARCHAR(50) NOT NULL,test_db(# age INTtest_db(# );NOTICE: CREATE TABLE / PRIMARY KEY will create implicit index "t_user_pkey" for table "t_user"CREATE TABLEtest_db=#
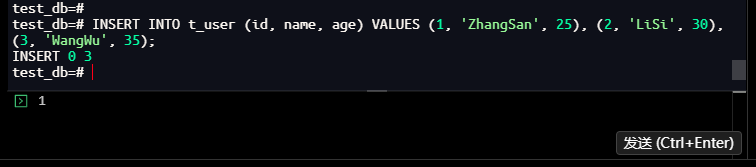
-- 3. 插入测试数据test_db=# INSERT INTO t_user (id, name, age) VALUES (1, 'ZhangSan', 25), (2, 'LiSi', 30), (3, 'WangWu', 35);INSERT 0 3test_db=#
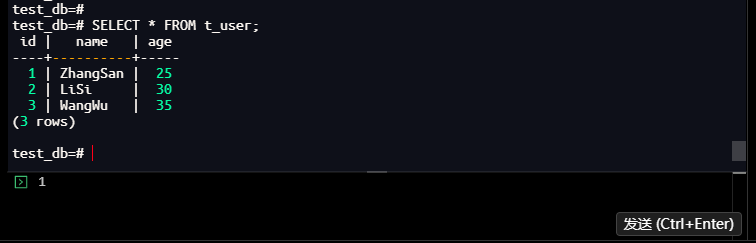
-- 4. 查询数据test_db=# SELECT * FROM t_user;
 id |   name   | age
----+----------+-----
  1 | ZhangSan |  25
  2 | LiSi     |  30
  3 | WangWu   |  35
(3 rows)
test_db=#
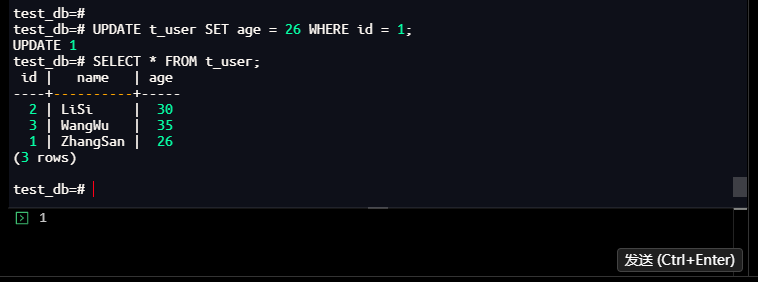
-- 5. 更新数据test_db=# UPDATE t_user SET age = 26 WHERE id = 1;UPDATE 1test_db=# SELECT * FROM t_user;
 id |   name   | age
----+----------+-----
  2 | LiSi     |  30
  3 | WangWu   |  35
  1 | ZhangSan |  26(3 rows)
test_db=#
-- 6. 删除数据test_db=# DELETE FROM t_user WHERE id = 3;DELETE 1test_db=#

-- 7. 再次查询test_db=# SELECT * FROM t_user;
 id |   name   | age
----+----------+-----
  2 | LiSi     |  30
  1 | ZhangSan |  26
(2 rows)
test_db=#
技术解析
- 主键约束
PRIMARY KEY:保证id字段的唯一性与非空性,底层会自动创建主键索引,提升查询效率; -
VARCHAR(50):可变长度字符串类型,节省磁盘空间,适合存储长度不固定的字符数据; - SQL操作的原子性:Vastbase G100遵循ACID特性,单条SQL操作均为原子操作,要么全部执行成功,要么全部失败,保证数据一致性。
3.5 用户与权限创建:验证数据库权限管理能力
国产化数据库的安全特性核心体现在权限管理,Vastbase G100支持精细化的用户权限控制。
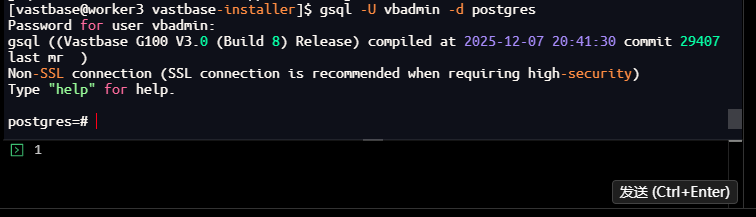
# 1. 重新连接数据库(使用vbadmin)[vastbase@worker3 vastbase-installer]$ gsql -U vbadmin -d postgres
Password for user vbadmin:
gsql ((Vastbase G100 V3.0 (Build 8) Release) compiled at 2025-12-07 20:41:30 commit 29407 last mr  )
Non-SSL connection (SSL connection is recommended when requiring high-security)
Type "help" for help.
postgres=#
-- 2. 创建普通用户vast_user,设置密码postgres=# CREATE USER vast_user WITH PASSWORD 'Test123456';CREATE ROLEpostgres=#

-- 3. 授权vast_user连接test_db数据库postgres=# GRANT CONNECT ON DATABASE test_db TO vast_user;GRANTpostgres=#

-- 4. 切换到test_db,赋予vast_user对t_user表的查询、插入权限postgres=# \c test_db;Password for user vbadmin:
Non-SSL connection (SSL connection is recommended when requiring high-security)
You are now connected to database "test_db" as user "vbadmin".
test_db=# GRANT SELECT, INSERT ON t_user TO vast_user;GRANTtest_db=#

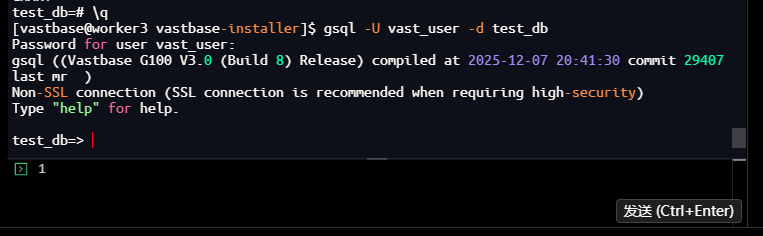
# 5. 退出超级用户连接,使用普通用户连接test_db=# \q[vastbase@worker3 vastbase-installer]$ gsql -U vast_user -d test_db
Password for user vast_user:
gsql ((Vastbase G100 V3.0 (Build 8) Release) compiled at 2025-12-07 20:41:30 commit 29407 last mr  )
Non-SSL connection (SSL connection is recommended when requiring high-security)
Type "help" for help.
test_db=>
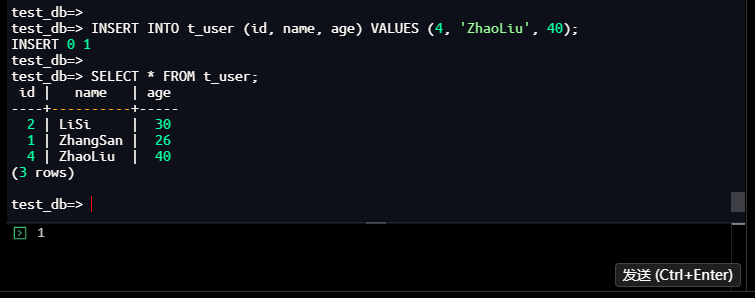
-- 6. 普通用户执行插入操作,验证权限test_db=> INSERT INTO t_user (id, name, age) VALUES (4, 'ZhaoLiu', 40);INSERT 0 1test_db=>
test_db=> SELECT * FROM t_user;
 id |   name   | age
----+----------+-----
  2 | LiSi     |  30
  1 | ZhangSan |  26
  4 | ZhaoLiu  |  40
(3 rows)
test_db=>
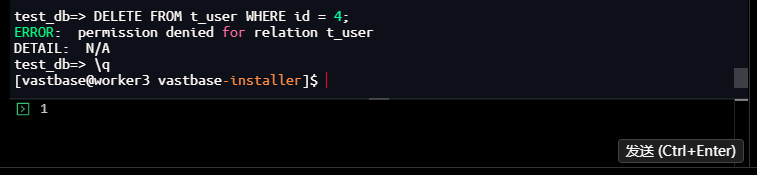
-- 7. 普通用户执行删除操作,验证权限限制(无删除权限,会报错)test_db=> DELETE FROM t_user WHERE id = 4;
ERROR:  permission denied for relation t_user
DETAIL:  N/A
test_db=> \q
[vastbase@worker3 vastbase-installer]$
技术解析
-
CREATE USER:创建数据库用户,WITH PASSWORD指定用户密码,需符合密码复杂度要求; -
GRANT:权限赋予指令,可精细化赋予用户对表、视图、数据库的不同权限(SELECT/INSERT/UPDATE/DELETE/ALL),实现最小权限原则,提升数据库安全性; - 权限限制:普通用户无超级用户的授权,无法执行超出权限范围的操作,会返回
permission denied报错,体现了Vastbase G100的精细化权限控制能力。
3.6 数据库实例启停:验证数据库控制工具的可用性
数据库的日常维护中,实例启停是最基础的操作,通过
vb_ctl工具完成实例的停止、启动、重启操作。
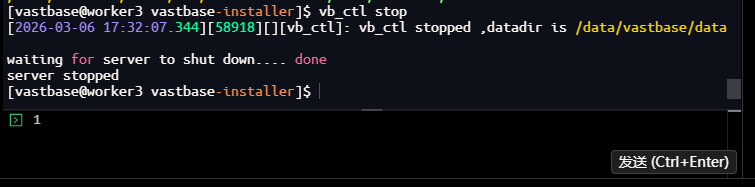
# 1. 停止数据库实例[vastbase@worker3 vastbase-installer]$ vb_ctl stop
[2026-03-06 17:32:07.344][58918][][vb_ctl]: vb_ctl stopped ,datadir is /data/vastbase/data
waiting for server to shut down.... doneserver stopped
[vastbase@worker3 vastbase-installer]$
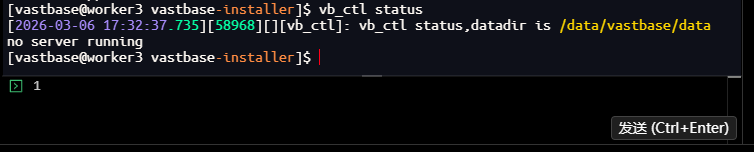
# 2. 查看实例状态,确认已停止[vastbase@worker3 vastbase-installer]$ vb_ctl status
[2026-03-06 17:32:37.735][58968][][vb_ctl]: vb_ctl status,datadir is /data/vastbase/data
no server running
[vastbase@worker3 vastbase-installer]$
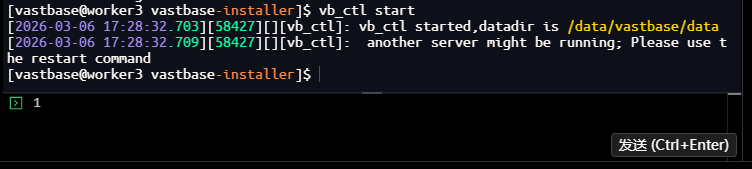
# 3. 启动数据库实例[vastbase@worker3 vastbase-installer]$ vb_ctl start
[2026-03-06 17:28:32.703][58427][][vb_ctl]: vb_ctl started,datadir is /data/vastbase/data
[2026-03-06 17:28:32.709][58427][][vb_ctl]:  another server might be running; Please use the restart command[vastbase@worker3 vastbase-installer]$
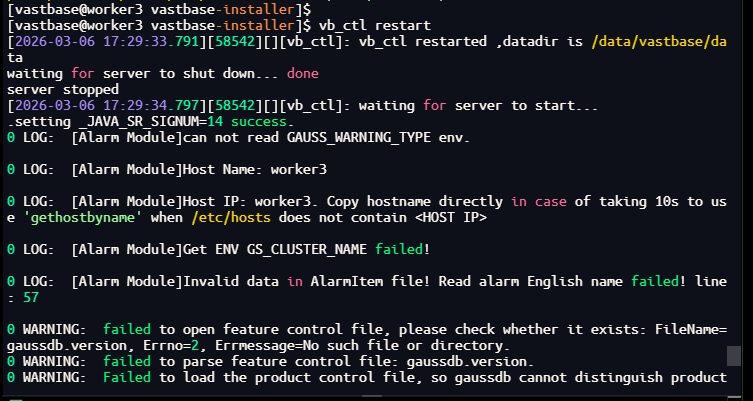
# 4. 重启数据库实例[vastbase@worker3 vastbase-installer]$ vb_ctl restart
[2026-03-06 17:29:33.791][58542][][vb_ctl]: vb_ctl restarted ,datadir is /data/vastbase/data
waiting for server to shut down... doneserver stopped
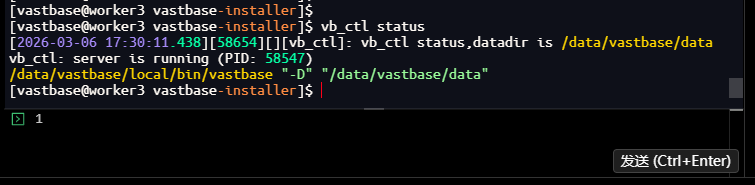
# 5. 查看实例状态,确认已启动[vastbase@worker3 vastbase-installer]$ vb_ctl status
[2026-03-06 17:30:11.438][58654][][vb_ctl]: vb_ctl status,datadir is /data/vastbase/data
vb_ctl: server is running (PID: 58547)
/data/vastbase/local/bin/vastbase "-D" "/data/vastbase/data"[vastbase@worker3 vastbase-installer]$
技术解析
-
vb_ctl stop -m fast:-m fast为快速停止模式,会中断当前的数据库连接,关闭所有进程,适用于日常维护;另有-m smart(智能停止,等待连接断开后关闭)、-m immediate(立即停止,强制关闭进程,不推荐); -
-D:始终指定实例的数据目录,vb_ctl工具通过数据目录识别实例,是所有操作的核心参数; - 实例启停的底层:启动时会加载配置文件
postgresql.conf与pg_hba.conf,初始化共享内存、后台进程,开启监听端口;停止时会释放共享内存,关闭后台进程与监听端口,保证数据文件的完整性。
四、installer安装核心技术要点与避坑指南
4.1 常见报错1:IPC参数配置错误(RemoveIPC)
在安装过程中,如果遇到如下IPC参数检查报错:
Type <Enter> to continue:
------------------
Preparing the installation environment...
Finish to prepare the installation environment
===============================================================================
IPC parameter check
---------------
The systemd-logind parameter setting is incorrect, perform the following steps to modify it:
---Explicitly set RemoveIPC=no in /etc/systemd/logind.conf
---Run systemctl daemon-reload
---Run the systemctl restart systemd-logind command A problem with the show-session parameter setting has been detected, please modify it as follows:
---please explicitly set RemoveIPC=no in the /usr/lib/systemd/system/systemd-logind.service
[vastbase@worker3 vastbase-installer]$

问题分析:Vastbase安装程序检测到系统的
RemoveIPC参数配置不符合要求,该参数控制用户退出会话时是否移除IPC资源。数据库需要长期占用IPC资源,若参数配置错误会导致数据库进程异常退出。
修复步骤(全程root用户操作):
# 切换至root用户[vastbase@worker3 vastbase-installer]$ exitlogout[root@worker3 vastbase]#

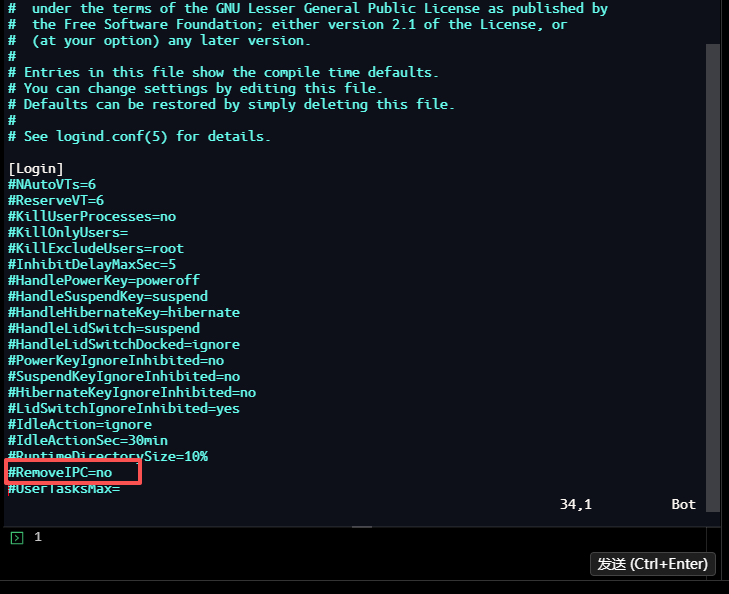
4.1.1 修改
/etc/systemd/logind.conf
[root@worker3 vastbase]# vim /etc/systemd/logind.conf

找到
RemoveIPC相关配置行,若存在
RemoveIPC=yes则修改为
RemoveIPC=no;若不存在则在文件末尾添加
RemoveIPC=no。
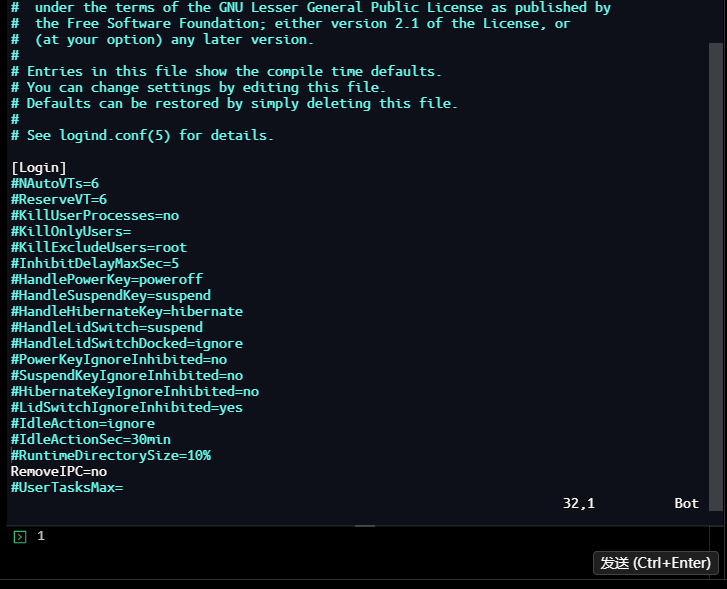
修改后示例:
[Login]
#NAutoVTs=6
#ReserveVT=6
#KillUserProcesses=no
#KillOnlyUsers=
#KillExcludeUsers=root
RemoveIPC=no  # 核心修改项
#InhibitDelayMaxSec=5
#UserStopDelaySec=10
4.1.2 修改
/usr/lib/systemd/system/systemd-logind.service
[root@worker3 vastbase]# vim /usr/lib/systemd/system/systemd-logind.service

在
[Service]段中添加
RemoveIPC=no:
[Service]
Type=notify
ExecStart=/usr/lib/systemd/systemd-logind
...
RemoveIPC=no  # 新增

4.1.3 重新加载配置并重启服务
[root@worker3 vastbase]# systemctl daemon-reload[root@worker3 vastbase]#[root@worker3 vastbase]# systemctl restart systemd-logind[root@worker3 vastbase]#

# 验证参数是否生效[root@worker3 vastbase]# grep RemoveIPC /etc/systemd/logind.conf /usr/lib/systemd/system/systemd-logind.service/etc/systemd/logind.conf:RemoveIPC=no
/usr/lib/systemd/system/systemd-logind.service:RemoveIPC=no
[root@worker3 vastbase]#

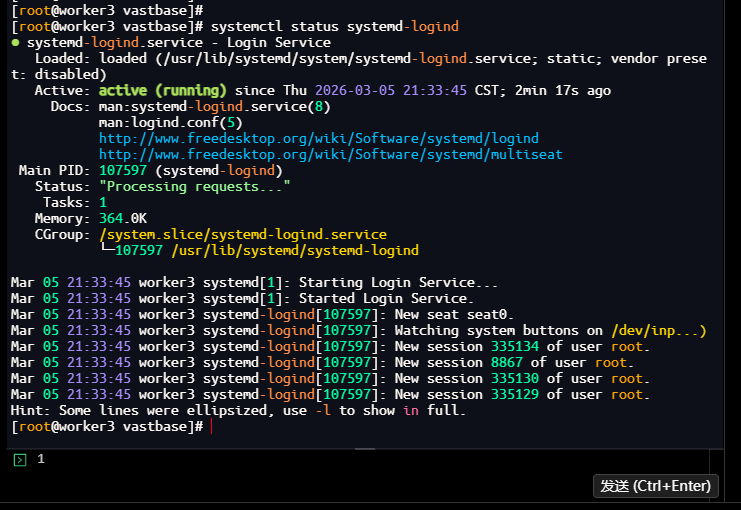
# 验证服务状态[root@worker3 vastbase]# systemctl status systemd-logind● systemd-logind.service - Login Service
   Loaded: loaded (/usr/lib/systemd/system/systemd-logind.service; static; vendor preset: disabled)
   Active: active (running) since Thu 2026-03-05 21:33:45 CST; 2min 17s ago
...
4.1.4 重新执行安装程序
[root@worker3 vastbase]# su - vastbaseLast login: Thu Mar  5 17:58:25 CST 2026 on pts/1
[vastbase@worker3 ~]$ cd /data/vastbase/vastbase-installer/
[vastbase@worker3 vastbase-installer]$ ./vastbase_installer

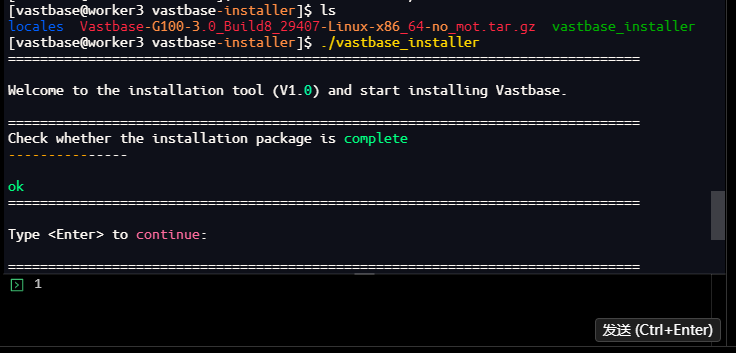
此时安装程序会重新检测IPC参数,通过后即可继续安装。
4.2 常见报错2:配置文件错误导致启动失败
stopped waiting pg_ctl: could not start server Examine the log output.
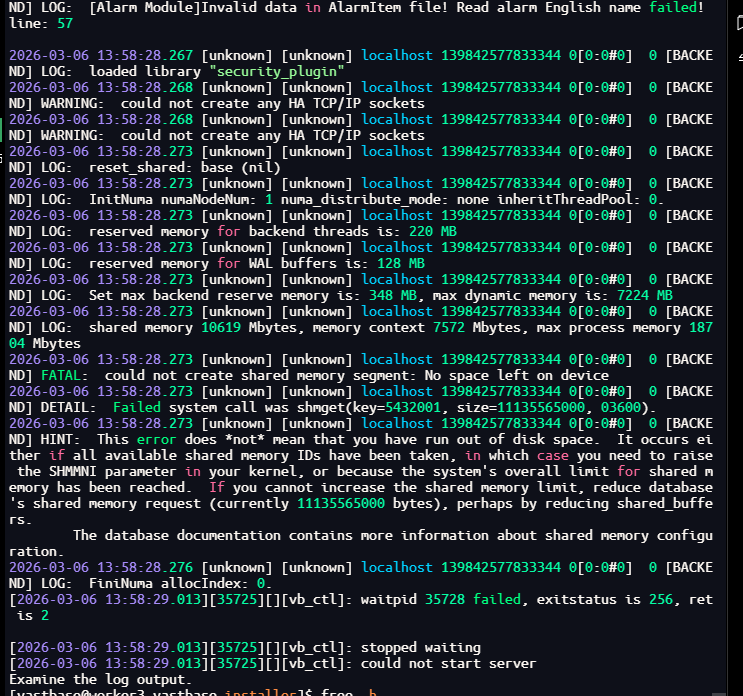
修复:编辑
postgresql.conf,调整内存参数适配服务器内存。
[vastbase@worker3 vastbase-installer]$ vim /data/vastbase/data/postgresql.conf
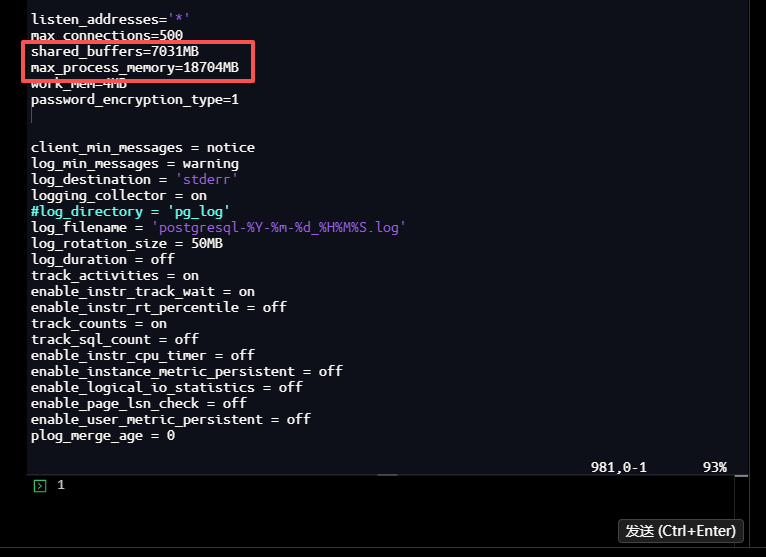
4.2.1 修改关键内存参数(示例:27GB内存)
# 核心内存参数(27GB内存适配)
shared_buffers = 4GB                # 总内存的1/4~1/5
max_process_memory = 12GB           # 总内存的60%左右
work_mem = 4MB                      # 单查询工作内存
maintenance_work_mem = 512MB        # 维护操作(建索引)内存
wal_buffers = 64MB                  # WAL日志缓存
cstore_buffers = 256MB              # 列存缓存
udf_memory_limit = 200MB            # UDF内存限制
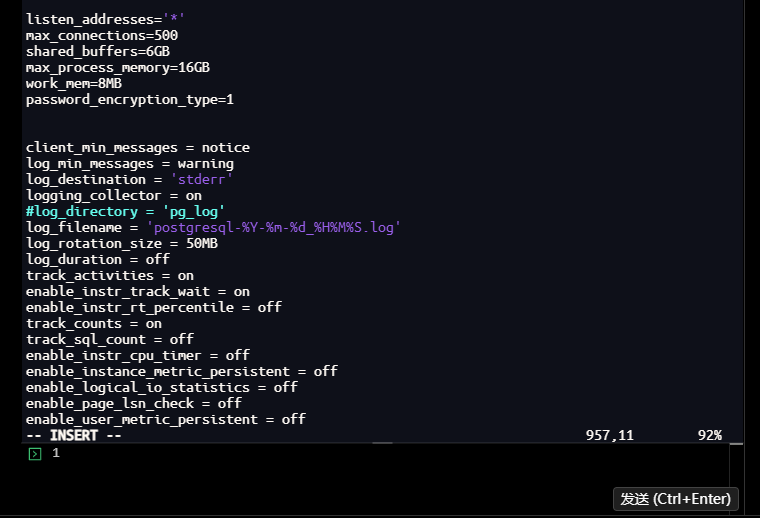
保存后重新启动数据库。
总结
Vastbase G100 V3.0.8PSU4作为海量数据打造的企业级国产化关系型数据库,其installer单机安装方式兼具 标准化、高效化、易操作的特性,从前置环境准备到核心安装流程,再到实操测试与问题排查,整个流程围绕命令行展开,既保证了安装的灵活性,又能让技术人员深入理解数据库部署的底层逻辑。
本文通过 实例化安装的全流程实操,搭配每一步的技术解析,拆解了服务器准备、环境配置、安装执行、功能测试的核心要点,同时补充了静默安装命令与高频问题排查方案,既适配新手的快速上手,也满足企业批量部署的需求。从实操结果来看,Vastbase G100 V3.0.8PSU4的installer安装流程简洁,环境适配性强,安装完成后可直接实现数据库的连接与基础操作,充分体现了该产品“开箱即用”的特性。
海量数据凭借领先的国产数据库产品,已深度渗透制造、政务、金融、通信等关键领域,成功服务2000+客户,以稳定可靠的技术实力赋能各行业数字化转型,相信凭借其优秀的产品特性与简洁的部署方式,将成为更多企业数字化转型的坚实数据基座。
作者注:
—— 本文所有操作及测试均基于 Vastbase G100 V3.0.8PSU4 版本,在 ** x86_64 Linux CentOS7 ** 环境下完成,核心围绕 单机 installer 安装与基础功能验证实战 展开。请注意,Vastbase G100 版本处于持续迭代中,部分特性与功能表现可能随版本更新发生变化,请以 海量数据 Vastbase G100 官方文档最新内容为准。
—— 以上仅为个人实战经验总结,不代表行业普遍观点。所有操作均需在具备足够权限的环境下执行,涉及生产环境时请提前做好数据备份与灰度测试,避免影响业务稳定性。文中案例与实操思路仅供参考,若与实际项目场景巧合,纯属无意。
来自 “ ITPUB博客 ” ,链接:https://blog.itpub.net/70042915/viewspace-3112076/ ,如需转载,请注明出处,否则将追究法律责任。

