大家好,我是皇子。
在代码随需求迭代和重构的不经意间,或许已悄然运用了提升代码复用性、扩展性和维护性的设计模式,只是我们自己未曾察觉或难以名状。
所以,继上篇分享的《详细、简单地学习这6种架构设计原则,再学设计模式也是 So Easy的事》之后,我们将详细、全面地分享有关设计模式的内容,包括:设计模式是什么?为什么要学习设计模式呢?以及如何学习好设计模式?
掌握好设计模式是程序员要进阶为架构师必备的思维工具箱,下面一一揭晓。长文预警,可以先点赞、收藏、再看~
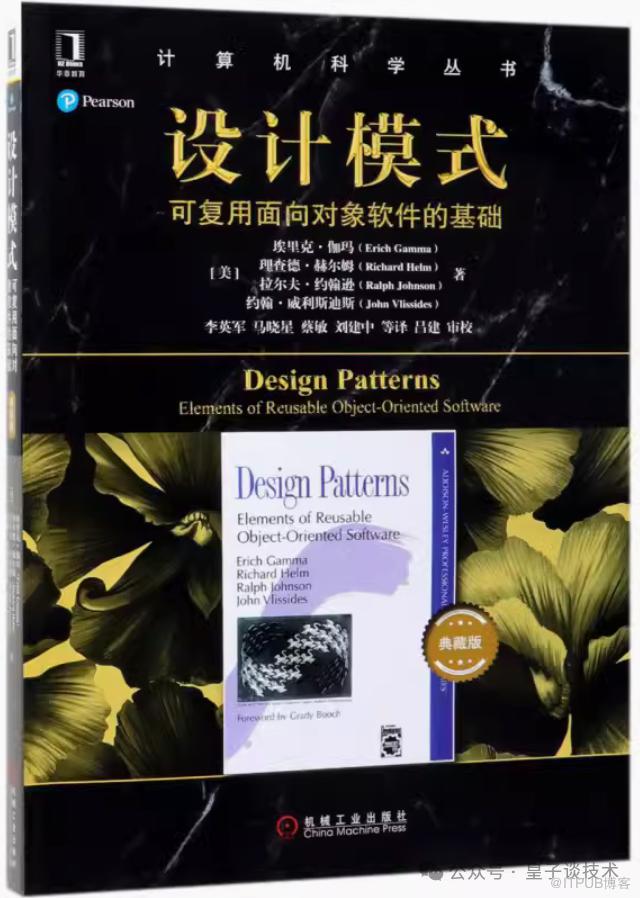
设计模式是针对特定编程问题的最佳实践,遵循这些模式可以编写出结构清晰、可复用性、可扩展性和可维护性。
它强调了对象之间的松耦合关系,通过抽象、封装和委托等手段,使得代码模块可以独立变化而不影响其他部分。这使得代码组件更易于复用,并能在不改动主体结构的情况下适应需求变化,增强了系统的灵活性和可扩展性。
同时,在现代软件开发环境中,业务需求常常快速变化,设计模式提供了应对变化的策略,如策略模式允许在运行时动态切换算法,观察者模式支持系统状态变化的自动通知,这些都使得软件能够更好地响应变化,保持敏捷性。
设计模式通常分为三大类:创建型模式、结构型模式和行为型模式。
以下是按照这三类分类,介绍23种设计模式,并且每种设计模式我们都使用一句简单的口述方式,让你学得明白。
一、创建型模式(Creational Patterns)
一)工厂模式(Factory Method)
定义一个用于创建对象的接口,让子类决定实例化哪一个类。工厂方法使一个类的实例化延迟到其子类。
口述:像一个生产流水线,不管你要什么产品(对象),只要告诉它型号(类型),它就能为你制造出来,无需关心具体的生产过程。
看 Golang 实现的核心代码
// 定义产品接口
type Product interface {
    Create()
}

// 具体产品A
type ProductA struct{}

func (p *ProductA) Create() {
    fmt.Println("Creating Product A")
}

// 具体产品B
type ProductB struct{}

func (p *ProductB) Create() {
    fmt.Println("Creating Product B")
}

// 工厂接口
type Factory interface {
    CreateProduct(type string) Product
}

// 具体工厂
type ConcreteFactory struct{}

func (f *ConcreteFactory) CreateProduct(t string) Product {
    switch t {
    case "A":
        return &ProductA{}
    case "B":
        return &ProductB{}
    default:
        panic("Invalid product type")
    }
}
二)抽象工厂模式(Abstract Factory)
提供一个创建一系列相关或相互依赖对象的接口,而无需指定它们的具体类。
口述:升级版的工厂,不仅能造单一产品,还能生产一整套相关产品(家族对象),让你轻松搭建不同风格的家居套装(系统模块)。
看 Golang 实现的核心代码
// 定义家具接口
type Furniture interface {
    Make()
}

// 定义家电接口
type Appliance interface {
    Assemble()
}

// 具体家具和家电实现...

// 家居套装接口
type HomeStyleFactory interface {
    CreateFurniture() Furniture
    CreateAppliance() Appliance
}

// 现代风格工厂
type ModernFactory struct{}

func (mf *ModernFactory) CreateFurniture() Furniture {
    return &ModernFurniture{} // 实现细节省略
}

func (mf *ModernFactory) CreateAppliance() Appliance {
    return &ModernAppliance{} // 实现细节省略
}

// 古典风格工厂
type ClassicFactory struct{}

// ...类似实现
三)单例模式(Singleton)
保证一个类仅有一个实例,并提供一个全局访问点。该模式常用于需要频繁实例化然后又只需要单个对象(如数据库连接)的场景。
口述:就像独一无二的魔法石,无论何时何地,保证全世界只有一个实例存在,确保资源高效共享且不会重复创建。
看 Golang 实现的核心代码
type Singleton struct{}

var instance *Singleton
var once sync.Once

func GetInstance() *Singleton {
    once.Do(func() {
        instance = &Singleton{}
    })
    return instance
}
四)建造者模式(Builder)
将一个复杂对象的构建与它的表示分离,使得同样的构建过程可以创建不同的表示。
口述:如同房屋建筑师,它提供一套详细的施工蓝图(接口),不同的建造者(具体类)按步骤打造不同风格的房子(对象),但用户只需关注最后的成品。
看 Golang 实现的核心代码
// 房屋接口
type House interface {
    Build()
}

// 具体房屋实现...

// 建筑师接口
type Builder interface {
    SetFoundation()
    AddWalls()
    AddRoof()
    GetHouse() House
}

// 洋房建筑师
type VillaBuilder struct {
    house House
}

func (vb *VillaBuilder) SetFoundation() {
    // 实现细节省略
}

// ...其他方法实现

// 工厂方法
func NewVillaBuilder() *VillaBuilder {
    vb := &VillaBuilder{
        house: &Villa{}, // 实现细节省略
    }
    return vb
}

func main() {
    builder := NewVillaBuilder()
    builder.SetFoundation()
    // ...完成构建
    house := builder.GetHouse()
    house.Build()
}
五)原型模式(Prototype)
通过复制现有的实例来创建新的对象,而不是每次都从头开始创建。适用于创建复杂或耗时的对象。
口述:就像克隆机器,能复制已有对象,快速生成多个相似的新对象,省去了繁琐的初始化过程。
看 Golang 实现的核心代码
import (
    "encoding/json"
    "errors"
)

// 具有克隆能力的对象接口
type Cloneable interface {
    Clone() Cloneable
}

// 具体对象实现
type ConcreteObject struct {
    Name string
    Data map[string]interface{}
}

func (c *ConcreteObject) Clone() Cloneable {
    clone := new(ConcreteObject)
    clone.Name = c.Name

    // 使用json序列化/反序列化实现深拷贝
    b, _ := json.Marshal(c.Data)
    json.Unmarshal(b, &clone.Data)

    return clone
}

func main() {
    original := &ConcreteObject{Name: "Original", Data: map[string]interface{}{"key": "value"}}
    cloned := original.Clone()

    // 修改克隆对象的数据,不影响原始对象
    cloned.Data["key"] = "new value"
    fmt.Println(original.Data)   // 输出:map[key:value]
    fmt.Println(cloned.Data)   // 输出:map[key:new value]
}
二、结构型模式(Structural Patterns)
一)适配器模式(Adapter)
将一个类的接口转换成客户期望的另一个接口。适配器让原本不兼容的类可以合作无间。
口述:如同电源转换插头,把原本不兼容的接口(类)“包装”成用户期待的样子,使两者能顺畅对接。
看 Golang 实现的核心代码
// 原接口
type OriginalInterface interface {
    OriginalMethod()
}

// 原接口的具体实现
type Original struct{}

func (o *Original) OriginalMethod() {
    fmt.Println("Executing original method")
}

// 目标接口
type TargetInterface interface {
    TargetMethod()
}

// 适配器
type Adapter struct {
    original OriginalInterface
}

func (a *Adapter) TargetMethod() {
    a.original.OriginalMethod()
}

func main() {
    adapter := &Adapter{original: &Original{}}
    adapter.TargetMethod() // 输出:Executing original method
}
二)装饰器模式(Decorator)
动态地给一个对象添加额外的职责。装饰器提供了比继承更灵活的扩展对象功能的方式。
口述:如同给家具添加装饰,动态地给对象添加新功能,不影响原有结构,实现功能的灵活扩展。
看 Golang 实现的核心代码
// 组件接口
type Component interface {
    Operation()
}

// 具体组件
type ConcreteComponent struct{}

func (cc *ConcreteComponent) Operation() {
    fmt.Println("Executing component operation")
}

// 装饰器抽象基类
type Decorator struct {
    component Component
}

func (d *Decorator) Operation() {
    d.component.Operation()
}

// 具体装饰器
type ConcreteDecorator struct {
    Decorator
}

func (cd *ConcreteDecorator) Operation() {
    cd.Decorator.Operation()
    fmt.Println("Executing additional decoration")
}

func main() {
    component := &ConcreteComponent{}
    decoratedComponent := &ConcreteDecorator{component: component}
    decoratedComponent.Operation()
    // 输出:
    // Executing component operation
    // Executing additional decoration
}
三)代理模式(Proxy)
为其他对象提供一个代理以控制对这个对象的访问。代理模式可以用于远程代理、安全代理、智能引用等场景。
口述:如同明星经纪人,对外代表明星处理事务,对内传达明星意愿。代理对象替代原对象执行某些操作,可增加额外控制或功能。
看 Golang 实现的核心代码
// 明星接口
type Star interface {
    Perform()
}

// 明星具体实现
type RealStar struct{}

func (rs *RealStar) Perform() {
    fmt.Println("Star is performing on stage")
}

// 经纪人(代理)
type Agent struct {
    star Star
}

func (a *Agent) Perform() {
    a.star.Perform()
    fmt.Println("Agent handles post-performance tasks")
}

func main() {
    star := &RealStar{}
    agent := &Agent{star: star}
    agent.Perform()
    // 输出:
    // Star is performing on stage
    // Agent handles post-performance tasks
}
四)外观模式(Facade)
为子系统中的一组接口提供一个统一的接口。外观模式简化了客户端与子系统的交互,降低了系统的复杂性。
口述:就像家电遥控器,提供一个简洁统一的接口,让用户无需了解复杂家电内部结构,轻松操控整个系统。
看 Golang 实现的核心代码
// 家电接口
type Appliance interface {
    TurnOn()
    TurnOff()
}

// 电视实现
type TV struct{}

func (t *TV) TurnOn() {
    fmt.Println("Turning on TV")
}

func (t *TV) TurnOff() {
    fmt.Println("Turning off TV")
}

// 空调实现
type AirConditioner struct{}

func (ac *AirConditioner) TurnOn() {
    fmt.Println("Turning on air conditioner")
}

func (ac *AirConditioner) TurnOff() {
    fmt.Println("Turning off air conditioner")
}

// 遥控器(外观)
type RemoteControl struct {
    tv      Appliance
    ac      Appliance
}

func (rc *RemoteControl) TurnAllOn() {
    rc.tv.TurnOn()
    rc.ac.TurnOn()
}

func (rc *RemoteControl) TurnAllOff() {
    rc.tv.TurnOff()
    rc.ac.TurnOff()
}

func main() {
    remote := &RemoteControl{
        tv:      &TV{},
        ac:      &AirConditioner{},
    }

    remote.TurnAllOn()
    // 输出:
    // Turning on TV
    // Turning on air conditioner

    remote.TurnAllOff()
    // 输出:
    // Turning off TV
    // Turning off air conditioner
}
五)桥接模式(Bridge)
将抽象部分与其实现部分分离,使它们都可以独立变化。桥接模式用于将抽象化与实现化解耦,应对多维度变化。
口述:如同手机壳与手机,两者独立设计、发展,通过接口(桥)紧密结合。实现抽象与实现分离,应对多维度变化。
看 Golang 实现的核心代码
// 手机品牌接口
type PhoneBrand interface {
    Assemble()
}

// iPhone品牌实现
type iPhone struct{}

func (i *iPhone) Assemble() {
    fmt.Println("Assembling iPhone")
}

// Samsung品牌实现
type Samsung struct{}

func (s *Samsung) Assemble() {
    fmt.Println("Assembling Samsung phone")
}

// 手机功能接口
type PhoneFeature interface {
    InstallOS()
}

// iOS功能实现
type iOS struct{}

func (ios *iOS) InstallOS() {
    fmt.Println("Installing iOS")
}

// Android功能实现
type Android struct{}

func (android *Android) InstallOS() {
    fmt.Println("Installing Android")
}

// 手机(桥接)
type Phone struct {
    brand   PhoneBrand
    feature PhoneFeature
}

func (p *Phone) Build() {
    p.brand.Assemble()
    p.feature.InstallOS()
}

func main() {
    iphone := &Phone{
        brand:   &iPhone{},
        feature: &iOS{},
    }
    iphone.Build()
    // 输出:
    // Assembling iPhone
    // Installing iOS

    samsung := &Phone{
        brand:   &Samsung{},
        feature: &Android{},
    }
    samsung.Build()
    // 输出:
    // Assembling Samsung phone
    // Installing Android
}
六)组合模式(Composite)
将对象组合成树形结构以表示“部分-整体”的层次结构。组合模式使得用户对单个对象和组合对象的使用具有一致性。
口述:像树枝与树叶构成一棵树,部分(叶子对象)与整体(树枝对象)具有相同接口,可以统一处理,实现层次结构的递归遍历。
看 Golang 实现的核心代码
// 树叶或树枝接口
type Component interface {
    Operation()
    Add(child Component)
    Remove(child Component)
}

// 树叶实现
type Leaf struct{}

func (l *Leaf) Operation() {
    fmt.Println("Leaf operation")
}

func (l *Leaf) Add(child Component) {
    fmt.Println("Cannot add children to a leaf")
}

func (l *Leaf) Remove(child Component) {
    fmt.Println("Cannot remove children from a leaf")
}

// 树枝实现
type Branch struct {
    children []Component
}

func (b *Branch) Operation() {
    fmt.Println("Branch operation")
    for _, child := range b.children {
        child.Operation()
    }
}

func (b *Branch) Add(child Component) {
    b.children = append(b.children, child)
}

func (b *Branch) Remove(child Component) {
    for i, c := range b.children {
        if c == child {
            b.children = append(b.children[:i], b.children[i+1:]...)
            break
        }
    }
}

func main() {
    branch := &Branch{}
    leaf1 := &Leaf{}
    leaf2 := &Leaf{}

    branch.Add(leaf1)
    branch.Add(leaf2)

    branch.Operation()
    // 输出:
    // Branch operation
    // Leaf operation
    // Leaf operation

    branch.Remove(leaf1)
    branch.Operation()
    // 输出:
    // Branch operation
    // Leaf operation
}
七)享元模式(Flyweight)
运用共享技术有效地支持大量细粒度的对象。当系统中存在大量相似对象时,享元模式可以大幅度减少内存消耗。
口述:如同共享自行车系统,通过复用大量相似对象(单车)来节省资源,适用于大量相似对象且状态可外部化的场景。
看 Golang 实现的核心代码
// 共享对象接口
type Flyweight interface {
    Operation(uniqueState interface{})
}

// 具体共享对象实现
type ConcreteFlyweight struct{}

func (cf *ConcreteFlyweight) Operation(uniqueState interface{}) {
    fmt.Printf("Executing flyweight operation with unique state: %v\n", uniqueState)
}

// 享元工厂
type FlyweightFactory struct {
    pool map[string]*ConcreteFlyweight
}

func (ff *FlyweightFactory) GetFlyweight(key string) Flyweight {
    if flyweight, ok := ff.pool[key]; ok {
        return flyweight
    }
    newFlyweight := &ConcreteFlyweight{}
    ff.pool[key] = newFlyweight
    return newFlyweight
}

func main() {
    factory := &FlyweightFactory{pool: make(map[string]*ConcreteFlyweight)}

    flyweight1 := factory.GetFlyweight("state1")
    flyweight1.Operation("state1")

    flyweight2 := factory.GetFlyweight("state1")
    flyweight2.Operation("state1")

    flyweight3 := factory.GetFlyweight("state2")
    flyweight3.Operation("state2")

    // 输出:
    // Executing flyweight operation with unique state: state1
    // Executing flyweight operation with unique state: state1
    // Executing flyweight operation with unique state: state2
}
三、行为型模式(Behavioral Patterns)
一)观察者模式(Observer)
定义了一种一对多的依赖关系,当一个对象的状态发生改变时,所有依赖于它的对象都会得到通知并被自动更新。
口述:如同天气预报订阅系统,天气站(主题)的状态变化会自动通知所有订阅者(观察者),实现对象间一对多的依赖关系。
看 Golang 实现的核心代码
import "sync"

// 主题接口
type Subject interface {
    Register(observer Observer)
    Unregister(observer Observer)
    Notify()
}

// 观察者接口
type Observer interface {
    Update()
}

// 具体主题
type ConcreteSubject struct {
    observers []Observer
    mutex     sync.Mutex
}

func (cs *ConcreteSubject) Register(observer Observer) {
    cs.mutex.Lock()
    defer cs.mutex.Unlock()
    cs.observers = append(cs.observers, observer)
}

func (cs *ConcreteSubject) Unregister(observer Observer) {
    cs.mutex.Lock()
    defer cs.mutex.Unlock()
    for i, o := range cs.observers {
        if o == observer {
            cs.observers = append(cs.observers[:i], cs.observers[i+1:]...)
            break
        }
    }
}

func (cs *ConcreteSubject) Notify() {
    cs.mutex.Lock()
    defer cs.mutex.Unlock()
    for _, observer := range cs.observers {
        observer.Update()
    }
}

// 具体观察者
type ConcreteObserver struct {
    name string
}

func (co *ConcreteObserver) Update() {
    fmt.Printf("%s received update.\n", co.name)
}

func main() {
    subject := &ConcreteSubject{}
    observer1 := &ConcreteObserver{name: "Observer 1"}
    observer2 := &ConcreteObserver{name: "Observer 2"}

    subject.Register(observer1)
    subject.Register(observer2)

    subject.Notify()
    // 输出:
    // Observer 1 received update.
    // Observer 2 received update.

    subject.Unregister(observer1)
    subject.Notify()
    // 输出:
    // Observer 2 received update.
}
二)模板方法模式(Template Method)
在一个抽象类中定义一个操作中的算法骨架,而将一些步骤延迟到子类中。模板方法使得子类可以在不改变算法结构的情况下重定义算法的某些特定步骤。
口述:就像烹饪食谱,规定了做菜的基本步骤(骨架),具体做法(具体步骤)留给子类来填充,实现算法框架的复用。
看 Golang 实现的核心代码
// 烹饪食谱接口
type Recipe interface {
    PrepareIngredients()
    Cook()
    Serve()
}

// 具体食谱(披萨)
type PizzaRecipe struct{}

func (pr *PizzaRecipe) PrepareIngredients() {
    fmt.Println("Preparing pizza ingredients: dough, sauce, cheese, toppings...")
}

func (pr *PizzaRecipe) Cook() {
    fmt.Println("Cooking pizza in the oven...")
}

func (pr *PizzaRecipe) Serve() {
    fmt.Println("Serving hot pizza!")
}

// 具体食谱(沙拉)
type SaladRecipe struct{}

func (sr *SaladRecipe) PrepareIngredients() {
    fmt.Println("Preparing salad ingredients: lettuce, tomatoes, cucumbers, dressing...")
}

func (sr *SaladRecipe) Cook() {
    fmt.Println("Mixing ingredients in a bowl...")
}

func (sr *SaladRecipe) Serve() {
    fmt.Println("Serving fresh salad!")
}

func main() {
    recipes := []Recipe{
        &PizzaRecipe{},
        &SaladRecipe{},
    }

    for _, recipe := range recipes {
        recipe.PrepareIngredients()
        recipe.Cook()
        recipe.Serve()
        fmt.Println("\n---\n")
    }
}
三)策略模式(Strategy)
定义了一系列算法,并将每个算法封装起来,使它们可以互相替换。策略模式让算法的变化独立于使用它的客户端。
口述:如同足球队根据对手制定战术(策略),在运行时选择合适的算法(策略对象)来解决问题,实现算法的自由切换。
看 Golang 实现的核心代码
// 策略接口
type Strategy interface {
    Execute()
}

// 具体策略A
type StrategyA struct{}

func (sa *StrategyA) Execute() {
    fmt.Println("Executing Strategy A")
}

// 具体策略B
type StrategyB struct{}

func (sb *StrategyB) Execute() {
    fmt.Println("Executing Strategy B")
}

// 环境类(使用策略)
type Context struct {
    strategy Strategy
}

func (c *Context) SetStrategy(strategy Strategy) {
    c.strategy = strategy
}

func (c *Context) ExecuteStrategy() {
    c.strategy.Execute()
}

func main() {
    context := &Context{}

    context.SetStrategy(&StrategyA{})
    context.ExecuteStrategy()
    // 输出:Executing Strategy A

    context.SetStrategy(&StrategyB{})
    context.ExecuteStrategy()
    // 输出:Executing Strategy B
}
四)命令模式(Command)
将请求封装为一个对象,从而使你可用不同的请求对客户进行参数化;对请求排队或记录请求日志,以及支持可撤销的操作。
口述:如同家电遥控器上的按键,封装操作(命令对象),将请求与执行解耦,支持撤销/重做、队列化等操作。
看 Golang 实现的核心代码
// 命令接口
type Command interface {
    Execute()
    Undo()
}

// 具体命令
type ConcreteCommand struct {
    receiver Receiver
}

func (cc *ConcreteCommand) Execute() {
    cc.receiver.Action()
}

func (cc *ConcreteCommand) Undo() {
    cc.receiver.ReverseAction()
}

// 接收者接口
type Receiver interface {
    Action()
    ReverseAction()
}

// 具体接收者
type ConcreteReceiver struct{}

func (cr *ConcreteReceiver) Action() {
    fmt.Println("Executing action")
}

func (cr *ConcreteReceiver) ReverseAction() {
    fmt.Println("Reversing action")
}

func main() {
    receiver := &ConcreteReceiver{}
    command := &ConcreteCommand{receiver: receiver}

    command.Execute()
    // 输出:Executing action

    command.Undo()
    // 输出:Reversing action
}
五)职责链模式(Chain of Responsibility)
使多个对象都有机会处理请求,从而避免请求的发送者和接收者之间的耦合关系。将这些对象连成一条链,并沿着这条链传递请求,直到有一个对象处理它为止。
口述:如同审批流程,请求沿着责任链传递,每个节点(对象)决定是否处理或传递给下一个节点,实现请求的多级处理。
看 Golang 实现的核心代码
// 请求接口
type Request interface {
    SetNextRequest(request Request)
    Process()
}

// 具体请求
type ConcreteRequest struct {
    nextRequest Request
}

func (cr *ConcreteRequest) SetNextRequest(request Request) {
    cr.nextRequest = request
}

func (cr *ConcreteRequest) Process() {
    fmt.Println("Processing ConcreteRequest")
    if cr.nextRequest != nil {
        cr.nextRequest.Process()
    }
}

func main() {
    request1 := &ConcreteRequest{}
    request2 := &ConcreteRequest{}
    request3 := &ConcreteRequest{}

    request1.SetNextRequest(request2)
    request2.SetNextRequest(request3)

    request1.Process()
    // 输出:
    // Processing ConcreteRequest
    // Processing ConcreteRequest
    // Processing ConcreteRequest
}
六)状态模式(State)
允许对象在其内部状态改变时改变其行为。对象看起来似乎修改了它的类。
口述:如同交通信号灯,根据外界状态(红黄绿)改变自身行为(通行禁止),对象在不同状态下表现出不同行为。
看 Golang 实现的核心代码
// 状态接口
type State interface {
    Handle(context *Context)
}

// 具体状态A
type StateA struct{}

func (sa *StateA) Handle(context *Context) {
    fmt.Println("Handling in State A")
    context.State = &StateB{}
}

// 具体状态B
type StateB struct{}

func (sb *StateB) Handle(context *Context) {
    fmt.Println("Handling in State B")
    context.State = &StateA{}
}

// 环境类(持有状态)
type Context struct {
    State State
}

func main() {
    context := &Context{State: &StateA{}}

    for i := 0; i < 5; i++ {
        context.State.Handle(context)
    }
    // 输出:
    // Handling in State A
    // Handling in State B
    // Handling in State A
    // Handling in State B
    // Handling in State A
}
七)迭代器模式(Iterator)
提供一种方法顺序访问一个聚合对象的各个元素,而又不暴露其内部的表示。
口述:如同书的目录,提供统一接口遍历集合中的元素,隐藏内部结构,使用户能方便地访问集合内容。
看 Golang 实现的核心代码
// 迭代器接口
type Iterator interface {
    Next() interface{}
    HasNext() bool
}

// 集合接口
type Collection interface {
    CreateIterator() Iterator
}

// 具体集合
type ConcreteCollection struct {
    items []interface{}
    index int
}

func (cc *ConcreteCollection) CreateIterator() Iterator {
    return &ConcreteIterator{collection: cc}
}

// 具体迭代器
type ConcreteIterator struct {
    collection *ConcreteCollection
}

func (ci *ConcreteIterator) Next() interface{} {
    item := ci.collection.items[ci.collection.index]
    ci.collection.index++
    return item
}

func (ci *ConcreteIterator) HasNext() bool {
    return ci.collection.index < len(ci.collection.items)
}

func main() {
    collection := &ConcreteCollection{
        items: []interface{}{"Apple", "Banana", "Cherry"},
    }
    iterator := collection.CreateIterator()

    for iterator.HasNext() {
        fmt.Println(iterator.Next())
    }
    // 输出:
    // Apple
    // Banana
    // Cherry
}
八)访问者模式(Visitor)
表示一个作用于某对象结构中的各元素的操作。它使你可以在不改变各元素类的前提下定义作用于这些元素的新操作。
口述:如同动物园区的导游,对不同类型的动物(元素)执行特定操作(访问者),分离操作与对象结构。
看 Golang 实现的核心代码
// 访问者接口
type Visitor interface {
    Visit(animal Animal)
}

// 动物接口
type Animal interface {
    Accept(visitor Visitor)
}

// 具体动物
type Cat struct{}

func (c *Cat) Accept(visitor Visitor) {
    visitor.Visit(c)
}

type Dog struct{}

func (d *Dog) Accept(visitor Visitor) {
    visitor.Visit(d)
}

// 具体访问者
type AnimalFeeder struct {
    food string
}

func (af *AnimalFeeder) Visit(animal Animal) {
    fmt.Printf("Feeding %T with %s\n", animal, af.food)
}

func main() {
    animals := []Animal{
        &Cat{},
        &Dog{},
    }
    feeder := &AnimalFeeder{food: "kibble"}

    for _, animal := range animals {
        animal.Accept(feeder)
    }
    // 输出:
    // Feeding *main.Cat with kibble
    // Feeding *main.Dog with kibble
}
九)中介者模式(Mediator)
用一个中介对象来封装一系列对象之间的交互关系。中介者使各对象不需要显式地相互引用,从而使其耦合松散,而且可以独立地改变它们之间的交互。
口述:如同公司的HR部门,协调各部门间的沟通,减少部门间直接交互,降低系统耦合度。
看 Golang 实现的核心代码
// 各部门接口
type Department interface {
    Send(message string, to string)
    Receive(message string, from string)
}

// 人力资源部门
type HRDepartment struct {
    mediator Mediator
}

func (hr *HRDepartment) Send(message string, to string) {
    hr.mediator.Send(message, "HR", to)
}

func (hr *HRDepartment) Receive(message string, from string) {
    fmt.Printf("HR received message from %s: %s\n", from, message)
}

// 销售部门
type SalesDepartment struct {
    mediator Mediator
}

func (sales *SalesDepartment) Send(message string, to string) {
    sales.mediator.Send(message, "Sales", to)
}

func (sales *SalesDepartment) Receive(message string, from string) {
    fmt.Printf("Sales received message from %s: %s\n", from, message)
}

// 中介者接口
type Mediator interface {
    Send(message string, from string, to string)
}

// 公司HR部门作为中介者
type CompanyHR struct{}

func (ch *CompanyHR) Send(message string, from string, to string) {
    switch to {
    case "HR":
        ch.notifyDepartment(from, message)
    case "Sales":
        ch.notifyDepartment(from, message)
    }
}

func (ch *CompanyHR) notifyDepartment(sender string, message string) {
    switch sender {
    case "HR":
        sales.Receive(message, "HR")
    case "Sales":
        hr.Receive(message, "Sales")
    }
}

func main() {
    hr := &HRDepartment{mediator: &CompanyHR{}}
    sales := &SalesDepartment{mediator: &CompanyHR{}}

    hr.Send("Hello from HR", "Sales")
    sales.Send("Hello from Sales", "HR")
    // 输出:
    // Sales received message from HR: Hello from HR
    // HR received message from Sales: Hello from Sales
}
十)备忘录模式(Memento)
在不破坏封装性的前提下,捕获一个对象的内部状态,并在该对象之外保存这个状态。这样以后就可将该对象恢复到原先保存的状态。
口述:如同游戏存档,记录对象的内部状态(备忘录),在需要时恢复,实现对象状态的回滚。
看 Golang 实现的核心代码
// 游戏角色状态接口
type GameCharacterState interface {
    Save() Memento
    Restore(memento Memento)
    Display()
}

// 游戏角色状态具体实现
type ConcreteGameCharacterState struct {
    health  int
    mana    int
    position string
}

func (cgcs *ConcreteGameCharacterState) Save() Memento {
    return &ConcreteMemento{
        health:  cgcs.health,
        mana:    cgcs.mana,
        position: cgcs.position,
    }
}

func (cgcs *ConcreteGameCharacterState) Restore(memento Memento) {
    mem := memento.(*ConcreteMemento)
    cgcs.health = mem.health
    cgcs.mana = mem.mana
    cgcs.position = mem.position
}

func (cgcs *ConcreteGameCharacterState) Display() {
    fmt.Printf("Health: %d, Mana: %d, Position: %s\n", cgcs.health, cgcs.mana, cgcs.position)
}

// 备忘录接口
type Memento interface{}

// 具体备忘录
type ConcreteMemento struct {
    health  int
    mana    int
    position string
}

func main() {
    character := &ConcreteGameCharacterState{
        health:  100,
        mana:    50,
        position: "Start",
    }

    memento := character.Save()
    character.Display() // 输出:Health: 100, Mana: 50, Position: Start

    character.health -= 50
    character.mana -= 25
    character.position = "Midway"
    character.Display() // 输出:Health: 50, Mana: 25, Position: Midway

    character.Restore(memento)
    character.Display() // 输出:Health: 100, Mana: 50, Position: Start
}
十一)解释器模式(Interpreter)
给定一个语言,定义它的文法的一种表示,并定义一个解释器,这个解释器使用该表示来解释语言中的句子。解释器模式主要用于解析特定领域的简单语言。
口述:如同编程语言的编译器,定义语法(语法规则)和解释执行(解释器)机制,用于解释特定语言(领域特定语言DSL)。
看 Golang 实现的核心代码
// 抽象表达式接口
type Expression interface {
    Interpret(context *Context)
}

// 具体表达式A
type ExpressionA struct{}

func (ea *ExpressionA) Interpret(context *Context) {
    context.Output += "A"
}

// 具体表达式B
type ExpressionB struct{}

func (eb *ExpressionB) Interpret(context *Context) {
    context.Output += "B"
}

// 上下文
type Context struct {
    Output string
}

func main() {
    context := &Context{}

    expressions := []Expression{
        &ExpressionA{},
        &ExpressionB{},
        &ExpressionA{},
    }

    for _, expr := range expressions {
        expr.Interpret(context)
    }

    fmt.Println(context.Output) // 输出:ABA
}
以上,按照设计模式三大类:创建型模式、结构型模式和行为型模式,介绍23种设计模式,并且每种设计模式我们都使用一句简单的口述方式,让我们更方便记忆和理解相应的设计模式,其中每种模式都旨在解决特定的软件设计问题,提高代码的可复用性、可扩展性和可维护性。
推荐阅读
详细、简单地学习这6种架构设计原则,再学设计模式也是 So Easy的事
原文作者:皇子谈技术;如有侵权,请联系管理员删除。

