背景:
目前,大模型的技术应用已经遍地开花。最快的应用方式无非是利用自有垂直领域的数据进行模型微调。chatglm2-6b在国内开源的大模型上,效果比较突出。本文章分享的内容是用chatglm2-6b模型在集团EA的P40机器上进行垂直领域的LORA微调。
一、chatglm2-6b介绍
github: https://github.com/THUDM/ChatGLM2-6B
chatglm2-6b相比于chatglm有几方面的提升:
1. 性能提升: 相比初代模型, 升级了 ChatGLM2-6B 的基座模型,同时在各项数据集评测上取得了不错的成绩;
2. 更长的上下文: 我们将基座模型的上下文长度(Context Length)由 ChatGLM-6B 的 2K 扩展到了 32K,并在对话阶段使用 8K 的上下文长度训练;
3. 更高效的推理: 基于 Multi-Query Attention 技术,ChatGLM2-6B 有更高效的推理速度和更低的显存占用:在官方的模型实现下,推理速度相比初代提升了 42%;
4. 更开放的协议:ChatGLM2-6B 权重对学术研究完全开放,在填写问卷进行登记后亦允许免费商业使用。
二、微调环境介绍
2.1 性能要求
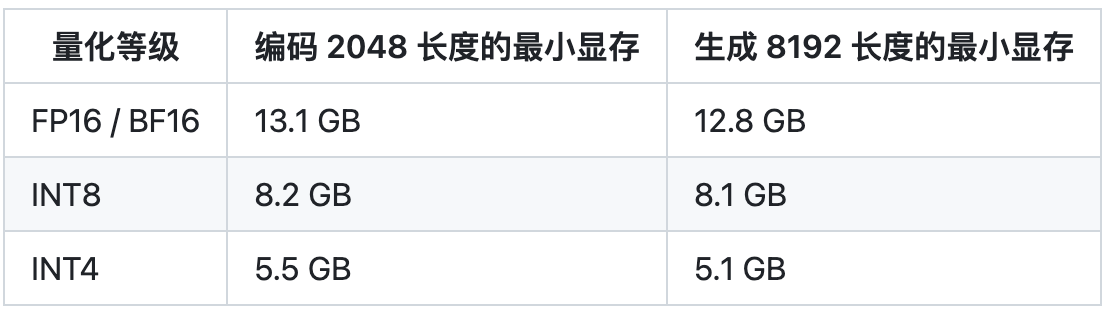
推理这块,chatglm2-6b在精度是fp16上只需要14G的显存,所以P40是可以cover的。
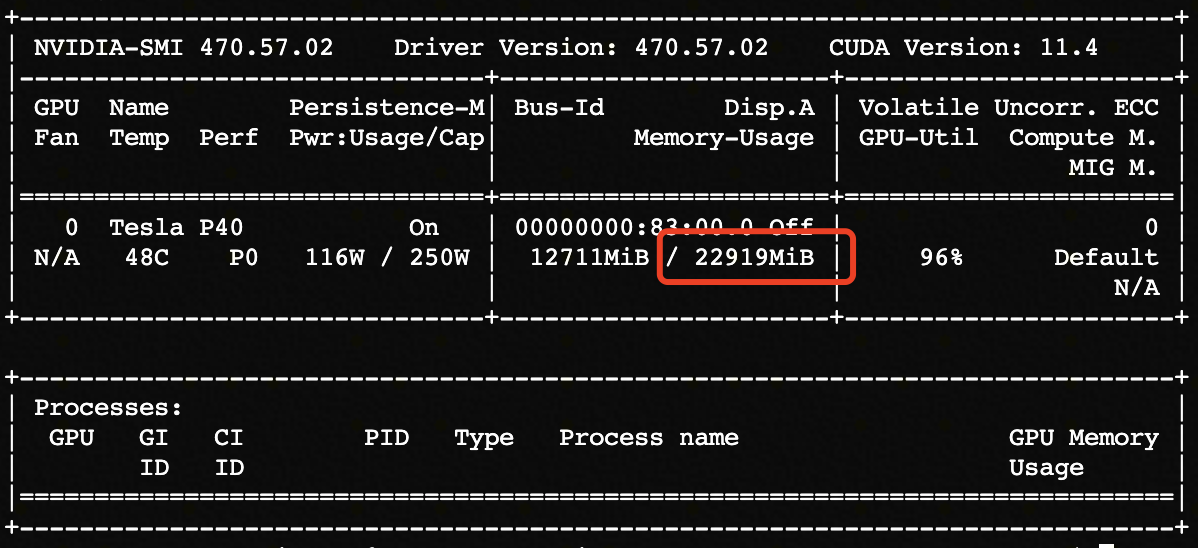
EA上P40显卡的配置如下:
2.2 镜像环境
做微调之前,需要编译环境进行配置,我这块用的是docker镜像的方式来加载镜像环境,具体配置如下:
FROM base-clone-mamba-py37-cuda11.0-gpu
# mpich
RUN yum install mpich
# create my own environment
RUN conda create -c https://mirrors.tuna.tsinghua.edu.cn/anaconda/cloud/conda-forge/ --override --yes --name py39 python=3.9
# display my own environment in Launcher
RUN source activate py39 \
    && conda install --yes --quiet ipykernel \
    && python -m ipykernel install --name py39 --display-name "py39"
# install your own requirement package
RUN source activate py39 \
    && conda install -y -c https://mirrors.tuna.tsinghua.edu.cn/anaconda/cloud/pytorch/ \
    pytorch  torchvision torchaudio faiss-gpu \
    && pip install --no-cache-dir  --ignore-installed -i https://pypi.tuna.tsinghua.edu.cn/simple \
    protobuf \
    streamlit \
    transformers==4.29.1 \
    cpm_kernels \
    mdtex2html \
    gradio==3.28.3 \
	sentencepiece \
	accelerate \
	langchain \
    pymupdf \
	unstructured[local-inference] \
	layoutparser[layoutmodels,tesseract] \
	nltk~=3.8.1 \
	sentence-transformers \
	beautifulsoup4 \
	icetk \
	fastapi~=0.95.0 \
	uvicorn~=0.21.1 \
	pypinyin~=0.48.0 \
    click~=8.1.3 \
    tabulate \
    feedparser \
    azure-core \
    openai \
    pydantic~=1.10.7 \
    starlette~=0.26.1 \
    numpy~=1.23.5 \
    tqdm~=4.65.0 \
    requests~=2.28.2 \
    rouge_chinese \
    jieba \
    datasets \
    deepspeed \
	pdf2image \
	urllib3==1.26.15 \
    tenacity~=8.2.2 \
    autopep8 \
    paddleocr \
    mpi4py \
    tiktoken
如果需要使用deepspeed方式来训练, EA上缺少mpich信息传递工具包,需要自己手动安装。
2.3 模型下载
huggingface地址: https://huggingface.co/THUDM/chatglm2-6b/tree/main
三、LORA微调
3.1 LORA介绍
paper: https://arxiv.org/pdf/2106.09685.pdf
LORA(Low-Rank Adaptation of Large Language Models)微调方法: 冻结预训练好的模型权重参数,在冻结原模型参数的情况下,通过往模型中加入额外的网络层,并只训练这些新增的网络层参数。
LoRA 的思想:
3.2 微调
huggingface提供的peft工具可以方便微调PLM模型,这里也是采用的peft工具来创建LORA。
peft的github: https://gitcode.net/mirrors/huggingface/peft?utm_source=csdn_github_accelerator
加载模型和lora微调:
    # load model
    tokenizer = AutoTokenizer.from_pretrained(args.model_dir, trust_remote_code=True)
    model = AutoModel.from_pretrained(args.model_dir, trust_remote_code=True)

    print("tokenizer:", tokenizer)

    # get LoRA model
    config = LoraConfig(
        r=args.lora_r,
        lora_alpha=32,
        lora_dropout=0.1,
        bias="none",)

    # 加载lora模型
    model = get_peft_model(model, config)
    # 半精度方式
    model = model.half().to(device)
这里需要注意的是,用huggingface加载本地模型,需要创建work文件,EA上没有权限在没有在.cache创建,这里需要自己先制定work路径。
import os
os.environ['TRANSFORMERS_CACHE'] = os.path.dirname(os.path.abspath(__file__))+"/work/"
os.environ['HF_MODULES_CACHE'] = os.path.dirname(os.path.abspath(__file__))+"/work/"
如果需要用deepspeed方式训练,选择你需要的zero-stage方式:
    conf = {"train_micro_batch_size_per_gpu": args.train_batch_size,
            "gradient_accumulation_steps": args.gradient_accumulation_steps,
            "optimizer": {
                "type": "Adam",
                "params": {
                    "lr": 1e-5,
                    "betas": [
                        0.9,
                        0.95
                    ],
                    "eps": 1e-8,
                    "weight_decay": 5e-4
                }
            },
            "fp16": {
                "enabled": True
            },
            "zero_optimization": {
                "stage": 1,
                "offload_optimizer": {
                    "device": "cpu",
                    "pin_memory": True
                },
                "allgather_partitions": True,
                "allgather_bucket_size": 2e8,
                "overlap_comm": True,
                "reduce_scatter": True,
                "reduce_bucket_size": 2e8,
                "contiguous_gradients": True
            },
            "steps_per_print": args.log_steps
            }
其他都是数据处理处理方面的工作,需要关注的就是怎么去构建prompt,个人认为在领域内做微调构建prompt非常重要,最终对模型的影响也比较大。
四、微调结果
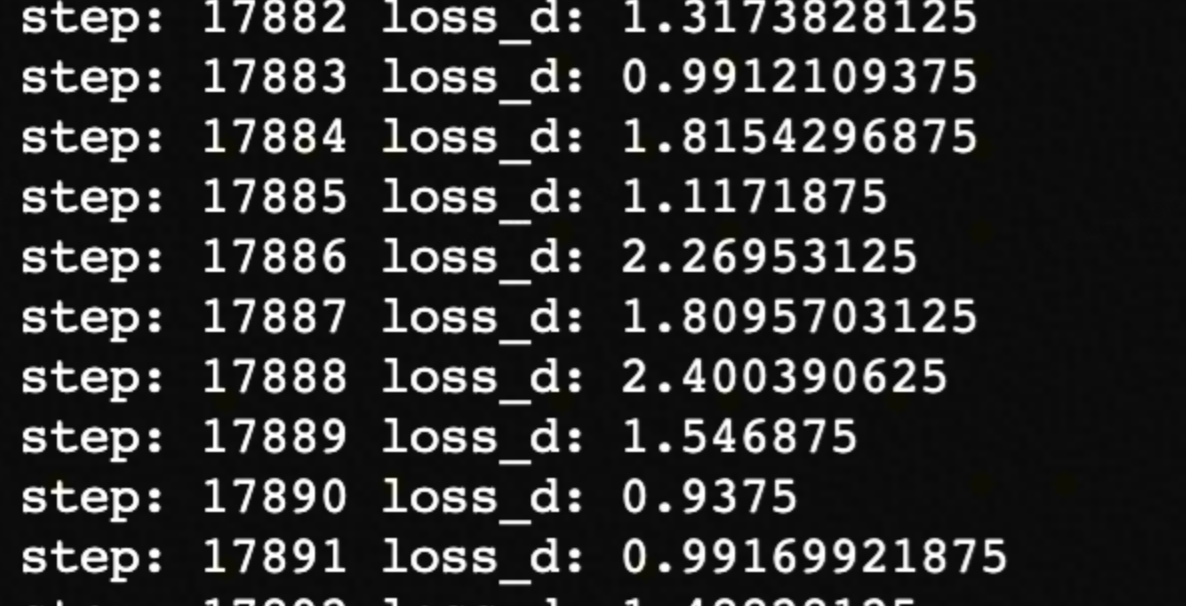
目前模型还在finetune中,batch=1,epoch=3,已经迭代一轮。
来自 “ ITPUB博客 ” ,链接:https://blog.itpub.net/70037994/viewspace-3024932/ ,如需转载,请注明出处,否则将追究法律责任。

