Linux下MySQL日志的启用
1. 在前面的博客中已经提到windows下mysql日志的启用,在linux下启用mysql日志和在windows下基本上一样。
连接mysql后查看日志状态
log_bin的值为OFF表示还未开启日志,为ON表示已开启。
2. 编辑mysql的配置文件my.cnf,这个文件通常在/etc目录下,但我用rpm装mysql的时候这个配置文件是在/usr目录下,但我测试过,无论是放在/etc目录下,还是放在
/usr目录下,都可以生效,不过由于习惯,我还是将my.cnf文件放到/etc目录下
# For advice on how to change settings please see
# http://dev.mysql.com/doc/refman/5.6/en/server-configuration-defaults.html
[mysqld]
# Remove leading # and set to the amount of RAM for the most important data
# cache in MySQL. Start at 70% of total RAM for dedicated server, else 10%.
# innodb_buffer_pool_size = 128M
# Remove leading # to turn on a very important data integrity option: logging
# changes to the binary log between backups.
log-bin = /var/mysqllog/logbin.log
log-error = /var/mysqllog/logerr.log
# These are commonly set, remove the # and set as required.
# basedir = .....
datadir = /var/lib/mysql
# port = .....
# server_id = .....
socket = /var/lib/mysql/mysql.sock
user = root
# Remove leading # to set options mainly useful for reporting servers.
# The server defaults are faster for transactions and fast SELECTs.
"my.cnf" 30L, 1042C
上面红色字体部分为新增,开启了二进制日志和错误日志,在这之前先在/var目录下创建mysqllog目录,用来存放日志。
3. 再查看日志的启用状态,这时log_bin的值就会变为ON,并且在/var/mysqllog/下会产生日志文件

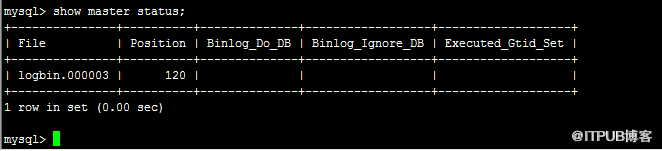
4. 默认情况下每次重启mysql服务就会切换一次日志文件,查看当前正在使用的日志文件
连接mysql后查看日志状态
- show global variables like \'log_bin\';
2. 编辑mysql的配置文件my.cnf,这个文件通常在/etc目录下,但我用rpm装mysql的时候这个配置文件是在/usr目录下,但我测试过,无论是放在/etc目录下,还是放在
/usr目录下,都可以生效,不过由于习惯,我还是将my.cnf文件放到/etc目录下
- vim /etc/my.cnf
# http://dev.mysql.com/doc/refman/5.6/en/server-configuration-defaults.html
[mysqld]
# Remove leading # and set to the amount of RAM for the most important data
# cache in MySQL. Start at 70% of total RAM for dedicated server, else 10%.
# innodb_buffer_pool_size = 128M
# Remove leading # to turn on a very important data integrity option: logging
# changes to the binary log between backups.
log-bin = /var/mysqllog/logbin.log
log-error = /var/mysqllog/logerr.log
# These are commonly set, remove the # and set as required.
# basedir = .....
datadir = /var/lib/mysql
# port = .....
# server_id = .....
socket = /var/lib/mysql/mysql.sock
user = root
# Remove leading # to set options mainly useful for reporting servers.
# The server defaults are faster for transactions and fast SELECTs.
"my.cnf" 30L, 1042C
上面红色字体部分为新增,开启了二进制日志和错误日志,在这之前先在/var目录下创建mysqllog目录,用来存放日志。
3. 再查看日志的启用状态,这时log_bin的值就会变为ON,并且在/var/mysqllog/下会产生日志文件
4. 默认情况下每次重启mysql服务就会切换一次日志文件,查看当前正在使用的日志文件
- show master status;
来自 “ ITPUB博客 ” ,链接:https://blog.itpub.net/29660208/viewspace-1196707/ ,如需转载,请注明出处,否则将追究法律责任。
上一篇:
linux下MySQL的卸载和安装

请登录后发表评论
登录
全部评论
