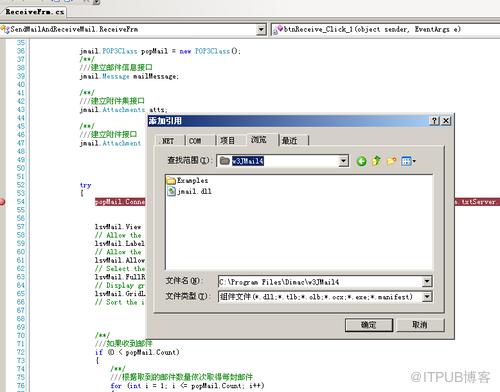
1、下载Jmail组件,并安装,将jmail.dll引用到工程中:
2、定义一个实体保存接受邮件的基本信息,为了简单起见,只定义了四个字段:
    class MailInfo
    {
       public string FromMail
        {
            get;
            set;
        }

      public string MailSubject
      {
          get;
          set;
      }

      public string MailMessage
      {
          get;
          set;
      }

      public List atts
      {
          get;
          set;
      }
   }
3、邮件发送代码:
 jmail.Message MailObj = new jmail.MessageClass();
            MailObj.From = parentform.txtMail.Text;  //发件人的地址
            MailObj.Logging = true;
            MailObj.MailServerUserName = parentform.txtMail.Text;   //发件人用户名
            MailObj.MailServerPassWord = parentform.txtPassWord.Text; //服务器验证
            MailObj.HTMLBody = txtMessage.Text;
            MailObj.Charset = "gb2312";
            MailObj.Subject = txtSubject.Text;
            MailObj.FromName = parentform.txtMail.Text;
            MailObj.AddRecipient(parentform.txtMail.Text, "User", "A");  //添加接收人
            MailObj.Priority = 3;
            if (txtAtt.Text != "")
            {
                MailObj.AddAttachment(txtAtt.Text, false, "image/jpg");
            }
            try
            {
                bool bool_OK = MailObj.Send(parentform.txtServer.Text, false);
                if (bool_OK == true)
                    MessageBox.Show("发送成功!");
                if (bool_OK == false)
                    MessageBox.Show("发送失败!");
            }
            catch (Exception ex)
            {
                MessageBox.Show(ex.Message);
            }
4、邮件接收代码:
///建立收邮件对象
jmail.POP3Class popMail = new POP3Class();
/**/
///建立邮件信息接口
jmail.Message mailMessage;
/**/
///建立附件集接口
jmail.Attachments atts;
/**/
///建立附件接口
jmail.Attachment att;
try
{
popMail.Connect(parentform.txtMail.Text.Trim(), parentform.txtPassWord.Text.Trim(), parentform.txtServer.Text.Trim(), Convert.ToInt32(parentform.txtPoint.Text.Trim()));
lsvMail.View = View.Details;
// Allow the user to edit item text.
lsvMail.LabelEdit = false;
// Allow the user to rearrange columns.
lsvMail.AllowColumnReorder = true;
// Select the item and subitems when selection is made.
lsvMail.FullRowSelect = true;
// Display grid lines.
lsvMail.GridLines = true;
// Sort the items in the list in ascending order.
/**/
///如果收到邮件
if (0 ();
for (int j = 0; j 5、测试:
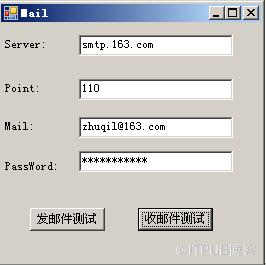
1)、在server中填写:smtp.163.com , mail:***@163.com password:******
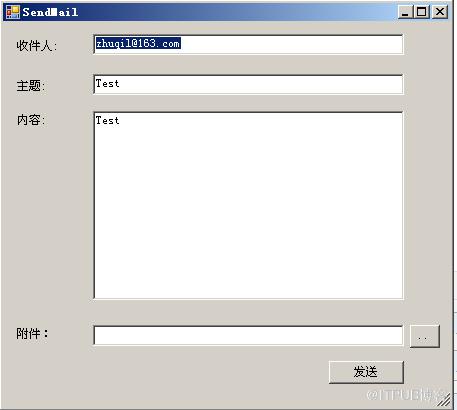
2)邮件发送:填写收件人、主题、内容、附件。
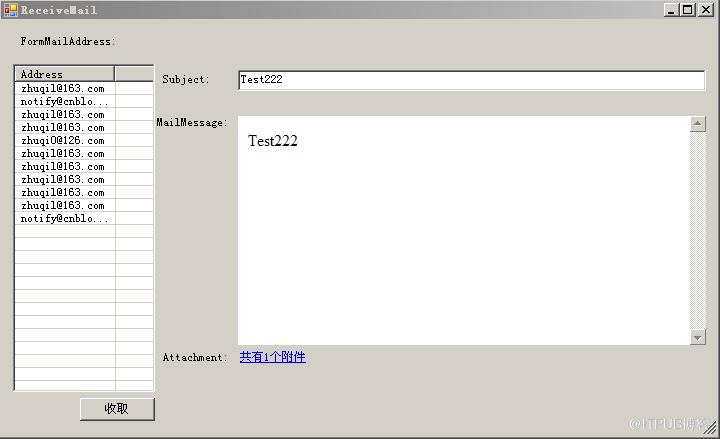
3)将server改写成:pop3.163.com , mail:***@163.com password:******,收取的邮件和附件,如下图:
6、总结:
这个非常的简单,网上也有很多代码,这里提供一个完整的Demo下载,偶也是整理网上的代码。
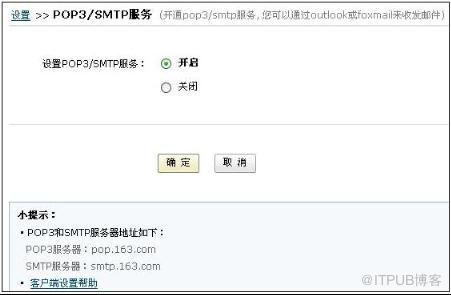
使用网易的邮箱测试的时候,请注意开启POP3/SMTP服务,设置如下图:
来自 “ ITPUB博客 ” ,链接:https://blog.itpub.net/963/viewspace-2800593/ ,如需转载,请注明出处,否则将追究法律责任。
上一篇:
也聊聊数据库范式那些事
下一篇:
图片人脸检测(OpenCV版)

请登录后发表评论
登录
全部评论
