Oracle 11g Release 1 RAC On Linux Using VMware Server
Oracle 11g Release 1 RAC On Linux Using VMware Server
Reference by: http://www.oracle-base.com/articles/11g/OracleDB11gR1RACInstallationOnOEL5UsingVMware.phpThis article describes the installation of Oracle 11g release 1 (11.1 32-bit) RAC on Linux (Oracle Enterprise Linux 5 32-bit) using VMware Server with no additional shared disk devices.
- Introduction
- Download Software
- VMware Server Installation
- Virtual Machine Setup
- Guest Operating System Installation
- Oracle Installation Prerequisites
- Install VMware Client Tools
- Create Shared Disks
- Clone the Virtual Machine
- Install the Clusterware Software
- Install the Database Software and Create an ASM Instance
- Create a Database using the DBCA
- TNS Configuration
- Check the Status of the RAC
Introduction
One of the biggest obstacles preventing people from setting up test RAC environments is the requirement for shared storage. In a production environment, shared storage is often provided by a SAN or high-end NAS device, but both of these options are very expensive when all you want to do is get some experience installing and using RAC. A cheaper alternative is to use a FireWire disk enclosure to allow two machines to access the same disk(s), but that still costs money and requires two servers. A third option is to use VMware Server to fake the shared storage.Using VMware Server you can run multiple Virtual Machines (VMs) on a single server, allowing you to run both RAC nodes on a single machine. In additon, it allows you to set up shared virtual disks, overcoming the obstacle of expensive shared storage.
Before you launch into this installation, here are a few things to consider.
- The finished system includes the host operating system, two guest operating systems, two sets of Oracle Clusterware, two ASM instances and two Database instances all on a single server. As you can imagine, this requires a significant amount of disk space, CPU and memory. I was able to complete this installation on a 3.4G Pentium 4 with 3G of memory, but it was extremely slow.
- This procedure provides a bare bones installation to get the RAC working. There is no redundancy in the Clusterware installation or the ASM installation. To add this, simply create double the amount of shared disks and select the "Normal" redundancy option when it is offered. Of course, this will take more disk space.
- During the virtual disk creation, I always choose not to preallocate the disk space. This makes virtual disk access slower during the installation, but saves on wasted disk space.
- This is not, and should not be considered, a production-ready system. It's simply to allow you to get used to installing and using RAC.
Download Software
Download the following software.VMware Server Installation
Regardless of the host OS, the setup of the virtual machines should be similar.First, install the VMware Server software. On Linux you do this with the following command as the root user.
Then finish the configuration by running the vmware-config.pl script. as the root user. Most of the questions can be answered with the default response by pressing the return key. The output below shows my responses to the questions.# rpm -Uvh VMware-server-*.rpm
Preparing... ########################################### [100%]
1:VMware-server ########################################### [100%]
#
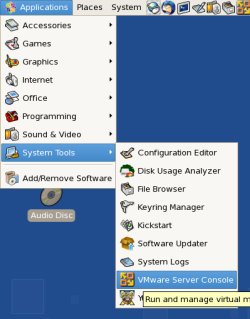
The VMware Server Console is started by issuing the command "vmware" at the command prompt, or by selecting it from the "System Tools" menu.# vmware-config.pl
Making sure services for VMware Server are stopped.
Stopping VMware services:
Virtual machine monitor [ OK ]
You must read and accept the End User License Agreement to continue.
Press enter to display it.
VMWARE, INC.
SOFTWARE BETA TEST AGREEMENT
*** Editied out license agreement ***
Do you accept? (yes/no) yes
Thank you.
Configuring fallback GTK+ 2.4 libraries.
In which directory do you want to install the mime type icons?
[/usr/share/icons]
What directory contains your desktop menu entry files? These files have a
.desktop file extension. [/usr/share/applications]
In which directory do you want to install the application's icon?
[/usr/share/pixmaps]
Trying to find a suitable vmmon module for your running kernel.
The module bld-2.6.9-5.EL-i686smp-RHEL4 loads perfectly in the running kernel.
Do you want networking for your virtual machines? (yes/no/help) [yes]
Configuring a bridged network for vmnet0.
The following bridged networks have been defined:
. vmnet0 is bridged to eth0
All your ethernet interfaces are already bridged.
Do you want to be able to use NAT networking in your virtual machines? (yes/no)
[yes]
Configuring a NAT network for vmnet8.
Do you want this program to probe for an unused private subnet? (yes/no/help)
[yes]
Probing for an unused private subnet (this can take some time)...
The subnet 172.16.210.0/255.255.255.0 appears to be unused.
The following NAT networks have been defined:
. vmnet8 is a NAT network on private subnet 172.16.210.0.
Do you wish to configure another NAT network? (yes/no) [no]
Do you want to be able to use host-only networking in your virtual machines?
[yes] no
Trying to find a suitable vmnet module for your running kernel.
The module bld-2.6.9-5.EL-i686smp-RHEL4 loads perfectly in the running kernel.
Please specify a port for remote console connections to use [902]
Stopping xinetd: [ OK ]
Starting xinetd: [ OK ]
Configuring the VMware VmPerl Scripting API.
Building the VMware VmPerl Scripting API.
Using compiler "/usr/bin/gcc". Use environment variable CC to override.
The installation of the VMware VmPerl Scripting API succeeded.
Do you want this program to set up permissions for your registered virtual
machines? This will be done by setting new permissions on all files found in
the "/etc/vmware/vm-list" file. [no] yes
Generating SSL Server Certificate
In which directory do you want to keep your virtual machine files?
[/var/lib/vmware/Virtual Machines] /u01/VM
Do you want to enter a serial number now? (yes/no/help) [no] yes
Please enter your 20-character serial number.
Type XXXXX-XXXXX-XXXXX-XXXXX or 'Enter' to cancel: ENTER-YOUR-SERIAL-NUMBER
Starting VMware services:
Virtual machine monitor [ OK ]
Virtual ethernet [ OK ]
Bridged networking on /dev/vmnet0 [ OK ]
Host-only networking on /dev/vmnet8 (background) [ OK ]
NAT service on /dev/vmnet8 [ OK ]
Starting VMware virtual machines... [ OK ]
The configuration of VMware Server e.x.p build-22874 for Linux for this running
kernel completed successfully.
#
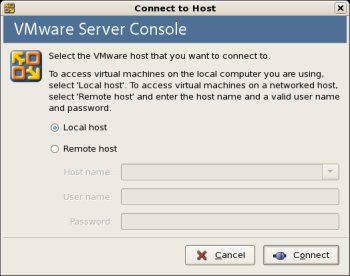
On the "Connect to Host" dialog, accept the "Local host" option by clicking the "Connect" button.
You are then presented with the main VMware Server Console screen.
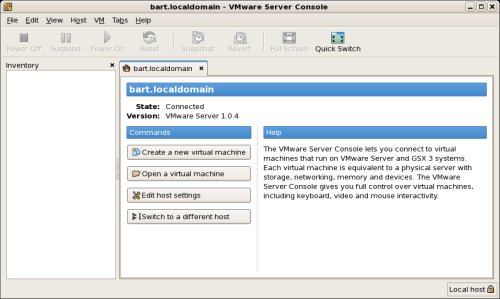
The VMware Server is now installed and ready to use.
Virtual Machine Setup
Now we must define the two virtual RAC nodes. We can save time by defining one VM, then cloning it when it is installed.Click the "Create a new virtual machine" button to start the "New Virtual Machine Wizard". Click the "Next" button on the welcome page.
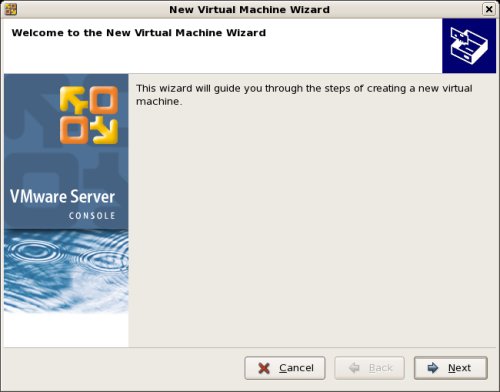
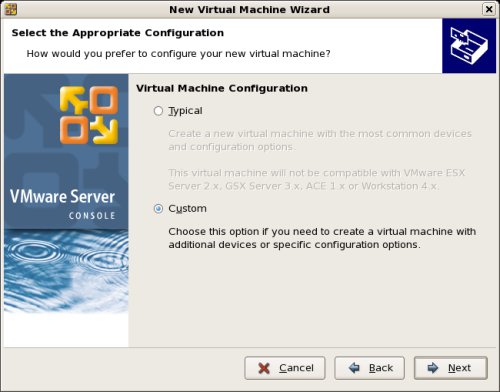
Select the "Custom" virtual machine configuration and click the "Next" button.
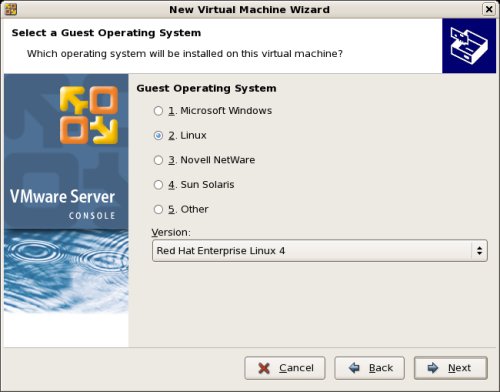
Select the "Linux" guest operating system option, and set the version to "Red Hat Enterprise Linux 4", then click the "Next" button. The RHEL4 option is used because at the time of writing, the current version of VMware server doesn't explicitly support RHEL5, but this setting works fine.
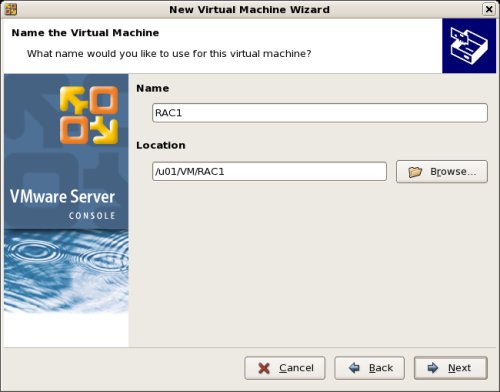
Enter the name "RAC1" and the location should default to "/u01/VM/RAC1", then click the "Next" button.
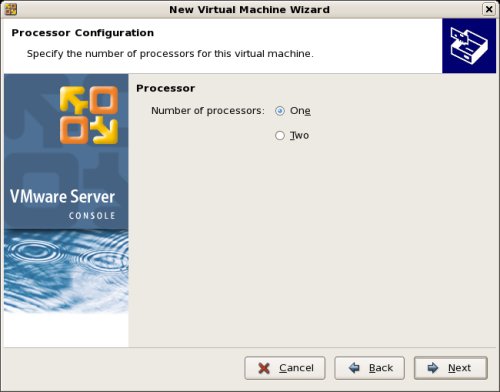
Select the required number of processors and click the "Next" button.
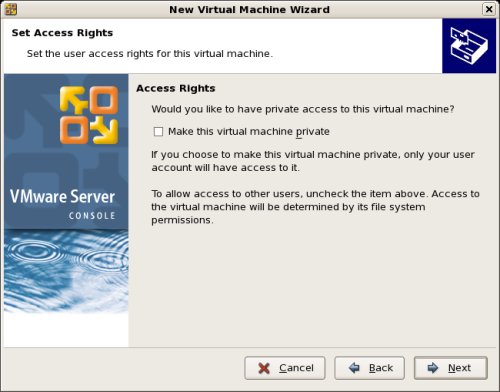
Uncheck the "Make this virtual machine private" checkbox and click the "Next" button.
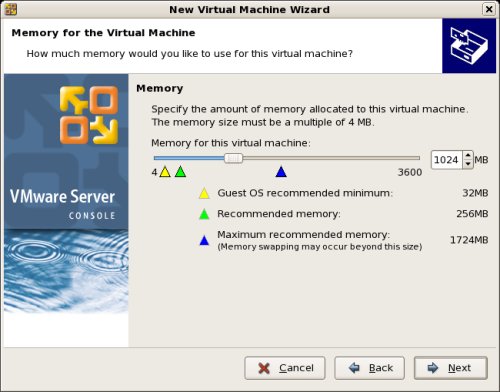
Select the amount of memory to associate with the virtual machine. Remember, you are going to need two instances, so don't associate too much, but you are going to need approximately 1 Gig (1024 Meg) to compete the installation successfully.
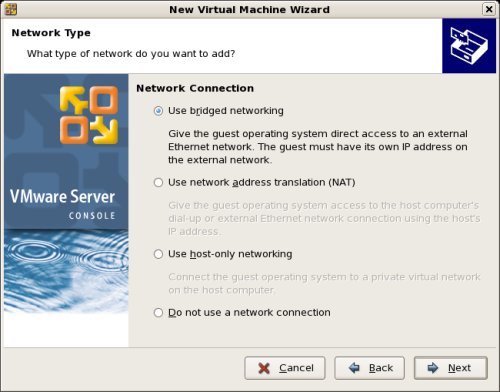
Accept the "Use bridged networking" option by clicking the "Next" button.
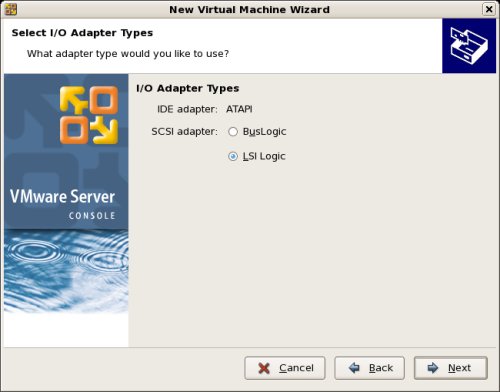
Accept the "LSI Logic" option by clicking the "Next" button.
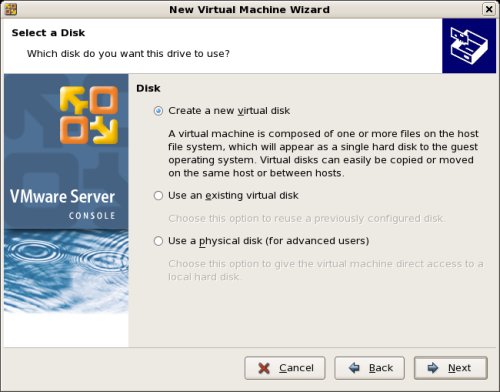
Select the "Create a new virtual disk" option and click the "Next" button.
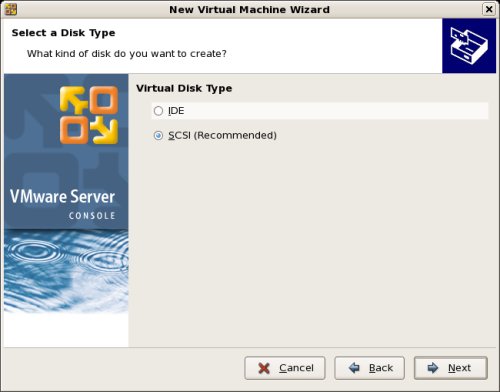
Accept the "SCSI" option by clicking the "Next" button. It's a virtual disk, so you can still use this option even if your physical disk is IDE or SATA.
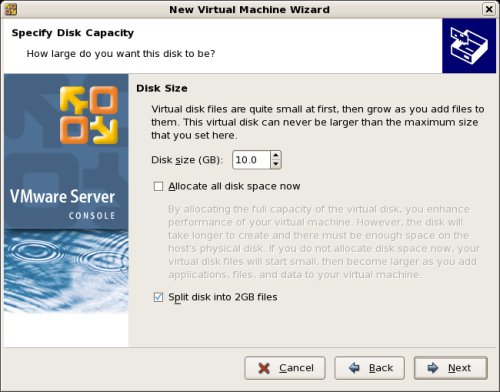
Set the disk size to "10.0" GB and uncheck the "Allocate all disk space now" option. The latter will make disk access slower, but will save you wasting disk space. Note: If you intend to unzip the Oracle installation software on the virtual disk you will need a 12-15 GB virtual disk.
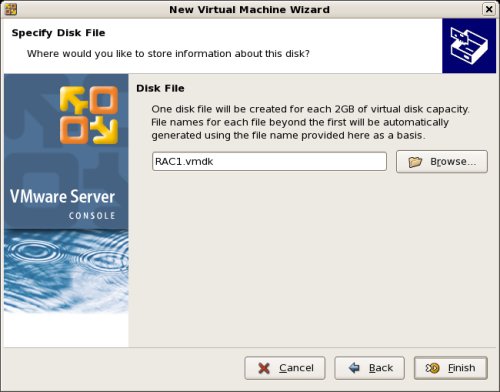
Accept "RAC1.vmdk" as the disk file name and complete the VM creation by clicking the "Finish" button.
On the "VMware Server Console" screen, click the "Edit virtual machine settings" button.
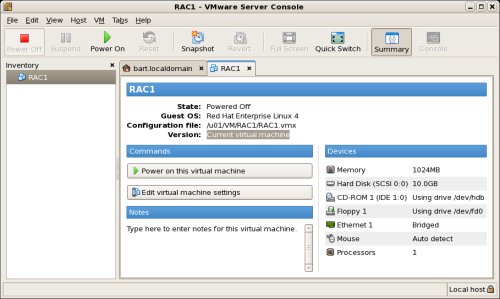
On the "Virtual Machine Settings" screen, highlight the "Floppy 1" drive and click the "- Remove" button.
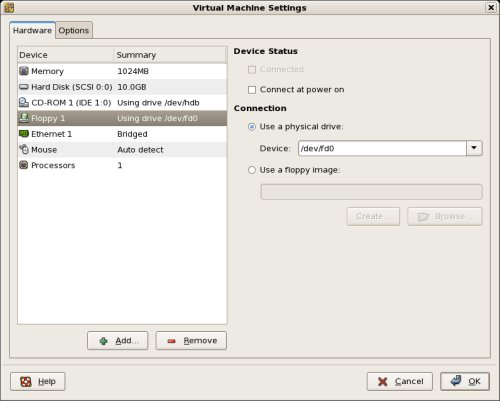
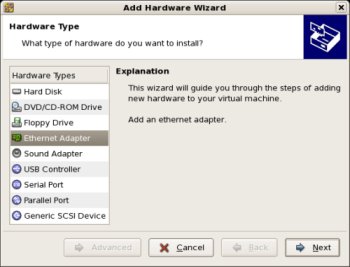
Click the "+ Add" button, select a hardware type of "Ethernet Adapter", then click the "Next" button.
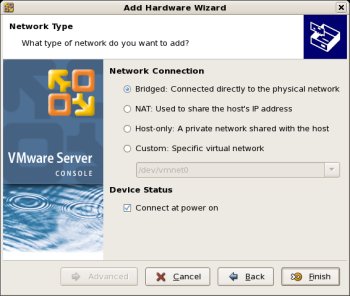
Accept the "Bridged" option by clicking the "Finish" button.
Finish by clicking the "OK" button on the Virtual Machine Settings dialog.
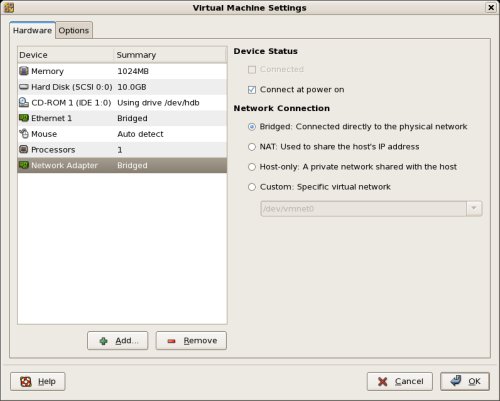
The virtual machine is now configured so we can start the guest operating system installation.
Guest Operating System Installation
Place the first OEL 5 disk in the CD drive and start the virtual machine by clicking the "Power on this virtual machine" button. The right pane of the VMware Server Console should display a boot loader, then the OEL installation screen.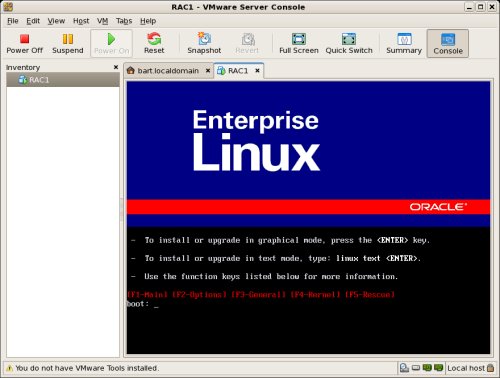
Continue through the OEL 5 installation as you would for a normal server. A general pictorial guide to the installation can be found here. More specifically, it should be a server installation with a minimum of 2G swap, firewall and SELinux disabled and the following package groups installed:
- GNOME Desktop Environment
- Editors
- Graphical Internet
- Text-based Internet
- Development Libraries
- Development Tools
- Server Configuration Tools
- Administration Tools
- Base
- System Tools
- X Window System
- hostname: rac1.localdomain
- IP Address eth0: 192.168.2.101 (public address)
- Default Gateway eth0: 192.168.2.1 (public address)
- IP Address eth1: 192.168.0.101 (private address)
- Default Gateway eth1: none
Once the basic installation is complete, install the following packages whilst logged in as the root user.
# From Enterprise Linux 5 Disk 1
cd /media/cdrom/Server
rpm -Uvh binutils-2.*
rpm -Uvh elfutils-libelf-0.*
rpm -Uvh glibc-2.*
rpm -Uvh glibc-common-2.*
rpm -Uvh libaio-0.*
rpm -Uvh libgcc-4.*
rpm -Uvh libstdc++-4.*
rpm -Uvh make-3.*
cd /
eject

# From Enterprise Linux 5 Disk 2
cd /media/cdrom/Server
rpm -Uvh compat-libstdc++-33*
rpm -Uvh elfutils-libelf-devel-*
rpm -Uvh glibc-headers*
rpm -Uvh glibc-devel-2.*
rpm -Uvh libgomp*
rpm -Uvh gcc-4.*
rpm -Uvh gcc-c++-4.*
rpm -Uvh libaio-devel-0.*
rpm -Uvh libstdc++-devel-4.*
rpm -Uvh unixODBC-2.*
rpm -Uvh unixODBC-devel-2.*
cd /
eject

# From Enterprise Linux 5 Disk 3
cd /media/cdrom/Server
rpm -Uvh sysstat-7.*
cd /
eject
Oracle Installation Prerequisites
Perform. the following steps whilst logged into the RAC1 virtual machine as the root user.The /etc/hosts file must contain the following information.
Add the following lines to the /etc/sysctl.conf file.127.0.0.1 localhost.localdomain localhost
# Public
192.168.2.101 rac1.localdomain rac1
192.168.2.102 rac2.localdomain rac2
#Private
192.168.0.101 rac1-priv.localdomain rac1-priv
192.168.0.102 rac2-priv.localdomain rac2-priv
#Virtual
192.168.2.111 rac1-vip.localdomain rac1-vip
192.168.2.112 rac2-vip.localdomain rac2-vip
Run the following command to change the current kernel parameters.kernel.shmmni = 4096
# semaphores: semmsl, semmns, semopm, semmni
kernel.sem = 250 32000 100 128
net.ipv4.ip_local_port_range = 1024 65000
net.core.rmem_default=4194304
net.core.rmem_max=4194304
net.core.wmem_default=262144
net.core.wmem_max=262144
Add the following lines to the /etc/security/limits.conf file./sbin/sysctl -p
Add the following lines to the /etc/pam.d/login file, if it does not already exist.oracle soft nproc 2047
oracle hard nproc 16384
oracle soft nofile 1024
oracle hard nofile 65536
Disable secure linux by editing the /etc/selinux/config file, making sure the SELINUX flag is set as follows.session required pam_limits.so
Alternatively, this alteration can be done using the GUI tool (System > Administration > Security Level and Firewall). Click on the SELinux tab and disable the feature.SELINUX=disabled
Create the new groups and users.
Create the directories in which the Oracle software will be installed.groupadd oinstall
groupadd dba
groupadd oper
groupadd asmadmin
useradd -u 500 -g oinstall -G dba,oper,asmadmin oracle
passwd oracle
Login as the oracle user and add the following lines at the end of the .bash_profile file.mkdir -p /u01/crs/oracle/product/11.1.0/crs
mkdir -p /u01/app/oracle/product/11.1.0/db_1
chown -R oracle:oinstall /u01
# Oracle Settings
TMP=/tmp; export TMP
TMPDIR=$TMP; export TMPDIR

ORACLE_HOSTNAME=rac1.localdomain; export ORACLE_HOSTNAME
ORACLE_BASE=/u01/app/oracle; export ORACLE_BASE
ORACLE_HOME=$ORACLE_BASE/product/11.1.0/db_1; export ORACLE_HOME
ORACLE_SID=RAC1; export ORACLE_SID
ORACLE_TERM=xterm; export ORACLE_TERM
PATH=/usr/sbin:$PATH; export PATH
PATH=$ORACLE_HOME/bin:$PATH; export PATH

LD_LIBRARY_PATH=$ORACLE_HOME/lib:/lib:/usr/lib; export LD_LIBRARY_PATH
CLASSPATH=$ORACLE_HOME/JRE:$ORACLE_HOME/jlib:$ORACLE_HOME/rdbms/jlib; export CLASSPATH

if [ $USER = "oracle" ]; then
  if [ $SHELL = "/bin/ksh" ]; then
    ulimit -p 16384
    ulimit -n 65536
  else
    ulimit -u 16384 -n 65536
  fi
fi
Install VMware Client Tools
Login as the root user on the RAC1 virtual machine, then select the "VM > Install VMware Tools..." option from the main VMware Server Console menu.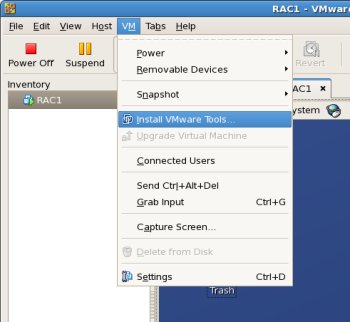
This should mount a virtual CD containing the VMware Tools software. Double-click on the CD icon labelled "VMware Tools" to open the CD. Right-click on the ".rpm" package and select the "Open with 'Install Packages'" menu option.
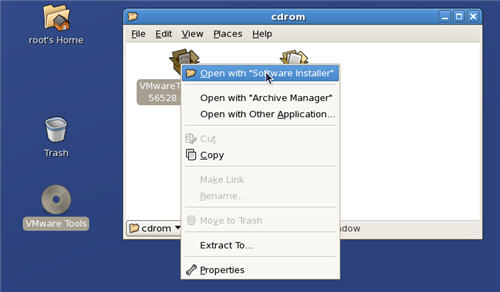
Click the "Continue" button on the "Completed System Preparation" screen and wait for the installation to complete.
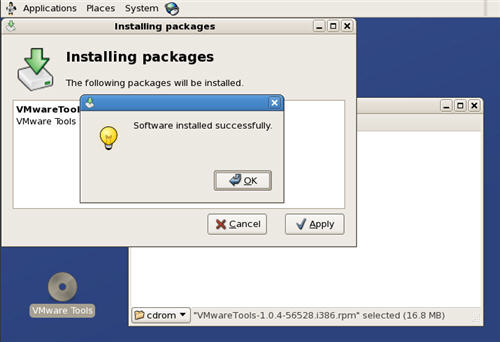
Once the package is loaded, the CD should unmount automatically. You must then run the "vmware-config-tools.pl" script. as the root user.
Accept all the default settings and pick the screen resolution of your choice. Ignore any warnings or errors. The VMware client tools are now installed. Reboot the server before proceeding. After the reboot, it is possible the monitor will not be recognised. If this is the case don't panic. Follow the instructions provided on the screen and reconfigure the monitor setting, which will allow the XServer to function correctly.# vmware-config-tools.pl
Create Shared Disks
Shut down the RAC1 virtual machine using the following command.Create a directory on the host system to hold the shared virtual disks.# shutdown -h now
On the VMware Server Console, click the "Edit virtual machine settings" button. On the "Virtual Machine Settings" screen, click the "+ Add" button.# mkdir -p /u01/VM/shared
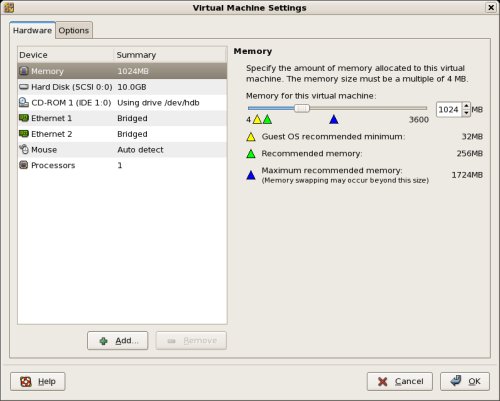
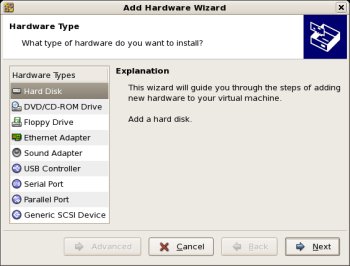
Click the "Next" button on the welcome screen, then select the hardware type of "Hard Disk" and click the "Next" button.
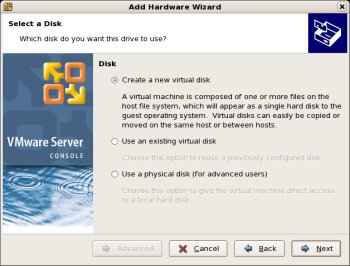
Accept the "Create a new virtual disk" option by clicking the "Next" button.
Accept the "SCSI" option by clicking the "Next" button.
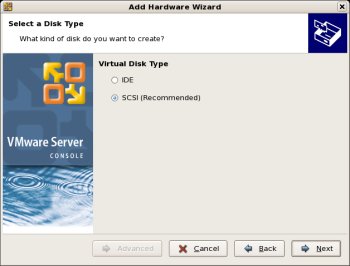
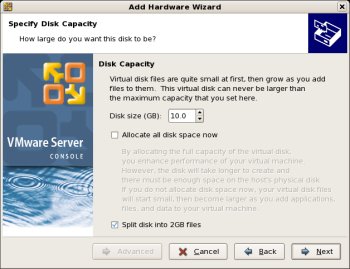
Set the disk size to "10.0" GB and uncheck the "Allocate all disk space now" option, then click the "Next" button.
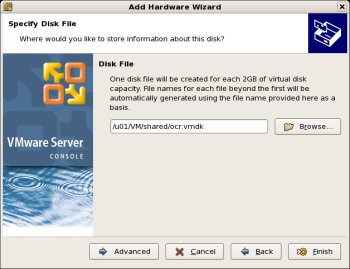
Set the disk name to "/u01/VM/shared/ocr.vmdk" and click the "Advanced" button.
Set the virtual device node to "SCSI 1:1" and the mode to "Independent" and "Persistent", then click the "Finish" button.
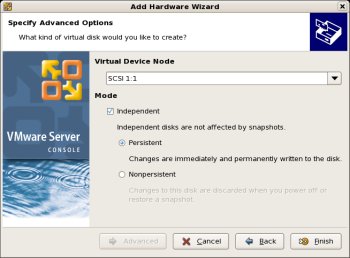
Repeat the previous hard disk creation steps 4 more times, using the following values:
- File Name: /u01/VM/shared/votingdisk.vmdk
Virtual Device Node: SCSI 1:2
Mode: Independent and Persistent
- File Name: /u01/VM/shared/asm1.vmdk
Virtual Device Node: SCSI 1:3
Mode: Independent and Persistent
- File Name: /u01/VM/shared/asm2.vmdk
Virtual Device Node: SCSI 1:4
Mode: Independent and Persistent
- File Name: /u01/VM/shared/asm3.vmdk
Virtual Device Node: SCSI 1:5
Mode: Independent and Persistent
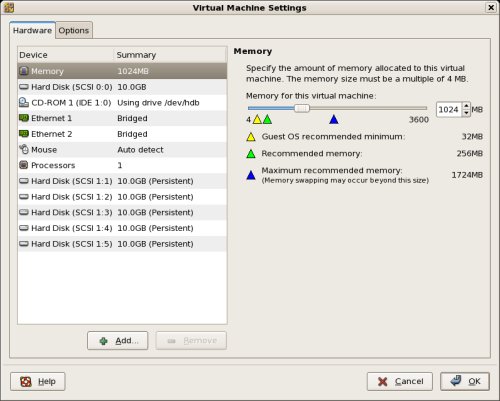
Edit the contents of the "/u01/VM/RAC1/RAC1.vmx" file using a text editor, making sure the following entries are present. Some of the tries will already be present, some will not.
Start the RAC1 virtual machine by clicking the "Power on this virtual machine" button on the VMware Server Console. When the server has started, log in as the root user so you can partition the disks. The current disks can be seen by issueing the following commands.disk.locking = "FALSE"
diskLib.dataCacheMaxSize = "0"
diskLib.dataCacheMaxReadAheadSize = "0"
diskLib.dataCacheMinReadAheadSize = "0"
diskLib.dataCachePageSize = "4096"
diskLib.maxUnsyncedWrites = "0"
scsi1.present = "TRUE"
scsi1.virtualDev = "lsilogic"
scsi1.sharedBus = "VIRTUAL"
scsi1:1.present = "TRUE"
scsi1:1.mode = "independent-persistent"
scsi1:1.fileName = "/u01/VM/shared/ocr.vmdk"
scsi1:1.deviceType = "plainDisk"
scsi1:1.redo = ""
scsi1:2.present = "TRUE"
scsi1:2.mode = "independent-persistent"
scsi1:2.fileName = "/u01/VM/shared/votingdisk.vmdk"
scsi1:2.deviceType = "plainDisk"
scsi1:2.redo = ""
scsi1:3.present = "TRUE"
scsi1:3.mode = "independent-persistent"
scsi1:3.fileName = "/u01/VM/shared/asm1.vmdk"
scsi1:3.deviceType = "plainDisk"
scsi1:3.redo = ""
scsi1:4.present = "TRUE"
scsi1:4.mode = "independent-persistent"
scsi1:4.fileName = "/u01/VM/shared/asm2.vmdk"
scsi1:4.deviceType = "plainDisk"
scsi1:4.redo = ""
scsi1:5.present = "TRUE"
scsi1:5.mode = "independent-persistent"
scsi1:5.fileName = "/u01/VM/shared/asm3.vmdk"
scsi1:5.deviceType = "plainDisk"
scsi1:5.redo = ""
Use the "fdisk" command to partition the disks sdb to sdf. The following output shows the expected fdisk output for the sdb disk.# cd /dev
# ls sd*
sda sda1 sda2 sdb sdc sdd sde sdf
#
In each case, the sequence of answers is "n", "p", "1", "Return", "Return", "p" and "w".# fdisk /dev/sdb
Device contains neither a valid DOS partition table, nor Sun, SGI or OSF disklabel
Building a new DOS disklabel. Changes will remain in memory only,
until you decide to write them. After that, of course, the previous
content won't be recoverable.
The number of cylinders for this disk is set to 1305.
There is nothing wrong with that, but this is larger than 1024,
and could in certain setups cause problems with:
1) software that runs at boot time (e.g., old versions of LILO)
2) booting and partitioning software from other OSs
(e.g., DOS FDISK, OS/2 FDISK)
Warning: invalid flag 0x0000 of partition table 4 will be corrected by w(rite)
Command (m for help): n
Command action
e extended
p primary partition (1-4)
p
Partition number (1-4): 1
First cylinder (1-1305, default 1):
Using default value 1
Last cylinder or +size or +sizeM or +sizeK (1-1305, default 1305):
Using default value 1305
Command (m for help): p
Disk /dev/sdb: 10.7 GB, 10737418240 bytes
255 heads, 63 sectors/track, 1305 cylinders
Units = cylinders of 16065 * 512 = 8225280 bytes
Device Boot Start End Blocks Id System
/dev/sdb1 1 1305 10482381 83 Linux
Command (m for help): w
The partition table has been altered!
Calling ioctl() to re-read partition table.
Syncing disks.
#
Once all the disks are partitioned, the results can be seen by repeating the previous "ls" command.
Add the following commands to the /etc/rc.local file.# cd /dev
# ls sd*
sda sda1 sda2 sdb sdb1 sdc sdc1 sdd sdd1 sde sde1 sdf sdf1
#
The shared disks are now configured. We don't have to worry about defining raw devices, which are deprecated in Enterprise Linux 5.chown oracle:oinstall /dev/sdb1
chown oracle:oinstall /dev/sdc1
chown oracle:oinstall /dev/sdd1
chown oracle:oinstall /dev/sde1
chown oracle:oinstall /dev/sdf1
chmod 600 /dev/sdb1
chmod 600 /dev/sdc1
chmod 600 /dev/sdd1
chmod 600 /dev/sde1
chmod 600 /dev/sdf1
Clone the Virtual Machine
The current version of VMware Server does not include an option to clone a virtual machine, but the following steps illustrate how this can be achieved manually.Shut down the RAC1 virtual machine using the following command.
Copy the RAC1 virtual machine using the following command.# shutdown -h now
Edit the contents of the "/u01/VM/RAC2/RAC1.vmx" file, making the following change.# cp -R /u01/VM/RAC1 /u01/VM/RAC2
Ignore discrepancies with the file names in the "/u01/VM/RAC2" directory. This does not affect the action of the virtual machine.displayName = "RAC2"
In the VMware Server Console, select the File > Open menu options and browse for the "/u01/VM/RAC2/RAC1.vmx" file. Once opened, the RAC2 virtual machine is visible on the console. Start the RAC2 virtual machine by clicking the "Power on this virtual machine" button and click the "Create" button on the subsequent "Question" screen.
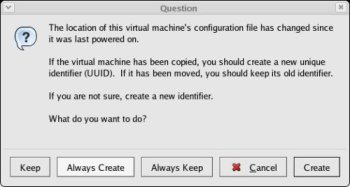
Ignore any errors during the server startup. We are expecting the networking components to fail at this point.
Log in to the RAC2 virtual machine as the root user and start the "Network Configuration" tool (System > Administration > Network).
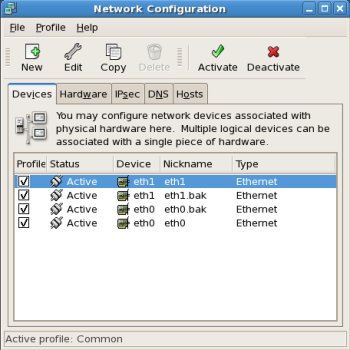
Remove the devices with the "%.bak" nicknames. To do this, highlight a device, deactivate, then delete it. This will leave just the regular "eth0" and "eth1" devices. Highlight the "eth0" interface and click the "Edit" button on the toolbar and alter the IP address to "192.168.2.102" in the resulting screen.
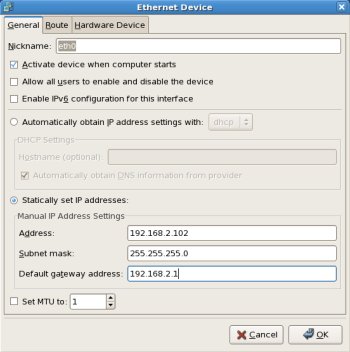
Click on the "Hardware Device" tab and click the "Probe" button. Then accept the changes by clicking the "OK" button.
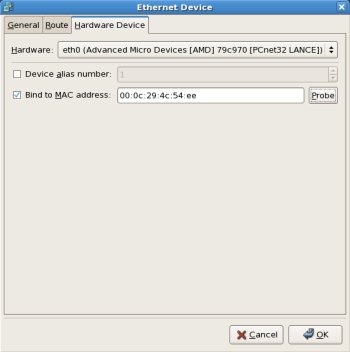
Repeat the process for the "eth1" interface, this time setting the IP Address to "192.168.0.102", and making sure the default gateway is not net for the "eth1" interface.
Click on the "DNS" tab and change the host name to "rac2.localdomain", then click on the "Devices" tab.
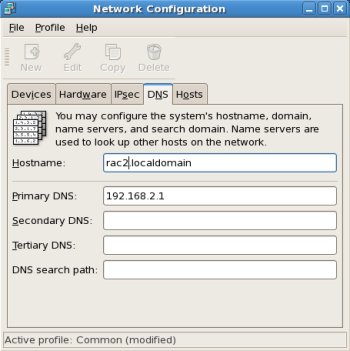
Once you are finished, save the changes (File > Save) and activate the network interfaces by highlighting them and clicking the "Activate" button. Once activated, the screen should look like the following image.
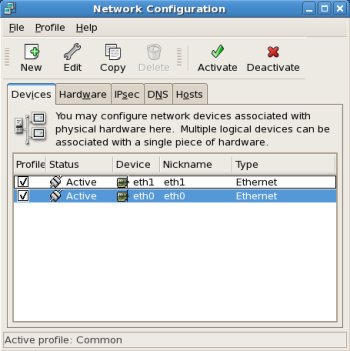
Edit the /home/oracle/.bash_profile file on the RAC2 node to correct the ORACLE_SID and ORACLE_HOSTNAME values.
Start the RAC1 virtual machine and restart the RAC2 virtual machine. When both nodes have started, check they can both ping all the public and private IP addresses using the following commands.ORACLE_SID=RAC2; export ORACLE_SID
ORACLE_HOSTNAME=rac2.localdomain; export ORACLE_HOSTNAME
At this point the virtual IP addresses defined in the /etc/hosts file will not work, so don't bother testing them.ping -c 3 rac1
ping -c 3 rac1-priv
ping -c 3 rac2
ping -c 3 rac2-priv
Configure SSH on each node in the cluster. Log in as the "oracle" user and perform. the following tasks on each node.
The RSA public key is written to the ~/.ssh/id_rsa.pub file and the private key to the ~/.ssh/id_rsa file.su - oracle
mkdir ~/.ssh
chmod 700 ~/.ssh
/usr/bin/ssh-keygen -t rsa # Accept the default settings.
Log in as the "oracle" user on RAC1, generate an "authorized_keys" file on RAC1 and copy it to RAC2 using the following commands.
Next, log in as the "oracle" user on RAC2 and perform. the following commands.su - oracle
cd ~/.ssh
cat id_rsa.pub >> authorized_keys
scp authorized_keys rac2:/home/oracle/.ssh/
The "authorized_keys" file on both servers now contains the public keys generated on all RAC nodes.su - oracle
cd ~/.ssh
cat id_rsa.pub >> authorized_keys
scp authorized_keys rac1:/home/oracle/.ssh/
To enable SSH user equivalency on the cluster member nodes issue the following commands on each node.
You should now be able to SSH and SCP between servers without entering passwords.ssh rac1 date
ssh rac2 date
ssh rac1.localdomain date
ssh rac2.localdomain date
exec /usr/bin/ssh-agent $SHELL
/usr/bin/ssh-add
Before installing the clusterware, check the prerequisites have been met using the "runcluvfy.sh" utility in the clusterware root directory.
If you get any failures be sure to correct them before proceeding./mountpoint/clusterware/runcluvfy.sh stage -pre crsinst -n rac1,rac2 -verbose
It's a good idea to take a snapshot of the virtual machines, so you can repeat the following stages if you run into any problems. To do this, shutdown both virtual machines and issue the following commands.
The virtual machine setup is now complete.# cd /u01/VM
# tar -cvf RAC-PreClusterware.tar RAC1 RAC2 shared
# gzip RAC-PreClusterware.tar
Install the Clusterware Software
Start the RAC1 and RAC2 virtual machines, login to RAC1 as the oracle user and start the Oracle installer.On the "Welcome" screen, click the "Next" button../runInstaller
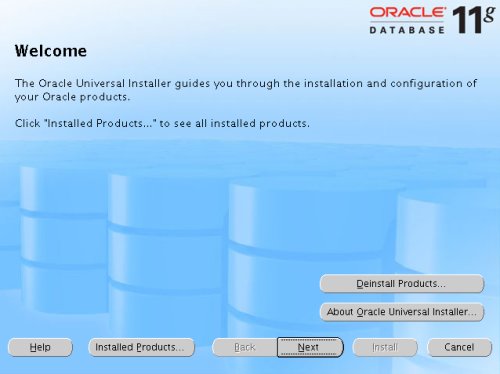
Accept the default inventory location by clicking the "Next" button.
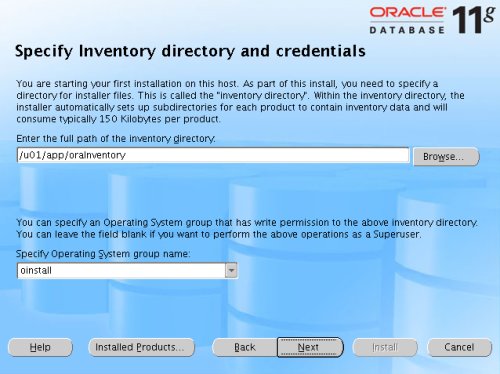
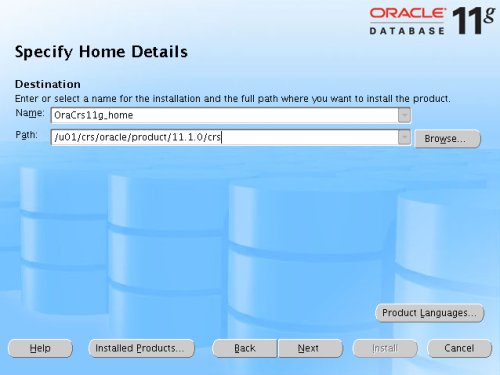
Enter the appropriate name and path for the Oracle Home and click the "Next" button.
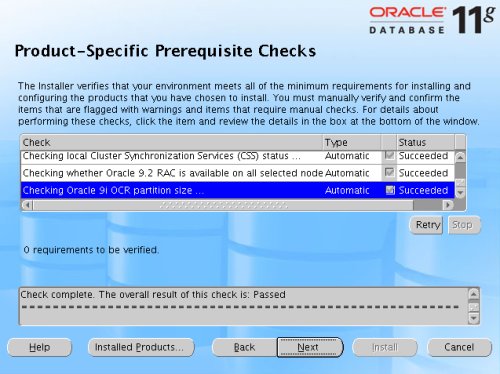
Wait while the prerequisite checks are done. If you have any failures correct them and retry the tests before clicking the "Next" button.
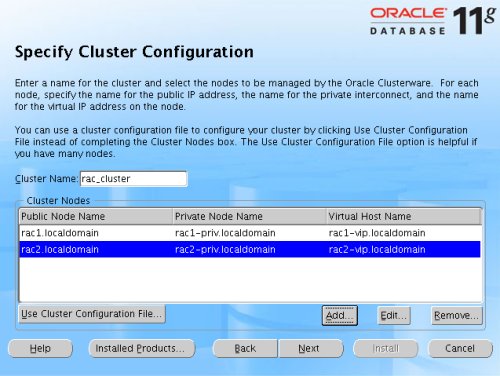
The "Specify Cluster Configuration" screen shows only the RAC1 node in the cluster. Click the "Add" button to continue.
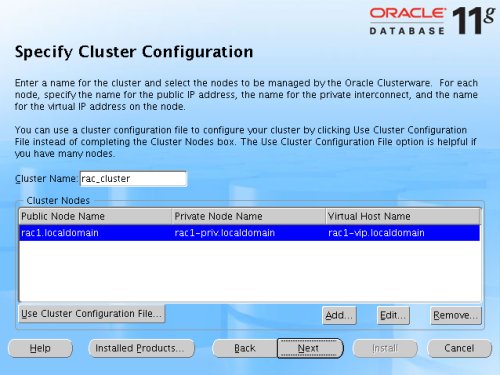
Enter the details for the RAC2 node and click the "OK" button.
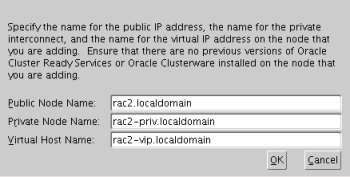
Click the "Next" button to continue.
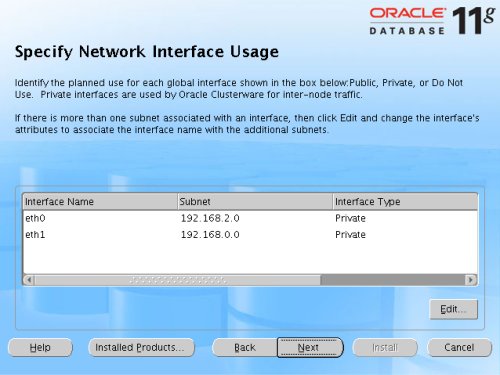
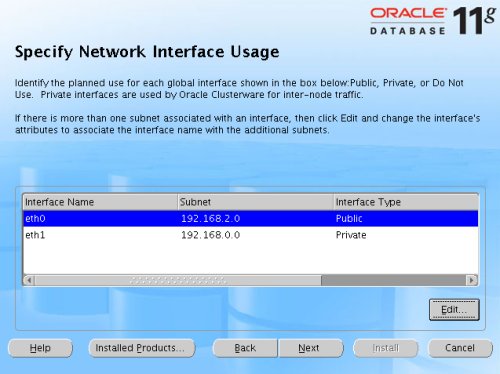
The "Specific Network Interface Usage" screen defines how each network interface will be used. Highlight the "eth0" interface and click the "Edit" button.
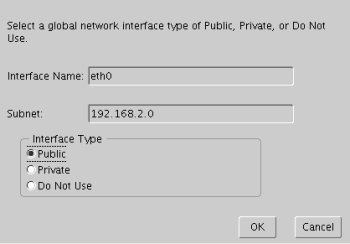
Set the "eht0" interface type to "Public" and click the "OK" button.
Leave the "eth1" interface as private and click the "Next" button.
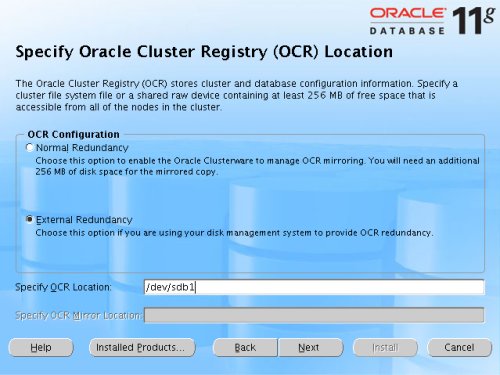
Click the "External Redundancy" option, enter "/dev/sdb1" as the OCR Location and click the "Next" button. To have greater redundancy we would need to define another shared disk for an alternate location.
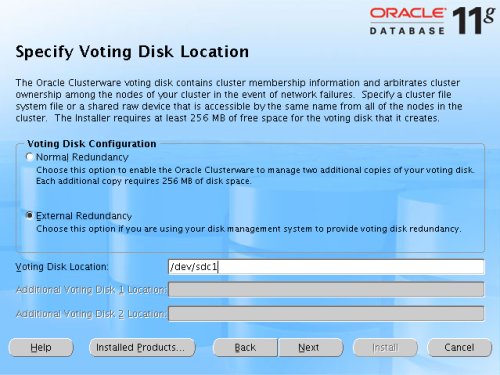
Click the "External Redundancy" option, enter "/dev/sdc1" as the Voting Disk Location and click the "Next" button. To have greater redundancy we would need to define another shared disk for an alternate location.
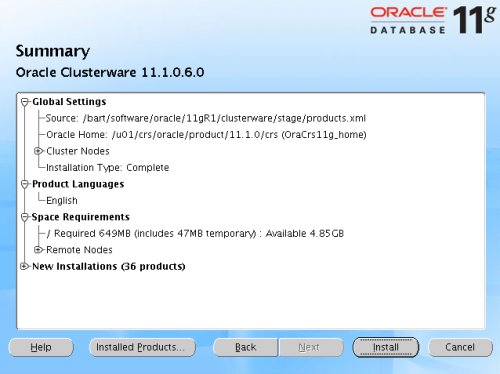
On the "Summary" screen, click the "Install" button to continue.
Wait while the installation takes place.
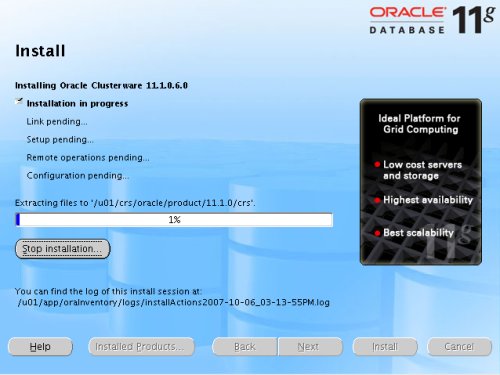
Once the install is complete, run the orainstRoot.sh and root.sh scripts on both nodes as directed on the following screen.

The output from the orainstRoot.sh file should look something like that listed below.
The output of the root.sh will vary a little depending on the node it is run on. The following text is the output from the RAC1 node.# cd /u01/app/oraInventory
# ./orainstRoot.sh
Changing permissions of /u01/app/oraInventory to 770.
Changing groupname of /u01/app/oraInventory to oinstall.
The execution of the script. is complete
#
Ignore the directory ownership warnings. We should really use a separate directory structure for the clusterware so it can be owned by the root user, but it has little effect on the finished results.# cd /u01/crs/oracle/product/11.1.0/crs
# ./root.sh
WARNING: directory '/u01/crs/oracle/product/11.1.0' is not owned by root
WARNING: directory '/u01/crs/oracle/product' is not owned by root
WARNING: directory '/u01/crs/oracle' is not owned by root
WARNING: directory '/u01/crs' is not owned by root
WARNING: directory '/u01' is not owned by root
Checking to see if Oracle CRS stack is already configured
/etc/oracle does not exist. Creating it now.
Setting the permissions on OCR backup directory
Setting up Network socket directories
Oracle Cluster Registry configuration upgraded successfully
The directory '/u01/crs/oracle/product/11.1.0' is not owned by root. Changing owner to root
The directory '/u01/crs/oracle/product' is not owned by root. Changing owner to root
The directory '/u01/crs/oracle' is not owned by root. Changing owner to root
The directory '/u01/crs' is not owned by root. Changing owner to root
The directory '/u01' is not owned by root. Changing owner to root
Successfully accumulated necessary OCR keys.
Using ports: CSS=49895 CRS=49896 EVMC=49898 and EVMR=49897.
node:
node 1: rac1 rac1-priv rac1
node 2: rac2 rac2-priv rac2
Creating OCR keys for user 'root', privgrp 'root'..
Operation successful.
Now formatting voting device: /dev/sdc1
Format of 1 voting devices complete.
Startup will be queued to init within 30 seconds.
Adding daemons to inittab
Expecting the CRS daemons to be up within 600 seconds.
Cluster Synchronization Services is active on these nodes.
rac1
Cluster Synchronization Services is inactive on these nodes.
rac2
Local node checking complete. Run root.sh on remaining nodes to start CRS daemons.
#
The output from the RAC2 node is listed below.
Here you can see that some of the configuration steps are omitted as they were done by the first node. In addition, the final part of the script. ran the Virtual IP Configuration Assistant (VIPCA) in silent mode.# cd /u01/crs/oracle/product/11.1.0/crs
# ./root.sh
WARNING: directory '/u01/crs/oracle/product/11.1.0' is not owned by root
WARNING: directory '/u01/crs/oracle/product' is not owned by root
WARNING: directory '/u01/crs/oracle' is not owned by root
WARNING: directory '/u01/crs' is not owned by root
WARNING: directory '/u01' is not owned by root
Checking to see if Oracle CRS stack is already configured
/etc/oracle does not exist. Creating it now.
Setting the permissions on OCR backup directory
Setting up Network socket directories
Oracle Cluster Registry configuration upgraded successfully
The directory '/u01/crs/oracle/product/11.1.0' is not owned by root. Changing owner to root
The directory '/u01/crs/oracle/product' is not owned by root. Changing owner to root
The directory '/u01/crs/oracle' is not owned by root. Changing owner to root
The directory '/u01/crs' is not owned by root. Changing owner to root
The directory '/u01' is not owned by root. Changing owner to root
clscfg: EXISTING configuration version 4 detected.
clscfg: version 4 is 11 Release 1.
Successfully accumulated necessary OCR keys.
Using ports: CSS=49895 CRS=49896 EVMC=49898 and EVMR=49897.
node:
node 1: rac1 rac1-priv rac1
node 2: rac2 rac2-priv rac2
clscfg: Arguments check out successfully.
NO KEYS WERE WRITTEN. Supply -force parameter to override.
-force is destructive and will destroy any previous cluster
configuration.
Oracle Cluster Registry for cluster has already been initialized
Startup will be queued to init within 30 seconds.
Adding daemons to inittab
Expecting the CRS daemons to be up within 600 seconds.
Cluster Synchronization Services is active on these nodes.
rac1
rac2
Cluster Synchronization Services is active on all the nodes.
Waiting for the Oracle CRSD and EVMD to start
Waiting for the Oracle CRSD and EVMD to start
Waiting for the Oracle CRSD and EVMD to start
Oracle CRS stack installed and running under init(1M)
Running vipca(silent) for configuring nodeapps
Creating VIP application resource on (2) nodes...
Creating GSD application resource on (2) nodes...
Creating ONS application resource on (2) nodes...
Starting VIP application resource on (2) nodes...
Starting GSD application resource on (2) nodes...
Starting ONS application resource on (2) nodes...
Done.
#
You should now return to the "Execute Configuration Scripts" screen on RAC1 and click the "OK" button.
Wait for the configuration assistants to complete.
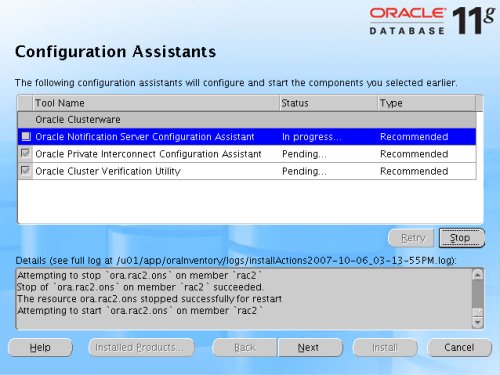
When the installation is complete, click the "Exit" button to leave the installer.
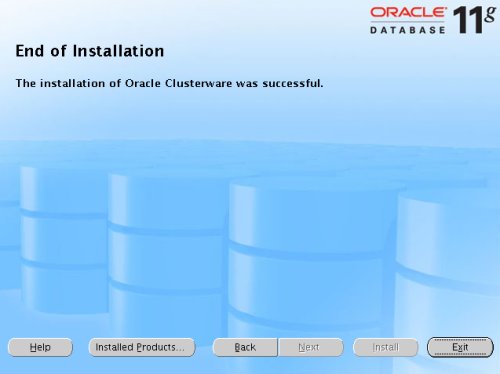
It's a good idea to take a snapshot of the virtual machines, so you can repeat the following stages if you run into any problems. To do this, shutdown both virtual machines and issue the following commands.
The clusterware installation is now complete.# cd /u01/VM
# tar -cvf RAC-PostClusterware.tar RAC1 RAC2 shared
# gzip RAC-PostClusterware.tar
Install the Database Software and Create an ASM Instance
Start the RAC1 and RAC2 virtual machines, login to RAC1 as the oracle user and start the Oracle installer.On the "Welcome" screen, click the "Next" button../runInstaller
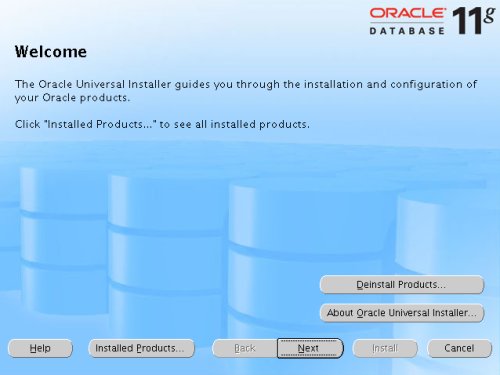
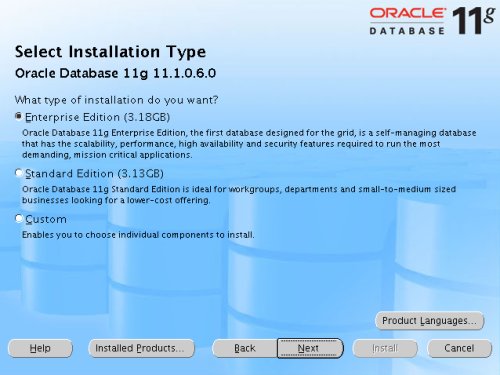
Select the "Enterprise Edition" option and click the "Next" button.
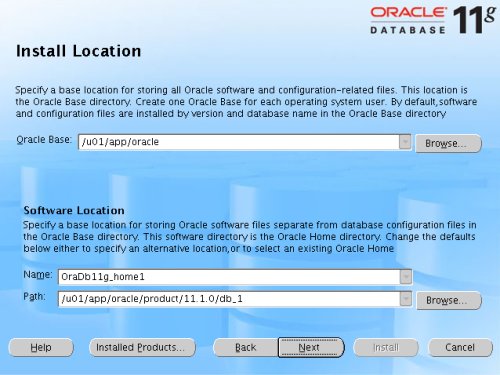
Enter the name and path for the Oracle Home and click the "Next" button.
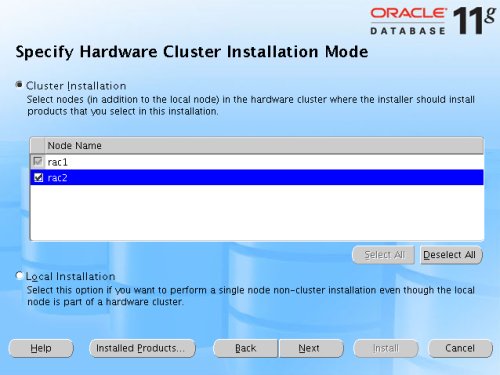
Select the "Cluster Install" option and make sure both RAC nodes are selected, the click the "Next" button.
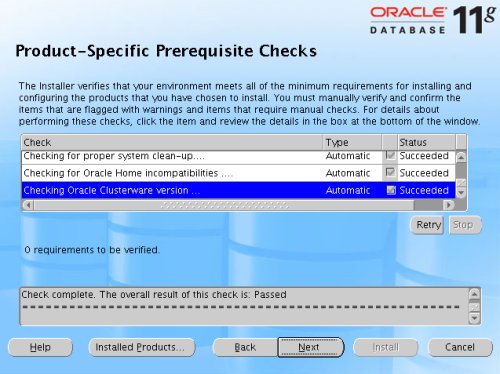
Wait while the prerequisite checks are done. If you have any failures correct them and retry the tests before clicking the "Next" button.
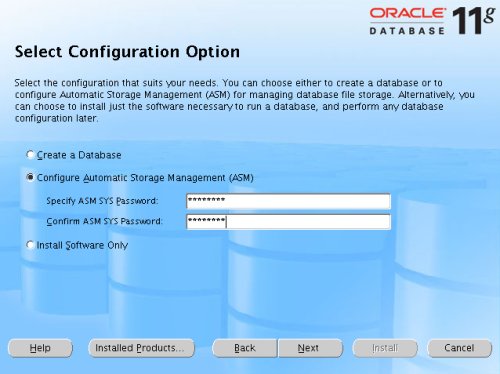
Select the "Configure Automatic Storage Management (ASM)" option, enter the SYS password for the ASM instance, then click the "Next" button.
Select the "External" redundancy option (no mirroring), select all three raw disks (/dev/sdd1, /dev/sde1 and /dev/sdf1), then click the "Next" button.
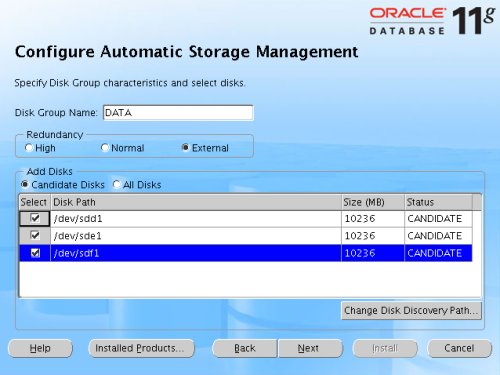
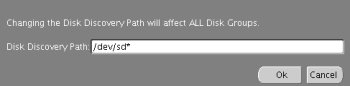
The candidate disks may not be listed at first. If this is the case, click the "Change Disk Discovery Path..." button, enter the value "/dev/sd*", then click the "OK" button. After a short pause, the candidate disks should be listed as above.
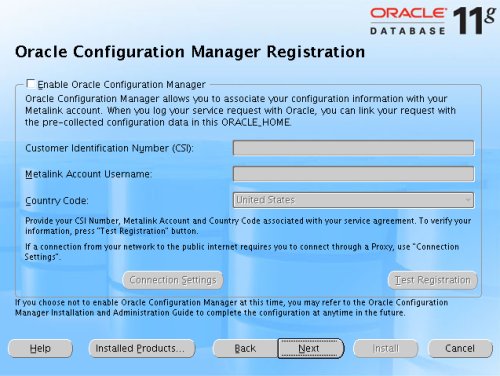
Click the "next" button to avoid the Oracle Configuration Manager Registration.
On the "Summary" screen, click the "Install" button to continue.
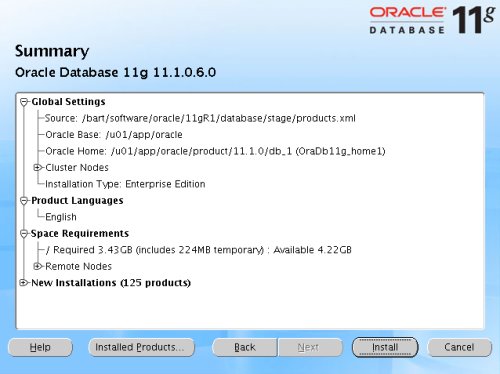
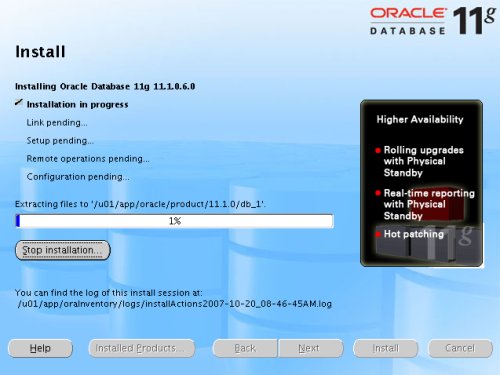
Wait while the database software installs.
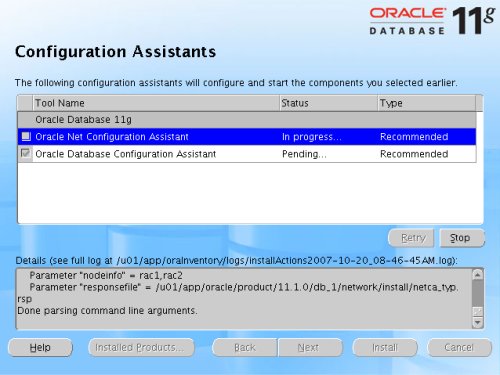
Once the installation is complete, wait while the configuration assistants run.
Execute the "root.sh" scripts on both nodes, as instructed on the "Execute Configuration scripts" screen, then click the "OK" button.

When the installation is complete, click the "Exit" button to leave the installer.
It's a good idea to take a snapshot of the virtual machines, so you can repeat the following stages if you run into any problems. To do this, shutdown both virtual machines and issue the following commands.
The database software installation and ASM creation step is now complete.# cd /u01/VM
# tar -cvf RAC-PostASM.tar RAC1 RAC2 shared
# gzip RAC-PostASM.tar
Create a Database using the DBCA
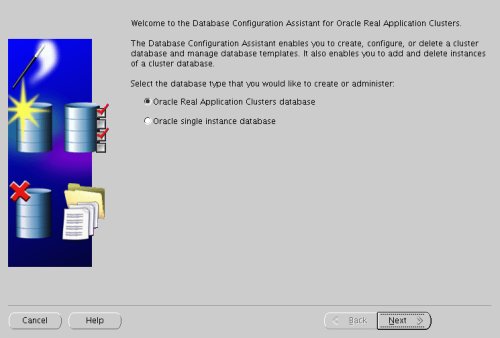
Start the RAC1 and RAC2 virtual machines, login to RAC1 as the oracle user and start the Database Configuration Assistant.On the "Welcome" screen, select the "Oracle Real Application Clusters database" option and click the "Next" button.dbca
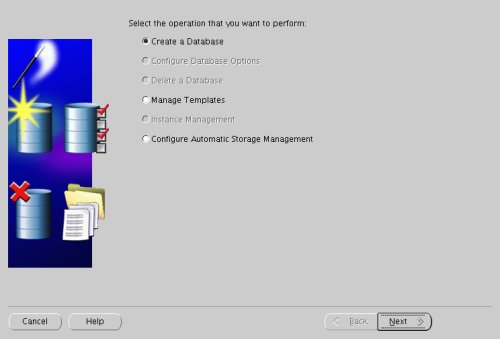
Select the "Create a Database" option and click the "Next" button.
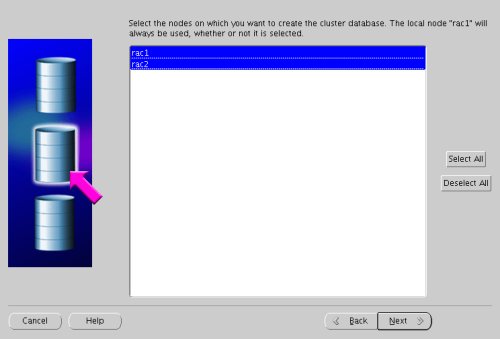
Highlight both RAC nodes and click the "Next" button.
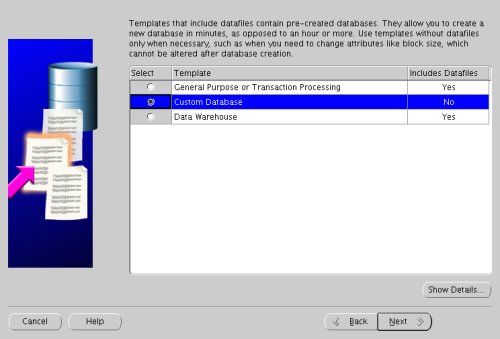
Select the "Custom Database" option and click the "Next" button.
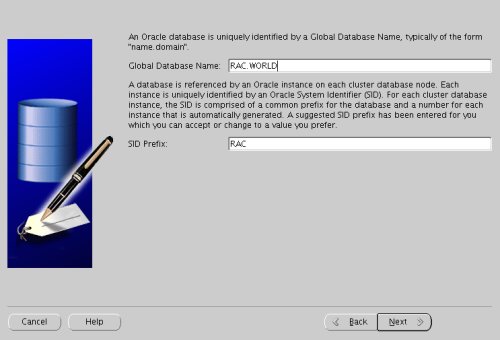
Enter the values "RAC.WORLD" and "RAC" for the Global Database Name and SID Prefix respectively, then click the "Next" button.
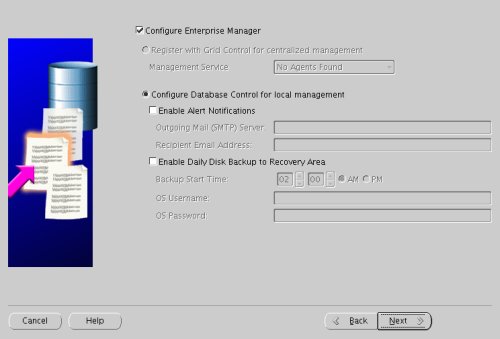
Accept the management options by clicking the "Next" button. If you are attempting the installation on a server with limited memory, you may prefer not to configure Enterprise Manager at this time.
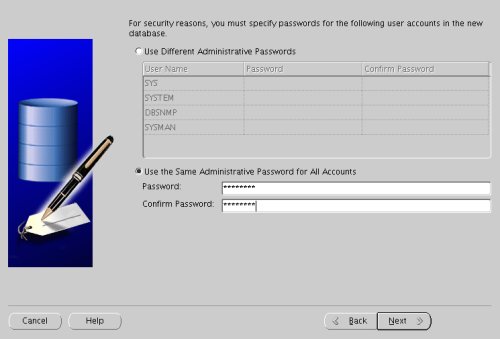
Enter database passwords then click the "Next" button.
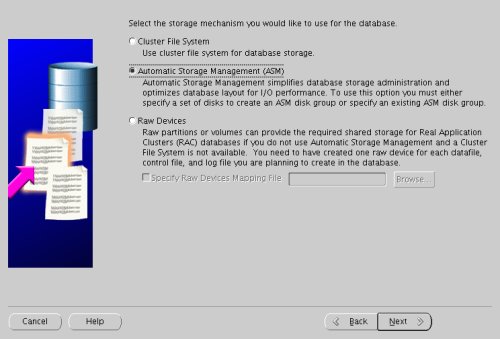
Select the "Automatic Storage Management (ASM)" option, then click the "Next" button.
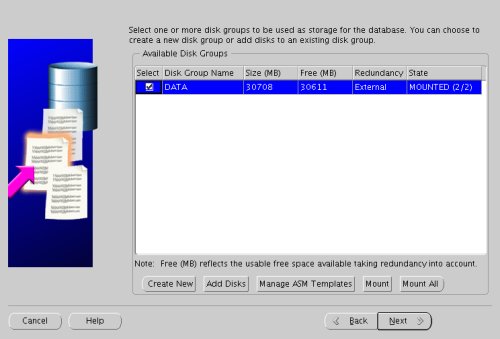
Select the "DATA" disk group, then click the "Next" button.
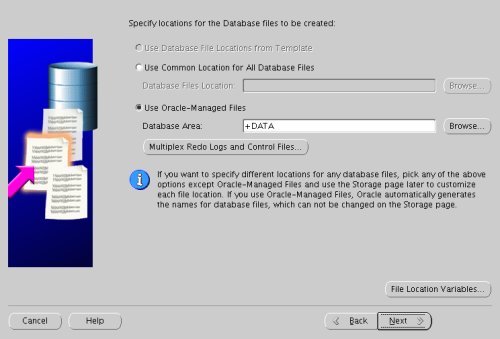
Accept the "Use Oracle-Managed Files" database location by the "Next" button.
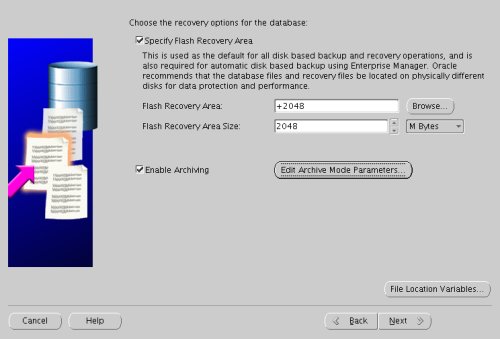
Check both the "Specify Flash Recovery Area" and "Enable Archiving" options. Enter "+DATA" as the Flash Recovery Area, then click the "Next" button.
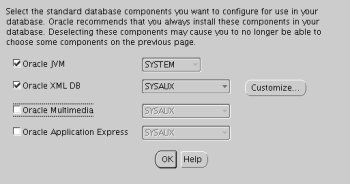
Uncheck all but the "Enterprise Manager Repository" option, then click the "Standard Database Components..." button.
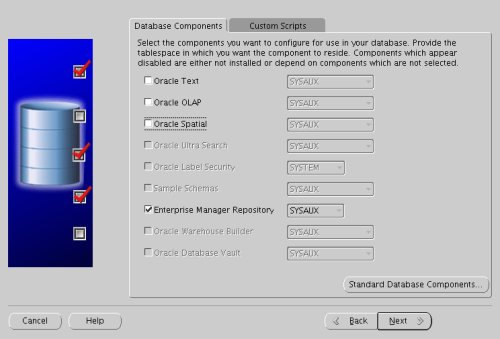
Uncheck all but the "Oracle JVM" and "Oracle XML DB" options, then click the "OK" button, followed by the "Next" button on the previous screen. If you are attempting the installation on a server with limited memory, you may prefer not to install the JVM at this time.
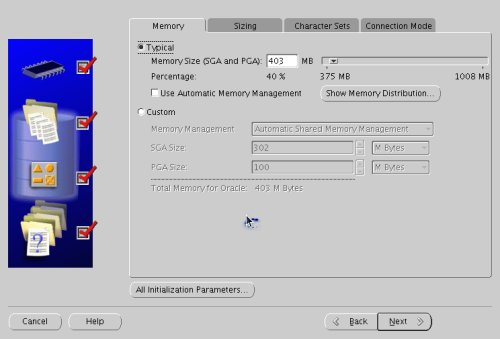
Accept the default memory settings by clicking the "Next" button.
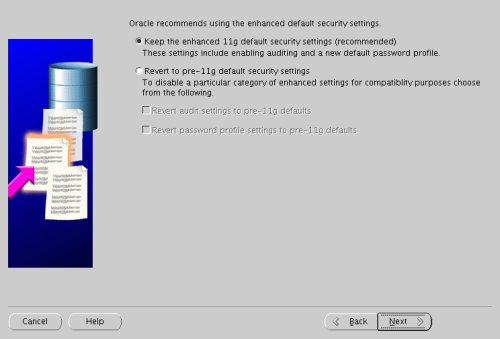
Accept the default security settings by clicking the "Next" button.
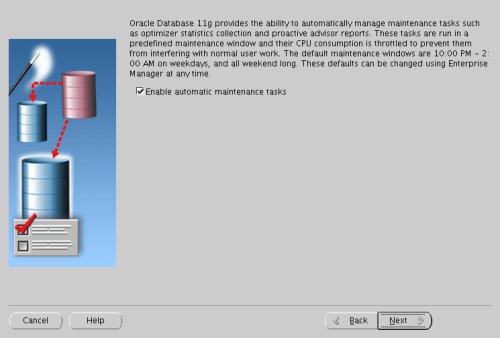
Accept the default automatic maintenence task settings by clicking the "Next" button.
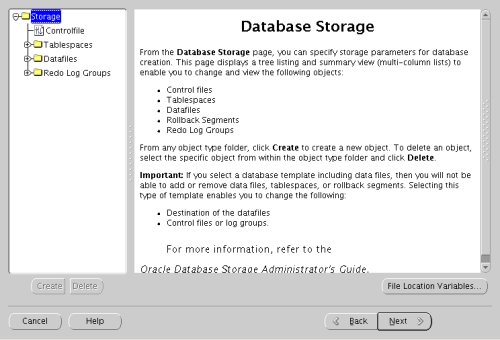
Accept the database storage settings by clicking the "Next" button.
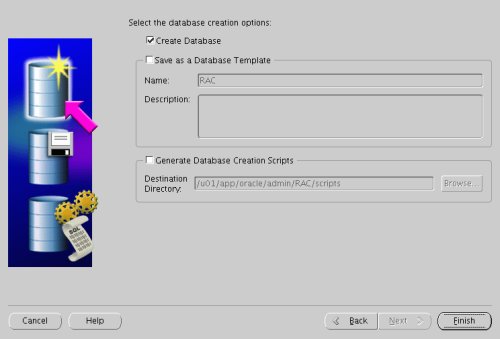
Accept the database creation options by clicking the "Finish" button.
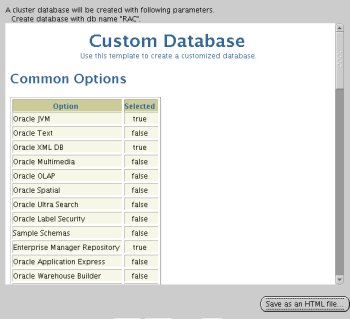
Accept the summary information by clicking the "OK" button.
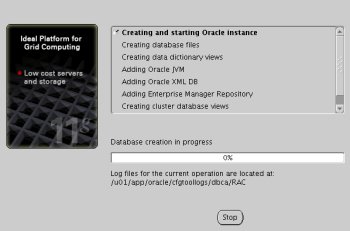
Wait while the database is created.
Once the database creation is complete you are presented with the following screen. Make a note of the information on the screen and click the "Exit" button.
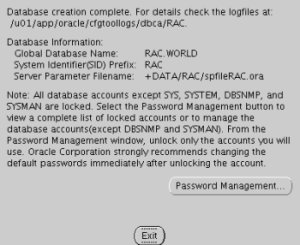
The RAC database creation is now complete.
TNS Configuration
Once the installation is complete, the "$ORACLE_HOME/network/admin/listener.ora" file on each RAC node will contain entries similar to the following.The "$ORACLE_HOME/network/admin/tnsnames.ora" file on each RAC node will contain entries similar to the following.LISTENER_RAC1 =
(DESCRIPTION_LIST =
(DESCRIPTION =
(ADDRESS = (PROTOCOL = IPC)(KEY = EXTPROC1521))
(ADDRESS = (PROTOCOL = TCP)(HOST = rac1-vip)(PORT = 1521)(IP = FIRST))
(ADDRESS = (PROTOCOL = TCP)(HOST = 192.168.2.101)(PORT = 1521)(IP = FIRST))
)
)
This configuration allows direct connections to specific instance, or using a load balanced connection to the main service.RAC =
(DESCRIPTION =
(ADDRESS = (PROTOCOL = TCP)(HOST = rac1-vip)(PORT = 1521))
(ADDRESS = (PROTOCOL = TCP)(HOST = rac2-vip)(PORT = 1521))
(LOAD_BALANCE = yes)
(CONNECT_DATA =
(SERVER = DEDICATED)
(SERVICE_NAME = RAC.WORLD)
)
)
LISTENERS_RAC =
(ADDRESS_LIST =
(ADDRESS = (PROTOCOL = TCP)(HOST = rac1-vip)(PORT = 1521))
(ADDRESS = (PROTOCOL = TCP)(HOST = rac2-vip)(PORT = 1521))
)
RAC2 =
(DESCRIPTION =
(ADDRESS = (PROTOCOL = TCP)(HOST = rac2-vip)(PORT = 1521))
(CONNECT_DATA =
(SERVER = DEDICATED)
(SERVICE_NAME = RAC.WORLD)
(INSTANCE_NAME = RAC2)
)
)
RAC1 =
(DESCRIPTION =
(ADDRESS = (PROTOCOL = TCP)(HOST = rac1-vip)(PORT = 1521))
(CONNECT_DATA =
(SERVER = DEDICATED)
(SERVICE_NAME = RAC.WORLD)
(INSTANCE_NAME = RAC1)
)
)
$ sqlplus / as sysdba

SQL*Plus: Release 11.1.0.6.0 - Production on Mon Oct 22 09:09:01 2007

Copyright (c) 1982, 2007, Oracle.  All rights reserved.


Connected to:
Oracle Database 11g Enterprise Edition Release 11.1.0.6.0 - Production
With the Partitioning, Real Application Clusters, OLAP, Data Mining
and Real Application Testing options

SQL> CONN sys/password@rac1 AS SYSDBA
Connected.
SQL> SELECT instance_name, host_name FROM v$instance;

INSTANCE_NAME    HOST_NAME
---------------- ----------------------------------------------------------------
RAC1             rac1.localdomain

SQL> CONN sys/password@rac2 AS SYSDBA
Connected.
SQL> SELECT instance_name, host_name FROM v$instance;

INSTANCE_NAME    HOST_NAME
---------------- ----------------------------------------------------------------
RAC2             rac2.localdomain

SQL> CONN sys/password@rac AS SYSDBA
Connected.
SQL> SELECT instance_name, host_name FROM v$instance;

INSTANCE_NAME    HOST_NAME
---------------- ----------------------------------------------------------------
RAC1             rac1.localdomain

SQL>
Check the Status of the RAC
There are several ways to check the status of the RAC. The srvctl utility shows the current configuration and status of the RAC database.The V$ACTIVE_INSTANCES view can also display the current status of the instances.$ srvctl config database -d RAC
rac1 RAC1 /u01/app/oracle/product/11.1.0/db_1
rac2 RAC2 /u01/app/oracle/product/11.1.0/db_1
$
$ srvctl status database -d RAC
Instance RAC1 is running on node rac1
Instance RAC2 is running on node rac2
$
Finally, the GV$ allow you to display global information for the whole RAC.$ sqlplus / as sysdba
SQL*Plus: Release 11.1.0.6.0 - Production on Mon Oct 22 09:09:01 2007
Copyright (c) 1982, 2007, Oracle. All rights reserved.
Connected to:
Oracle Database 11g Enterprise Edition Release 11.1.0.6.0 - Production
With the Partitioning, Real Application Clusters, OLAP, Data Mining
and Real Application Testing options
SQL> SELECT * FROM v$active_instances;
INST_NUMBER INST_NAME
----------- ------------------------------------------------------------
1 rac1.localdomain:RAC1
2 rac2.localdomain:RAC2
SQL>
If you have configured Enterprise Manager, it can be used to view the configuration and current status of the database using a URL like "https://rac1.localdomain:1158/em".SQL> SELECT inst_id, program, sid, serial# FROM gv$session;
SQL> /
INST_ID PROGRAM SID SERIAL#
---------- ------------------------------------------------ ---------- ----------
1 oracle@rac1.localdomain (q002) 121 46
.
.
1 racgimon@rac1.localdomain (TNS V1-V3) 170 11
2 sqlplus@rac2.localdomain (TNS V1-V3) 120 51
.
.
2 oracle@rac2.localdomain (RSMN) 170 3
77 rows selected.
SQL>
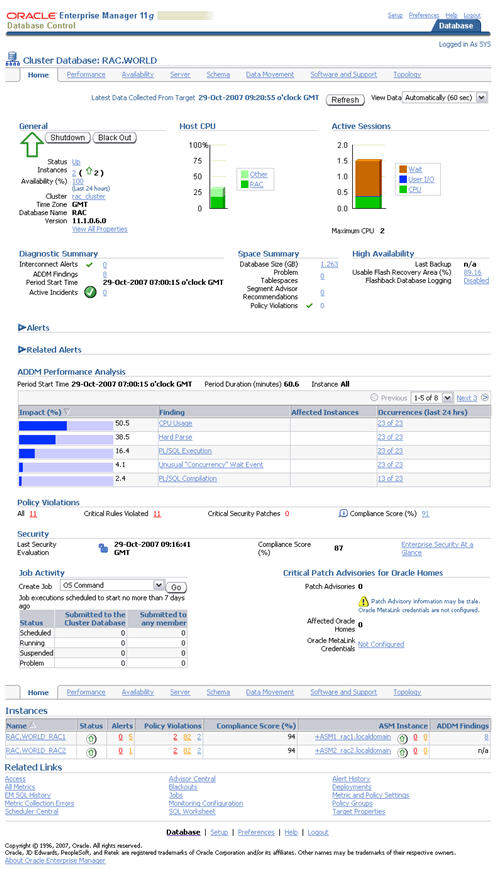
For more information see:
- Oracle 11g Release 1 RAC On Linux Using NFS
- Oracle 10g RAC On Linux Using VMware Server
- Clusterware Installation Guide for Linux
- Real Application Clusters Installation Guide for Linux and UNIX
- Oracle Database Installation Guide 11g Release 1 (11.1) for Linux
- Direct and Asynchronous I/O
Back to the Top.
来自 “ ITPUB博客 ” ,链接:https://blog.itpub.net/9466564/viewspace-631442/ ,如需转载,请注明出处,否则将追究法律责任。

请登录后发表评论
登录
全部评论
