fastapi框架源码分析系列-(9)HTTP协议中的Chunked transfer encoding
1 fastapi 分段传输
之前提到过关于符合asgiapp协议下的如果进行分段传输的做法,如下示例源码:
from starlette.types import Receive, Scope, Send

import asyncio
class FrameApp:
    async def __call__(self, scope: Scope, receive: Receive, send: Send) -> None:
        assert scope['type'] == 'http'
        # 设置为text/plain 则会等待整个结果处理完成再一次性的返回
        # await send({'type': 'http.response.start','status': 200,'headers': [[b'content-type', b'text/plain'],]})
        # 设置application/octet-stream 会打包会一个文件流进行下载
        # await send({'type': 'http.response.start', 'status': 200, 'headers': [[b'content-type', b'application/octet-stream'], ]})
        # 设置 application/json 则会分批次的请求响应返回,也就是可以分段
        await send({'type': 'http.response.start', 'status': 200, 'headers': [[b'content-type', b'application/json'], ]})
        # 分段请求1:返回A--然后间隔2秒继续返回B- more_body:True  # 代表后面还有消息要返回
        await send({"type": "http.response.body", "body": b'A-1', "more_body": True})
        await asyncio.sleep(2)
        # 分段请求2:返回B--然后间隔2秒继续返回C
        await send({"type": "http.response.body", "body": b'>--B-2', "more_body": True})
        await asyncio.sleep(2)
        # 分段请求3:返回C--然后间隔2秒继续返回C--more_body-不填默认值则为False
        await send({"type": "http.response.body", "body": b'>--C-3', "more_body": True})
        await asyncio.sleep(2)
        # 分段请求4:返回C--然后间隔2秒继续返回C--more_body-不填默认值则为False
        await send({"type": "http.response.body", "body": b'>--END-4',})

app = FrameApp()
if __name__ == '__main__':
    import uvicorn
    uvicorn.run('dsasd:app')
上面代码的示例在浏览器上的表现形式为:
第一个时段: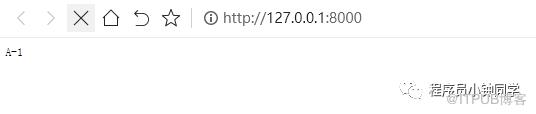 第二时段:
第二时段:
第三时段:
第四个时段:
注意点的是,上述中,仅仅只能在浏览器访问URL请求下出现这种分段显示的效果。观察浏览器的响应头信息:
所以从上面的情况我们可以的得知要实现分段(分片)数据传输的话,则需要上面的HTTP分片数据传输方式。上面是纯的asgiapp协议的下处理,当我们使用到我们的Fastapi里面的时候呢,此时我们需要如何处理类似上面的效果的呢?其实原理也一样,都是通过设置响应头协议。不过下面我们先简单了解一下关于Chunked transfer encoding分段传输编码。
Chunked transfer encoding分段传输编码说明
在http协议中有关于transfer-encoding: chunked中的分块传输编码协议说明,读者可以自行百度了解细则,这里我只是简单总结一下。需要说明的是:分块传输编码只在HTTP协议1.1版本(HTTP/1.1)中提供。假如我们使用分块传输编码,也就是我们在响应报文中设置了响应报文头里面包含有了transfer-encoding: chunked,则说明我们的此时的请求响应是需要分片返回的数据的,而且此时我们的不需要已知消息体的长度。在之前的的视频流播放中,我们的都是通过需要已知响应体内容长度的方式来进行分片读取的,而这里使用transfer-encoding: chunked的话则不需要了,也就是是:有了transfer-encoding: chunked的设置,那么就算是你设置了,Content-Length消息头字段里面的数据长度,此时浏览器也会忽略。也就是说transfer-encoding: chunked的优先级高于Content-Length。而Content-Lengt一般通常用于的是当我们需要一次性的发送整个响应体数据的时候则需要使用Content-Length表示当前响应体消息头的长度。
transfer-encoding: chunked :通常用于未知的动态内容创建返回传输,此时需要传输的数据可以分解成一系列数据块,并以一个或多个块发送
chunked的传输是在在每一个分块的开头添加【当前分块的长度】, 以十六进制的形式表示,后面紧跟着 \r\n , 之后是分块本身, 后面也是\r\n. 而结束分块发送,则是终止块是一个常规的分块, 不同之处在于其长度为0,但是它是会站一个字节.
Content-Leng :通常用于已知创建的内容长度返回传输
PS:Content-Length首部它表示的是报文中实体主体的字节大小. 这个大小是包含了所有内容编码的,如果 有存在传输过程的压缩处理的话,如gzip, 那么Content-Length指的就是压缩后的大小而不是原始大小.
在fastapi框架中的使用
如果需要在fastap实现类似的分片效果的话,那么则你需要使用基于Response响应体,来实现,如下代码示例
from fastapi import FastAPI
from starlette.responses import Response
from starlette.background import BackgroundTask
from starlette.datastructures import URL, MutableHeaders
from starlette.types import Receive, Scope, Send
import typing
import asyncio

class ChunkedResponse(Response):
    media_type = "application/json"
    charset = "utf-8"

    def __init__(self, content: typing.Any = None, status_code: int = 200,
                 headers: typing.Optional[typing.Mapping[str, str]] = None, media_type: typing.Optional[str] = None,
                 background: typing.Optional[BackgroundTask] = None) -> None:
        super().__init__(content, status_code, headers, media_type, background)
        self.status_code = status_code
        if media_type is not None:
            self.media_type = media_type
        self.background = background
        self.init_headers(headers)

    def render(self, content: typing.Any) -> bytes:
        if content is None:
            return b""
        if isinstance(content, bytes):
            return content
        return content.encode(self.charset)

    def init_headers(
            self, headers: typing.Optional[typing.Mapping[str, str]] = None
    ) -> None:
        if headers is None:
            raw_headers: typing.List[typing.Tuple[bytes, bytes]] = []
            populate_content_length = True
            populate_content_type = True
        else:
            raw_headers = [
                (k.lower().encode("latin-1"), v.encode("latin-1"))
                for k, v in headers.items()
            ]
            keys = [h[0] for h in raw_headers]
            populate_content_type = b"content-type" not in keys

        content_type = self.media_type
        if content_type is not None and populate_content_type:
            if content_type.startswith("text/"):
                content_type += "; charset=" + self.charset
            raw_headers.append((b"content-type", content_type.encode("latin-1")))

        self.raw_headers = raw_headers

    @property
    def headers(self) -> MutableHeaders:
        if not hasattr(self, "_headers"):
            self._headers = MutableHeaders(raw=self.raw_headers)
        return self._headers

    async def __call__(self, scope: Scope, receive: Receive, send: Send) -> None:
        await send(
            {
                "type": "http.response.start",
                "status": self.status_code,
                "headers": self.raw_headers,
            }
        )
        for item in "你好,我是小钟同学!":
            await asyncio.sleep(1)
            await send({"type": "http.response.body", "body": self.render(item), "more_body": True})
        await send({"type": "http.response.body", "body": b''})
        if self.background is not None:
            await self.background()


app = FastAPI()


@app.get('/')
def indx():
    res = ChunkedResponse()
    # 设置分段返回
    res.headers['transfer-encoding'] = 'chunked'
    return ChunkedResponse()


if __name__ == "__main__":
    import uvicorn
    import os
    app_modeel_name = os.path.basename(__file__).replace(".py", "")
    print(app_modeel_name)
    uvicorn.run(f"{app_modeel_name}:app", host='127.0.0.1', reload=True)
执行上面的代码,最终浏览器中得到效果则是类似打字效果的,每隔1秒的输出一个字,知道最终输出完成:
上面的中国关键的代码其实在于:
必须要继承于from starlette.responses import Response 需要设置 media_type = "application/json" 必须设置 res.headers['transfer-encoding'] = 'chunked' 需要在call对方进行boday数据的发次发送处理,这里还可以封装优化从外部传入一个迭代器,然后里面指向也可以。
但是上面的问题局限是:
上面效果只能在浏览器中显示出来 使用接口请求或POTMAN的话,则无法显示类似浏览器上的效果
以上仅仅是个人结合自己的实际需求,做学习的实践笔记!如有笔误!欢迎批评指正!感谢各位大佬!
结尾
END
简书:https://www.jianshu.com/u/d6960089b087
掘金:https://juejin.cn/user/2963939079225608
公众号:微信搜【程序员小钟同学】
小钟同学 | 文 【欢迎一起学习交流】| QQ:308711822
原文作者:程序员小钟同学;如有侵权,请联系管理员删除。

最新文章
- 深入FastAPI异步编程-之并发编程(15)-定义全局的支持全局上下文变量和局部上下文的对象可以任意传递了!
- 深入FastAPI异步编程-之并发编程(13)-纠错-修改基于aiojobs库结合aiojobs的和FastAPI框架的示例
- 深入FastAPI异步编程-之并发编程(13)-基于aiojobs库实现类似Background Tasks的效果
- 深入FastAPI异步编程-之并发编程(12)-基于pyee异步事件驱动通知
- 深入FastAPI异步编程-之并发编程(11)-异步中的?同步原语
- 深入FastAPI异步编程-之并发编程(10)-?asyncio.wait 更精细化并发补充说明
- 深入FastAPI异步编程-之并发编程(9)-asyncio.as_completed的补充说明
- 深入FastAPI异步编程-之并发编程(8)-asyncio.gather的补充说明
- 深入FastAPI异步编程-之并发编程(7)番外篇~Windows系统下事件循环插曲
- 深入FastAPI异步编程-之并发编程(6)~事件循环
