在使用spring cloud云架构的时候,我们不得不使用Spring cloud Stream,因为消息中间件的使用在项目中无处不在,我们公司后面做了娱乐方面的APP,在使用spring cloud做架构的时候,其中消息的异步通知,业务的异步处理都需要使用消息中间件机制。spring cloud的官方给出的集成建议(使用rabbit mq和kafka),我看了一下源码和配置,只要把rabbit mq集成,kafka只是换了一个pom配置jar包而已,闲话少说,我们就直接进入配置实施:
1. 简介:
Spring cloud Stream 数据流操作开发包,封装了与Redis,Rabbit、Kafka等发送接收消息。
2. 使用工具:
rabbit,具体的下载和安装细节我这里不做太多讲解,网上的实例太多了
3. 创建 commonservice-mq-producer 消息的发送者 项目,在pom里面配置stream-rabbit的依赖

- <span style= "font-size: 16px;" ><!-- 引入MQ消息驱动的微服务包,引入stream只需要进行配置化即可,是对rabbit、kafka很好的封装 -->
- <dependency>
- <groupId>org.springframework.cloud</groupId>
- <artifactId>spring-cloud-starter-stream-rabbit</artifactId>
- </dependency></span>
4. 在yml文件里面配置rabbit mq
- <span style= "font-size: 16px;" >server:
- port: 5666
- spring:
- application:
- name: commonservice-mq-producer
- profiles:
- active: dev
- cloud:
- config:
- discovery:
- enabled: true
- service-id: commonservice-config-server
- <span style= "color: #ff0000;" ># rabbitmq和kafka都有相关配置的默认值,如果修改,可以再次进行配置
- stream:
- bindings:
- mqScoreOutput:
- destination: honghu_exchange
- contentType: application/json
- rabbitmq:
- host: localhost
- port: 5672
- username: honghu
- password: honghu</span>
- eureka:
- client:
- service-url:
- defaultZone: http: //honghu:123456@localhost:8761/eureka
- instance:
- prefer-ip-address: true </span>
5. 定义接口ProducerService
- <span style= "font-size: 16px;" > package com.honghu.cloud.producer;
- import org.springframework.cloud.stream.annotation.Output;
- import org.springframework.messaging.SubscribableChannel;
- public interface ProducerService {
- String SCORE_OUPUT = "mqScoreOutput" ;
- @Output (ProducerService.SCORE_OUPUT)
- SubscribableChannel sendMessage();
- }</span>
6. 定义绑定
- <span style= "font-size: 16px;" > package com.honghu.cloud.producer;
- import org.springframework.cloud.stream.annotation.EnableBinding;
- @EnableBinding (ProducerService. class )
- public class SendServerConfig {
- }</span>
7. 定义发送消息业务ProducerController
- <span style= "font-size: 16px;" > package com.honghu.cloud.controller;
- import org.springframework.beans.factory.annotation.Autowired;
- import org.springframework.integration.support.MessageBuilder;
- import org.springframework.messaging.Message;
- import org.springframework.web.bind.annotation.PathVariable;
- import org.springframework.web.bind.annotation.RequestBody;
- import org.springframework.web.bind.annotation.RequestMapping;
- import org.springframework.web.bind.annotation.RequestMethod;
- import org.springframework.web.bind.annotation.RestController;
- import com.honghu.cloud.common.code.ResponseCode;
- import com.honghu.cloud.common.code.ResponseVO;
- import com.honghu.cloud.entity.User;
- import com.honghu.cloud.producer.ProducerService;
- import net.sf.json.JSONObject;
- @RestController
- @RequestMapping (value = "producer" )
- public class ProducerController {
- @Autowired
- private ProducerService producerService;
- /**
- * 通过get方式发送</span>对象<span style="font-size: 16px;">
- * @param name 路径参数
- * @return 成功|失败
- */
- @RequestMapping (value = "/sendObj" , method = RequestMethod.GET)
- public ResponseVO sendObj() {
- User user = new User( 1 , "hello User" );
- <span style= "color: #ff0000;" >Message<User> msg = MessageBuilder.withPayload(user).build();</span>
- boolean result = producerService.sendMessage().send(msg);
- if (result){
- return ResponseCode.buildEnumResponseVO(ResponseCode.RESPONSE_CODE_SUCCESS, false );
- }
- return ResponseCode.buildEnumResponseVO(ResponseCode.RESPONSE_CODE_FAILURE, false );
- }
- /**
- * 通过get方式发送字符串消息
- * @param name 路径参数
- * @return 成功|失败
- */
- @RequestMapping (value = "/send/{name}" , method = RequestMethod.GET)
- public ResponseVO send( @PathVariable (value = "name" , required = true ) String name) {
- Message msg = MessageBuilder.withPayload(name.getBytes()).build();
- boolean result = producerService.sendMessage().send(msg);
- if (result){
- return ResponseCode.buildEnumResponseVO(ResponseCode.RESPONSE_CODE_SUCCESS, false );
- }
- return ResponseCode.buildEnumResponseVO(ResponseCode.RESPONSE_CODE_FAILURE, false );
- }
- /**
- * 通过post方式发送</span>json对象<span style="font-size: 16px;">
- * @param name 路径参数
- * @return 成功|失败
- */
- @RequestMapping (value = "/sendJsonObj" , method = RequestMethod.POST)
- public ResponseVO sendJsonObj( @RequestBody JSONObject jsonObj) {
- Message<JSONObject> msg = MessageBuilder.withPayload(jsonObj).build();
- boolean result = producerService.sendMessage().send(msg);
- if (result){
- return ResponseCode.buildEnumResponseVO(ResponseCode.RESPONSE_CODE_SUCCESS, false );
- }
- return ResponseCode.buildEnumResponseVO(ResponseCode.RESPONSE_CODE_FAILURE, false );
- }
- }
- </span>
8. 创建 commonservice-mq-consumer1 消息的消费者 项目,在pom里面配置stream-rabbit的依赖
- <!-- 引入MQ消息驱动的微服务包,引入stream只需要进行配置化即可,是对rabbit、kafka很好的封装 -->
- <dependency>
- <groupId>org.springframework.cloud</groupId>
- <artifactId>spring-cloud-starter-stream-rabbit</artifactId>
- </dependency>
9. 在yml文件中配置:
- server:
- port: 5111
- spring:
- application:
- name: commonservice-mq-consumer1
- profiles:
- active: dev
- cloud:
- config:
- discovery:
- enabled: true
- service-id: commonservice-config-server
- <span style= "color: #ff0000;" >stream:
- bindings:
- mqScoreInput:
- group: honghu_queue
- destination: honghu_exchange
- contentType: application/json
- rabbitmq:
- host: localhost
- port: 5672
- username: honghu
- password: honghu</span>
- eureka:
- client:
- service-url:
- defaultZone: http: //honghu:123456@localhost:8761/eureka
- instance:
- prefer-ip-address: true
9. 定义接口ConsumerService
- package com.honghu.cloud.consumer;
- import org.springframework.cloud.stream.annotation.Input;
- import org.springframework.messaging.SubscribableChannel;
- public interface ConsumerService {
- <span style= "color: #ff0000;" >String SCORE_INPUT = "mqScoreInput" ;
- @Input (ConsumerService.SCORE_INPUT)
- SubscribableChannel sendMessage();</span>
- }
10. 定义启动类和消息消费
- package com.honghu.cloud;
- import org.springframework.boot.SpringApplication;
- import org.springframework.boot.autoconfigure.SpringBootApplication;
- import org.springframework.cloud.netflix.eureka.EnableEurekaClient;
- import org.springframework.cloud.stream.annotation.EnableBinding;
- import org.springframework.cloud.stream.annotation.StreamListener;
- import com.honghu.cloud.consumer.ConsumerService;
- import com.honghu.cloud.entity.User;
- @EnableEurekaClient
- @SpringBootApplication
- @EnableBinding (ConsumerService. class ) //可以绑定多个接口
- public class ConsumerApplication {
- public static void main(String[] args) {
- SpringApplication.run(ConsumerApplication. class , args);
- }
- <span style= "color: #ff0000;" > @StreamListener (ConsumerService.SCORE_INPUT)
- public void onMessage(Object obj) {
- System.out.println( "消费者1,接收到的消息:" + obj);
- }</span>
- }
11. 分别启动commonservice-mq-producer、commonservice-mq-consumer1
12. 通过postman来验证消息的发送和接收
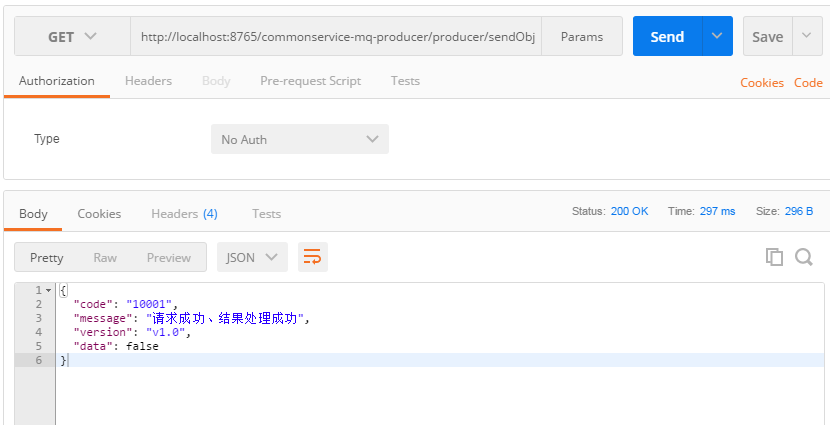
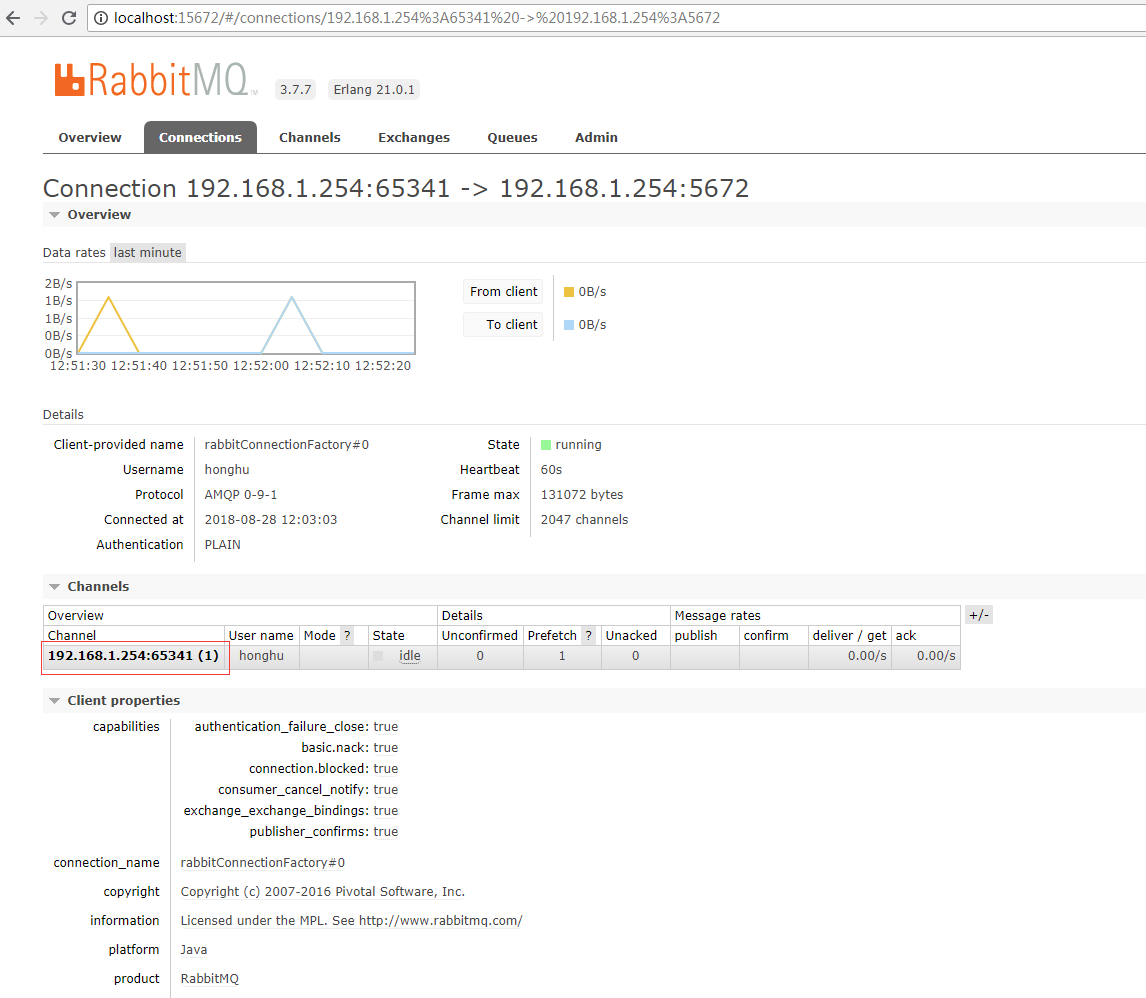
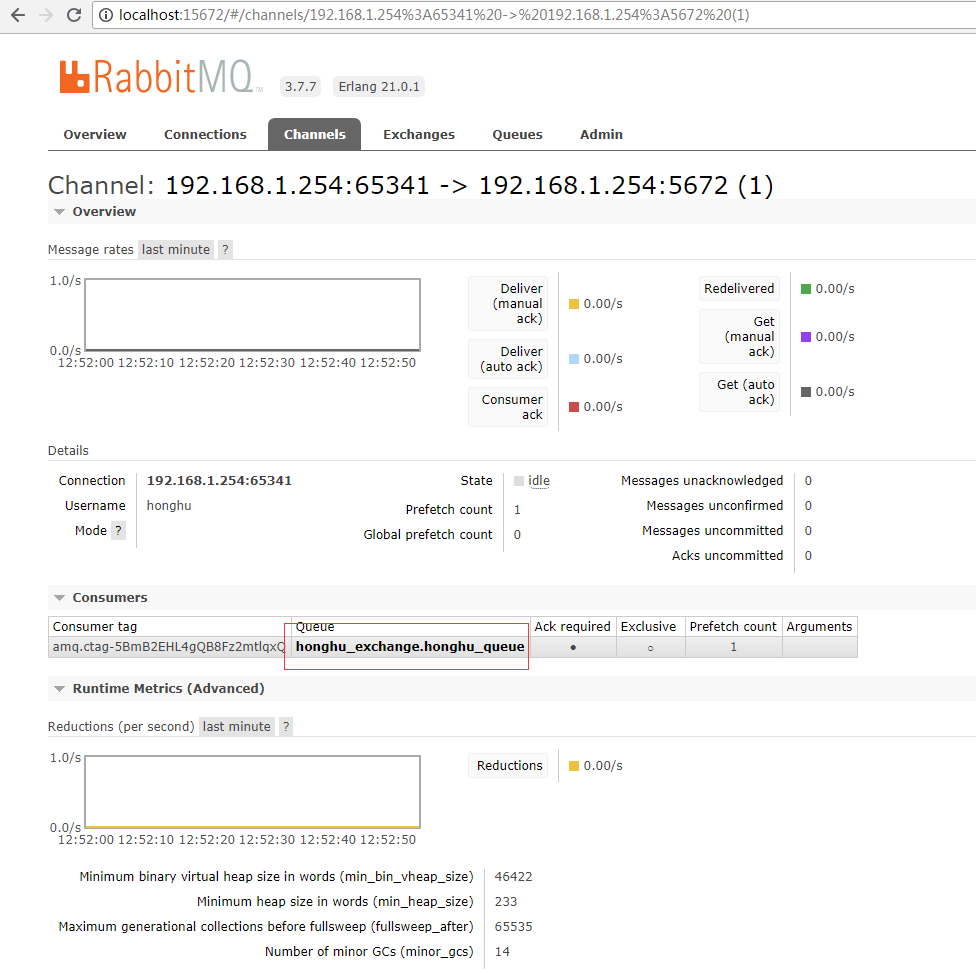
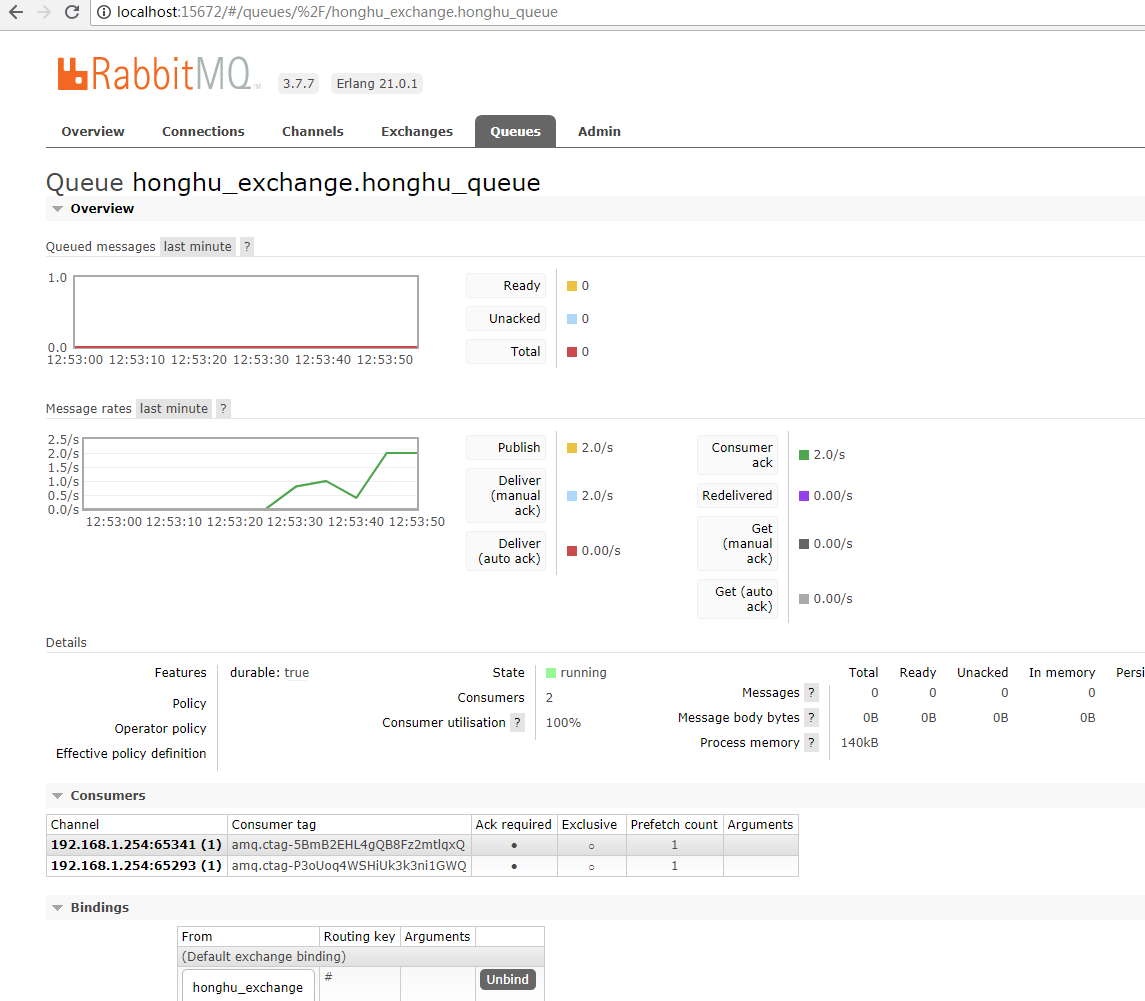
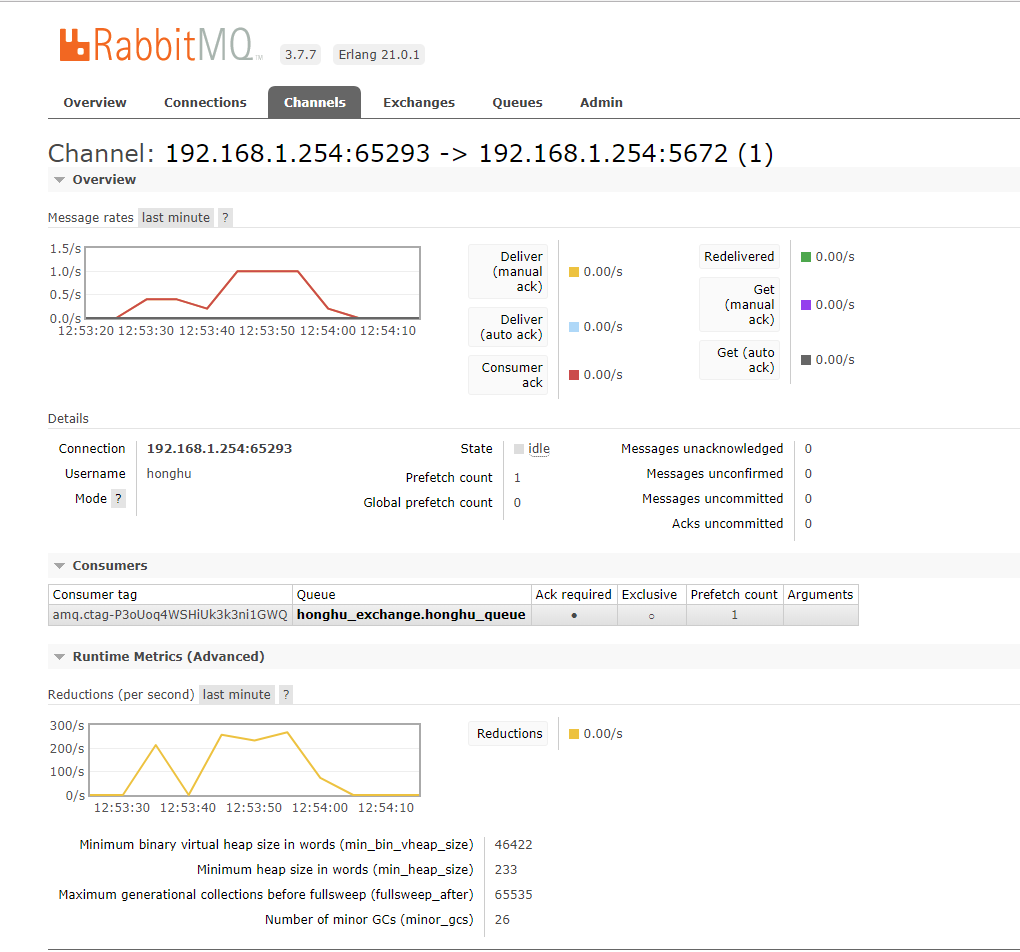
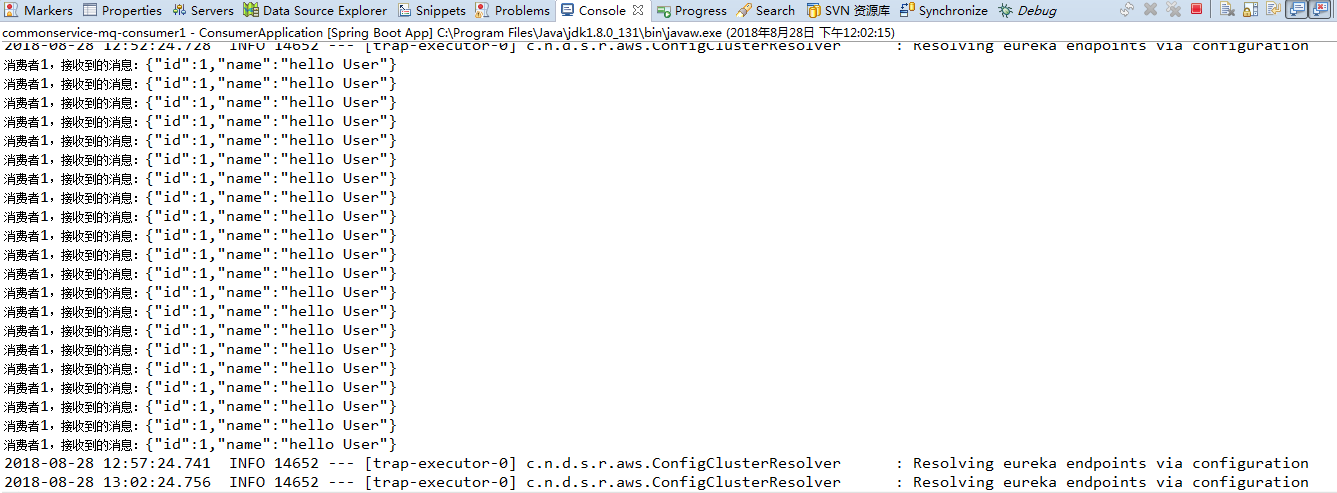
可以看到接收到了消息,下一章我们介绍mq的集群方案。
到此,整个消息中心方案集成完毕(企业架构源码可以加求球:三五三六二四七二五九)!!
欢迎大家和我一起学习spring cloud构建微服务云架构,我这边会将近期研发的spring cloud微服务云架构的搭建过程和精髓记录下来,帮助更多有兴趣研发spring cloud框架的朋友,大家来一起探讨spring cloud架构的搭建过程及如何运用于企业项目。
来自 “ ITPUB博客 ” ,链接:https://blog.itpub.net/69984376/viewspace-2734435/ ,如需转载,请注明出处,否则将追究法律责任。

最新文章
- 分布式微服务架构源码 SpringCloud+SpringBoot2+Mybatis+Oauth2 快速开发平台
- spring cloud构建全球多租户分布式微服务部署的方案
- 微服务框架(基于开源技术的分布式、服务化框架)
- 最新Spring Boot 与Spring Cloud版本对应关系
- (一)互联网分布式微服务云平台规划分析--平台整体规划
- (十六) 整合spring cloud云架构 -使用spring cloud Bus刷新配置
- Spring Cloud关注者总结
- CAS SSO单点登录框架介绍
- Spring MVC+Mybatis+cms实现UC浏览器文章相关功能
- Spring mvc+oss存储+fileupload多文件上传实现SSO单点登录模板管理
