本篇文章为大家介绍3个超级经典的Linux实战项目,内含详细的操作流程以及源码,让你可以轻松快速的入门Linux系统。
| 编译安装nginx搭建小游戏网站
编译安装流程
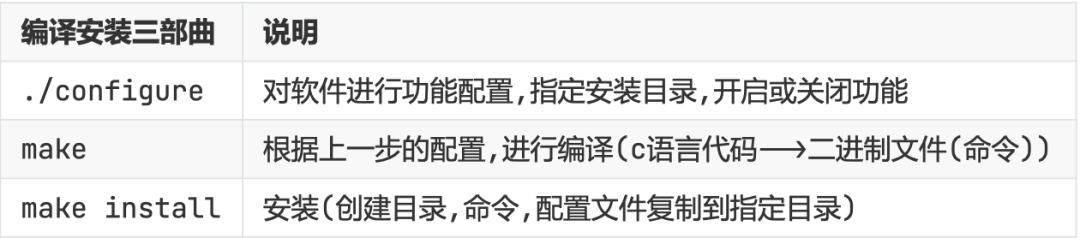
下载nginx代码

解压并进入目录

配置
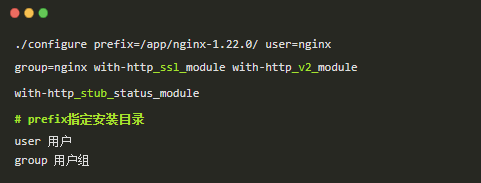
成功提示:
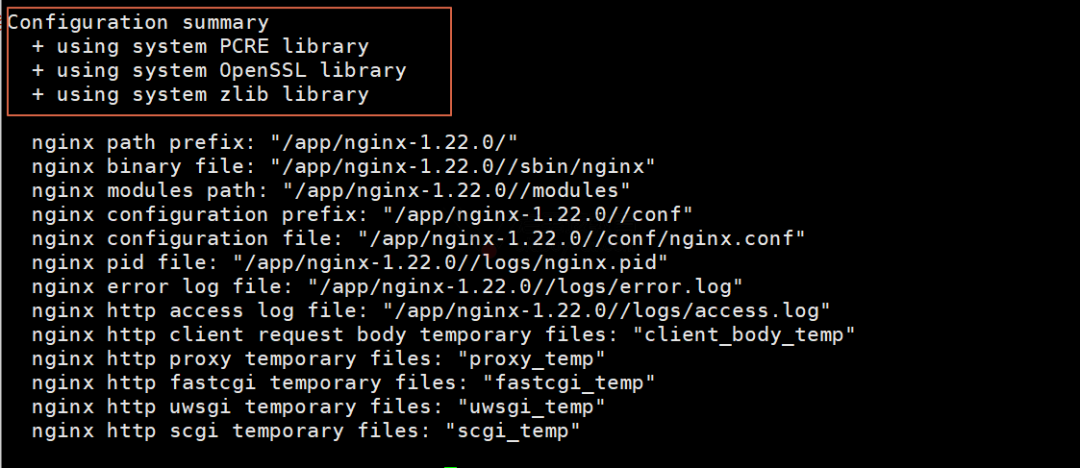
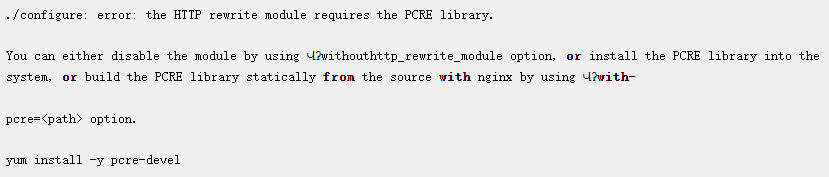
错误提示:

编译make成功提示:
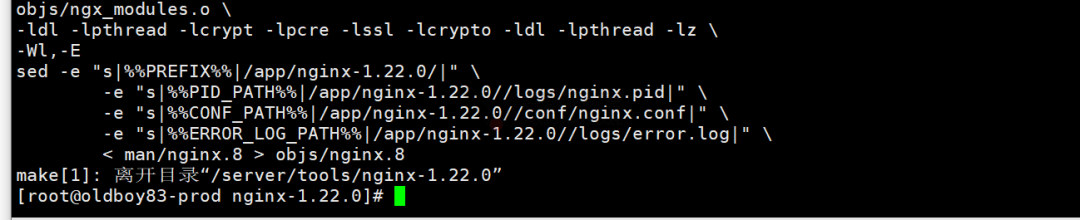
安装:
make install
后续配置
检查目录
ll /app/nginx-1.22.0/ 总用量 0 drwxr-xr-x 2 root root 333 7月
drwxr-xr-x 2 root root 40 7月
drwxr-xr-x 2 root root 6 7月
drwxr-xr-x 2 root root 19 7月
创建用户
useradd -s /sbin/nologin -M nginx
创建软连接
ln -s /app/nginx-1.22.0/   /app/nginx
并检查
管理编译安装的nginx
温馨提示:关闭防火墙和selinux
#1. 查看nginx版本信息及编译信息/app/nginx/sbin/nginx -V nginx version: nginx/1.22.0 built by gcc 4.8.5 20150623 (Red Hat 4.8.5-44) (GCC) built with OpenSSL 1.0.2k-fips 26 Jan 2017 TLS SNI support enabled configure arguments: Վʔprefix=/app/nginx-1.22.0/ Վʔ user=nginx Վʔgroup=nginx Վʔwith-http_ssl_module Վʔwithhttp_v2_module Վʔwith-http_stub_status_module#2.启动nginx /app/nginx/sbin/nginx ps aux |grep nginx#3. 关闭 pkill nginx
nginx: [emerg] bind() to 0.0.0.0:80 failed (98: Address already in use) nginx: [emerg] bind() to 0.0.0.0:80 failed (98: Address already in use) nginx: [emerg] bind() to 0.0.0.0:80 failed (98: Address already in use) nginx: [emerg] bind() to 0.0.0.0:80 failed (98: Address already in use) nginx已经运行了并占用80端口
检查端口nginx
ss -lntup |grep nginx
访问网站
启动nginx并检查:浏览器中输入服务器ip地址即可
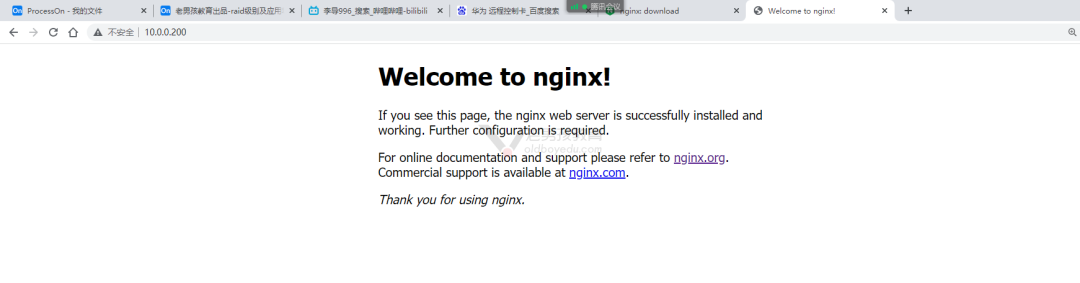
配置代码
代码目录/app/nginx/html/下面 默认显示index.html内容
修改index.html内容刷新浏览器就可以查看改变

部署小鸟飞飞代码
#1. 解压 unzip bird.zip #2. 移动 \mv bird/* /app/nginx/html/#3. 检查 ll /app/nginx/html/总用量 144-rw-r--r-- 1 root root 15329 8月  2 2014 2000.png-rw-r--r-- 1 root root 51562 8月  2 2014 21.js-rw-r--r-- 1 root root 497 7月  29 12:10 50x.html-rw-r--r-- 1 root root 254 8月  2 2014 icon.png
drwxr-xr-x 2 root root 102 8月  8 2014 img-rw-r--r-- 1 root root 3049 8月  2 2014 index.html-rw-r--r-- 1 root root 63008 8月  2 2014 sound1.mp3
检查最终结果
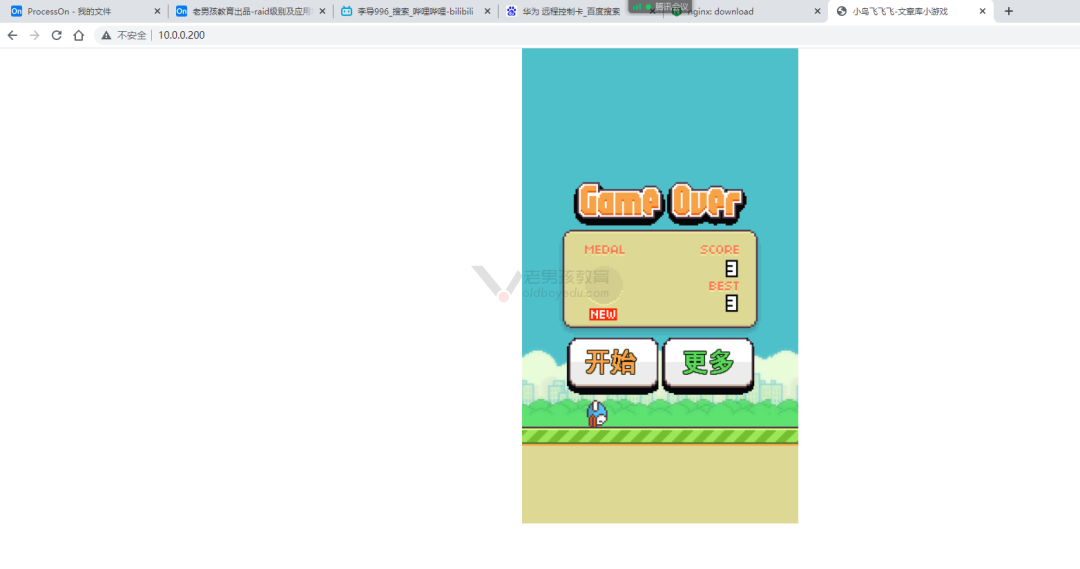
| 二进制方式安装Tomcat
部署tomcat
安装jdk
yum install -y java #openjdk
下载
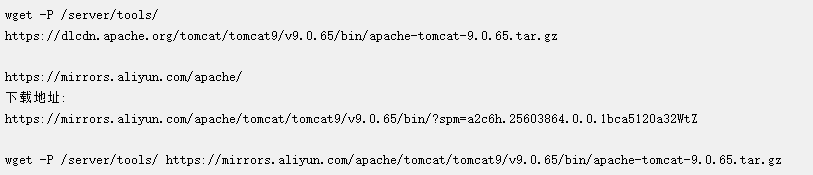
解压
tar xf apache-tomcat-9.0.65.tar.gz -C /app/
软连接
ln -s /app/apache-tomcat-9.0.65/ /app/tomcat
启动与访问
启动
/app/tomcat/bin/startup.sh/app/tomcat/bin/shutdown.sh
检查端口与进程
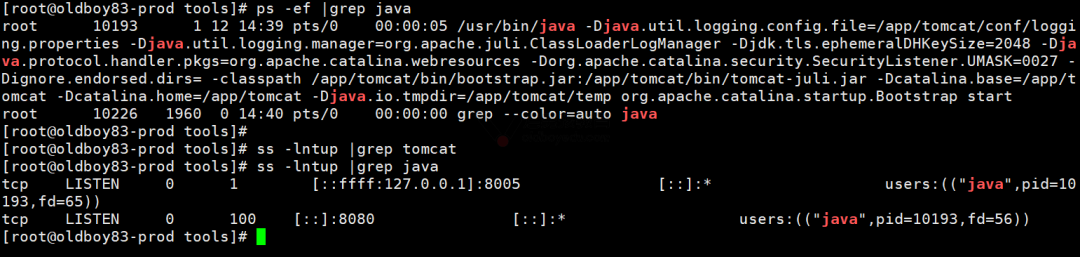
ps -ef |grep java
ss -lntup |grep java
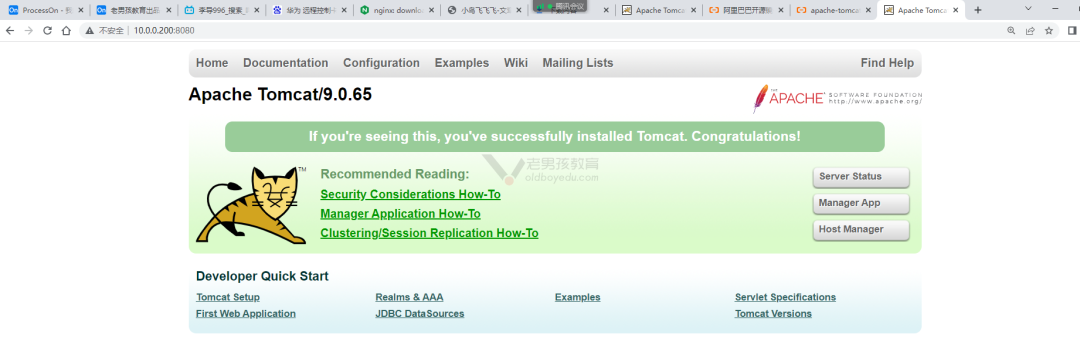
浏览器访问: http://10.0.0.200:8080
| 搭建企业内部yum仓库
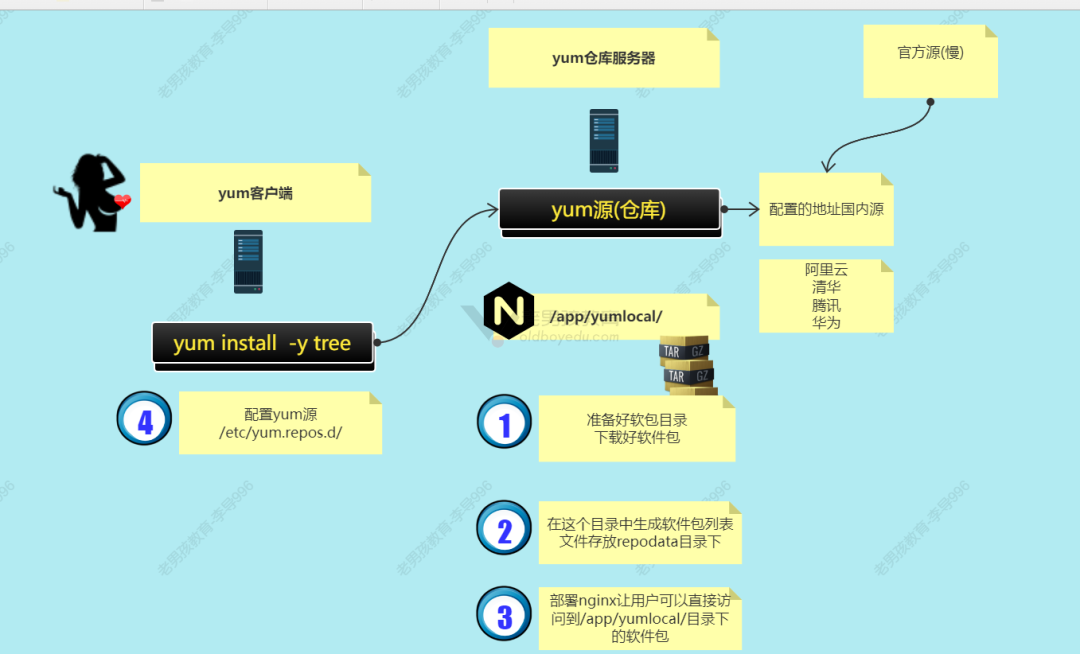
yum仓库架构详解
自己搭建内部yum仓库
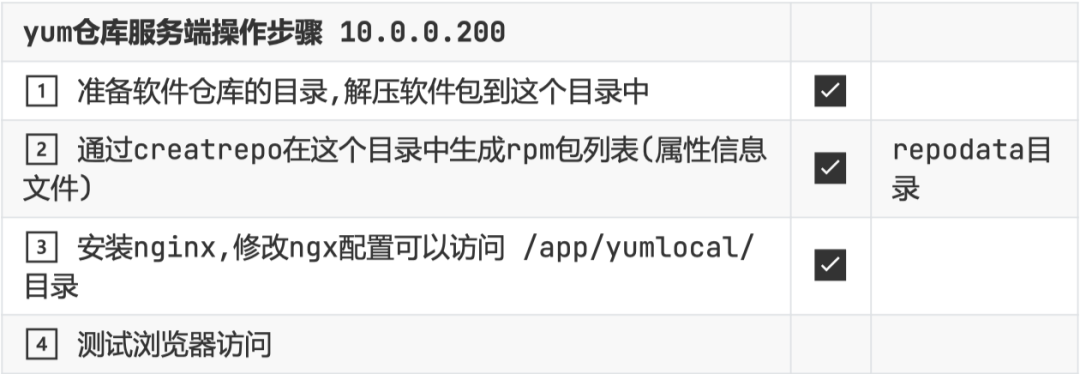
yum仓库服务端
创建目录
/app/yumlocal
解压软件包到/app/yumlocal目录下
php72w-new.tar.gz
通过creatrepo在这个目录中生成rpm包列表(属性信息文件)
yum install -y createrepo
createrepo /app/yumlocal/ 目录下面就多了个repodata目录.
安装与配置nginx
#关闭已有的nginx pkill nginx ps -ef |grep nginx#安装 yum install -y nginx#启动 systemctl enable nginx systemctl start nginx#检查端口与进程#浏览器访问
配置nginx
[root@oldboy83-prod tools]# cat/etc/nginx/conf.d/yumlocal.conf
server {listen 12306;root /app/yumlocal;autoindex on;index index.html;}systemctl restart nginx
ss -lntup |grep nginx
tcp LISTEN 0 128 *:12306*:* users:(("nginx",pid=10460,fd=6),("nginx",pid=10458,fd=6))tcp LISTEN 0 128 *:80*:* users:(("nginx",pid=10460,fd=7),("nginx",pid=10458,fd=7))tcp LISTEN 0 128 [ ]:80[ ]:* users:(("nginx",pid=10460,fd=8),("nginx",pid=10458,fd=8))
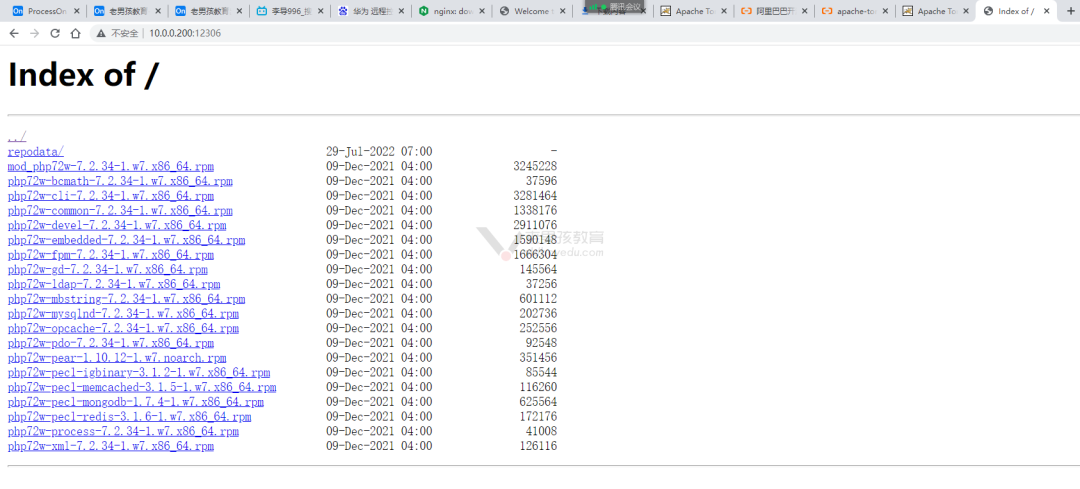
浏览器访问测试 http: 10.0.0.200:12306
yum客户端配置
注释已经配置的yum源文件
cd /etc/yum.repos.d/ gzip *
书写新的yum配置即可
cat yumlocal-10.0.0.200.repo[yumlocal] name = 'yum local 内部yum源 10.0.0.200' baseurl = http:Վˌ10.0.0.200:12306 enalbed = 1 gpgcheck = 0
测试是否可以使用内部yum仓库
#1.清空缓存yum clean allLoaded plugins: fastestmirror
Cleaning repos: yumlocal
Cleaning up list of fastest mirrors
Other repos take up 183 M of disk space (use verbose fordetails)#2.根据新的配置生成缓存yum makecache
Loaded plugins: fastestmirror
Determining fastest mirrors
yumlocal| 2.9 kB 00:00:00(1/3): yumlocal/filelists_db| 13 kB 00:00:00(2/3): yumlocal/other_db| 5.3 kB 00:00:00(3/3): yumlocal/primary_db| 22 kB 00:00:00Metadata Cache Created#3. 查看yum源列表yum repolist
Loaded plugins: fastestmirror
Loading mirror speeds from cached hostfile
repo id repo name
status
yumlocal 'yum local 内部
yum源 10.0.0.200' 20repolist: 20
遇到下载失败或依赖问题
服务端:需要在服务端下载依赖,上传到目录中
#1. 开启keepcache功能grep keepcache /etc/yum.conf#2. 进入软件包目录cd /app/yumlocal/#3. 本地安装并下载依赖yum localinstall -y *.rpm#4. 找出缓存的rpm包find /var/cache/yum/ -type f -name "*.rpm"#4.找出缓存的rpm包并复制到/app/yumlocal/目录find /var/cache/yum/ -type f -name "*.rpm" |xargs cp -t/app/yumlocal/ll /app/yumlocal/*.rpm |wc -l
服务端:重新createrepo
#5. 重新生成createrepo /app/yumlocal/
服务端:yum clean all 然后 yum makecache 然后 yum install
yum clean allyum makecache
yum repolist
yum install -y php72w-cli
来自 “ ITPUB博客 ” ,链接:https://blog.itpub.net/69952968/viewspace-3102613/ ,如需转载,请注明出处,否则将追究法律责任。

