出处:https://doc.sitecore.com/developers/90/platform-administration-and-architecture/en/configure-azure-search.html#UUID-6db2d23d-88f1-df71-5144-82fd14c811d3_id__Create_a_Search
创建搜索服务
登陆 the Azure portal, "All service" --> 输入 “search” -->选择“Search Services”
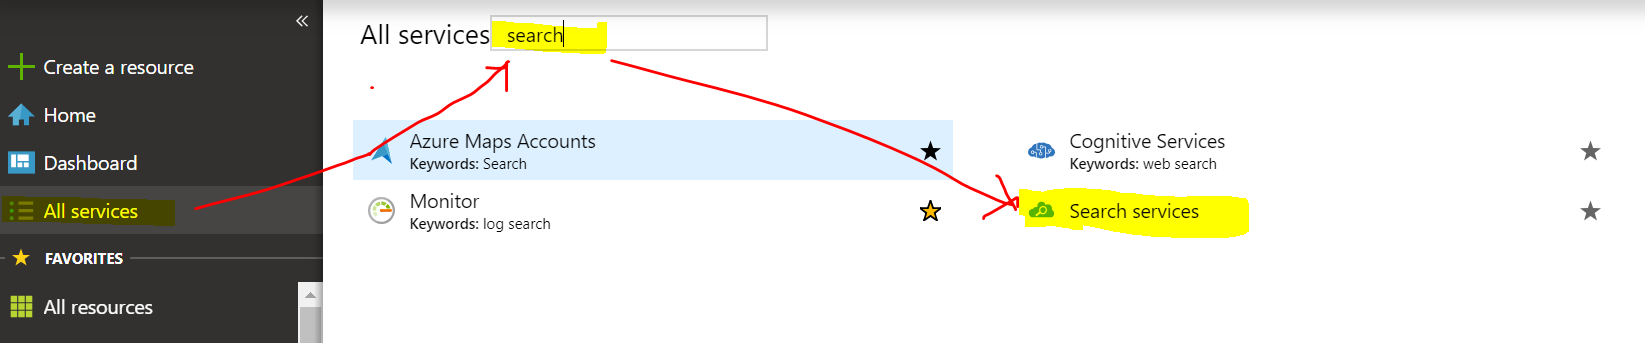
在 “Search services”页面, 点击“Add”
在“New Search Service”页面:
输入服务名称
- 选择subscription
选择合适的resource group, location, and pricing tier
Note
Sitecore 需要 15 search indexes, 所以至少需要选择S Standard pricing tier. (译者:选择Basic也可,如果没有自定义的index正好够 )
点 Create.
在创建好的Search Service中点Keys,可以找到Primary/Secondary admin key,稍后会在connection string中用到
更新Connection String
在 connection string 配置文件(通常在App_Config文件夹中)找到"cloud.search"(译者:如果没有,新建一个),应该包含如下信息:
serviceUrl– Search Service API的HTTPS URL (比如: https://dk-test.search.windows.net).apiVersion– follows a date format, for example, 2015-02-28 (译者:目前是2017-11-11,可以在Search Service的“Search Explorer”中的“Set API version”找到).apiKey– 上一步中提到的admin key,可以在Search Service的“Keys”中找到
Note
Sitecore 8.2-Update 3 以及之后的版本默认使用 API version 2015-02-28-Preview.
Connection string 格式:
<add name="cloud.search" connectionString="serviceUrl=<url>;apiVersion=<apiVersion>;apiKey=<apiKey>" />
Sitecore 支持 geo-replicated Search Service:
建立两个或多个 Search service.
在connection strings 使用 | 作为分割符. 例如在一个geo-replicated scenario中使用两个search services:searchservice1 和searchservice2, 在connection string需要做以下配置:
<add name="cloud.search"
connectionString="serviceUrl=https://searchservice1.search.windows.net;apiVersion=2015-02-28;apiKey=AdminKey1|serviceUrl=https://searchservice2.search.windows.net;apiVersion=2015-02-28;apiKey=AdminKey2" />
Best practice:每个index使用专用的search service. :
connection string 新建一条,比如
cloud.search.analytics.在index配置中使用新建的connect string值:
指定Azure作为搜索引擎
Sitecore默认Solr作为搜索引擎,如果要使用Azure Search Service,需要如下更改(译者:以下步骤翻译自https://doc.sitecore.com/developers/90/platform-administration-and-architecture/en/configure-a-search-and-indexing-provider.html):
在 web.config 文件, 找到 <AppSettings> "search:define" setting,设置为Azure:
<AppSettings>
<add key="search:define" value="Azure"/>
</AppSettings>
重建所有index
使用admin登陆Sitecore (http:// {your_instance}/sitecore/login)
"Control Panel" --> "Indexing manager".
选择所有 indexes,点击 Rebuild.
Note
重建index消耗一定时间,可能需要 15 minutes 甚至更长
重建index之后,在Azure Search Service中可以看到
Map the Azure field types
Azure Search使用 Entity Data Model (EDM) field types.
Mapping between .Net and Sitecore:
sitecore\contentsearch\indexConfigurations\defaultCloudIndexConfiguration\CloudTypeMapper\Sitecore.ContentSearch.Azure.DefaultIndexConfiguration.config file.
Note
对所有自定义的field需要定义map element:
<map type="<Field type>" cloudType="<Edm type from list of supported types>" />
Map fields
Best Practice: listing all fields under the index configuration section
sitecore\contentSearch\configuration\indexes\index\configuration\fieldMap
Attribute | Description |
|---|---|
| The name of the field, as defined for Lucene and Solr. |
| The field name as defined for Cloud. It can only contain letters, numbers, and underscores. NoteThe first character must be a letter. |
| Use the boost attribute to give one field more importance than another. |
| You must configure this attribute for |
| The |
来自 “ ITPUB博客 ” ,链接:https://blog.itpub.net/69946831/viewspace-3125184/ ,如需转载,请注明出处,否则将追究法律责任。

