前言
前面一系列我们纯粹是讲AngularJS,在讲一门知识时我们应该结合之前所学综合起来来做一个小的例子,前面我们讲了在MVC中上传文件的例子,在本节我们讲讲如何利用AngularJS在WebAPi中如何上传,来巩固下WebAPi并结合AngularJS中对应的一些组件学习下。
AngularJS Upload Files for WebAPi
(一)在WebAPi中我们如何获得上传本地文件的物理路径呢?需要实现此类: MultipartFormDataStreamProvider ,从该类中获取上传文件的物理路径并返回。如下:
public class UploadMultipartFormProvider : MultipartFormDataStreamProvider
    {
        public UploadMultipartFormProvider(string rootPath) : base(rootPath) { }

        public override string GetLocalFileName(HttpContentHeaders headers)
        {
            if (headers != null &&
                headers.ContentDisposition != null)
            {
                return headers
                    .ContentDisposition
                    .FileName.TrimEnd('"').TrimStart('"');
            }

            return base.GetLocalFileName(headers);
        }
    }
(二)为避免有些浏览器不支持多个文件上传我们通过实现 ActionFilterAttribute 特性来加以判断,如下:
public class MimeMultipart : ActionFilterAttribute
    {
        public override void OnActionExecuting(HttpActionContext actionContext)
        {
            if (!actionContext.Request.Content.IsMimeMultipartContent())
            {
                throw new HttpResponseException(
                    new HttpResponseMessage(
                        HttpStatusCode.UnsupportedMediaType)
                );
            }
        }

        public override void OnActionExecuted(HttpActionExecutedContext actionExecutedContext)
        {

        }
    }
以上两个类为我们在WebAPi中上传提供一个保障。接下来我们需要的是如何利用AngularJS来上传。
在AngularJS中上传需要用到 ng-file-upload 组件,而非 angularFileUpload 组件,在此之前一直是利用angularFileUpload组件,但是后来逐步迁移并且命名为ng-file-upload组件。同时为了一些加载效果如在github中顶部有加载线的过程,决定也在这里实现一下看看【说明:上传过程用到angular-loading-bar(加载)和ng-file-upload(上传)组件】。
脚本
(1)为了重用,我们将加载组件进行封装。
 //common.load.js
(function () {
    'use strict';

    angular
        .module('common.load', [
            'angular-loading-bar',
            'ngAnimate'
        ]);
})();
(2)启动加载线。
//loadBarCtrl.js
(function (app) {
    "use strict";

    app.controller("loadCtrl", loadCtrl);

    function loadCtrl(cfpLoadingBar) {
        cfpLoadingBar.start();
    }

})(angular.module("common.load"));
(3)上传文件代码
//fileUploadCtrl.js
(function (app) {
'use strict';
app.controller('fileUploadCtrl', fileUploadCtrl);
fileUploadCtrl.$inject = ['$scope', '$http', '$timeout', 'Upload'];
function fileUploadCtrl($scope, $http, $timeout, Upload, cfpLoadingBar) {
$scope.upload = [];
$scope.UploadedFiles = [];
$scope.startUploading = function ($files) {
for (var i = 0; i (4)加载主模块以及依赖模块。
//app.js
(function () {
'use strict';
angular
.module('angularUploadApp', [
'ngRoute',
'ngFileUpload',
'common.load'
])
.config(config)
config.$inject = ['$routeProvider'];
function config($routeProvider) {
$routeProvider
.when('/', {
templateUrl: '../../app/templates/fileUpload.html',
controller: 'fileUploadCtrl'
})
.otherwise({
redirectTo: '/'
});
}
})();界面
@{
Layout = null;
}
html>
模板页:
{{uploadedFile.FileName}}
 {{uploadedFile.FilePath}}
图片总字节: {{uploadedFile.FileLength}}
{{uploadedFile.FilePath}}
图片总字节: {{uploadedFile.FileLength}}
后台api服务:
[RoutePrefix("api/upload")] public class FileUploadController : ApiController
{
[Route("")]
[MimeMultipart] public async Task Post()
{ var uploadPath = HttpRuntime.AppDomainAppPath + "UploadImages"; if (!Directory.Exists(uploadPath))
Directory.CreateDirectory(uploadPath); var multipartFormDataStreamProvider = new UploadMultipartFormProvider(uploadPath);
await Request.Content.ReadAsMultipartAsync(multipartFormDataStreamProvider); string _localFileName = multipartFormDataStreamProvider
.FileData.Select(multiPartData => multiPartData.LocalFileName).FirstOrDefault(); return new FileUploadResult
{
LocalFilePath = _localFileName,
FileName = Path.GetFileName(_localFileName),
FileLength = new FileInfo(_localFileName).Length
};
}
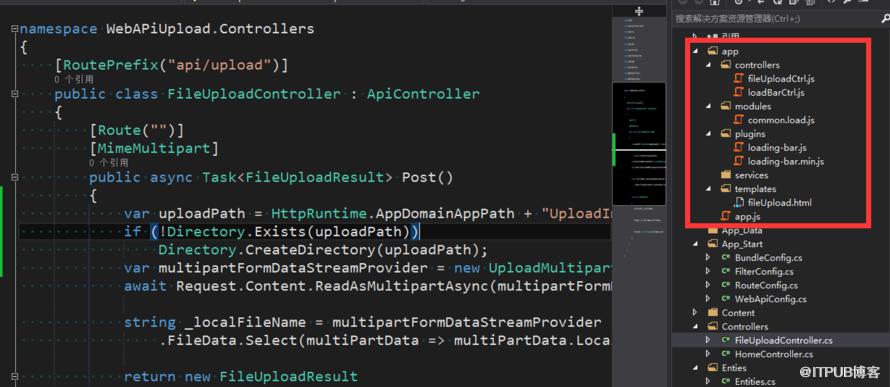
} 首先我们来看看例子搭建的结构:
生成界面效果:

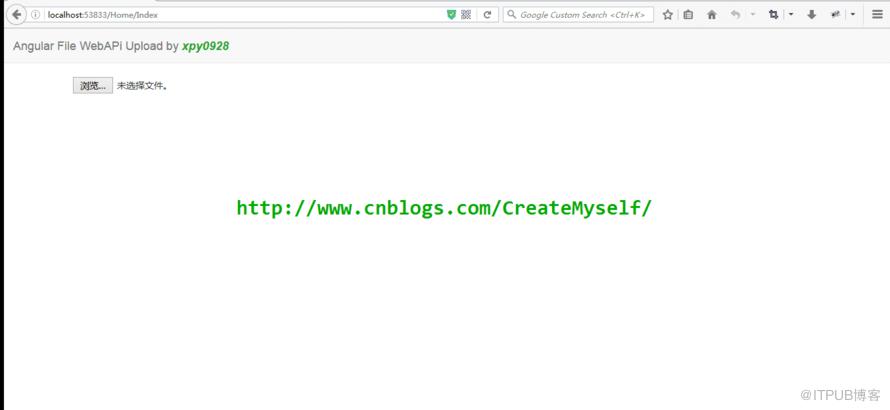
下面我们来演示下最终效果:
总结
(1)在WebAPi中用到路由特性时,若在控制器中如 [RoutePrefix("api/upload")] 此时在方法中若未有 [Route("")] 此时在上传的url必须显示添加Post如: url: "/api/upload/post" 若添加则不用显示添加方法名。
(2)在angular中加载模板为
【注】:src中要加单引号,否则出错 或者
(3)对于在WebAPi中上传可以参看此链接,更加详细。
WebAPi:https://github.com/stewartm83/angular-fileupload-sample
来自 “ ITPUB博客 ” ,链接:https://blog.itpub.net/359/viewspace-2808513/ ,如需转载,请注明出处,否则将追究法律责任。

