引言 在这一章节里,钢哥将带领大家进一步优化我们的开发环境,让我们的免费开发环境更“生产”,优化思路和方法也完全可以用在生产环境。
删除Tomcat自带的不必要的文件是有必要的,最大限度保证系统安全。
1 rm -Rf /u01/tomcat/webapps/examples
由于我们的 Oracle XE 数据库跟 Tomcat 都是开机自启动的,但在数据库启动完毕之前,部署在 Tomcat 服务器上的 ORDS 应用就会随着 Tomcat 的启动而进行初始化了,这时候初始化肯定不正常(连接池报错等),不得不重启 Tomcat 服务才行。所以我们要对 tomcat.service进行必要的修改,让tomcat等待数据库启动完毕再启动。
/etc/systemd/system/tomcat.service
1
2
3
4
[Unit] Description=Apache Tomcat 8 Servlet Container After=syslog.target network.target oracle-xe.service Wants=oracle-xe.service
加载启动脚本,下次重启就会按照新的自启动脚本启动了。
切换到 oracle 账户,用 sqlplus 登录数据库,进行必要的优化。
1
2
3
su - oracle sqlplus / as sysdba
1
2
3
4
5
6
7
8
9
10
11
12
13
14
15
16
17
18
19
20
21
22
23
24
25
26
27
28
29
30
31
32
33
34
35
36
37
38
39
40
41
42
43
44
45
-- 禁用匿名数据库账号 alter user anonymous account lock ; -- 删除自带的数据库schema drop user hr cascade ;-- 修改默认的密码规则(默认180天要重新修改所有密码的) alter profile default limit password_life_time unlimited ;-- 优化数据库核心参数 alter system set sessions=250 scope =spfile ;alter system set processes=200 scope =spfile ;alter system set memory_target=1 G scope =spfile ;alter system set memory_max_target=1 G scope =spfile ;alter system set job_queue_processes=100 scope =spfile ;-- 为我们后面新建的APEX workspace创建单独的表空间 create tablespace apex datafile '/u01/app/oracle/oradata/XE/apex.dbf' size 256 M reuse autoextend on next 100 M maxsize unlimited ; -- 为APEX workspaces创建单独的数据库schema create user apex identified by "YourPasswordHere" default tablespace apex temporary tablespace temp;alter user apex quota unlimited on apex;grant unlimited tablespace to apex;grant create session to apex;grant create cluster to apex;grant create dimension to apex;grant create indextype to apex;grant create job to apex;grant create materialized view to apex;grant create operator to apex;grant create procedure to apex;grant create sequence to apex;grant create snapshot to apex;grant create synonym to apex;grant create table to apex;grant create trigger to apex;grant create type to apex;grant create view to apex;-- 重启数据库 shutdown immediate startup -- 退出 exit
调整/u01/ords/config/ords/defaults.xml中的参数值,具体如下:
1
2
3
<entry key="jdbc.InitialLimit" > 10</entry> <entry key="jdbc.MinLimit" > 10</entry> <entry key="jdbc.MaxLimit" > 60</entry>
重启 tomcat 服务以便使 ORDS 配置生效
1 systemctl restart tomcat
修改/etc/nginx/nginx.conf,以下是我的nginx.conf文件内容:
1
2
3
4
5
6
7
8
9
10
11
12
13
14
15
16
17
18
19
20
21
22
23
24
25
26
27
28
29
30
31
32
33
34
35
36
37
38
39
40
41
42
43
44
45
46
47
48
49
50
51
52
53
54
55
56
57
58
59
60
61
62
63
64
65
66
67
68
69
70
71
72
73
74
75
76
77
78
79
80
81
82
83
84
85
86
87
88
89
90
91
92
93
94
95
96
user nginx; worker_processes auto; worker_rlimit_nofile 10000; error_log /var/log /nginx/error.log; pid /run/nginx.pid; # Load dynamic modules. See /usr/share/nginx/README.dynamic. include /usr/share/nginx/modules/*.conf; events { worker_connections 1024; #==告诉nginx收到一个新链接通知后接受尽可能多的链接 multi_accept on; #==设置用于复用客户端线程的轮训方法 use epoll; } http { log_format main '$remote_addr - $remote_user [$time_local] "$request" ' '$status $body_bytes_sent "$http_referer" ' '"$http_user_agent" "$http_x_forwarded_for"' ; access_log /var/log /nginx/access.log main; server_tokens off; sendfile on; tcp_nopush on; tcp_nodelay on; keepalive_timeout 65; types_hash_max_size 2048; include /etc/nginx/mime.types; default_type application/octet-stream; charset UTF-8; proxy_connect_timeout 600; proxy_send_timeout 600; proxy_read_timeout 600; send_timeout 600; #==设置nginx采用gzip压缩的形式发送数据,减少发送数据量,但会增加请求处理时间及CPU处理时间,需要权衡 gzip on; #==加vary给代理服务器使用,针对有的浏览器支持压缩,有个不支持,根据客户端的HTTP头来判断是否需要压缩 gzip_vary on; gzip_http_version 1.0; gzip_types text/plain application/javascript application/x-javascript text/css; gzip_min_length 1024; gzip_comp_level 3; # Load modular configuration files from the /etc/nginx/conf.d directory. # See http://nginx.org/en/docs/ngx_core_module.html#include # for more information. include /etc/nginx/conf.d/*.conf; server { listen 80 default_server; listen [::]:80 default_server; server_name _; root /usr/share/nginx/html; # Load configuration files for the default server block. include /etc/nginx/default.d/*.conf; location / { } # 增加了/i/目录的请求转发规则,/i/目录是APEX默认的静态文件目录别名。 location ^~ /i/ { alias /u01/tomcat/webapps/i/; } # 增加/ords/目录的请求转发规则,所有形如http://xxx.xxx.xxx.xxx/ords/的请求都会自动转发到http://xxx.xxx.xxx.xxx:8080/ords/上 # 即APEX请求都会由Tomcat接管 location ^~ /ords/ { proxy_pass http://localhost:8080/ords/; proxy_redirect off; proxy_set_header Host $host ; proxy_set_header X-Real-IP $remote_addr ; proxy_set_header X-Forwarded-Proto $scheme ; proxy_set_header X-Forwarded-For $proxy_add_x_forwarded_for ; client_max_body_size 20m; } error_page 404 /404.html; location = /40x.html { } error_page 500 502 503 504 /50x.html; location = /50x.html { } } }
重启 Nginx 服务
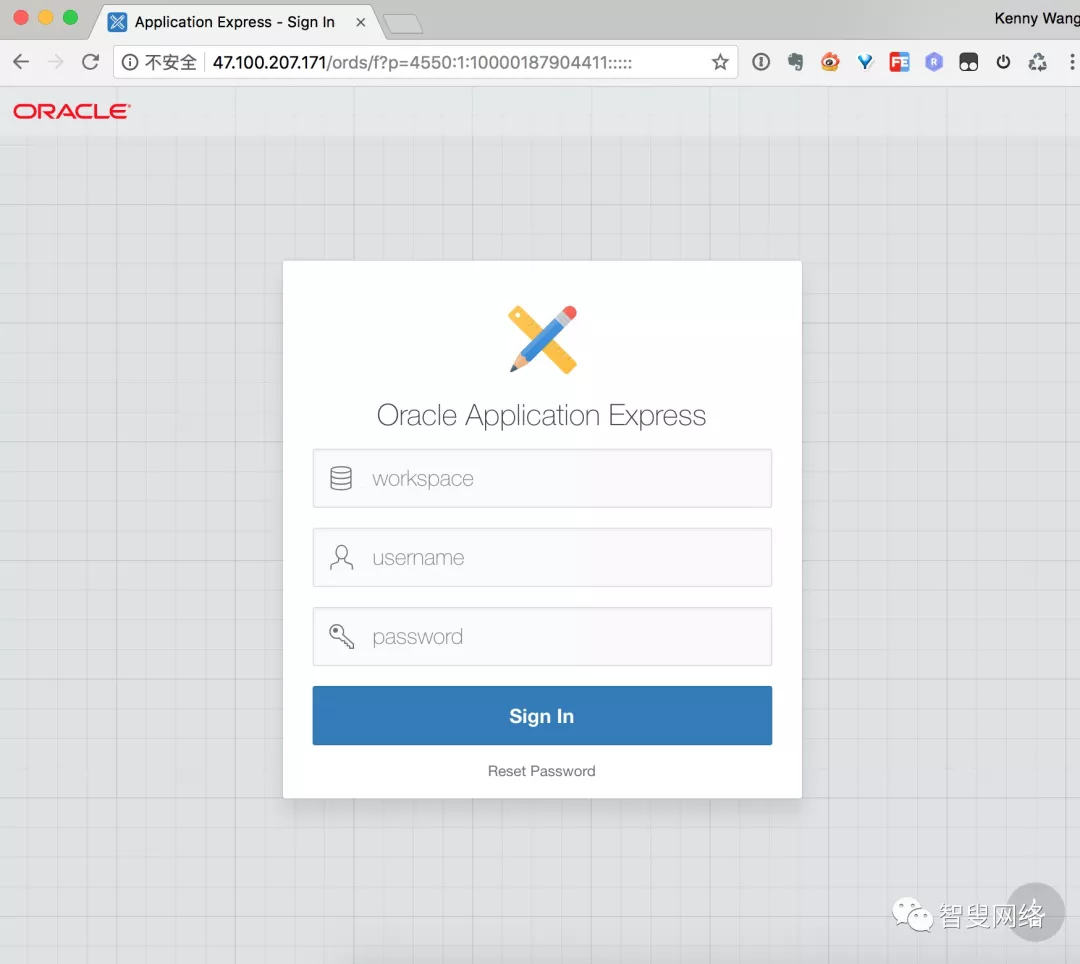
打开浏览器,再次访问 http://47.100.207.171/ords,应该可以看到APEX的登录页面了。
本章节主要带着大家过了一遍APEX常见的服务器优化配置,这些用于个人开发已经足够了。如果搭建生产环境,还需要配置SSL证书等操作,有兴趣的同学可以看这篇文章:申请 Let’s Encrypt 的免费通配符证书 。
关于 Oracle APEX 的使用,大家可以参考 Oracle Learning Library 上面的 Oracle APEX 5.1 系列教程 。
后面我也会给大家带来更多有关 Oracle APEX 使用方面的文章,以及一些个人工作中遇到的问题和经验积累,请大家拭目以待。
来自 “ ITPUB博客 ” ,链接:https://blog.itpub.net/31509949/viewspace-3136879/
,如需转载,请注明出处,否则将追究法律责任。