本笔记是记录redmine在linux centos6.8 x86_64下的安装过程。redmine 是ruby写的项目管理工具,中间需要用到web服务器webrick,其中webrick在redmine已经有了,另外需要安装的是mysql、ruby、bundler。
1.在官网下载redmine3.3.1到linux下。解压后目录:
[root@wiki redmine-3.3.1]# ls
app bin config.ru db extra Gemfile lib plugins Rakefile script tmp
appveyor.yml config CONTRIBUTING.md doc files Gemfile.lock log public README.rdoc test vendor
2.查看安装文件install ,$redmine_home/doc/install文件:
告诉我们,至少要ruby1.9版本以上,mysql5.1以上。ruby1.9以上gem.
rubygems,bundler是ruby的打包安装器,类似rpm和yum。
3.安装ruby ,请网上百度搜索关键字:“ruby 2.2 安装”。这里我只说下重点:ruby安装有依赖包,请先安装ruby依赖包,否则会出现如下错误:
4.ruby 安装好后,有个源要更改,否则gem 安装东西的时候,特别慢。gem是什么玩意?就是从远程服务器搜索ruby包,下载本地安装的工具,类似yum,rpm。
gem sources --add http://gems.ruby-china.org/ --remove https://rubygems.org/
5.ruby安装好后,安装bundler. bundler的官网是http://bundler.io/
==================分割线=======================
以上软件都准备好之后,可以按照install,往下安装。
以下是摘录redmine软件解压,找到安装文件install:
3. Configure the database parameters in config/database.yml
在config中copy一份database.yml.example,然后根据情况更改。
在这里,你可能会疑惑mysql2是什么意思?其实这是ruby连接mysql的一种驱动程序。如下
[root@wiki config]# gem list |grep mysql
mysql2 (0.4.5, 0.3.21)
验证:你需要在本地验证测试一下,看看能不能连接上数据库,mysql -uredmine -predmine123.
4. Install the required gems by running:
bundle install --without development test
在这个步骤,你会看到bundle 在刷刷的安装程序,把相互依赖的程序都安装了,类似yum,类似perl的cpanm。是不是很爽?
你还会看到,ruby通过mysql2连接程序连接到mysql数据库,然后插入了很多表,很多数据。看下都有哪些表:
5. Generate a session store secret
bundle exec rake generate_secret_token
在这个步骤我报错,不过我忽略了
7. Setting up permissions (Windows users have to skip this section)
我跳过,因为我全部都是在root下执行
8. Test the installation by running the WEBrick web server
Under the main application directory run:
ruby bin/rails server -e production
在这个步骤,请在redmine的安装目录下执行。就是ruby启动了自动的web服务器:webrick,可以看到,这个werick只是绑定在127.0.0.1 IP上监听的,其他机器访问不到,需要把上面命令稍微改造下:
nohup ruby bin/rails server -e production --binding=172.16.0.200 &
加参数--binding
好啦,大功告成,用浏览器登录看看:
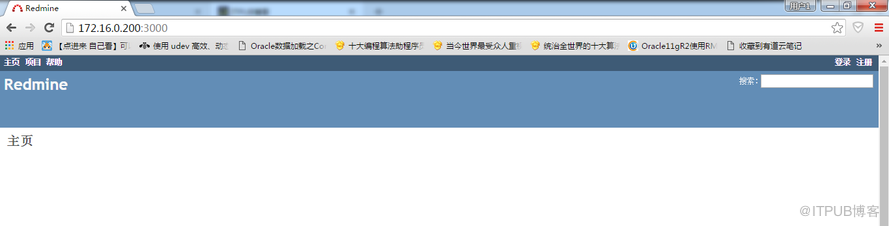
最后在总结下:redmine是用ruby写的,不熟悉ruby的朋友 ,能花个半天时间熟悉ruby,gem,bundler,安装定能事半功倍。
1.在官网下载redmine3.3.1到linux下。解压后目录:
[root@wiki redmine-3.3.1]# ls
app bin config.ru db extra Gemfile lib plugins Rakefile script tmp
appveyor.yml config CONTRIBUTING.md doc files Gemfile.lock log public README.rdoc test vendor
2.查看安装文件install ,$redmine_home/doc/install文件:
点击(此处)折叠或打开
-
== Redmine installation
-
Redmine - project management software
-
Copyright (C) 2006-2016 Jean-Philippe Lang
-
http://www.redmine.org/
-
== Requirements
-
* Ruby >= 1.9.3
-
* RubyGems
-
* Bundler >= 1.5.0
-
* A database:
-
* MySQL (tested with MySQL 5.1)
-
* PostgreSQL (tested with PostgreSQL 9.1)
-
* SQLite3 (tested with SQLite 3.7)
-
* SQLServer (tested with SQLServer 2012)
-
Optional:
-
* SCM binaries (e.g. svn, git...), for repository browsing (must be
-
available in PATH)
- * ImageMagick (to enable Gantt export to png images)
rubygems,bundler是ruby的打包安装器,类似rpm和yum。
3.安装ruby ,请网上百度搜索关键字:“ruby 2.2 安装”。这里我只说下重点:ruby安装有依赖包,请先安装ruby依赖包,否则会出现如下错误:
- ERROR: Loading command: install (LoadError)
- no such file to load — zlib
- ERROR: While executing gem … (NameError)
- uninitialized constant Gem::Commands::InstallCommand
4.ruby 安装好后,有个源要更改,否则gem 安装东西的时候,特别慢。gem是什么玩意?就是从远程服务器搜索ruby包,下载本地安装的工具,类似yum,rpm。
gem sources --add http://gems.ruby-china.org/ --remove https://rubygems.org/
5.ruby安装好后,安装bundler. bundler的官网是http://bundler.io/
==================分割线=======================
以上软件都准备好之后,可以按照install,往下安装。
以下是摘录redmine软件解压,找到安装文件install:
3. Configure the database parameters in config/database.yml
在config中copy一份database.yml.example,然后根据情况更改。
点击(此处)折叠或打开
-
production:
-
adapter: mysql2
-
database: redmine
-
host: localhost
-
username: redmine
-
password: "redmine123"
- encoding: utf8
[root@wiki config]# gem list |grep mysql
mysql2 (0.4.5, 0.3.21)
验证:你需要在本地验证测试一下,看看能不能连接上数据库,mysql -uredmine -predmine123.
4. Install the required gems by running:
bundle install --without development test
在这个步骤,你会看到bundle 在刷刷的安装程序,把相互依赖的程序都安装了,类似yum,类似perl的cpanm。是不是很爽?
你还会看到,ruby通过mysql2连接程序连接到mysql数据库,然后插入了很多表,很多数据。看下都有哪些表:
点击(此处)折叠或打开
-
mysql> show tables;
-
+-------------------------------------+
-
| Tables_in_redmine |
-
+-------------------------------------+
-
| attachments |
-
| auth_sources |
-
| boards |
-
| changes |
-
| changeset_parents |
-
| changesets |
-
| changesets_issues |
-
| comments |
-
| custom_field_enumerations |
-
| custom_fields |
-
| custom_fields_projects |
-
| custom_fields_roles |
-
| custom_fields_trackers |
-
| custom_values |
-
| documents |
-
| email_addresses |
-
| enabled_modules |
-
| enumerations |
-
| groups_users |
-
| import_items |
-
| imports |
-
| issue_categories |
-
| issue_relations |
-
| issue_statuses |
-
| issues |
-
| journal_details |
-
| journals |
-
| member_roles |
-
| members |
-
| messages |
- | news |
5. Generate a session store secret
bundle exec rake generate_secret_token
在这个步骤我报错,不过我忽略了
7. Setting up permissions (Windows users have to skip this section)
我跳过,因为我全部都是在root下执行
8. Test the installation by running the WEBrick web server
Under the main application directory run:
ruby bin/rails server -e production
在这个步骤,请在redmine的安装目录下执行。就是ruby启动了自动的web服务器:webrick,可以看到,这个werick只是绑定在127.0.0.1 IP上监听的,其他机器访问不到,需要把上面命令稍微改造下:
nohup ruby bin/rails server -e production --binding=172.16.0.200 &
加参数--binding
好啦,大功告成,用浏览器登录看看:
最后在总结下:redmine是用ruby写的,不熟悉ruby的朋友 ,能花个半天时间熟悉ruby,gem,bundler,安装定能事半功倍。
来自 “ ITPUB博客 ” ,链接:https://blog.itpub.net/30393770/viewspace-2128287/ ,如需转载,请注明出处,否则将追究法律责任。
上一篇:
linux下几个问题的调试

请登录后发表评论
登录
全部评论
最新文章
- sysbench fileio 压测磁盘raid 5 raid 1 raid10 raid 50 情况
- oracle orion 压测磁盘性能raid10 raid5 raid50 数据
- tpcc-mysql 压测报告
- mysql benchmarksql 压测
- mysql ,tidb sysbench 测试结果记录
- pt-online-schema-change 错误集 Wide character
- mysql lock 大量会话锁住,快速定位,快速解锁
- tidb Error: Operation aborted by user answer '' (cliutil.operation_aborted)
- Oracle的OEM enterprise manager mail notificatio 邮件告警通知设置
- redis cluster 集群故障恢复操作思路
