环境及安装包描述:
系统版本:ubuntu 12.0.4-server-amd
所需包:
cmake-2.8.6.tar.gz
libmcrypt-2.5.7.tar.gz
mysql-5.5.25.tar.gz
apr-1.4.6.tar.gz
apr-util-1.4.1.tar.gz
pcre-8.21.tar.gz
httpd-2.4.2.tar.bz2
php-5.4.4.tar.gz
libxml2-dev
libncurses5-dev
注:libxml2-dev和libncurses5-dev为安装所需的依赖包,所占空间较小,建议官网下载安装。
本地源安装gcc和g++
配置本地源:
加载镜像并挂载
(服务器如果没有光驱,可以把系统镜像文件上传到服务器,然后通过下面的命令挂载镜像文件挂载方式:
mount -o loop -t iso9660 /home/ubuntu-12.04.2-server-amd64.iso /media/cdrom )
root@localhost:~# mount /dev/cdrom /media/cdrom
配置源文件
cp /etc/apt/sources.list /etc/apt/sources.listbak
nano /etc/apt/sources.list
删除所有内容 添加一行下列内容:
deb file:///media/cdrom precise main
更新源:
root@localhost:/media/cdrom/dists/precise/main# apt-get update
Ign file: precise InRelease
Get:1 file: precise Release.gpg [198 B]
Get:2 file: precise Release [4,595 B]
Ign file: precise/main TranslationIndex
Ign file: precise/main Translation-en_US
Ign file: precise/main Translation-en
Reading package lists... Done
以上是配置本地源,如若需远程安装,将/etc/apt/sources.listbak复制至原位置即可
安装gcc:
root@localhost:/media/cdrom/dists/precise/main# apt-get install gcc
Reading package lists... Done
。
。
。
查看gcc版本,验证安装是否成功:
root@localhost:/media/cdrom/dists/precise/main# gcc --version
gcc (Ubuntu/Linaro 4.6.3-1ubuntu5) 4.6.3
Copyright (C) 2011 Free Software Foundation, Inc.
This is free software; see the source for copying conditions. There is NO
warranty; not even for MERCHANTABILITY or FITNESS FOR A PARTICULAR PURPOSE.
安装g++
root@localhost:~# apt-get install g++
Reading package lists... Done
Building dependency tree
Reading state information... Done
The following extra packages will be installed:
g++-4.6 libstdc++6-4.6-dev
Suggested packages:
g++-multilib g++-4.6-multilib gcc-4.6-doc libstdc++6-4.6-dbg
libstdc++6-4.6-doc
.
.
.
安装make
root@localhost:~/cmake-2.8.6# apt-get install make
Reading package lists... Done
Building dependency tree
Reading state information... Done
Suggested packages:
make-doc
The following NEW packages will be installed:
make
.
.
.
安装cmake编译工具
[root@orcl10g LAMP]# tar zxvf cmake-2.8.6.tar.gz
[root@orcl10g LAMP]# cd cmake-2.8.6
[root@orcl10g cmake-2.8.6]# ./configure
[root@orcl10g cmake-2.8.6]# make
[root@orcl10g cmake-2.8.6]# make install
查看cmake是否安装成功
root@localhost:~/cmake-2.8.6# which cmake
/usr/local/bin/cmake
安装libmcrypt-2.5.7
root@localhost:~# tar zxvf libmcrypt-2.5.7.tar.gz
[root@orcl10g LAMP]# cd libmcrypt-2.5.7
[root@orcl10g libmcrypt-2.5.7]# ./configure
编译:
[root@orcl10g libmcrypt-2.5.7]# make
安装:
[root@orcl10g libmcrypt-2.5.7]# make install
安装libncurses5-dev
本地源没有该包,这个包不大,需联网安装,RedHat 的包名为ncurses-devel
root@localhost:~# cd /etc/apt/
root@localhost:/etc/apt# mv sources.list sources.list_bak2
root@localhost:/etc/apt# cp sources.listbak sources.list
root@localhost:/etc/apt# apt-get update
root@localhost:/etc/apt# apt-get install libncurses5-dev
Reading package lists... Done
Building dependency tree
Reading state information... Done
The following extra packages will be installed:
libtinfo-dev
Suggested packages:
ncurses-doc
The following NEW packages will be installed:
libncurses5-dev libtinfo-dev
0 upgraded, 2 newly installed, 0 to remove and 194 not upgraded.
Need to get 325 kB of archives.
After this operation, 1,623 kB of additional disk space will be used.
Do you want to continue [Y/n]? Y
Get:1 http://us.archive.ubuntu.com/ubuntu/ precise/main libtinfo-dev amd64 5.9-4 [103 kB]
Get:2 http://us.archive.ubuntu.com/ubuntu/ precise/main libtinfo-dev amd64 5.9-4 [103 kB] 31% [2 libtinfo-dev 102 kB/103 kB 99%]
安装mysql
添加mysql用户组
[root@orcl10g LAMP]# groupadd mysql
创建mysql用户,不允许其直接登入系统
[root@orcl10g LAMP]# useradd -g mysql -s /sbin/nologin mysql
创建mysql 的数据存放路径并设置目录权限
[root@orcl10g mysql-5.5.25]# mkdir -p /mysql/data
[root@orcl10g mysql-5.5.25]# chown -R mysql:mysql /mysql/data
解压安装mysql
[root@orcl10g LAMP]# tar zxvf mysql-5.5.25.tar.gz
cmake配置使安装路径为/usr/local/mysql5字符集设置为all
[root@orcl10g mysql-5.5.25]# cmake -DCMAKE_INSTALL_PREFIX=/usr/local/mysql5 -DEXTRA_CHARSETS=all
如果上一步未安装libncurses5-dev 会报如下错误,需安装该包后删除CMakeCache.txt重新执行该cmake命令
-- Could NOT find Curses (missing: CURSES_LIBRARY CURSES_INCLUDE_PATH)
CMake Error at cmake/readline.cmake:83 (MESSAGE):
Curses library not found. Please install appropriate package,
remove CMakeCache.txt and rerun cmake.On Debian/Ubuntu, package name is libncurses5-dev, on Redhat and derivates it is ncurses-devel.
Call Stack (most recent call first):
cmake/readline.cmake:127 (FIND_CURSES)
cmake/readline.cmake:217 (MYSQL_USE_BUNDLED_LIBEDIT)
CMakeLists.txt:257 (MYSQL_CHECK_READLINE)
-- Configuring incomplete, errors occurred!
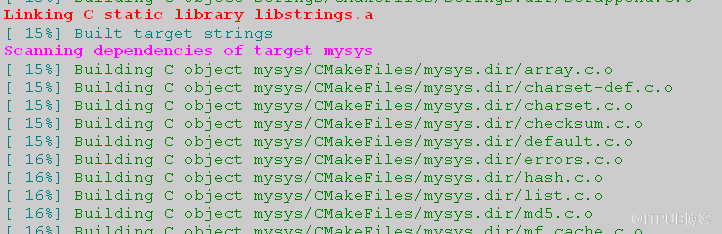
无报错,进行编译和安装,效果如图:
[root@orcl10g mysql-5.5.25]# make
[root@orcl10g mysql-5.5.25]# make install
配置mysql
[root@orcl10g mysql]# cp ./support-files/my-medium.cnf /etc/my.cnf
[root@orcl10g apache2]# vi /etc/my.cnf
添加数据存放路径:
[mysqld]
添加
datadir = /mysql/data
[root@orcl10g apache2]# chown -R mysql:mysql /usr/lcoal/msyql5
生成测试数据库:
root@localhost:~/mysql-5.5.25# cd /usr/local/mysql5/
root@localhost:/usr/local/mysql5# /usr/local/mysql5/scripts/mysql_install_db --user=mysql
启动数据库
[root@orcl10g mysql-5.5.25]# /usr/local/mysql5/bin/mysqld --user=mysql
添加root密码
[root@orcl10g apache2]# /usr/local/mysql5/bin/mysqladmin -u root password 123456
登入测试
[root@orcl10g apache2]# /usr/local/mysql5/bin/mysql -u root -p
Enter password:
Welcome to the MySQL monitor. Commands end with ; or \g.
Your MySQL connection id is 10
Server version: 5.5.25-log Source distribution
Copyright (c) 2000, 2011, Oracle and/or its affiliates. All rights reserved.
Oracle is a registered trademark of Oracle Corporation and/or its
affiliates. Other names may be trademarks of their respective
owners.
Type 'help;' or '\h' for help. Type '\c' to clear the current input statement.
mysql> show databases;
+--------------------+
| Database |
+--------------------+
| information_schema |
| mysql |
| performance_schema |
| test |
+--------------------+
4 rows in set (0.00 sec)
mysql>
安装配置apache2
安装apr-1.4.6
[root@orcl10g LAMP]# tar zxvf apr-1.4.6.tar.gz
[root@orcl10g LAMP]# cd apr-1.4.6
[root@orcl10g apr-1.4.6]# ./configure --prefix=/usr/local/apr-httpd/
[root@orcl10g apr-1.4.6]# make
[root@orcl10g apr-1.4.6]# make install
安装apr-util-1.4.1
[root@orcl10g apr-1.4.6]# cd ..
[root@orcl10g LAMP]# tar zxvf apr-util-1.4.1.tar.gz
[root@orcl10g LAMP]# cd apr-util-1.4.1
[root@orcl10g apr-util-1.4.1]# ./configure --prefix=/usr/local/apr-util-httpd/ --with-apr=/usr/local/apr-httpd/
[root@orcl10g apr-1.4.6]# make
[root@orcl10g apr-1.4.6]# make install
安装pcre
root@localhost:~# tar zxvf pcre-8.21.tar.gz
root@localhost:~# cd pcre-8.21/
root@localhost:~/pcre-8.21# ./configure
root@localhost:~/pcre-8.21# make
root@localhost:~/pcre-8.21# make install
root@localhost:/usr/local/lib# ln -s /usr/local/lib/libpcre.so.0 /lib
解压安装apache
[root@orcl10g LAMP]# tar ixvf httpd-2.4.2.tar.bz2
[root@orcl10g LAMP]# cd httpd-2.4.2
指定安装路径,并允许读写,指派刚安过的apr和apr-util路径
[root@orcl10g httpd-2.4.2]# ./configure --prefix=/usr/local/apache2 --enable-rewrite --enable-so --with-apr=/usr/local/apr-httpd/ --with-apr-util=/usr/local/apr-util-httpd/
编译
[root@orcl10g httpd-2.4.2]# make
安装
[root@orcl10g httpd-2.4.2]# make install
[root@orcl10g httpd-2.4.2]# /usr/local/apache2/bin/apachectl start
如果报以下错误,需修改一下配置文件:
AH00558: httpd: Could not reliably determine the server's fully qualified domain name, using 127.0.0.1. Set the 'ServerName' directive globally to suppress this message
[root@orcl10g httpd-2.4.2]# vi /usr/local/apache2/conf/httpd.conf
加入ServerName
# If your host doesn't have a registered DNS name, enter its IP address here.
#
#ServerName
ServerName localhost:80
再次启动apache
[root@orcl10g httpd-2.4.2]# /usr/local/apache2/bin/apachectl start
[root@orcl10g httpd-2.4.2]# /usr/local/apache2/bin/apachectl start
httpd (pid 15249) already running
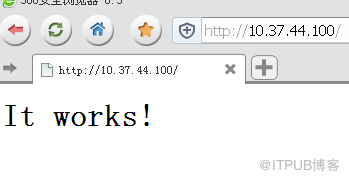
浏览器输入http://10.37.44.100查看结果:
安装php
安装libxml2
注:仍然需联网安装
root@localhost:~# cd /etc/apt/
root@localhost:/etc/apt# cp sources.listbak sources.list
root@localhost:/etc/apt# apt-get update
root@localhost:/etc/apt# apt-get install libxml2-dev
Reading package lists... Done
Building dependency tree
Reading state information... Done
The following extra packages will be installed:
libxml2
The following NEW packages will be installed:
libxml2-dev
The following packages will be upgraded:
libxml2
1 upgraded, 1 newly installed, 0 to remove and 195 not upgraded.
Need to get 1,478 kB of archives.
After this operation, 2,763 kB of additional disk space will be used.
Do you want to continue [Y/n]?Y
.
.
.
解压安装php
[root@orcl10g LAMP]# tar zxvf php-5.4.4.tar.gz
[root@orcl10g LAMP]# cd php-5.4.4
配置:
[root@orcl10gphp-5.4.4]# ./configure --prefix=/usr/local/php5/ --with-apxs2=/usr/local/apache2/bin/apxs --with-mysql=/usr/local/mysql5/ --enable-mbstring
编译
[root@orcl10g php-5.4.4]#make
安装
[root@orcl10g php-5.4.4]#make install
[root@orcl10g php-5.4.4]#make test
生成php.ini文件
[root@orcl10g php-5.4.4]# cp -rf php.ini-development /usr/local/php5/php.ini
环境测试:
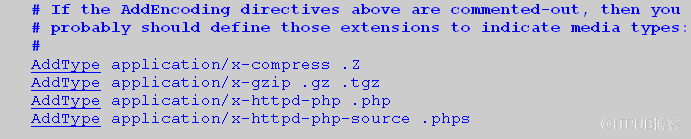
配置apache添加php
root@localhost:~# vi /usr/local/apache2/conf/httpd.conf
添加
AddType application/x-httpd-php .php
AddType application/x-httpd-php-source .phps
效果如图:
重启apache2:
root@localhost:~# /usr/local/apache2/bin/apachectl stop
root@localhost:~# /usr/local/apache2/bin/apachectl start
[root@orcl10g ~]# cd /usr/local/apache2/htdocs/
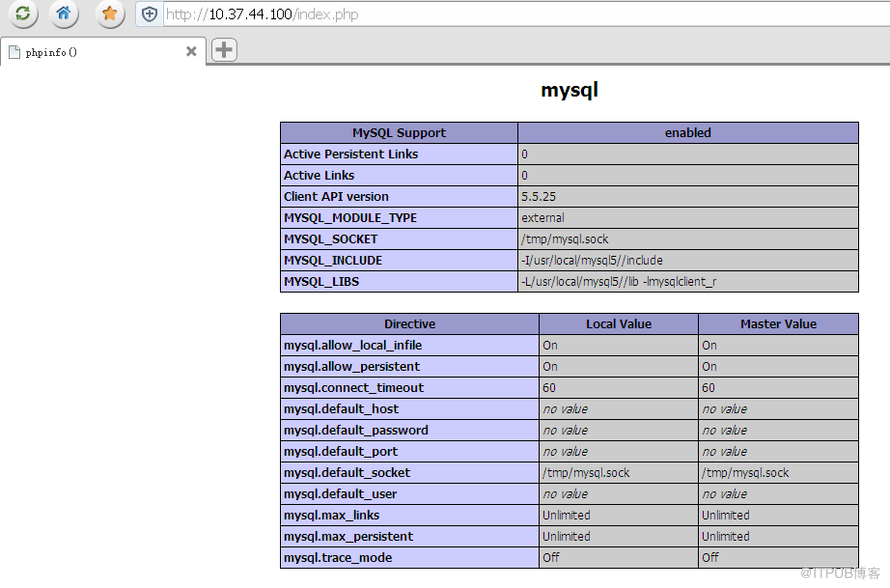
输入指针函数显示php信息
[root@orcl10g htdocs]# vi index.php
写入内容如下:
phpinfo();
?>
篇尾:
环境的启动/关闭:
启动apache:
root@localhost:~# /usr/local/apache2/bin/apachectl start/stop
启动数据库
root@localhost:~# /usr/local/mysql5/bin/mysqld --user=mysql
php项目目录:/usr/local/apache2/htdocs/
来自 “ ITPUB博客 ” ,链接:https://blog.itpub.net/29320885/viewspace-1189568/ ,如需转载,请注明出处,否则将追究法律责任。

