下载Maven和Nexus
apache-maven-3.3.9
nexus-2.12.0-01
解压nexus,进入目录
D:\nexus-2.12.0-01-bundle\nexus-2.12.0-01\bin>
安装服务
D:\nexus-2.12.0-01-bundle\nexus-2.12.0-01\bin>nexus.bat install
启动服务
D:\nexus-2.12.0-01-bundle\nexus-2.12.0-01\bin>nexus.bat start
wrapper | Starting the nexus service...
wrapper | Waiting to start...
wrapper | Waiting to start...
wrapper | Waiting to start...
wrapper | Waiting to start...
wrapper | Waiting to start...
wrapper | nexus started.
访问如下地址测试Nexus私服是否安装成功
http://127.0.0.1:8081/nexus
管理员的默认密码是
admin/admin123
同步Maven中央库的索引文件
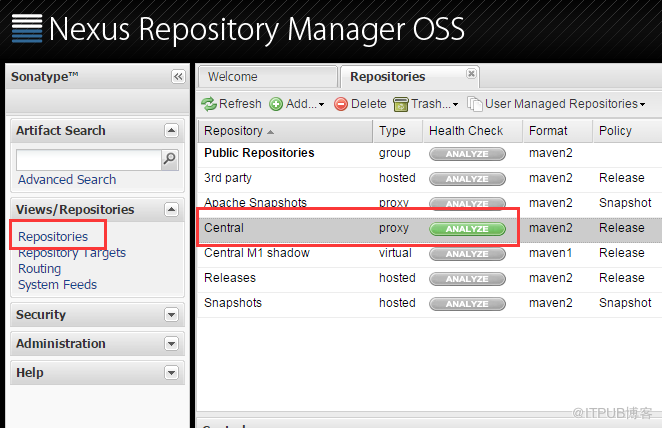
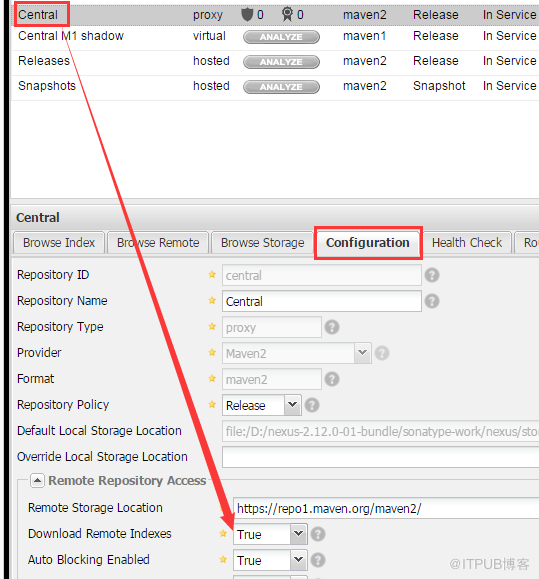
修改配置,下载远程的索引
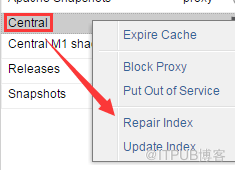
然后Repair索引.
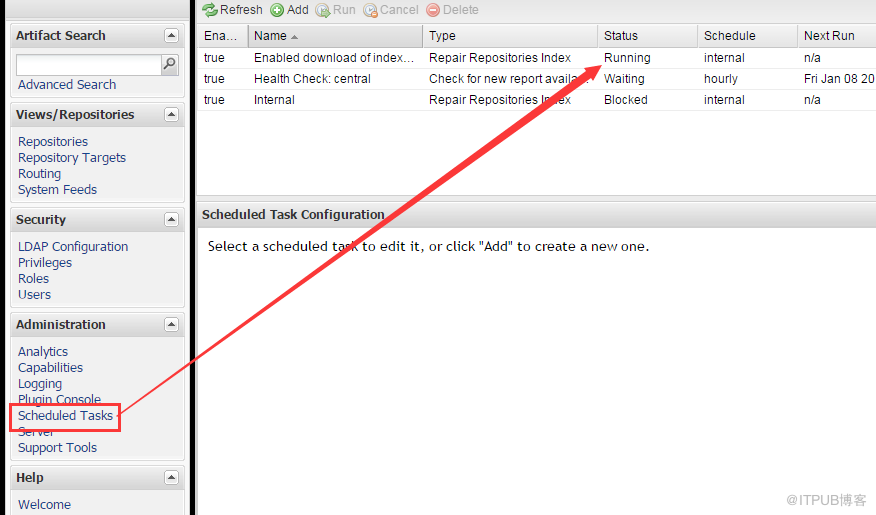
可以看到正在执行的RepairIndex的任务.
在项目的pom.xml文件中,配置私服地址
或者拷贝maven/conf/settings.xml文件到用户家目录的.m2文件夹下
修改该文件
如果需要从本地发布jar包到私服
需要先在私服上创建一个账号
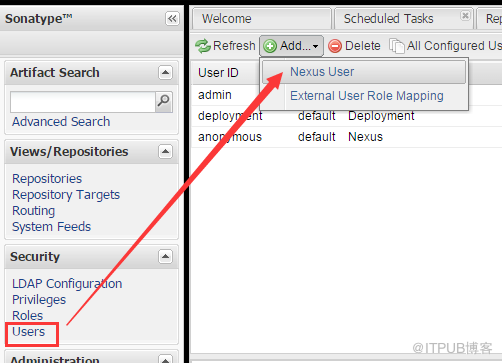
设置用户,注意权限

然后在项目的pom中加入如下配置
然后修改家目录.m2文件下的settings.xml文件
标红的ID需要一致.
这时候运行如下命令
E:\workspace\test>mvn clean deploy
就可以将jar包直接发布在私服了.
参考:
http://tianweili.github.io/blog/2015/03/17/linux-nexus-maven-private-server/
apache-maven-3.3.9
nexus-2.12.0-01
解压nexus,进入目录
D:\nexus-2.12.0-01-bundle\nexus-2.12.0-01\bin>
安装服务
D:\nexus-2.12.0-01-bundle\nexus-2.12.0-01\bin>nexus.bat install
启动服务
D:\nexus-2.12.0-01-bundle\nexus-2.12.0-01\bin>nexus.bat start
wrapper | Starting the nexus service...
wrapper | Waiting to start...
wrapper | Waiting to start...
wrapper | Waiting to start...
wrapper | Waiting to start...
wrapper | Waiting to start...
wrapper | nexus started.
访问如下地址测试Nexus私服是否安装成功
http://127.0.0.1:8081/nexus
管理员的默认密码是
admin/admin123
同步Maven中央库的索引文件
修改配置,下载远程的索引
然后Repair索引.
可以看到正在执行的RepairIndex的任务.
在项目的pom.xml文件中,配置私服地址
-
<repositories>
-
<repository>
-
<id>nexus</id>
-
<name>Team Nexus Repository</name>
-
<url>http://localhost:8081/nexus/content/groups/public</url>
-
</repository>
-
</repositories>
-
<pluginRepositories>
-
<pluginRepository>
-
<id>nexus</id>
-
<name>Team Nexus Repository</name>
-
<url>http://localhost:8081/nexus/content/groups/public</url>
-
</pluginRepository>
- </pluginRepositories>
或者拷贝maven/conf/settings.xml文件到用户家目录的.m2文件夹下
修改该文件
-
<mirrors>
-
<mirror>
-
<id>central</id>
-
<mirrorOf>*</mirrorOf> <!-- * 表示让所有仓库使用该镜像-->
-
<name>central-mirror</name>
-
<url>http://localhost:8081/nexus/content/groups/public/</url>
-
</mirror>
- </mirrors>
如果需要从本地发布jar包到私服
需要先在私服上创建一个账号
设置用户,注意权限

然后在项目的pom中加入如下配置
-
<distributionManagement>
-
<repository>
-
<id>deployment</id>
-
<name>Nexus Release Repository</name>
-
<url>http://127.0.0.1:8081/nexus/content/repositories/releases</url>
-
</repository>
-
<snapshotRepository>
-
<id>deployment</id>
-
<name>Nexus Snapshot Repository</name>
-
<url>http://127.0.0.1:8081/nexus/content/repositories/snapshots</url>
-
</snapshotRepository>
- </distributionManagement>
然后修改家目录.m2文件下的settings.xml文件
-
<servers>
-
<server>
-
<id>deployment</id>
-
<username>dev</username>
-
<password>123456</password>
-
</server>
- </servers>
标红的ID需要一致.
这时候运行如下命令
E:\workspace\test>mvn clean deploy
就可以将jar包直接发布在私服了.
参考:
http://tianweili.github.io/blog/2015/03/17/linux-nexus-maven-private-server/
来自 “ ITPUB博客 ” ,链接:https://blog.itpub.net/29254281/viewspace-1973387/ ,如需转载,请注明出处,否则将追究法律责任。
上一篇:
只用五分钟为系统实现基于JMX的监控
下一篇:
指定一个ID找到上下的范围

请登录后发表评论
登录
全部评论
