Maven多模块项目搭建+SSM框架整合(一、多模块搭建)
项目使用IDEA进行构建,源码将会提交到GitHub上,使用Eclipse的用户也可以轻松导入。
在此我们将项目划分为4块,分别为model、dao、service和controller。
一、创建父模块
打开IDEA创建项目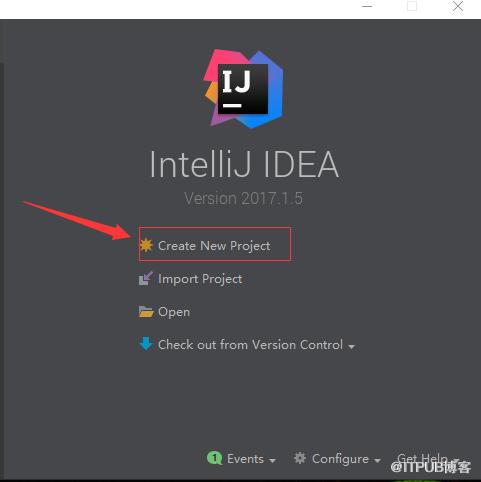
点击Maven直接选择Next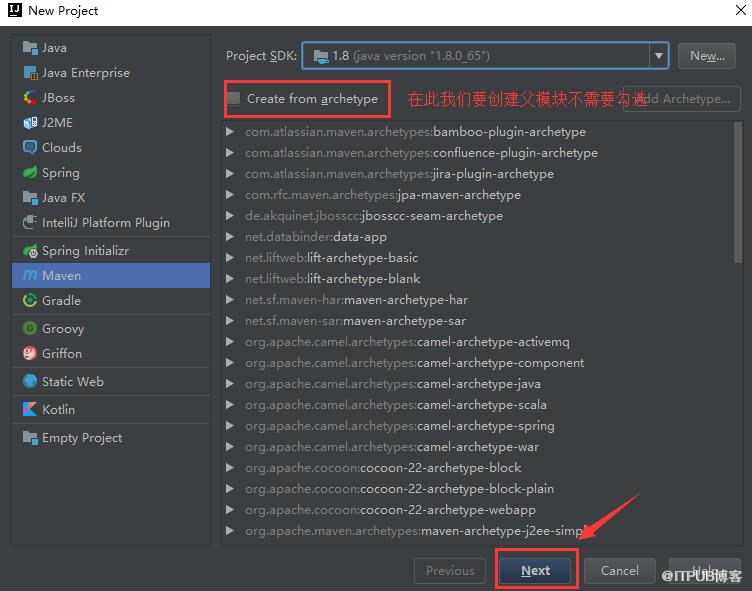
补全GroupId与ArtifactId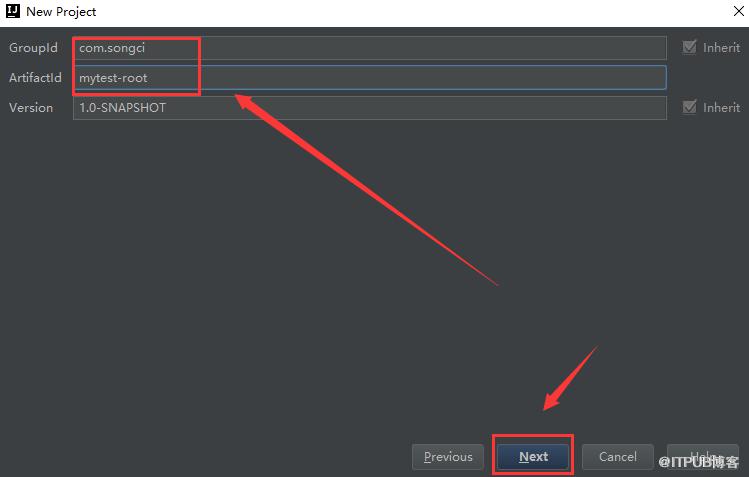
填写项目名称与存放本地地址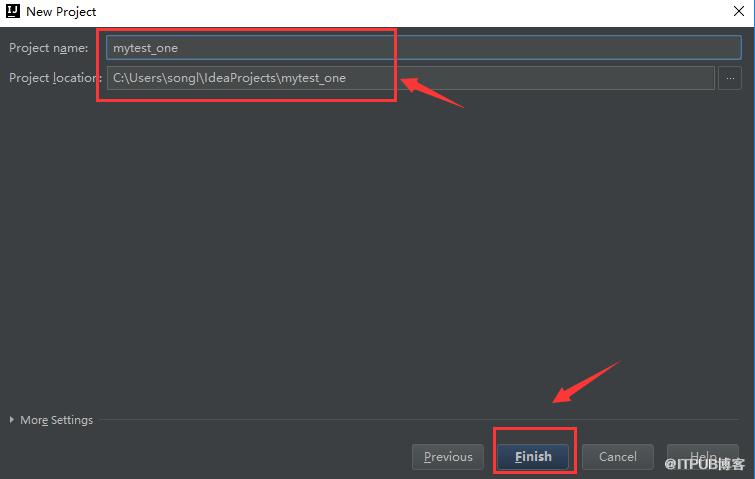
此时项目结构如图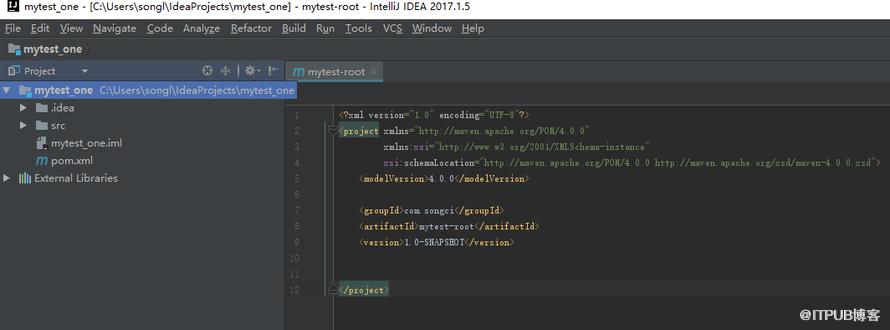
二、创建model子模块
如图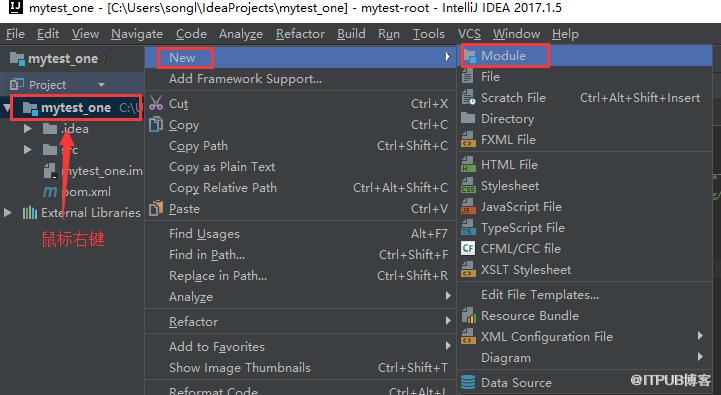
在此因为是普通的子模块所以我们还是直接next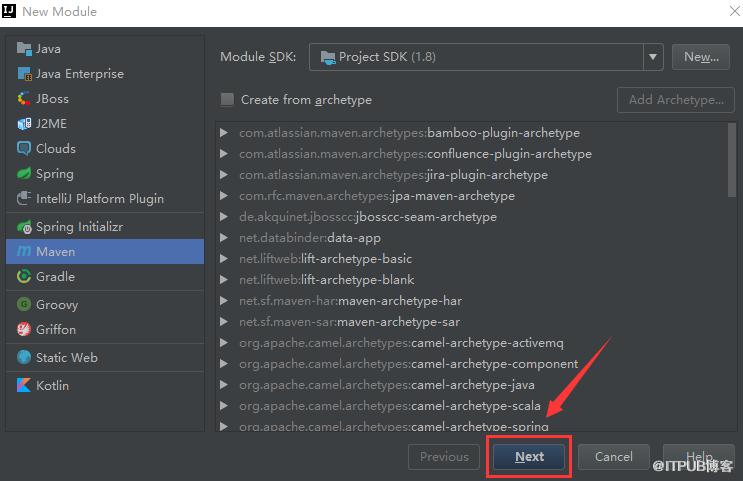
接着填写ArtifactId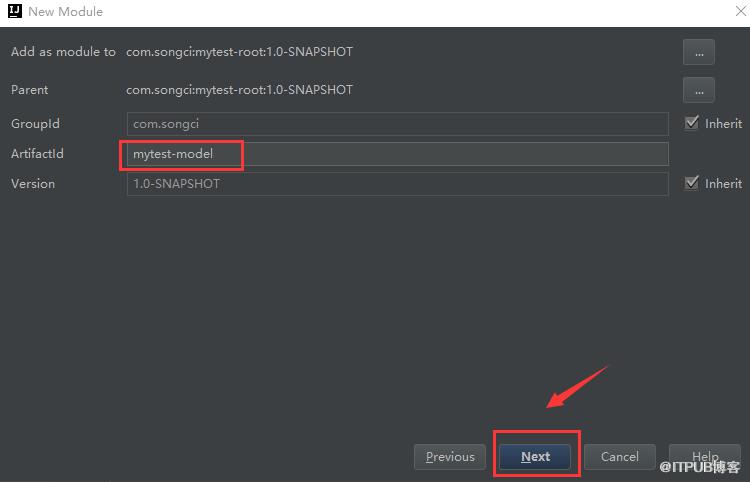
填写Module name接着finish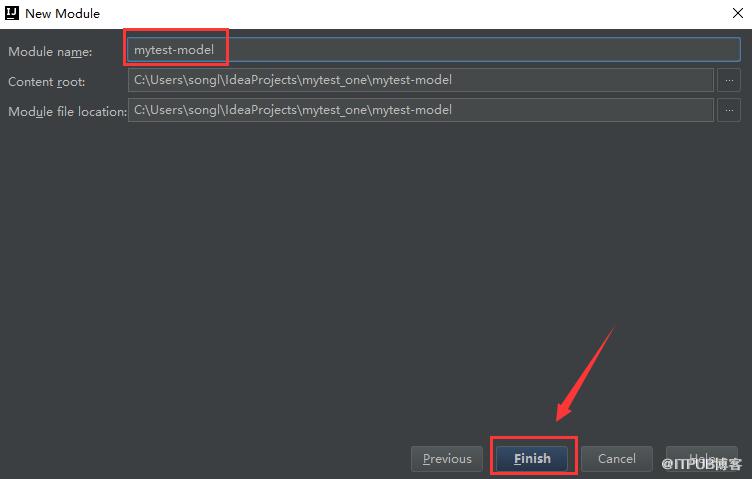
最终项目结构如下图所示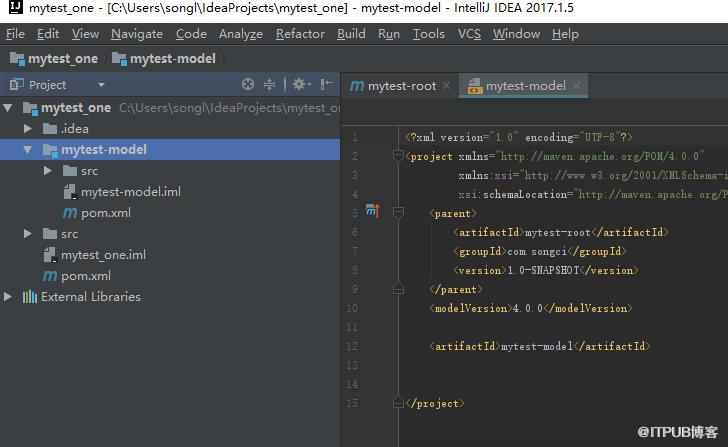
创建dao、service这两个子模块与model一样
最终项目结构如图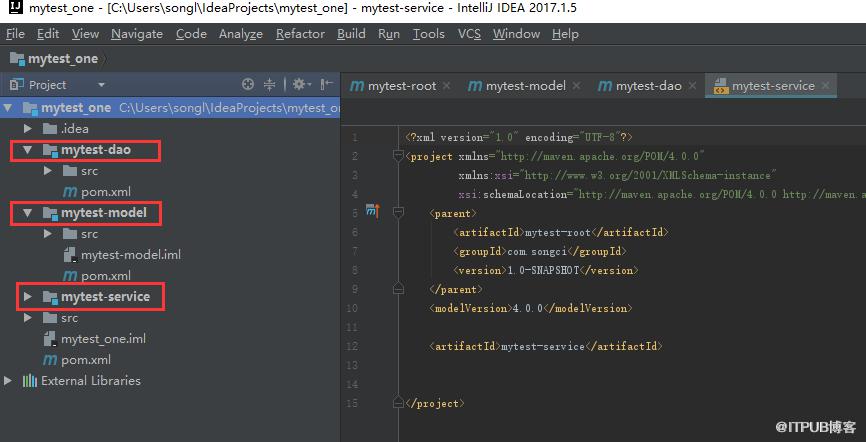
三、创建子模块controller
还是先创建Module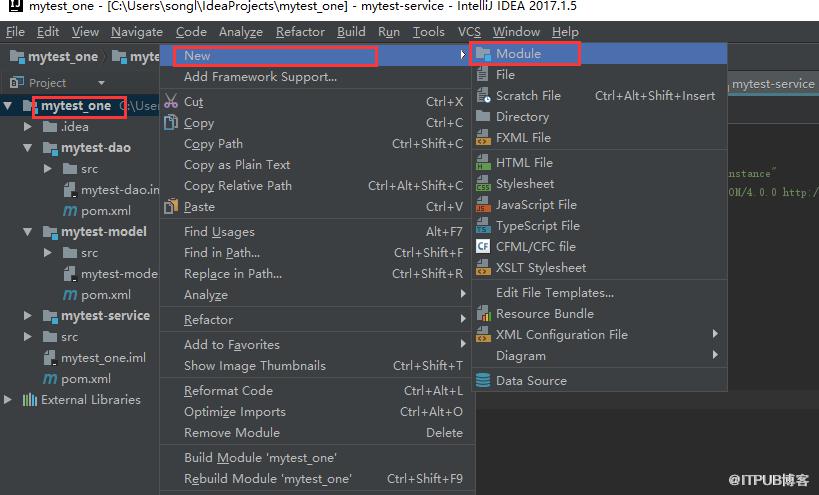
然后选择webapp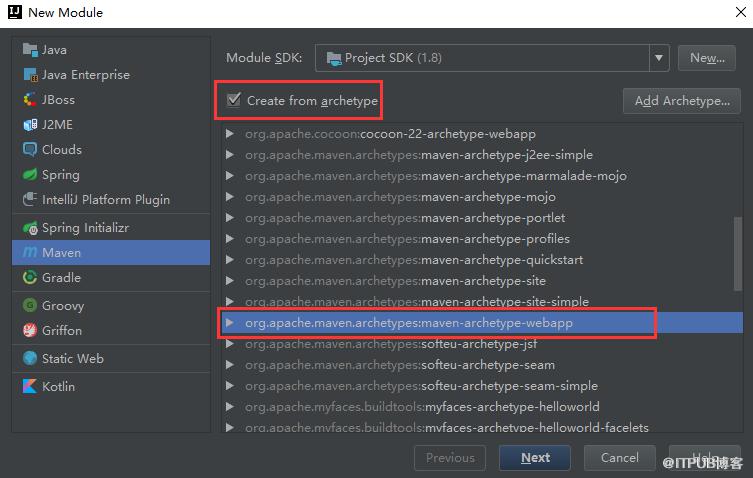
接着填写ArtifactId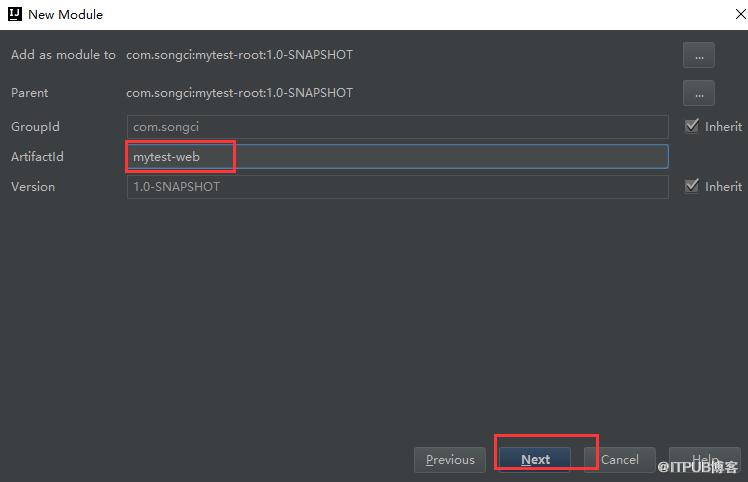
接下来是Maven的配置,可以参考Maven 环境变量设置---------IDEA配置maven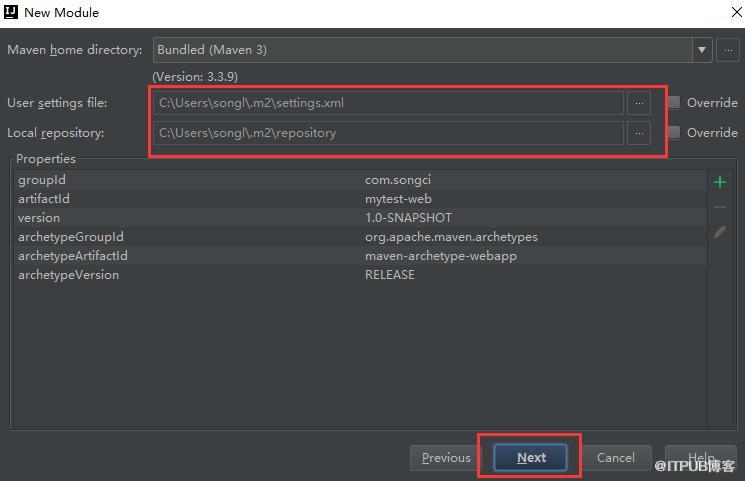
点击finish多模块的框架就基本上搭建好了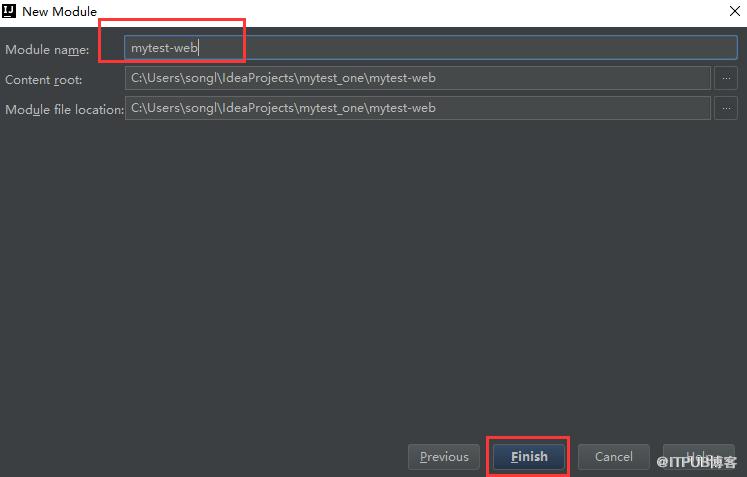
如图所示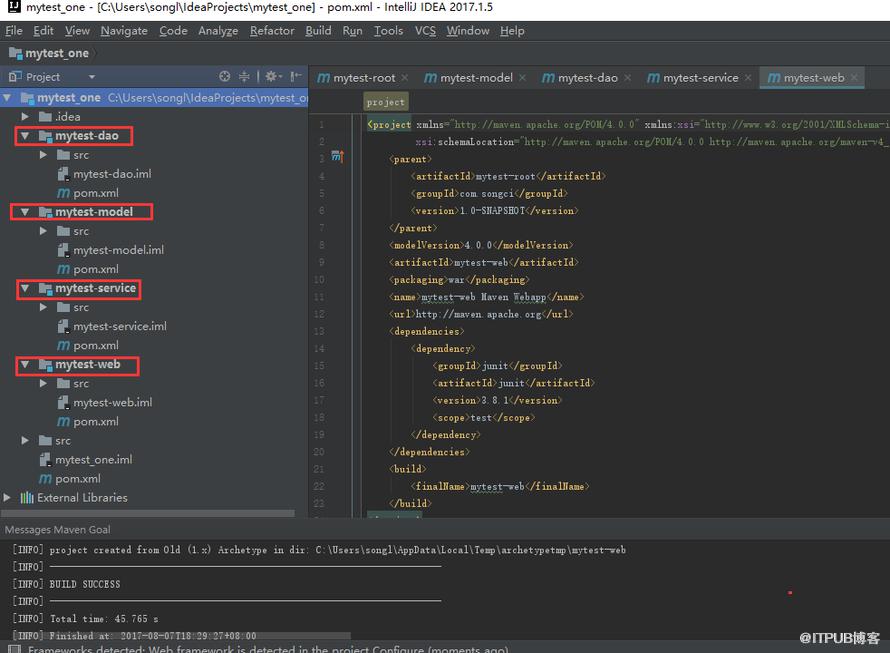
四、每个模块中依赖的配置
配置mytest-model中的pom.xml
mytest-root com.songci 1.0-SNAPSHOT 4.0.0 mytest-model <!--添加start-->jar <!--添加end-->配置mytest-dao中的pom.xml
mytest-root com.songci 1.0-SNAPSHOT 4.0.0 mytest-dao <!--添加start-->jar <!--添加对mytest-model的依赖-->com.songci mytest-model ${project.version} 配置mytest-service中的pom.xml
mytest-root com.songci 1.0-SNAPSHOT 4.0.0 mytest-service <!--添加start-->jar <!--添加对mytest-model的依赖-->com.songci mytest-model ${project.version} com.songci mytest-dao ${project.version} <!--添加end-->配置mytest-web中的pom.xml
mytest-root com.songci 1.0-SNAPSHOT 4.0.0 mytest-web war mytest-web Maven Webapp http://maven.apache.org junit junit 3.8.1 test com.songci mytest-model ${project.version} com.songci mytest-dao ${project.version} com.songci mytest-service ${project.version} mytest-web 配置mytest_one中的pom.xml(就是最外面那个pom.xml)
4.0.0 com.songci mytest-root pom 1.0-SNAPSHOT mytest-model mytest-dao mytest-service mytest-web UTF-8 以上maven多模块就搭建好了,接下来我们在该项目基础上对Spring、SpringMVC、Mybatis进行整合
下一篇Maven-maven多模块项目搭建+SSM框架整合((二、Dao层添加测试,服务层添加))
GitHub地址:https://github.com/iamsongci/mytest_one
未完待续--------
来自 “ ITPUB博客 ” ,链接:https://blog.itpub.net/1446/viewspace-2799257/ ,如需转载,请注明出处,否则将追究法律责任。
上一篇:
JAVA第二季 哒哒租车网
下一篇:
学习python过程中的记录2

请登录后发表评论
登录
全部评论
