Oracle 10g RAC On Linux Using NFS
This article describes the installation of Oracle 10g release 2 (10.2.0.1) RAC on Linux (Oracle Enterprise Linux 4.5) using NFS to provide the shared storage.- Introduction
- Download Software
- Operating System Installation
- Oracle Installation Prerequisites
- Create Shared Disks
- Install the Clusterware Software
- Install the Database Software
- Create a Database using the DBCA
- TNS Configuration
- Check the Status of the RAC
- Direct and Asynchronous I/O
Introduction
NFS is an abbreviation of Network File System, a platform. independent technology created by Sun Microsystems that allows shared access to files stored on computers via an interface called the Virtual File System (VFS) that runs on top of TCP/IP. Computers that share files are considered NFS servers, while those that access shared files are considered NFS clients. An individual computer can be either an NFS server, a NFS client or both.We can use NFS to provide shared storage for a RAC installation. In a production environment we would expect the NFS server to be a NAS, but for testing it can just as easily be another server, or even one of the RAC nodes itself.
To cut costs, this articles uses one of the RAC nodes as the source of the shared storage. Obviously, this means if that node goes down the whole database is lost, so it's not a sensible idea to do this if you are testing high availability. If you have access to a NAS or a third server you can easily use that for the shared storage, making the whole solution much more resilient. Whichever route you take, the fundamentals of the installation are the same.
This article was inspired by the blog postings of Kevin Closson.
Download Software
Download the following software.Operating System Installation
This article uses Oracle Enterprise Linux 4.5, but it will work equally well on CentOS 4 or Red Hat Enterprise Linux (RHEL) 4. A general pictorial guide to the operating system installation can be found here. More specifically, it should be a server installation with a minimum of 2G swap, firewall and secure Linux disabled and the following package groups installed:- X Window System
- GNOME Desktop Environment
- Editors
- Graphical Internet
- Server Configuration Tools
- FTP Server
- Development Tools
- Legacy Software Development
- Administration Tools
- System Tools
RAC1:
- hostname: rac1.localdomain
- IP Address eth0: 192.168.2.101 (public address)
- Default Gateway eth0: 192.168.2.1 (public address)
- IP Address eth1: 192.168.0.101 (private address)
- Default Gateway eth1: none
- hostname: rac2.localdomain
- IP Address eth0: 192.168.2.102 (public address)
- Default Gateway eth0: 192.168.2.1 (public address)
- IP Address eth1: 192.168.0.102 (private address)
- Default Gateway eth1: none
Once the basic installation is complete, install the following packages whilst logged in as the root user.
# From Oracle Enterprise Linux 4.5 Disk 1
cd /media/cdrecorder/CentOS/RPMS
rpm -Uvh setarch-1*
rpm -Uvh compat-libstdc++-33-3*
rpm -Uvh make-3*
rpm -Uvh glibc-2*
cd /
eject

# From Oracle Enterprise Linux 4.5 Disk 2
cd /media/cdrecorder/CentOS/RPMS
rpm -Uvh openmotif-2*
rpm -Uvh compat-db-4*
rpm -Uvh gcc-3*
cd /
eject

# From Oracle Enterprise Linux 4.5 Disk 3
cd /media/cdrecorder/CentOS/RPMS
rpm -Uvh libaio-0*
rpm -Uvh rsh-*
rpm -Uvh compat-gcc-32-3*
rpm -Uvh compat-gcc-32-c++-3*
rpm -Uvh openmotif21*
cd /
eject
Oracle Installation Prerequisites
Perform. the following steps whilst logged into the RAC1 virtual machine as the root user.The /etc/hosts file must contain the following information.
Notice that the NAS1 entry is actually pointing to the RAC1 node. If you are using a real NAS or a third server to provide your shared storage put the correct IP address into the file.127.0.0.1 localhost.localdomain localhost # Public 192.168.2.101 rac1.localdomain rac1 192.168.2.102 rac2.localdomain rac2 #Private 192.168.0.101 rac1-priv.localdomain rac1-priv 192.168.0.102 rac2-priv.localdomain rac2-priv #Virtual 192.168.2.111 rac1-vip.localdomain rac1-vip 192.168.2.112 rac2-vip.localdomain rac2-vip #NAS 192.168.2.101 nas1.localdomain nas1
Add the following lines to the /etc/sysctl.conf file.
Run the following command to change the current kernel parameters.kernel.shmall = 2097152 kernel.shmmax = 2147483648 kernel.shmmni = 4096 # semaphores: semmsl, semmns, semopm, semmni kernel.sem = 250 32000 100 128 #fs.file-max = 65536 net.ipv4.ip_local_port_range = 1024 65000 #net.core.rmem_default=262144 #net.core.rmem_max=262144 #net.core.wmem_default=262144 #net.core.wmem_max=262144 # Additional and amended parameters suggested by Kevin Closson net.core.rmem_default = 524288 net.core.wmem_default = 524288 net.core.rmem_max = 16777216 net.core.wmem_max = 16777216 net.ipv4.ipfrag_high_thresh=524288 net.ipv4.ipfrag_low_thresh=393216 net.ipv4.tcp_rmem=4096 524288 16777216 net.ipv4.tcp_wmem=4096 524288 16777216 net.ipv4.tcp_timestamps=0 net.ipv4.tcp_sack=0 net.ipv4.tcp_window_scaling=1 net.core.optmem_max=524287 net.core.netdev_max_backlog=2500 sunrpc.tcp_slot_table_entries=128 sunrpc.udp_slot_table_entries=128 net.ipv4.tcp_mem=16384 16384 16384
Add the following lines to the /etc/security/limits.conf file./sbin/sysctl -p
Add the following line to the /etc/pam.d/login file, if it does not already exist.* soft nproc 2047 * hard nproc 16384 * soft nofile 1024 * hard nofile 65536
Disable secure linux by editing the /etc/selinux/config file, making sure the SELINUX flag is set as follows.session required /lib/security/pam_limits.so
Alternatively, this alteration can be done using the GUI tool (Applications > System Settings > Security Level). Click on the SELinux tab and disable the feature.SELINUX=disabled
Set the hangcheck kernel module parameters by adding the following line to the /etc/modprobe.conf file.
To load the module immediately, execute "modprobe -v hangcheck-timer".options hangcheck-timer hangcheck_tick=30 hangcheck_margin=180
Create the new groups and users.
During the installation, both RSH and RSH-Server were installed. Enable remote shell and rlogin by doing the following.groupadd oinstall groupadd dba groupadd oper useradd -g oinstall -G dba oracle passwd oracle
Create the /etc/hosts.equiv file as the root user.chkconfig rsh on chkconfig rlogin on service xinetd reload
Edit the /etc/hosts.equiv file to include all the RAC nodes:touch /etc/hosts.equiv chmod 600 /etc/hosts.equiv chown root:root /etc/hosts.equiv
Login as the oracle user and add the following lines at the end of the .bash_profile file.+rac1 oracle +rac2 oracle +rac1-priv oracle +rac2-priv oracle
# Oracle Settings
TMP=/tmp; export TMP
TMPDIR=$TMP; export TMPDIR

ORACLE_BASE=/u01/app/oracle; export ORACLE_BASE
ORACLE_HOME=$ORACLE_BASE/product/10.2.0/db_1; export ORACLE_HOME
ORACLE_SID=RAC1; export ORACLE_SID
ORACLE_TERM=xterm; export ORACLE_TERM
PATH=/usr/sbin:$PATH; export PATH
PATH=$ORACLE_HOME/bin:$PATH; export PATH

LD_LIBRARY_PATH=$ORACLE_HOME/lib:/lib:/usr/lib; export LD_LIBRARY_PATH
CLASSPATH=$ORACLE_HOME/JRE:$ORACLE_HOME/jlib:$ORACLE_HOME/rdbms/jlib; export CLASSPATH

if [ $USER = "oracle" ]; then
  if [ $SHELL = "/bin/ksh" ]; then
    ulimit -p 16384
    ulimit -n 65536
  else
    ulimit -u 16384 -n 65536
  fi
fiCreate Shared Disks
First we need to set up some NFS shares. In this case we will do this on the RAC1 node, but you can do the on a NAS or a third server if you have one available. On the RAC1 node create the following directories.Add the following lines to the /etc/exports file.mkdir /share1 mkdir /share2
Run the following command to export the NFS shares./share1 *(rw,sync,no_wdelay,insecure_locks,no_root_squash) /share2 *(rw,sync,no_wdelay,insecure_locks,no_root_squash)
On both RAC1 and RAC2 create some mount points to mount the NFS shares to.chkconfig nfs on service nfs restart
Add the following lines to the "/etc/fstab" file. The mount options are suggestions from Kevin Closson.mkdir /u01 mkdir /u02
Mount the NFS shares on both servers.nas1:/share1 /u01 nfs rw,bg,hard,nointr,tcp,vers=3,timeo=300,rsize=32768,wsize=32768,actimeo=0 0 0 nas1:/share2 /u02 nfs rw,bg,hard,nointr,tcp,vers=3,timeo=300,rsize=32768,wsize=32768,actimeo=0 0 0
Create the shared CRS Configuration and Voting Disk files.mount /u01 mount /u02
Create the directories in which the Oracle software will be installed.touch /u01/crs_configuration touch /u01/voting_disk
mkdir -p /u01/crs/oracle/product/10.2.0/crs
mkdir -p /u01/app/oracle/product/10.2.0/db_1
mkdir -p /u01/oradata
chown -R oracle:oinstall /u01 /u02
Install the Clusterware Software
Place the clusterware and database software in the /u02 directory and unzip it.Login to RAC1 as the oracle user and start the Oracle installer.cd /u02 unzip 10201_clusterware_linux32.zip unzip 10201_database_linux32.zip
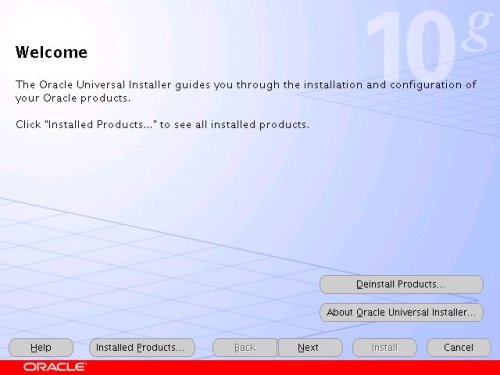
On the "Welcome" screen, click the "Next" button.cd /u02/clusterware ./runInstaller
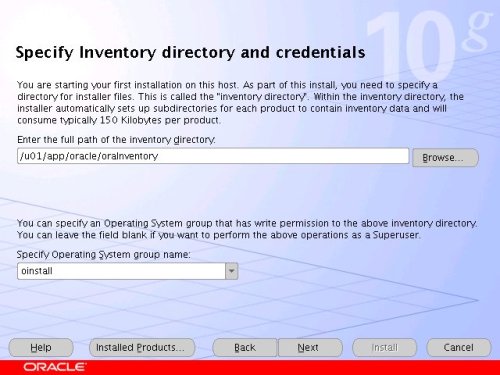
Accept the default inventory location by clicking the "Next" button.
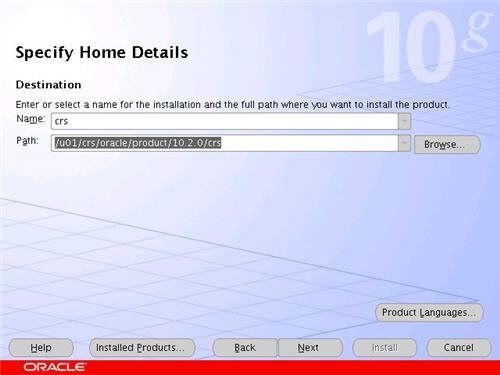
Enter the appropriate name and path for the Oracle Home and click the "Next" button.
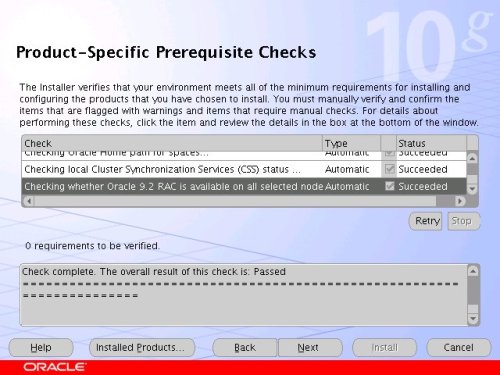
Wait while the prerequisite checks are done. If you have any failures correct them and retry the tests before clicking the "Next" button.
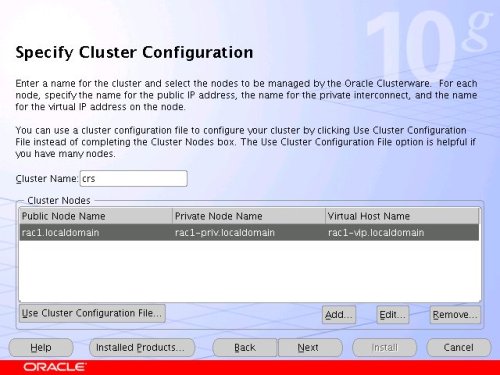
The "Specify Cluster Configuration" screen shows only the RAC1 node in the cluster. Click the "Add" button to continue.
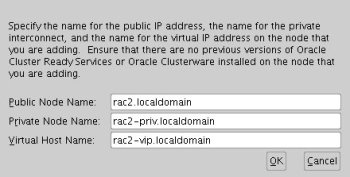
Enter the details for the RAC2 node and click the "OK" button.
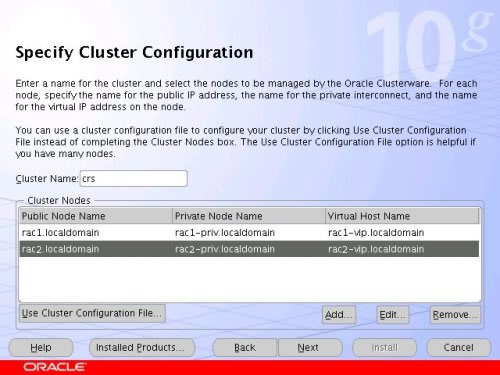
Click the "Next" button to continue.
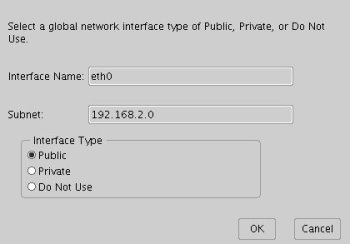
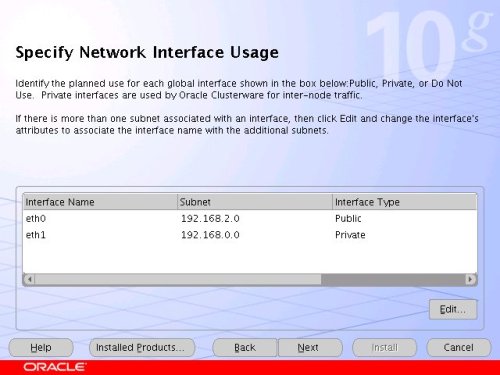
The "Specific Network Interface Usage" screen defines how each network interface will be used. Highlight the "eth0" interface and click the "Edit" button.
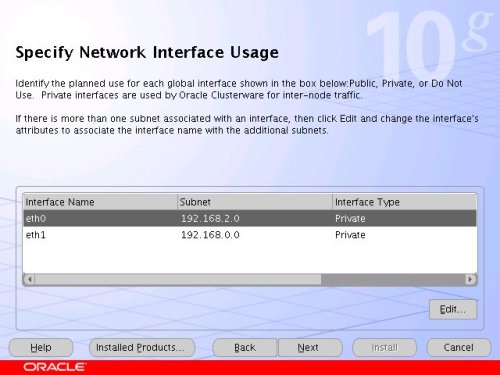
Set the "eht0" interface type to "Public" and click the "OK" button.
Leave the "eth1" interface as private and click the "Next" button.
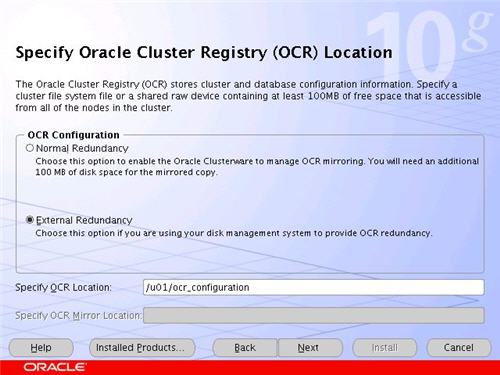
Click the "External Redundancy" option, enter "/u01/ocr_configuration" as the OCR Location and click the "Next" button. To have greater redundancy we would need to define another shared disk for an alternate location.
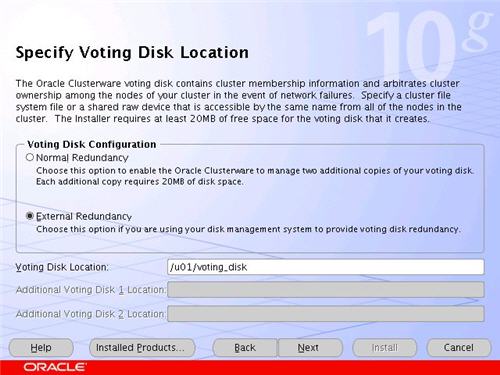
Click the "External Redundancy" option, enter "/u01/voting_disk" as the Voting Disk Location and click the "Next" button. To have greater redundancy we would need to define another shared disk for an alternate location.
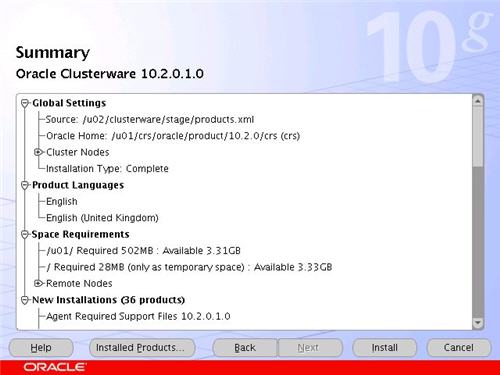
On the "Summary" screen, click the "Install" button to continue.
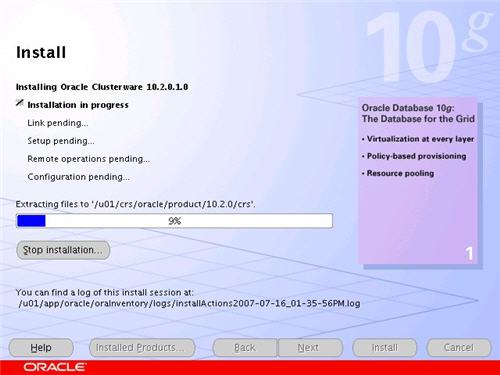
Wait while the installation takes place.
Once the install is complete, run the orainstRoot.sh and root.sh scripts on both nodes as directed on the following screen.

The output from the orainstRoot.sh file should look something like that listed below.
The output of the root.sh will vary a little depending on the node it is run on. The following text is the output from the RAC1 node.# cd /u01/app/oracle/oraInventory # ./orainstRoot.sh Changing permissions of /u01/app/oracle/oraInventory to 770. Changing groupname of /u01/app/oracle/oraInventory to oinstall. The execution of the script. is complete #
Ignore the directory ownership warnings. We should really use a separate directory structure for the clusterware so it can be owned by the root user, but it has little effect on the finished results.# cd /u01/crs/oracle/product/10.2.0/crs # ./root.sh WARNING: directory '/u01/crs/oracle/product/10.2.0' is not owned by root WARNING: directory '/u01/crs/oracle/product' is not owned by root WARNING: directory '/u01/crs/oracle' is not owned by root WARNING: directory '/u01/crs' is not owned by root WARNING: directory '/u01' is not owned by root Checking to see if Oracle CRS stack is already configured /etc/oracle does not exist. Creating it now. Setting the permissions on OCR backup directory Setting up NS directories Oracle Cluster Registry configuration upgraded successfully WARNING: directory '/u01/crs/oracle/product/10.2.0' is not owned by root WARNING: directory '/u01/crs/oracle/product' is not owned by root WARNING: directory '/u01/crs/oracle' is not owned by root WARNING: directory '/u01/crs' is not owned by root WARNING: directory '/u01' is not owned by root assigning default hostname rac1 for node 1. assigning default hostname rac2 for node 2. Successfully accumulated necessary OCR keys. Using ports: CSS=49895 CRS=49896 EVMC=49898 and EVMR=49897. node: node 1: rac1 rac1-priv rac1 node 2: rac2 rac2-priv rac2 Creating OCR keys for user 'root', privgrp 'root'.. Operation successful. Now formatting voting device: /u01/voting_disk Format of 1 voting devices complete. Startup will be queued to init within 90 seconds. Adding daemons to inittab Expecting the CRS daemons to be up within 600 seconds. CSS is active on these nodes. rac1 CSS is inactive on these nodes. rac2 Local node checking complete. Run root.sh on remaining nodes to start CRS daemons. #
The output from the RAC2 node is listed below.
Here you can see that some of the configuration steps are omitted as they were done by the first node. In addition, the final part of the script. ran the Virtual IP Configuration Assistant (VIPCA) in silent mode, but it failed. This is because my public IP addresses are actually within the "192.168.255.255" range which is a private IP range. If you were using "legal" IP addresses you would not see this and you could ignore the following VIPCA steps.# /u01/crs/oracle/product/10.2.0/crs # ./root.sh WARNING: directory '/u01/crs/oracle/product/10.2.0' is not owned by root WARNING: directory '/u01/crs/oracle/product' is not owned by root WARNING: directory '/u01/crs/oracle' is not owned by root WARNING: directory '/u01/crs' is not owned by root WARNING: directory '/u01' is not owned by root Checking to see if Oracle CRS stack is already configured /etc/oracle does not exist. Creating it now. Setting the permissions on OCR backup directory Setting up NS directories Oracle Cluster Registry configuration upgraded successfully WARNING: directory '/u01/crs/oracle/product/10.2.0' is not owned by root WARNING: directory '/u01/crs/oracle/product' is not owned by root WARNING: directory '/u01/crs/oracle' is not owned by root WARNING: directory '/u01/crs' is not owned by root WARNING: directory '/u01' is not owned by root clscfg: EXISTING configuration version 3 detected. clscfg: version 3 is 10G Release 2. assigning default hostname rac1 for node 1. assigning default hostname rac2 for node 2. Successfully accumulated necessary OCR keys. Using ports: CSS=49895 CRS=49896 EVMC=49898 and EVMR=49897. node: node 1: rac1 rac1-priv rac1 node 2: rac2 rac2-priv rac2 clscfg: Arguments check out successfully. NO KEYS WERE WRITTEN. Supply -force parameter to override. -force is destructive and will destroy any previous cluster configuration. Oracle Cluster Registry for cluster has already been initialized Startup will be queued to init within 90 seconds. Adding daemons to inittab Expecting the CRS daemons to be up within 600 seconds. CSS is active on these nodes. rac1 rac2 CSS is active on all nodes. Waiting for the Oracle CRSD and EVMD to start Waiting for the Oracle CRSD and EVMD to start Waiting for the Oracle CRSD and EVMD to start Waiting for the Oracle CRSD and EVMD to start Waiting for the Oracle CRSD and EVMD to start Waiting for the Oracle CRSD and EVMD to start Waiting for the Oracle CRSD and EVMD to start Oracle CRS stack installed and running under init(1M) Running vipca(silent) for configuring nodeapps The given interface(s), "eth0" is not public. Public interfaces should be used to configure virtual IPs. #
Run the VIPCA manually as the root user on the RAC2 node using the following command.
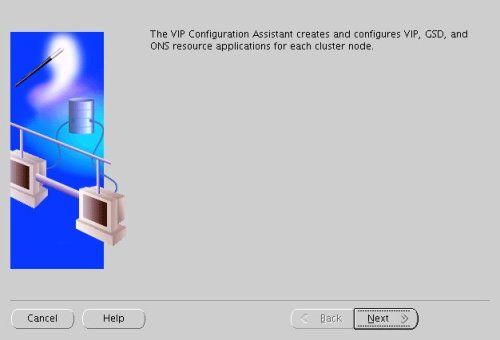
Click the "Next" button on the VIPCA welcome screen.# cd /u01/crs/oracle/product/10.2.0/crs/bin # ./vipca
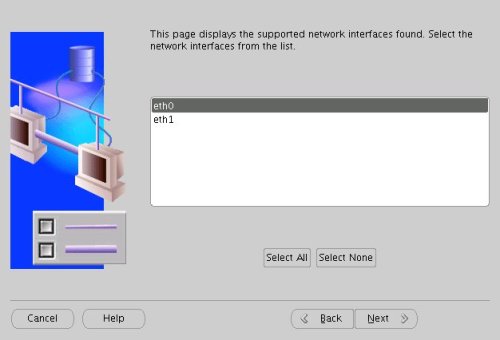
Highlight the "eth0" interface and click the "Next" button.
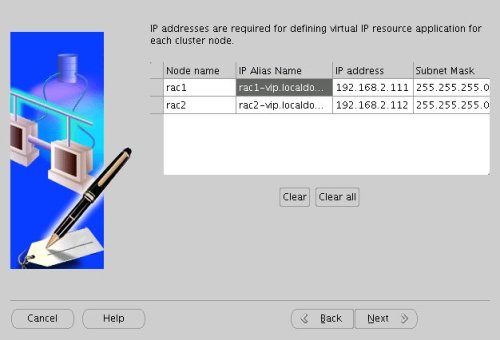
Enter the vitual IP alias and address for each node. Once you enter the first alias, the remaining values should default automatically. Click the "Next" button to continue.
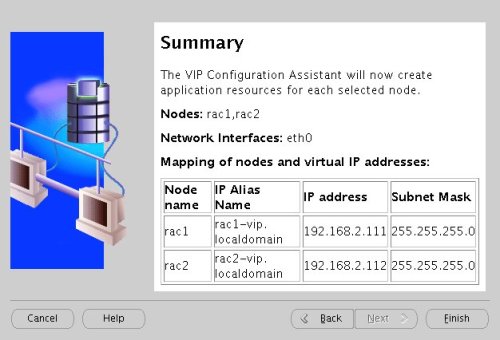
Accept the summary information by clicking the "Finish" button.
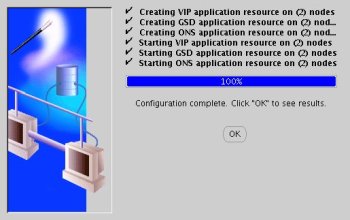
Wait until the configuration is complete, then click the "OK" button.
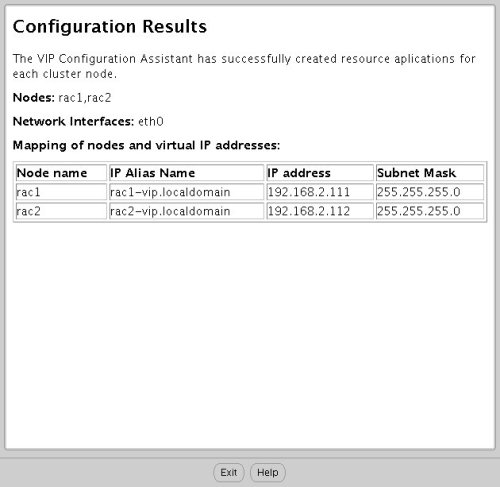
Accept the VIPCA results by clicking the "Exit" button.
You should now return to the "Execute Configuration Scripts" screen on RAC1 and click the "OK" button.
Wait for the configuration assistants to complete.
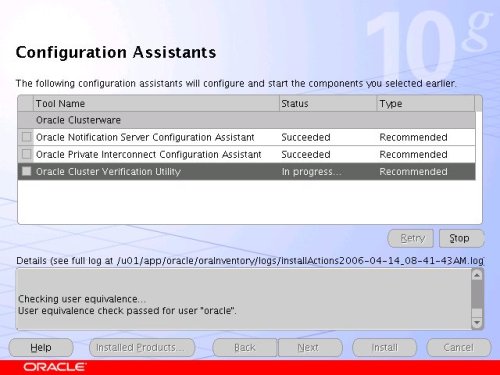
When the installation is complete, click the "Exit" button to leave the installer.
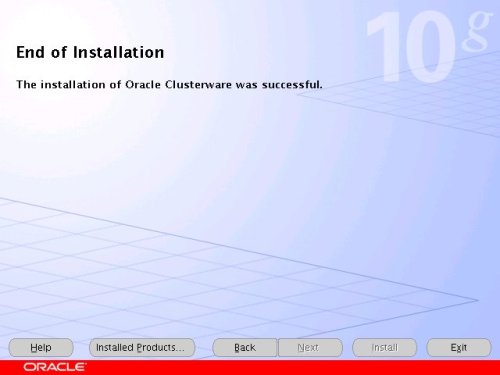
The clusterware installation is now complete.
Install the Database Software
Login to RAC1 as the oracle user and start the Oracle installer.On the "Welcome" screen, click the "Next" button.cd /u02/database ./runInstaller
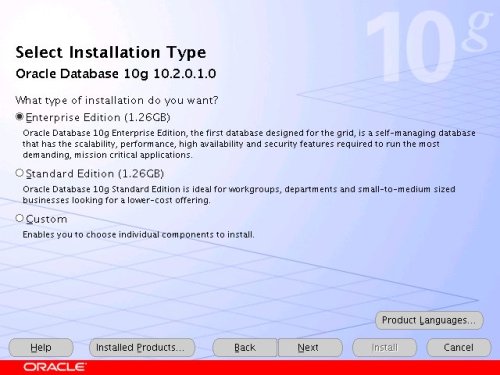
Select the "Enterprise Edition" option and click the "Next" button.
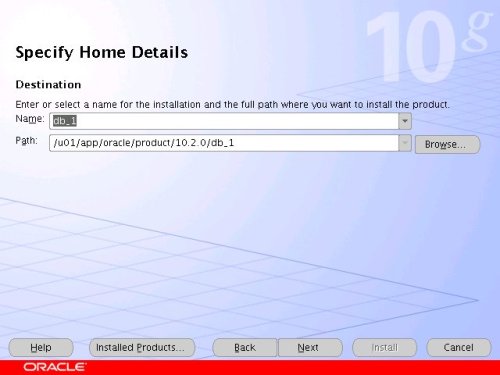
Enter the name and path for the Oracle Home and click the "Next" button.
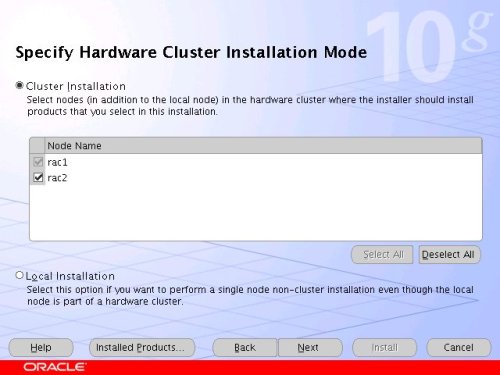
Select the "Cluster Install" option and make sure both RAC nodes are selected, the click the "Next" button.
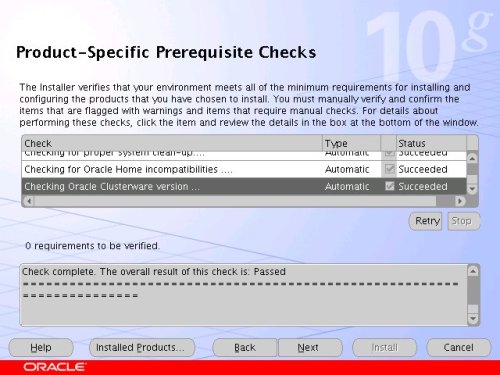
Wait while the prerequisite checks are done. If you have any failures correct them and retry the tests before clicking the "Next" button.
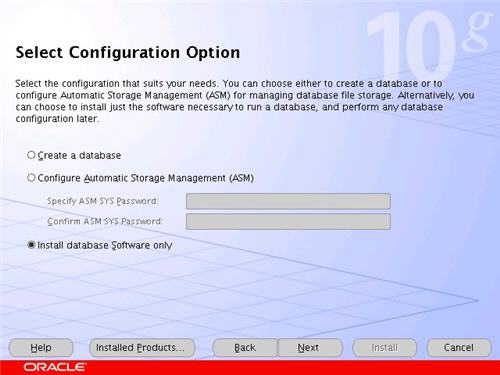
Select the "Install database Software only" option, then click the "Next" button.
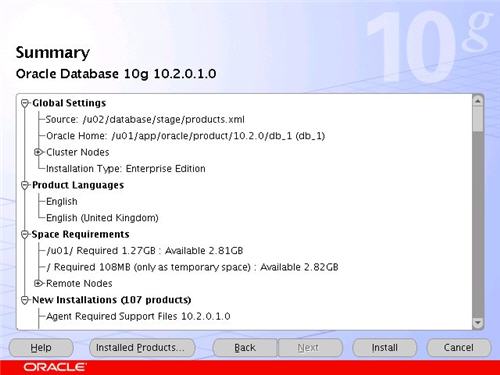
On the "Summary" screen, click the "Install" button to continue.
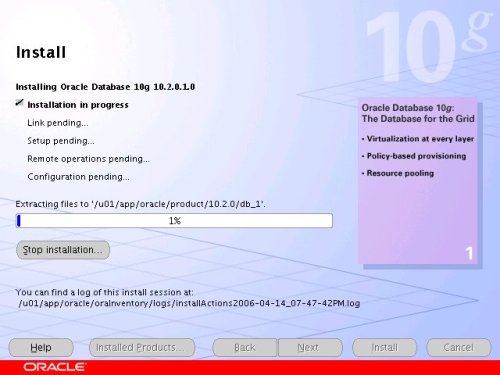
Wait while the database software installs.
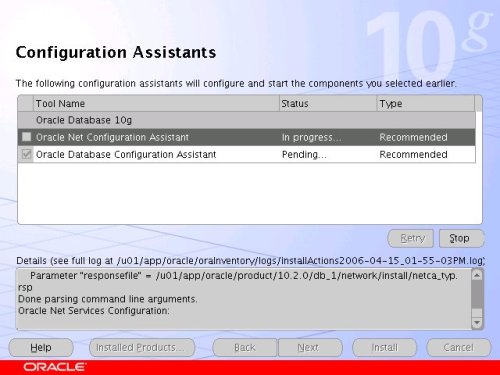
Once the installation is complete, wait while the configuration assistants run.
Execute the "root.sh" scripts on both nodes, as instructed on the "Execute Configuration scripts" screen, then click the "OK" button.

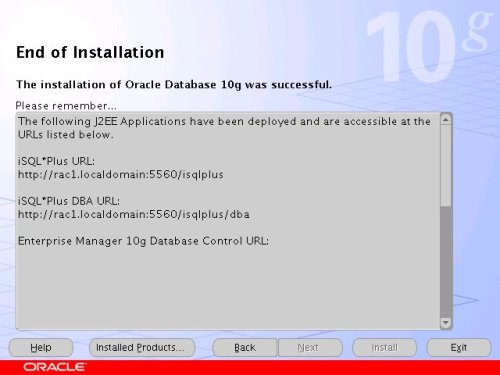
When the installation is complete, click the "Exit" button to leave the installer.
Create a Database using the DBCA
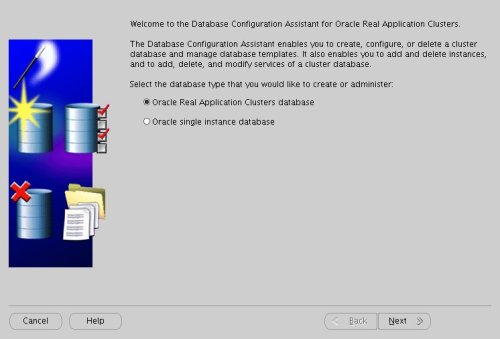
Login to RAC1 as the oracle user and start the Database Configuration Assistant.On the "Welcome" screen, select the "Oracle Real Application Clusters database" option and click the "Next" button.dbca
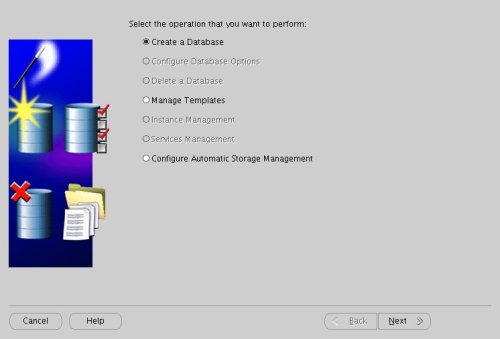
Select the "Create a Database" option and click the "Next" button.
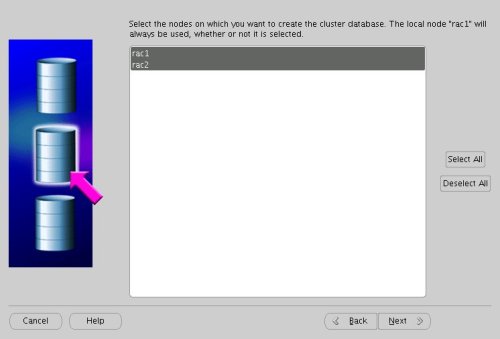
Highlight both RAC nodes and click the "Next" button.
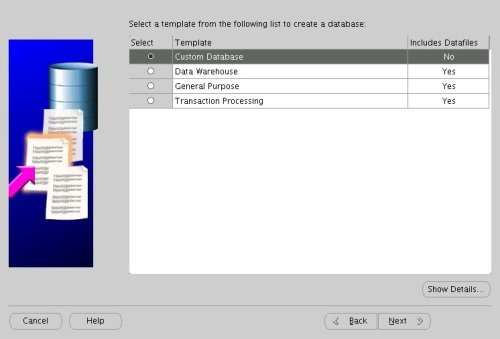
Select the "Custom Database" option and click the "Next" button.
Enter the values "RAC.WORLD" and "RAC" for the Global Database Name and SID Prefix respectively, then click the "Next" button.
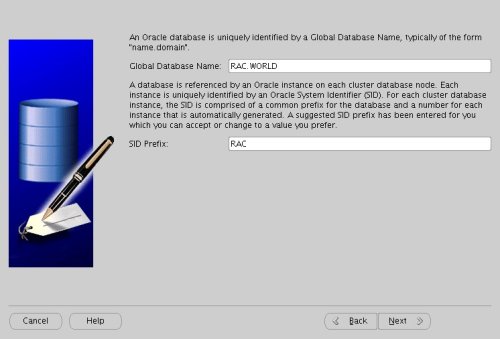
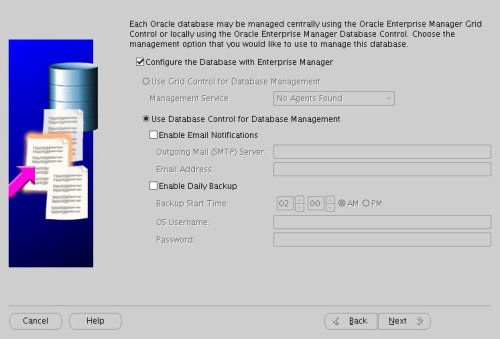
Accept the management options by clicking the "Next" button. If you are attempting the installation on a server with limited memory, you may prefer not to configure Enterprise Manager at this time.
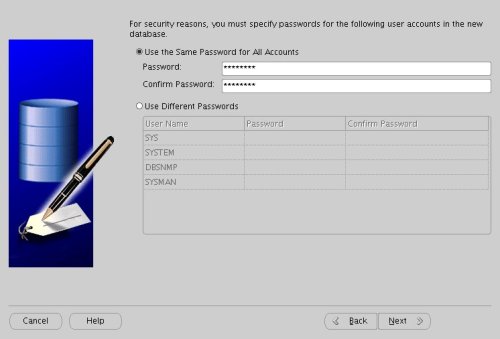
Enter database passwords then click the "Next" button.
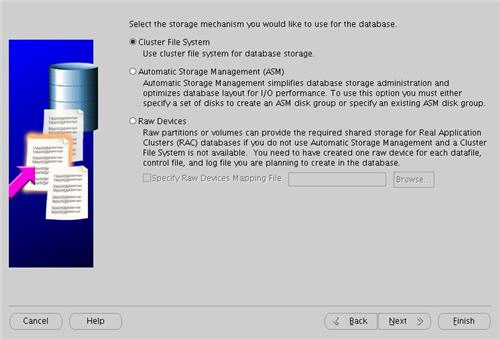
Select the "Cluster File System" option, then click the "Next" button.
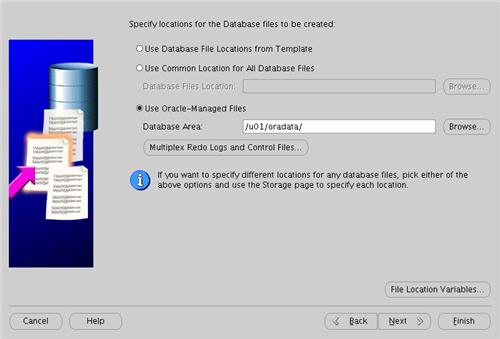
Select the "Use Oracle-Managed Files" option and enter "/u01/oradata/" as the database location, then click the "Next" button.
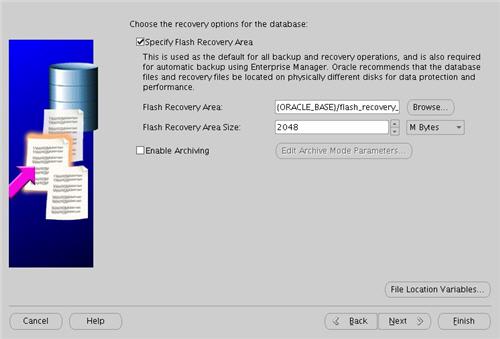
Check the "Specify Flash Recovery Area" option and accept the default location by clicking the "Next" button.
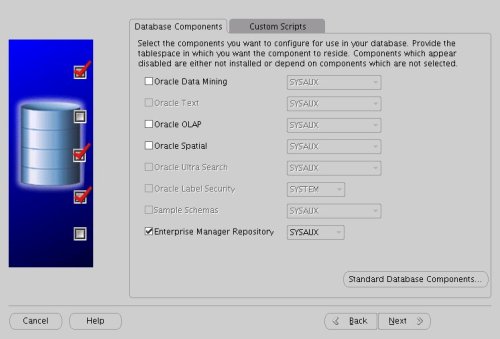
Uncheck all but the "Enterprise Manager Repository" option, then click the "Standard Database Components..." button.
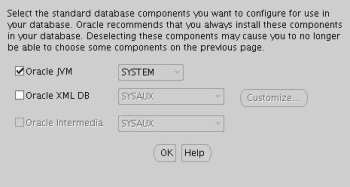
Uncheck all but the "Oracle JVM" option, then click the "OK" button, followed by the "Next" button on the previous screen. If you are attempting the installation on a server with limited memory, you may prefer not to install the JVM at this time.
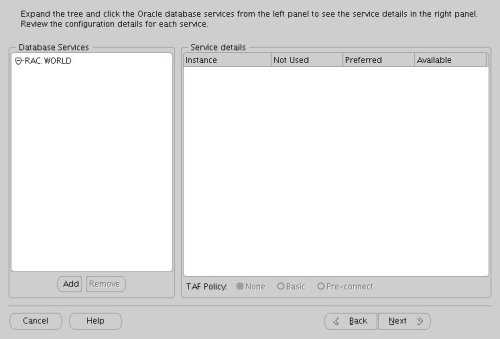
Accept the current database services configuration by clicking the "Next" button.
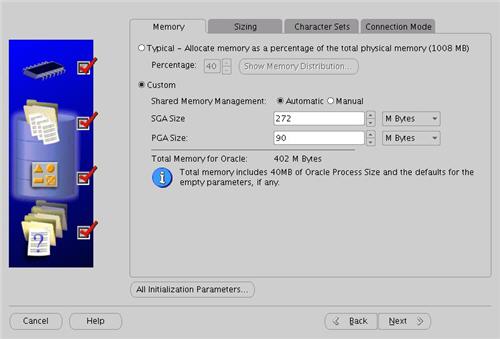
Select the "Custom" memory management option and accept the default settings by clicking the "Next" button.
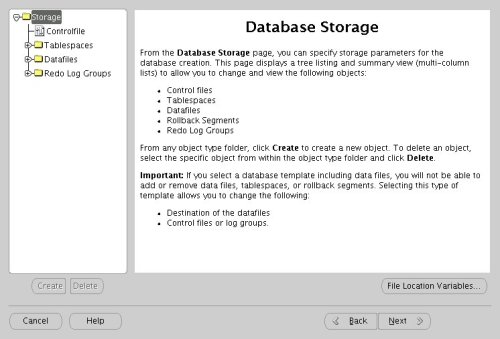
Accept the database storage settings by clicking the "Next" button.
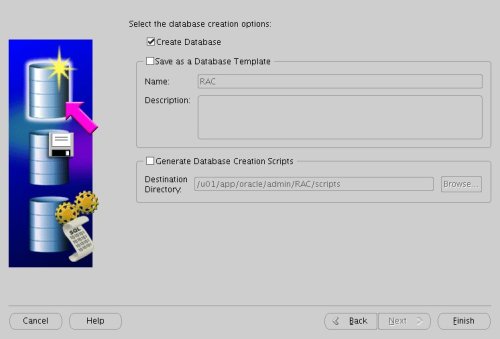
Accept the database creation options by clicking the "Finish" button.
Accept the summary information by clicking the "OK" button.
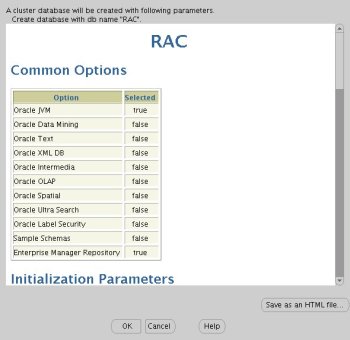
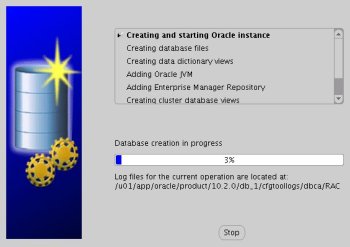
Wait while the database is created.
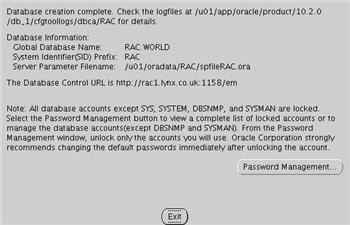
Once the database creation is complete you are presented with the following screen. Make a note of the information on the screen and click the "Exit" button.
The RAC database creation is now complete.
TNS Configuration
Once the installation is complete, the "$ORACLE_HOME/network/admin/listener.ora" file in the shared $ORACLE_HOME will contain the following entries.LISTENER_RAC2 =
(DESCRIPTION_LIST =
(DESCRIPTION =
(ADDRESS_LIST =
(ADDRESS = (PROTOCOL = TCP)(HOST = rac2-vip.lynx.co.uk)(PORT = 1521)(IP = FIRST))
)
(ADDRESS_LIST =
(ADDRESS = (PROTOCOL = TCP)(HOST = 192.168.2.102)(PORT = 1521)(IP = FIRST))
)
(ADDRESS_LIST =
(ADDRESS = (PROTOCOL = IPC)(KEY = EXTPROC))
)
)
)
LISTENER_RAC1 =
(DESCRIPTION_LIST =
(DESCRIPTION =
(ADDRESS_LIST =
(ADDRESS = (PROTOCOL = TCP)(HOST = rac1-vip.lynx.co.uk)(PORT = 1521)(IP = FIRST))
)
(ADDRESS_LIST =
(ADDRESS = (PROTOCOL = TCP)(HOST = 192.168.2.101)(PORT = 1521)(IP = FIRST))
)
(ADDRESS_LIST =
(ADDRESS = (PROTOCOL = IPC)(KEY = EXTPROC))
)
)
)RAC =
(DESCRIPTION =
(ADDRESS = (PROTOCOL = TCP)(HOST = rac1-vip.lynx.co.uk)(PORT = 1521))
(ADDRESS = (PROTOCOL = TCP)(HOST = rac2-vip.lynx.co.uk)(PORT = 1521))
(LOAD_BALANCE = yes)
(CONNECT_DATA =
(SERVER = DEDICATED)
(SERVICE_NAME = RAC.WORLD)
)
)
LISTENERS_RAC =
(ADDRESS_LIST =
(ADDRESS = (PROTOCOL = TCP)(HOST = rac1-vip.lynx.co.uk)(PORT = 1521))
(ADDRESS = (PROTOCOL = TCP)(HOST = rac2-vip.lynx.co.uk)(PORT = 1521))
)
RAC2 =
(DESCRIPTION =
(ADDRESS = (PROTOCOL = TCP)(HOST = rac2-vip.lynx.co.uk)(PORT = 1521))
(CONNECT_DATA =
(SERVER = DEDICATED)
(SERVICE_NAME = RAC.WORLD)
(INSTANCE_NAME = RAC2)
)
)
RAC1 =
(DESCRIPTION =
(ADDRESS = (PROTOCOL = TCP)(HOST = rac1-vip.lynx.co.uk)(PORT = 1521))
(CONNECT_DATA =
(SERVER = DEDICATED)
(SERVICE_NAME = RAC.WORLD)
(INSTANCE_NAME = RAC1)
)
)$ sqlplus / as sysdba SQL*Plus: Release 10.2.0.1.0 - Production on Tue Apr 18 12:27:11 2006 Copyright (c) 1982, 2005, Oracle. All rights reserved. Connected to: Oracle Database 10g Enterprise Edition Release 10.2.0.1.0 - Production With the Partitioning, Real Application Clusters, OLAP and Data Mining options SQL> CONN sys/password@rac1 AS SYSDBA Connected. SQL> SELECT instance_name, host_name FROM v$instance; INSTANCE_NAME HOST_NAME ---------------- ---------------------------------------------------------------- RAC1 rac1.localdomain SQL> CONN sys/password@rac2 AS SYSDBA Connected. SQL> SELECT instance_name, host_name FROM v$instance; INSTANCE_NAME HOST_NAME ---------------- ---------------------------------------------------------------- RAC2 rac2.localdomain SQL> CONN sys/password@rac AS SYSDBA Connected. SQL> SELECT instance_name, host_name FROM v$instance; INSTANCE_NAME HOST_NAME ---------------- ---------------------------------------------------------------- RAC1 rac1.localdomain SQL>
Check the Status of the RAC
There are several ways to check the status of the RAC. The srvctl utility shows the current configuration and status of the RAC database.The V$ACTIVE_INSTANCES view can also display the current status of the instances.$ srvctl config database -d RAC rac1 RAC1 /u01/app/oracle/product/10.2.0/db_1 rac2 RAC2 /u01/app/oracle/product/10.2.0/db_1 $ $ srvctl status database -d RAC Instance RAC1 is running on node rac1 Instance RAC2 is running on node rac2 $
$ sqlplus / as sysdba

SQL*Plus: Release 10.2.0.1.0 - Production on Tue Apr 18 12:15:15 2006

Copyright (c) 1982, 2005, Oracle.  All rights reserved.


Connected to:
Oracle Database 10g Enterprise Edition Release 10.2.0.1.0 - Production
With the Partitioning, Real Application Clusters, OLAP and Data Mining options

SQL> SELECT * FROM v$active_instances;

INST_NUMBER INST_NAME
----------- ------------------------------------------------------------
          1 rac1.localdomain:RAC1
          2 rac2.localdomain:RAC2

SQL>SQL> SELECT inst_id, username, sid, serial# FROM gv$session WHERE username IS NOT NULL;
INST_ID USERNAME SID SERIAL#
---------- ------------------------------ ---------- ----------
1 SYS 127 2
1 SYS 128 28
1 SYS 130 10
1 SYS 131 4
1 SYS 133 9
1 DBSNMP 134 27
1 DBSNMP 135 1
1 SYS 153 122
2 SYSMAN 120 243
2 DBSNMP 122 37
2 DBSNMP 124 93
INST_ID USERNAME SID SERIAL#
---------- ------------------------------ ---------- ----------
2 SYSMAN 125 2
2 SYSMAN 127 6
2 SYS 128 26
2 SYS 129 30
2 SYS 130 3
2 SYS 133 149
2 SYSMAN 134 58
2 SYS 136 32
19 rows selected.
SQL>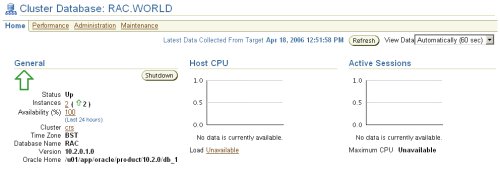
Direct and Asynchronous I/O
Remember to use direct I/O and asynchronous I/O to improve performance. Direct I/O has been supported over NFS for some time, but support for asynchronous I/O over NFS was only introduced in RHEL 4 Update 3 (and its clones), so you need to use an up to date version of your Linux distribution to take advantage of this feature.You can get details about this Direct and Asynchronous I/O by following the link.
For more information see:
- Oracle 10g RAC On Linux Using VMware Server
- Oracle Database 10g Release 2 (10.2.0.1) RAC Installation On Windows 2003 Using VMware Server
- Build Your Own Oracle RAC 10g Release 2 Cluster on Linux and FireWire
- Installation Guide for Linux x86 (10.2)
- Oracle Clusterware and Oracle Real Application Clusters Installation Guide for Linux (10.2)
- Direct and Asynchronous I/O
来自 “ ITPUB博客 ” ,链接:https://blog.itpub.net/119501/viewspace-607296/ ,如需转载,请注明出处,否则将追究法律责任。

请登录后发表评论
登录
全部评论
